In this article we'll go over how to remove, disassemble and rebuild your G80. Most G80 failures are a result of worn out clutches or a broken governor assembly. You'll need to figure out what's wrong with your G80 so you can have the appropriate parts on hand. Pulling the cover and doing a visual inspection should show the problem.
Before we do anything, familiarize yourself with this diagram.

This diagram shows how all of the many parts fit together inside the G80 carrier. If ever you're unsure of where something goes, refer to this diagram. I'll refer to parts by their number in parenthesis throughout this article.
Parts you may need: (this is for the 8.0" rear)
12479036 - (18) Left side clutch set (includes spring and positioning clips)
12479037 - (10) Right side clutch set (includes positioning clips)
12479048 - (14) Cam plate
12471530 - (11) Governor kit (includes both pieces)
Generally speaking, if you have worn out clutches, you probably only need to buy the left side pack. The left and right side clutches are interchangeable. The used clutches that were still intact in my G80 looked nearly new.
Let's get started.
Carrier Removal
First, jack up the rear of the truck, support it via the frame and let the rear axle hang. Block the front wheels. Put the trans in neutral and release the parking brake.
Remove both wheels and the rear brake calipers, brackets, rotors, and shoes.
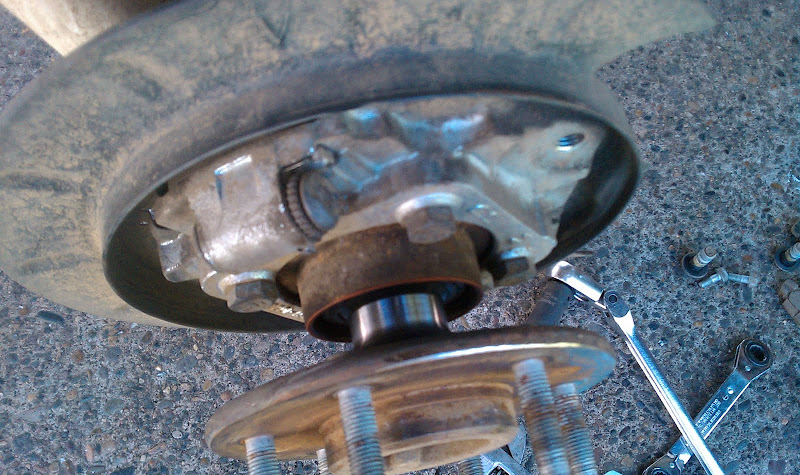
Use some compressed air to blow all the dirt and debris out of the assembly. Now's the time to check your rear axle seals. Mine were dirty, and had a tiny amount of seepage (expected), but weren't leaking.
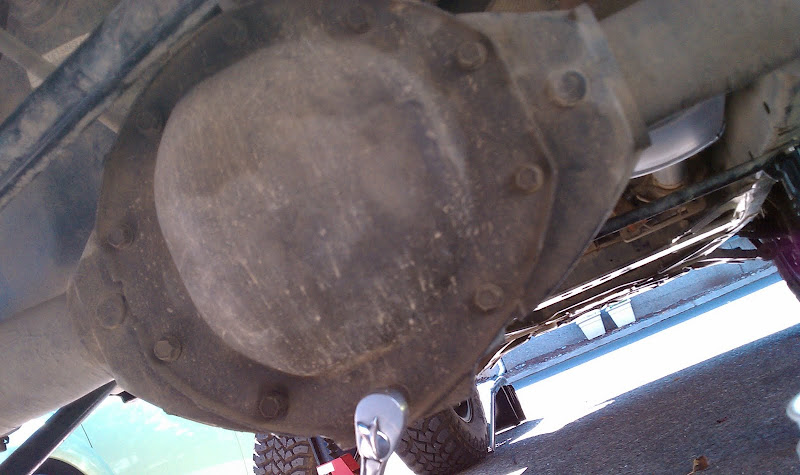
Unbolt the diff cover. (13mm bolts) Have a catch pan ready for the gear lube which will spill out.

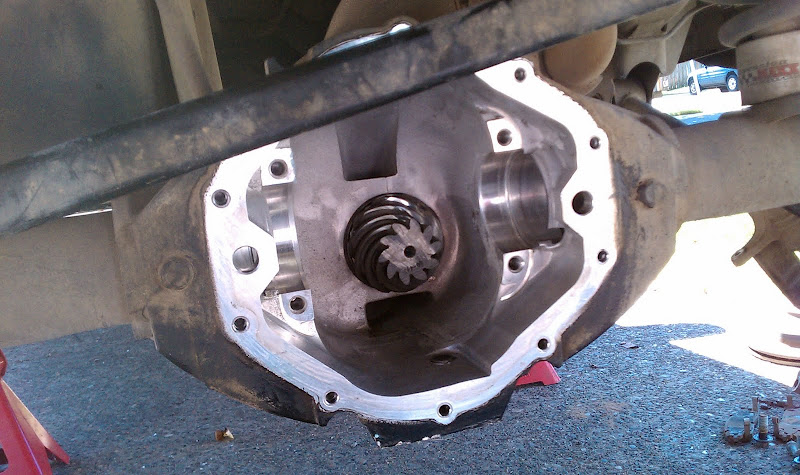
Here is the G80 carrier. Note how clean my internals are. This is because I had the cover off earlier to try to discern what was wrong with my G80 before ordering parts. Yours will most likely be much darker.
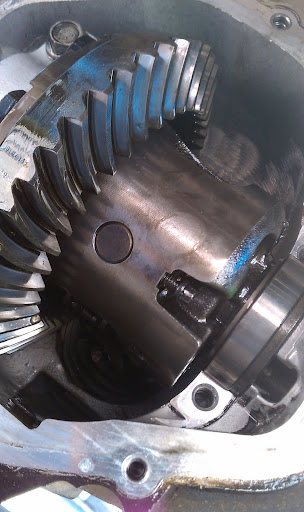
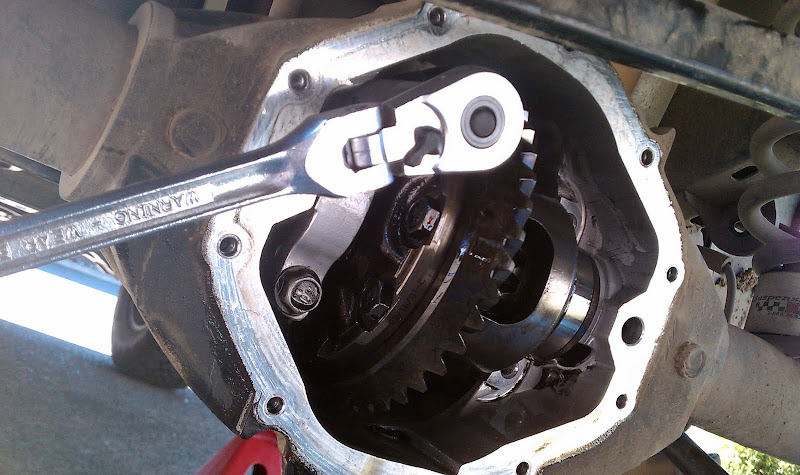
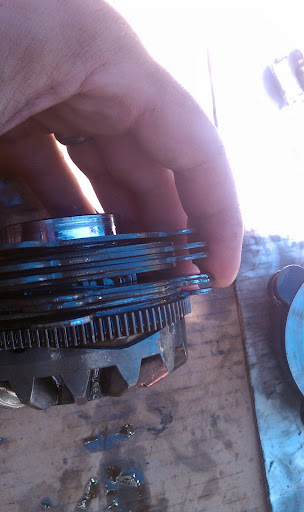
Grab the driveshaft and twist it. This will rotate the carrier. Rotate it until you see the reatining bolt (3) pictured above. I unscrewed it partially to make it easier to see, your will be tight. The correct tool for loosening this bolt is an 8mm 6 point wrench or socket. Using a 12 point socket will cause the bolt corners to round. Ask me how I know.
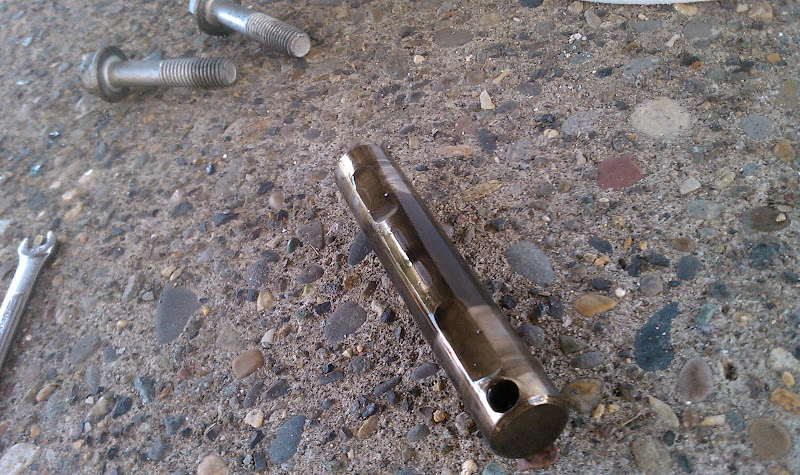
This bolt holds the alignment shaft (2) in place. You can see the end of the shaft in the above pic (the large circle). When removed this shaft should side out of the carrier fairly easily. You may need to rotate the carrier a bit and push it out from the other end. Here's what it looks like.
This shaft also keeps the axles in place. Now that it's out go to each hub and push in towards the center of the truck. Each axle will move in about 1/4". Go back under the truck and rotate the carrier until you see this.
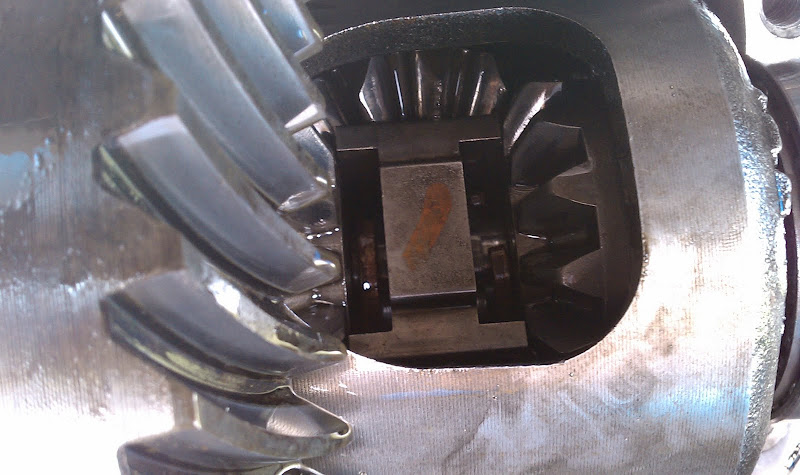
The large metal piece is called the thrust block (12). On either side you can see the C clips (they are brownish in the picture). These hold the axles from falling out of the differential. We need these out, so use a small magnet to grab them.
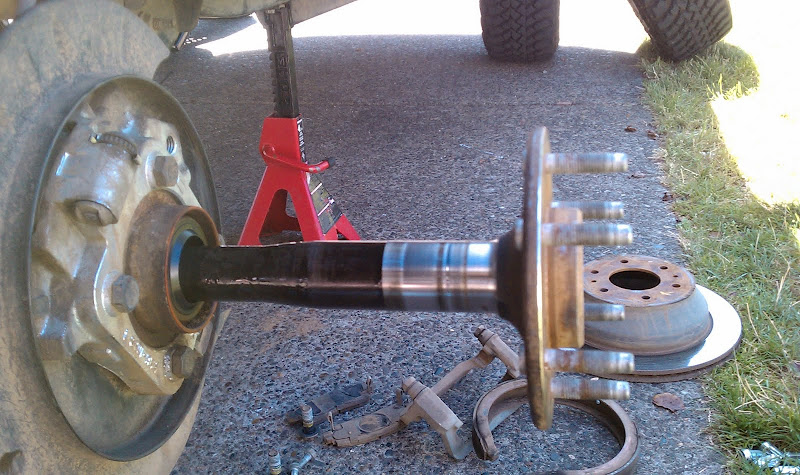
Carefully pull each hub out about 12" and let them sit. You'll probably get some extra gear lube draining out of the housing.
Remove the bearing caps. The bolts are 18mm. Mark each one for side and orientation, as they need to be installed the same way. Be ready, as the carrier may start to move on you as you remove the caps. Don't let it fall if so. Pull the whole carrier out and put it on your work surface. Keep track of the carrier bearing races and thrust washers on each side, which will probably try to get away from you.
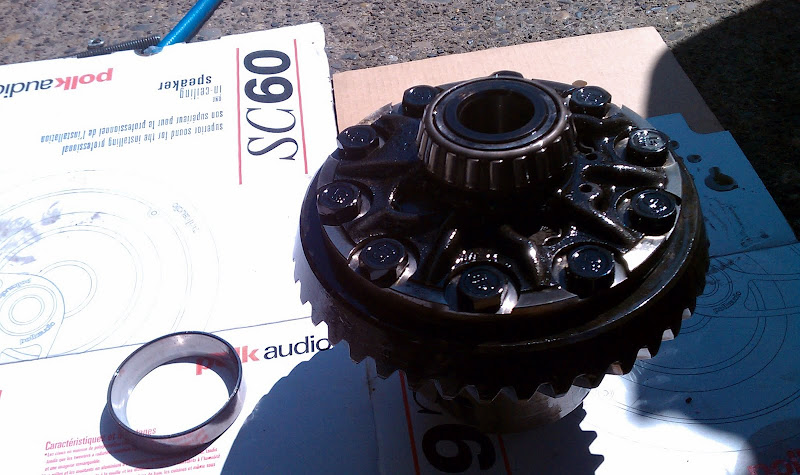
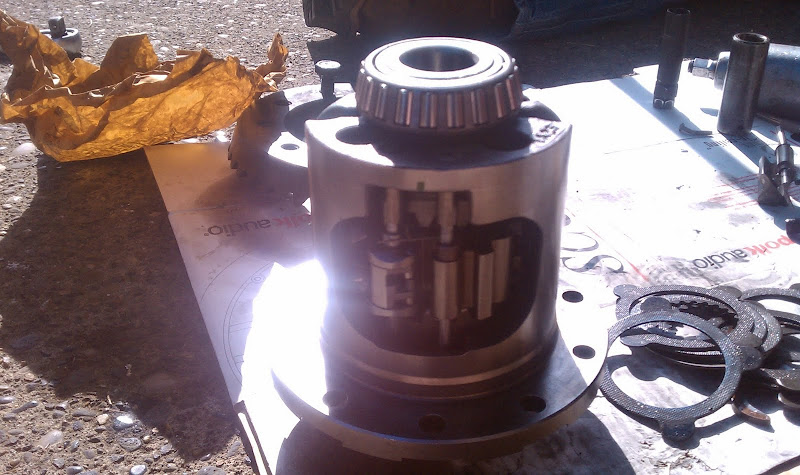
Ta-da! The carrier.
Now go back to the housing. Get out some brake cleaner and spray/blow/wipe down everything. The cleaner everything is, the more harmonious your life will be.
Do this now so the housing has time to air dry. We don't want any brake cleaner contaminating our new gear lube later.
Carrier Disassembly
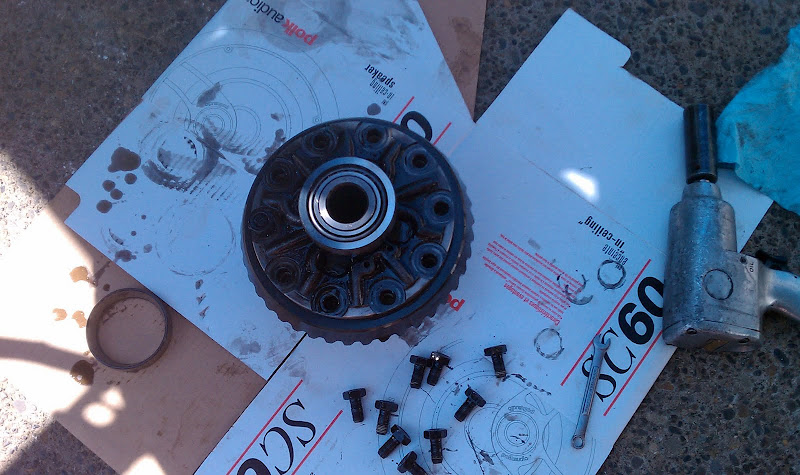
You don't have to remove the ring gear, but I wanted it out of the way. The ring gear bolts have left handed threads. This means clockwise will loosen them. Remove all of the bolts. An impact gun helps.

Look on the side of the carrier where the ring gear attaches. You'll see some numbers stamped into the side. Make note of the closest bolt hole to those numbers. Partially screw a bolt into that hole. Partially screw a bolt into the hole opposite of that one. Tap both bolt heads gently in an alternating pattern to remove the ring gear. Remember to put the bolt back into the first hole so we can reinstall the ring gear back in the same orientation.
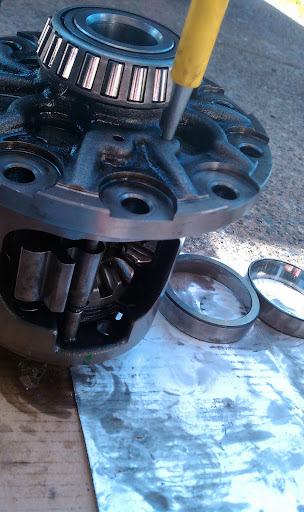
We need to remove the governor parts (11 and 4). There are two holes in the left side of the carrier. Using a punch we can knock the governor parts out the other side. I broke a punch getting the weight out. It's really in there.
With the governor assembly removed, reach into the carrier and give one of the side gears (7 or 13) a twist. This will pop the spider gears (6) out. Place those aside. Then pull the right side gear and clutch plates out. They may fall apart on the way out. Don't worry, just refer to the diagram. Pull the left side next.
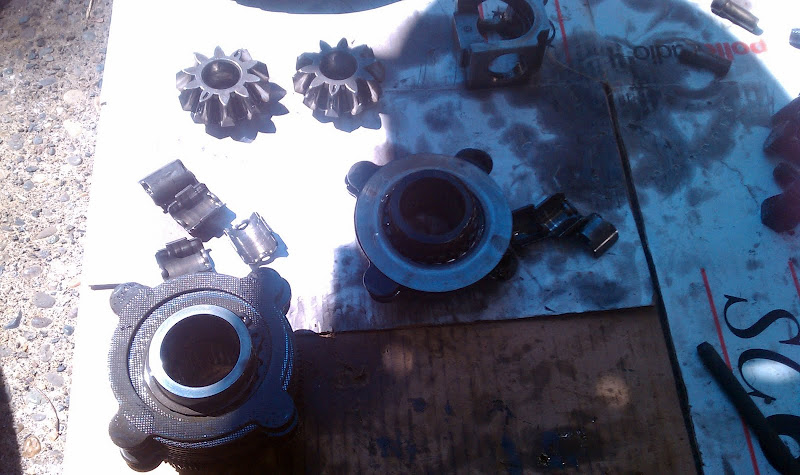
Inspect your side gears(7 and 13) and spider gears (6) for damage. Chipped gear teeth is a very bad thing, and means your rear diff is probably on borrowed time. A gear kit with all 4 is available from GM, but is expensive. You might be better off finding another G80 carrier to rebuild or cannibalize parts from. Inspect the alignment shaft (2) for wear. It should be perfectly round save for 4 flattened portions.
Here's my left side gear assembly. This is where most of the magic happens in the G80. Two of the clutches (18) in mine are completely gone.
You need to check the gears on the cam plate (14) and governor (11) for damage. Any problems with these gears meshing and your G80 will work sporadically at best. Replace them if they're chewed up at all.
Replace clutches as necessary. The left side assembly is together with a snap ring (17). The shaft keyed discs and tabbed discs go on in an alternating pattern, along with the spring, and plate. There is one tabbed disc that goes against the cam plate (14) it will have significantly more material on it than the others and should be pretty obvious. Use the new spring in the disc kit. Follow the diagram if you're unclear on assembly.
Make sure you clean everything very well. Extra metal/clutch material is just going to wear all your new parts faster.
Reassembly
Reassembly is basically the reverse of disassembly. Note that the right side clips (8) and left side clips (16) are different length, and need to go back into the proper sides. The left side clips can be attached before replacing the assembly and will stay in place. The right side ones may take some patience and they like to move around.
When reinstalling the spider gears (6) , I had a little trouble. I found if I installed removed the washer (5) from one of the spider gears, then twisted them into place they would both go in smoothly. After that you can rotate the spider gears around enough to slide the washer back in. I wish I had a picture of this, but I was by myself doing this and getting a picture would have required 3-4 hands. You'll understand when you try putting them back in.
After you get the thrust block (12) back into the carrier (may require some light tapping with a hammer). Reinsert the alignment shaft (2) into the carrier to hold everything in place while you reinstall the carrier back into the diff housing.
When reinstalling the governor, make sure the spring on the bottom weight is holding tension against the top shaft, otherwise your G80 will never engage.
When reinstalling the ring gear, be sure to tighten the bolts (counter clockiwise!) in a star pattern. Torque is 60 ft-lbs.
Once the carrier is back in the diff housing, and the bearing caps are reinstalled, (Torque = 50 ft lbs) pull the alignment pin (2) back out and then carefully push the hubs/axles back in. You may need to twist them a bit to realign the splines. Don't twist the axles once they've seated or you risk moving the spider gears our of alignment, which will make reinstalling the alignment shaft a pain.
Rotate the carrier so you can see the thrust block (12) and reinsert the C clips onto the the axles. Pull both hubs back towards the outside of the truck to seat the C clips then reinstall the alignment shaft into the carrier. Install the retaining bolt (3).
Bolt up the diff cover and refill the diff with gear lube. Reassemble the brake hardware on both sides. Now is a great time to adjust your parking brake if it's not holding very well. Install the wheels and give them a spin to ensure everything is rotating smoothly. Lower the vehicle.
To test your G80, jack up one rear wheel by jacking on the shock mount. Just get it off the ground by an inch or so. Start the truck and with your foot on the brake, put it into gear. Let your foot off the brake slowly. If you G80 is working, the rear should lock and the truck should try to move forward. If its not, the wheel that's off the ground will simply spin.


 offroadtb.com If you can, can you resize to 600 px wide?