Offroad Trailblazers and Envoys

Bumper/Skid/Whatever Fabrication Tips Thread

Any special projects involving a decent amount of fab work (bumpers, sliders, roof racks, etc)

by bartonmd » Wed Jan 30, 2013 11:48 am

I figured it would be nice to have a thread to point people to, where we can give tips on how we do projects and such, to give members a leg-up on fabricating stuff for themselves. I'll start with a custom front/rear bumper overview that I've posted elsewhere.

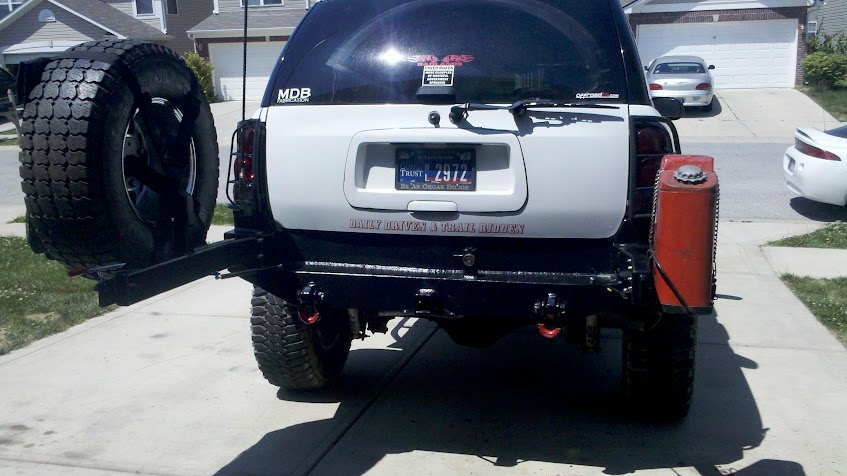
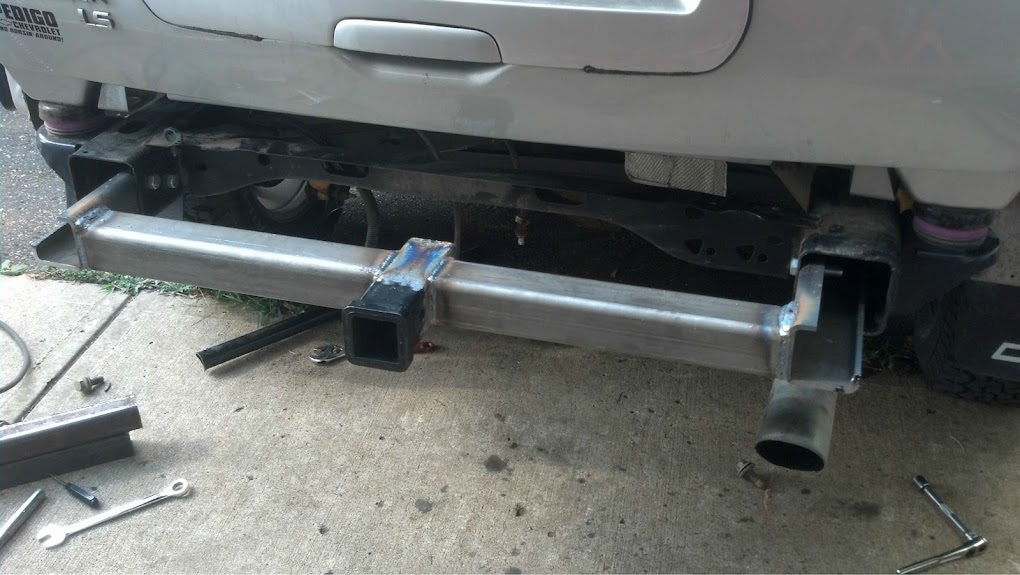
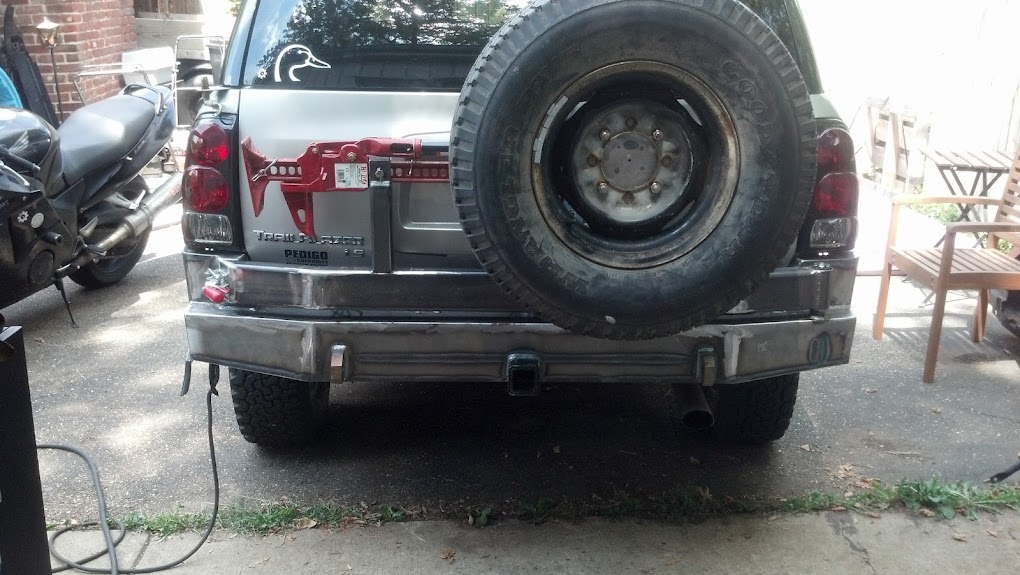
Rear, IMO, I'd start with a hitch (built, bought, or existing), and make the bumper around that. Much stronger than trying to make a bumper strong enough to tow AFTER the bumper is done...

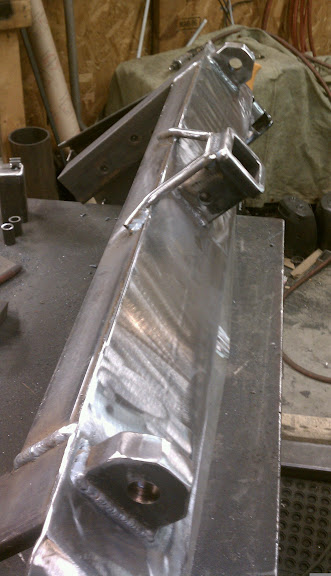
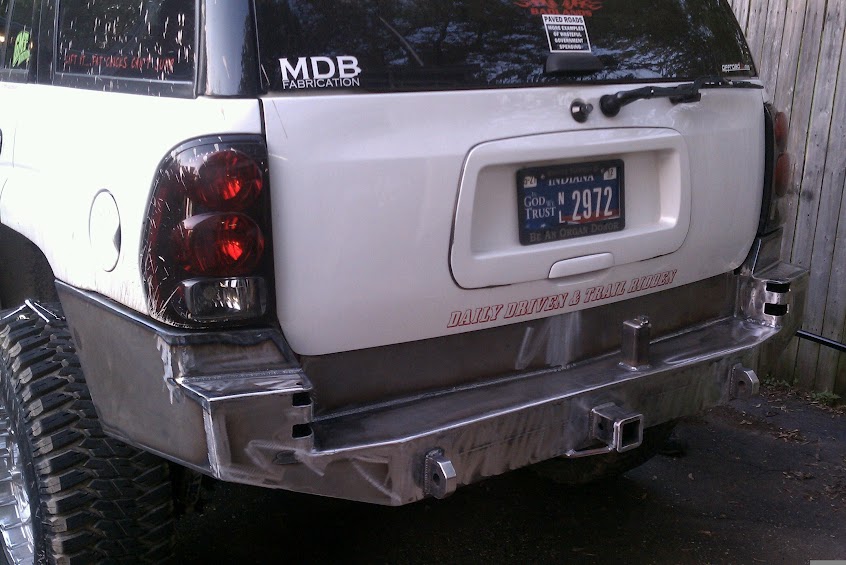
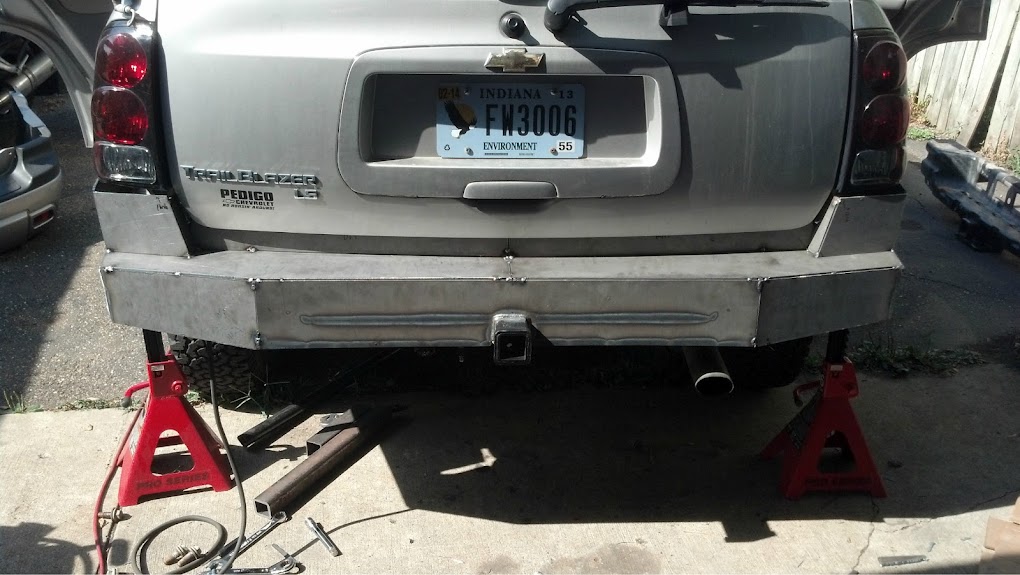
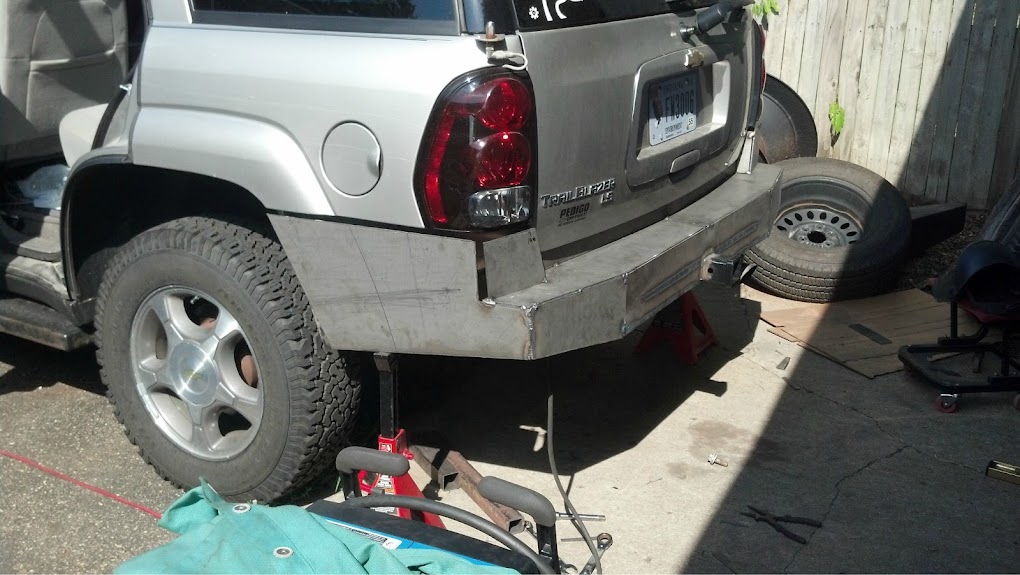
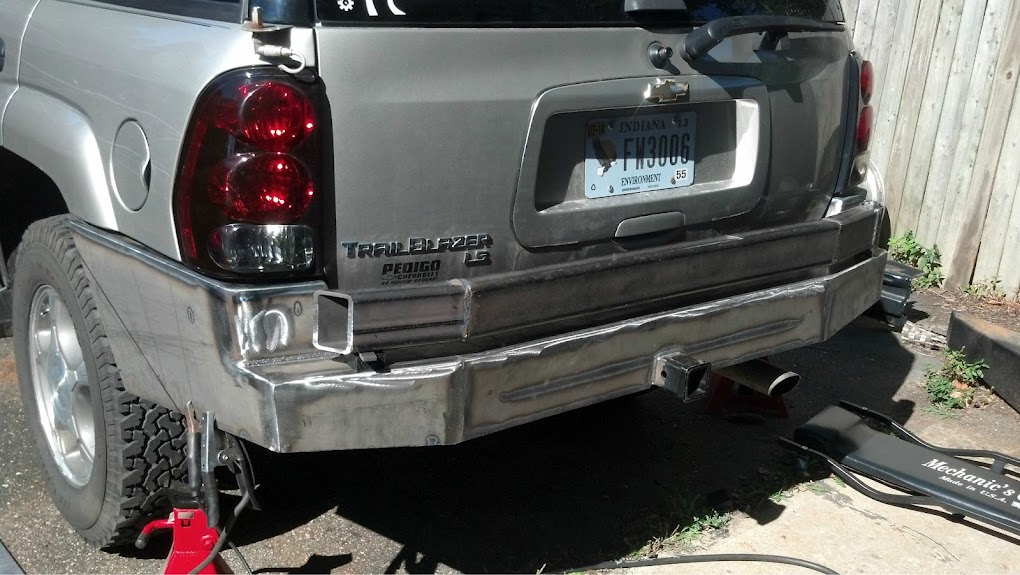
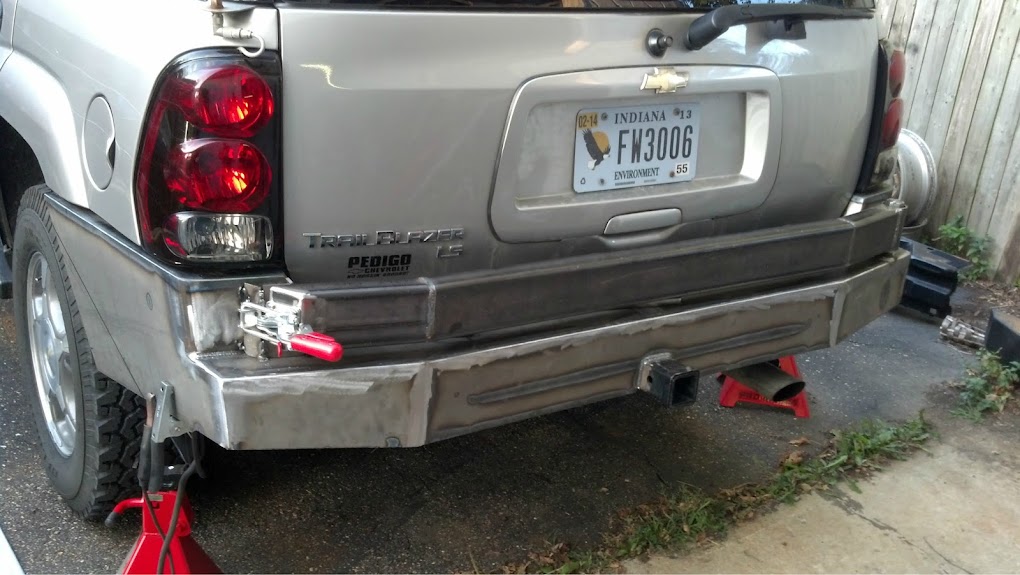
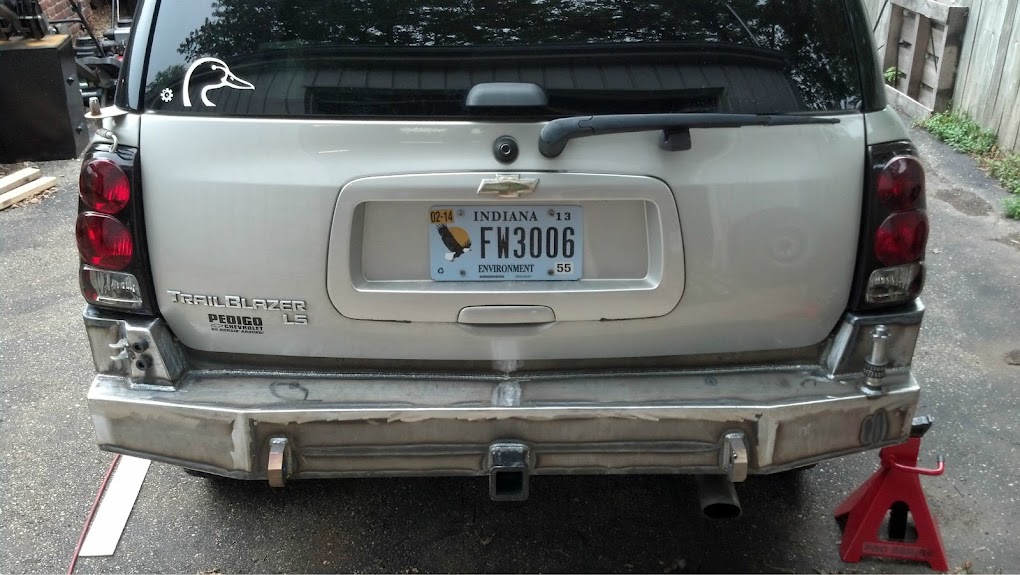
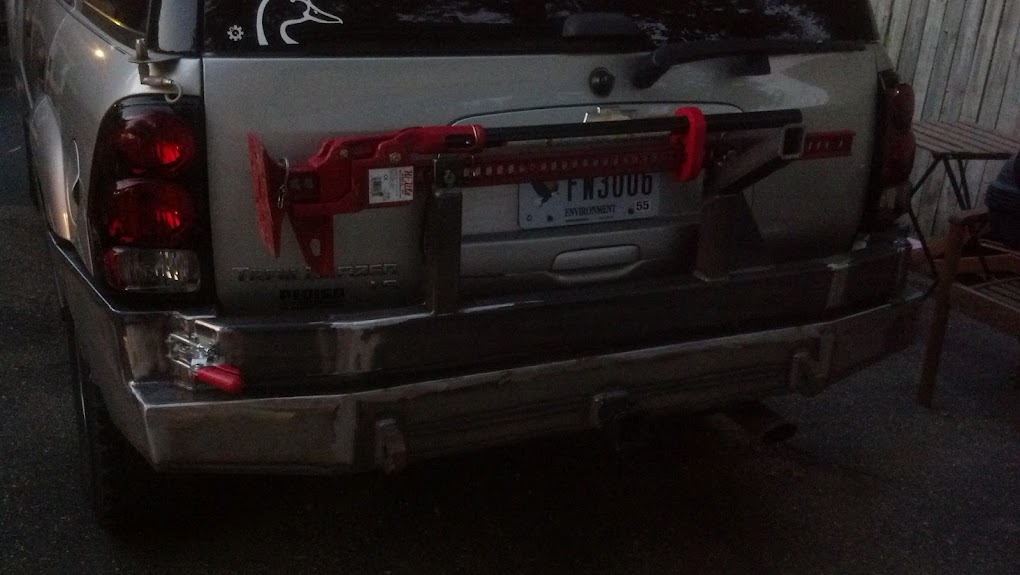
Here's a rear that I did: (Nevermind the angle cuts on the side pieces. They were for a guy who had his axle moved back farther)

Image

Image

Image

Image

Image

Image

Image

Image.

Image

Image

Image

Image

Image

Image

Image

Image

Image


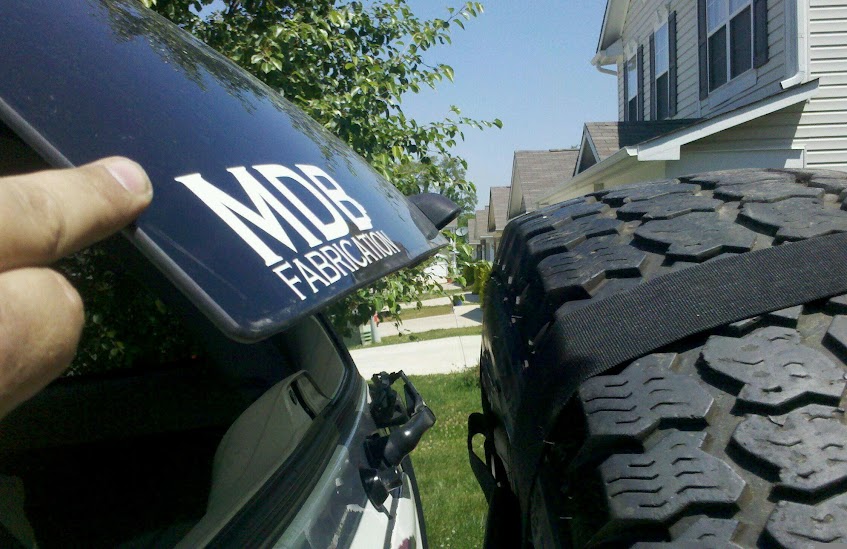
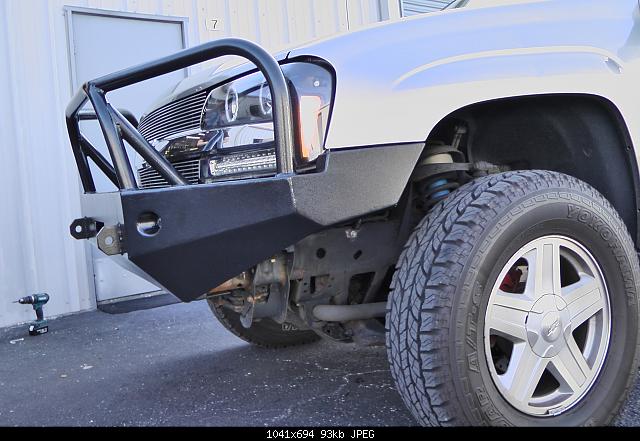
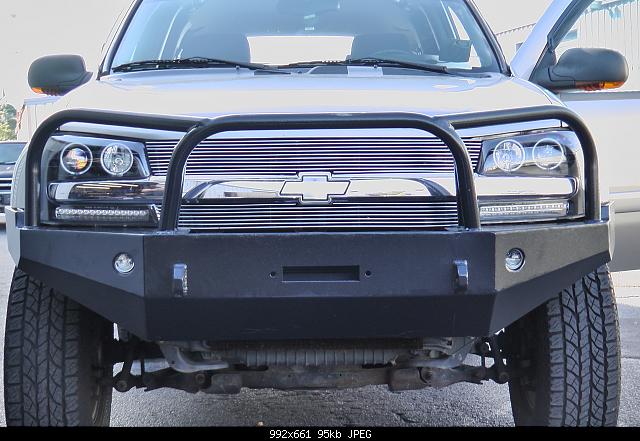
Front, same deal... Start with the mounts (and winch box if required), and make your front, center panel, then build out from there. work the vertical panels first, then the supporting panels underneath, then do the tops, then the sides where it meets the body. If you're not sure of something, leave it and cut if off later.

Image

Image

Image

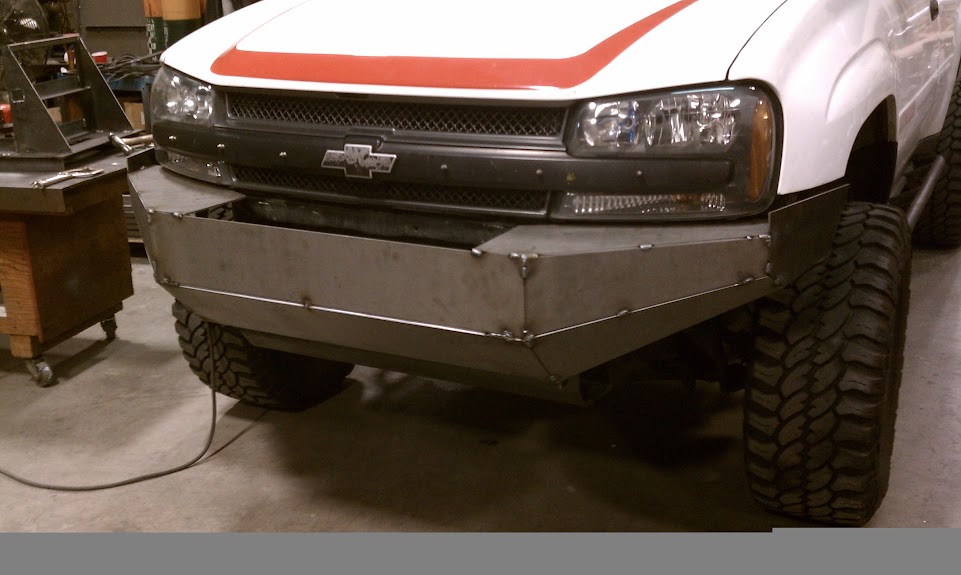
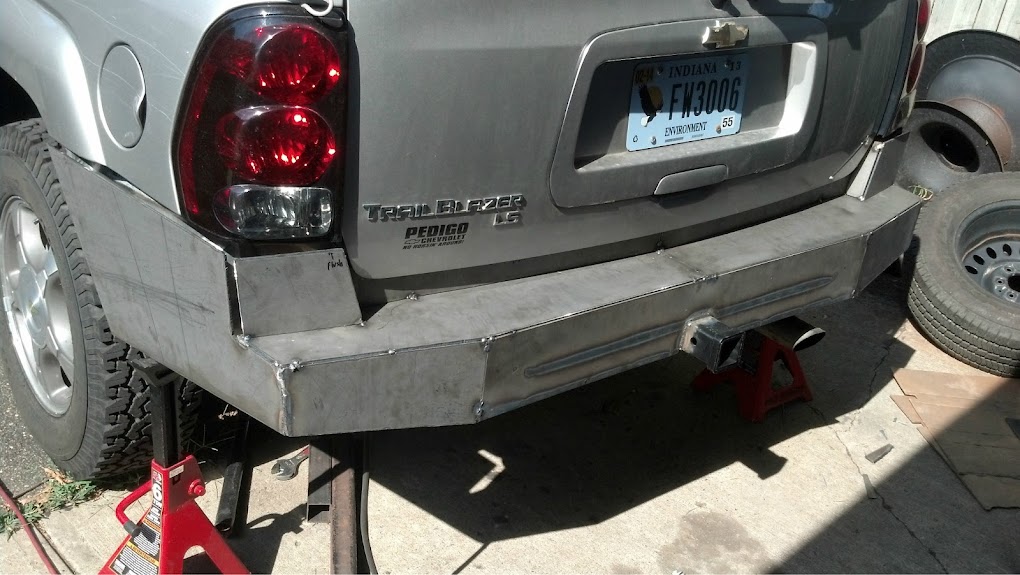
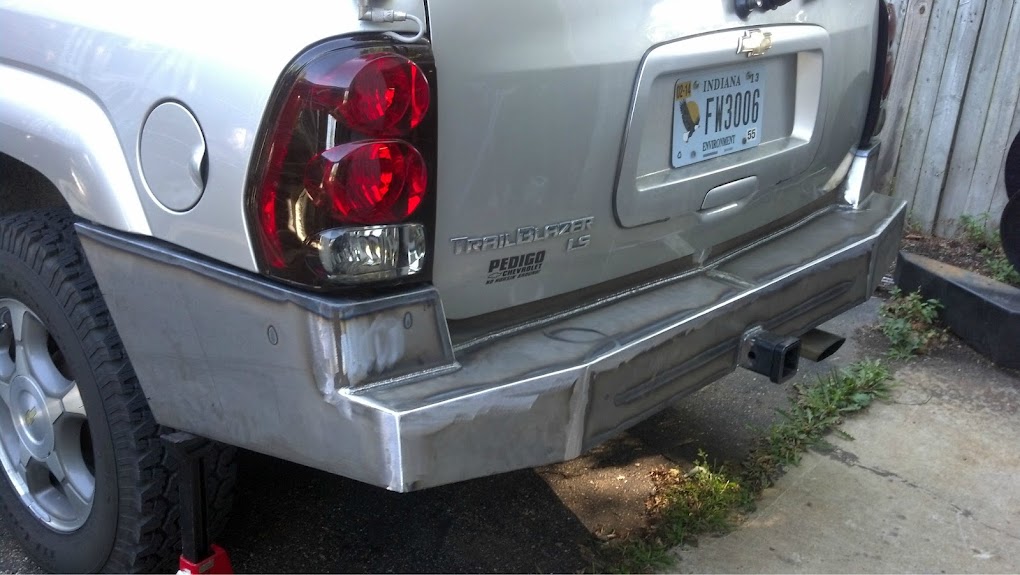
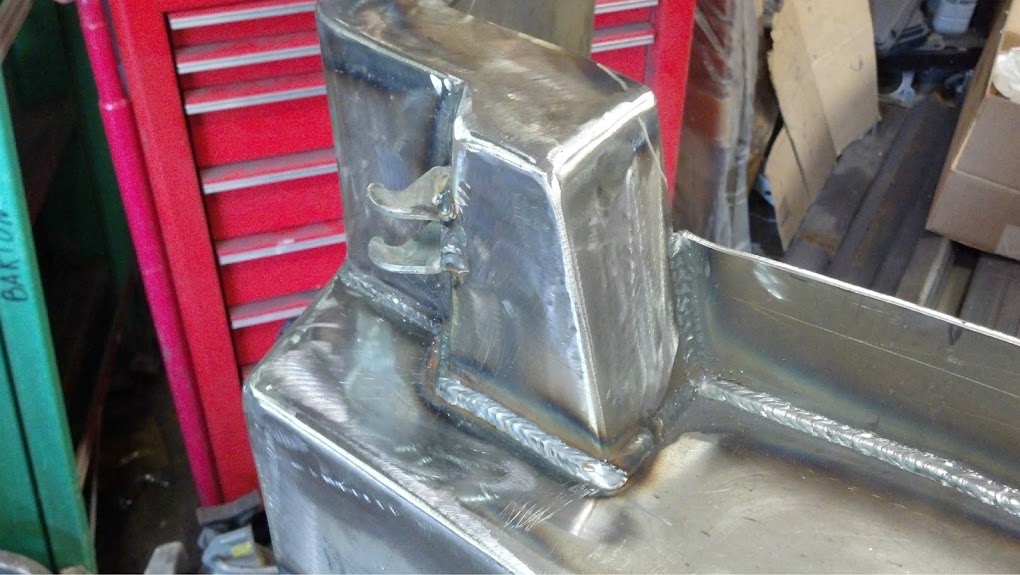
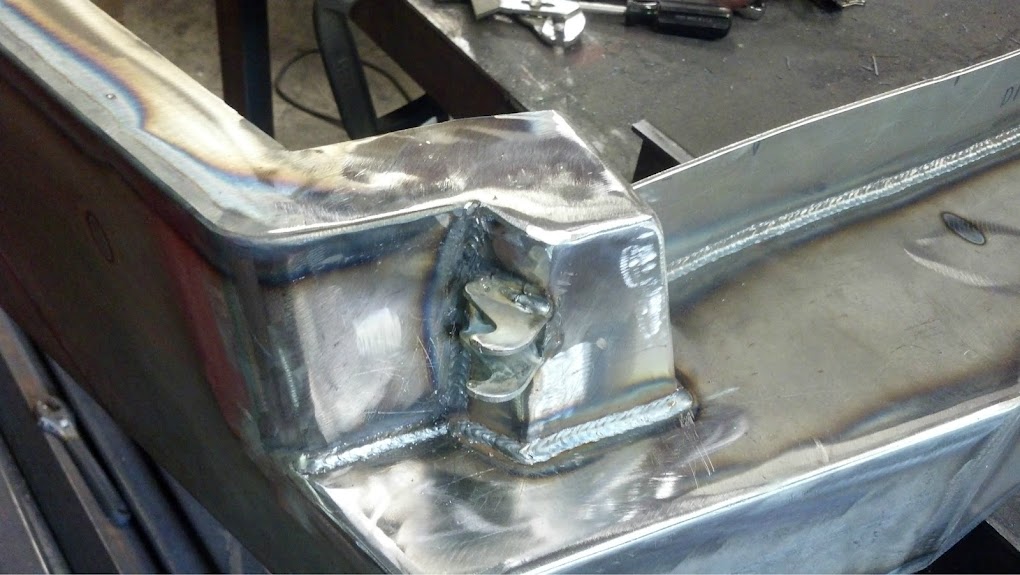
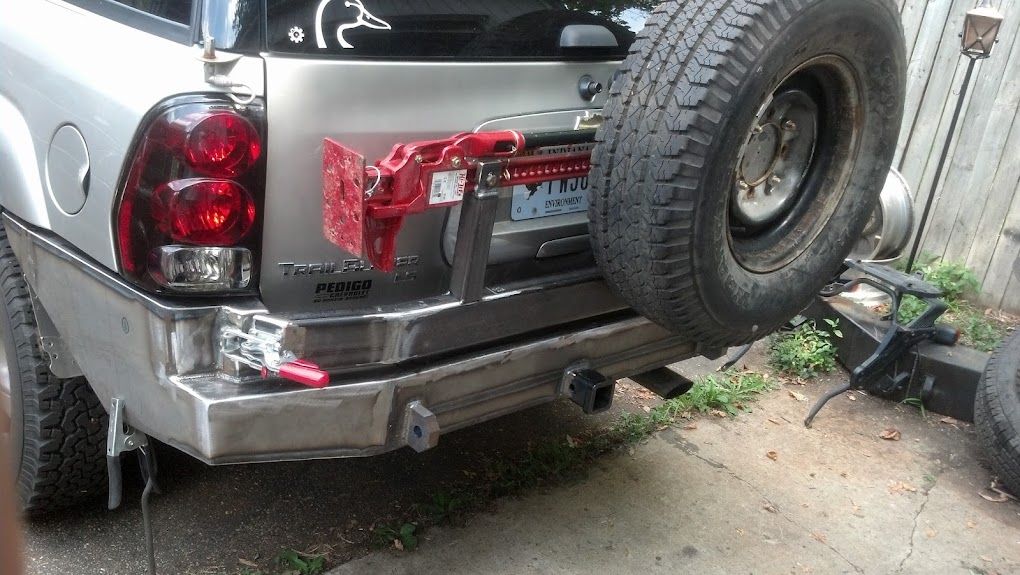
Notice the square front of the body-blending pieces on the first pictures, then notice how it's cut back and angled on the finish pieces?

Image

Image


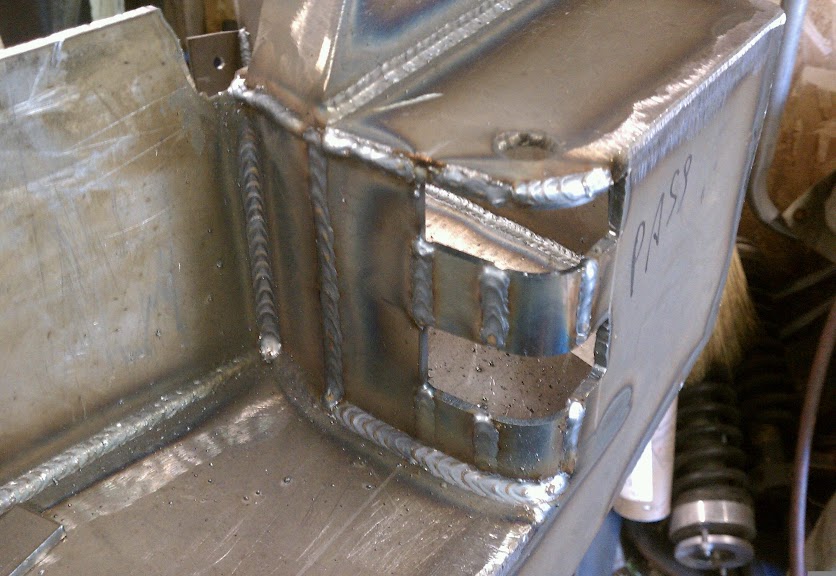
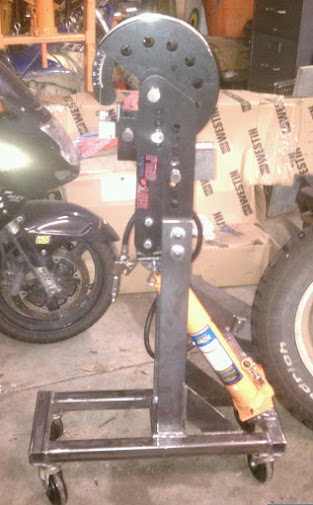
On full-custom stuff, or even customized standard stuff, I always start with cardboard, and cut/shape/cut/tape back together/start over with cardboard until I have a shape that I like. Once I have the shape in cardboard, I trace it onto steel, then cut it out. I used to cut out straight lines with my circular saw with one of those carbide blades on it ($20 for the Oshlun ones on Amazon. One blade is good for about 1 bumper if you aren't too hard on it), but I now use a straight-edge clamped to the piece and my HT Powermax 45 plasma. This works pretty fast, too. As a "for instance" the bumper below is about 7 hours from sort of having a little bit of an idea of what I wanted to do, to this picture:

Image

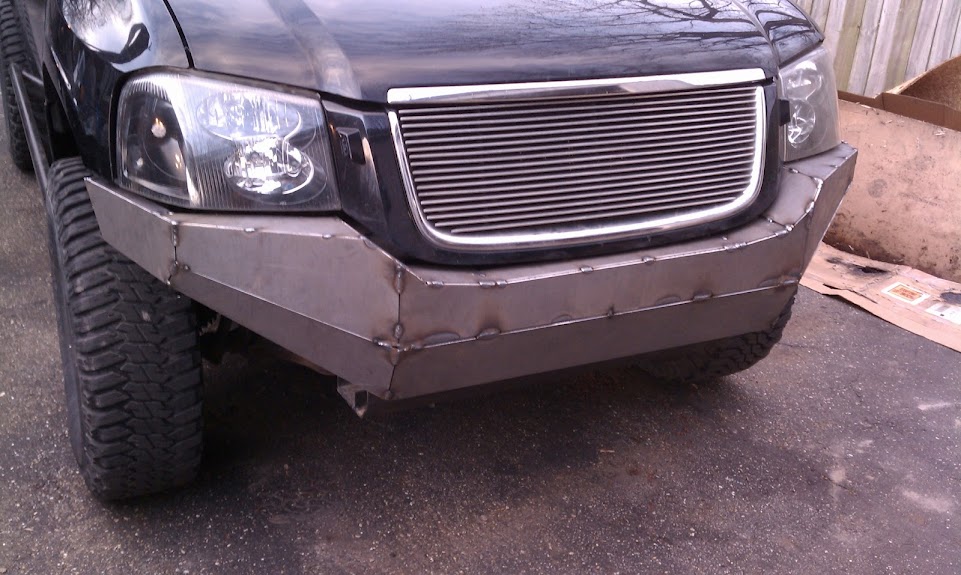
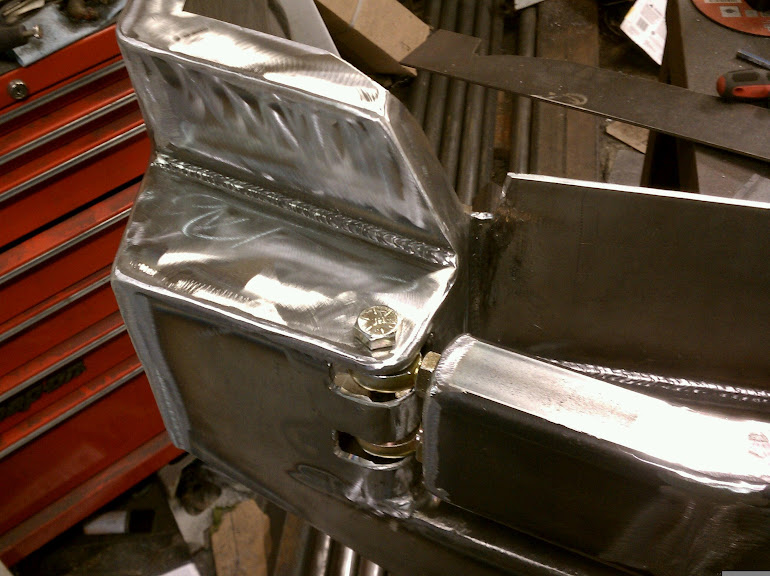
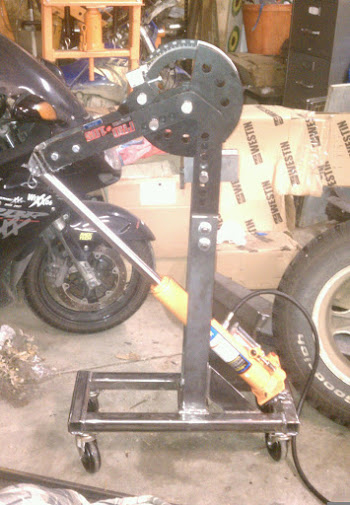
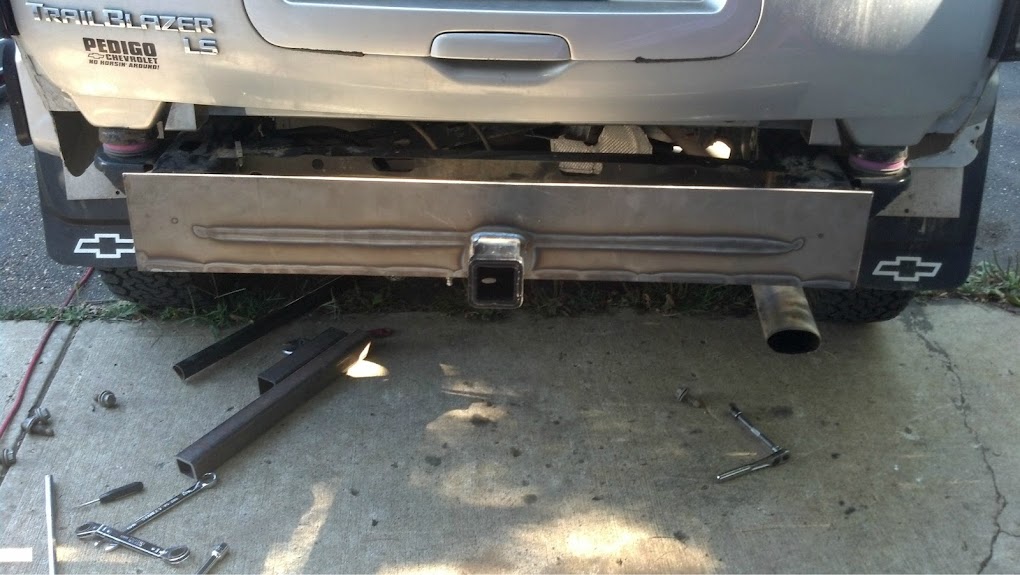
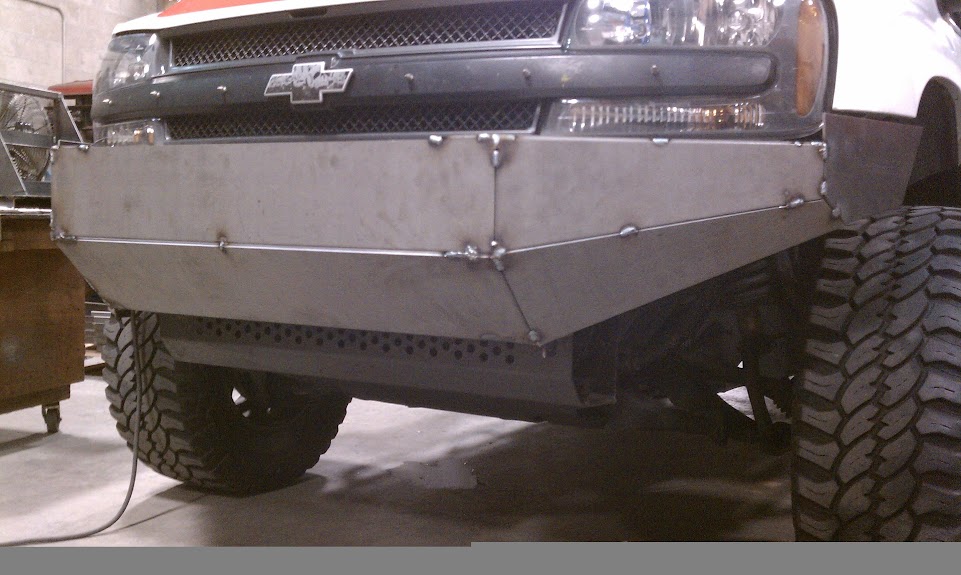
Then it was probably another 8-9 hours of work to this picture:

Image

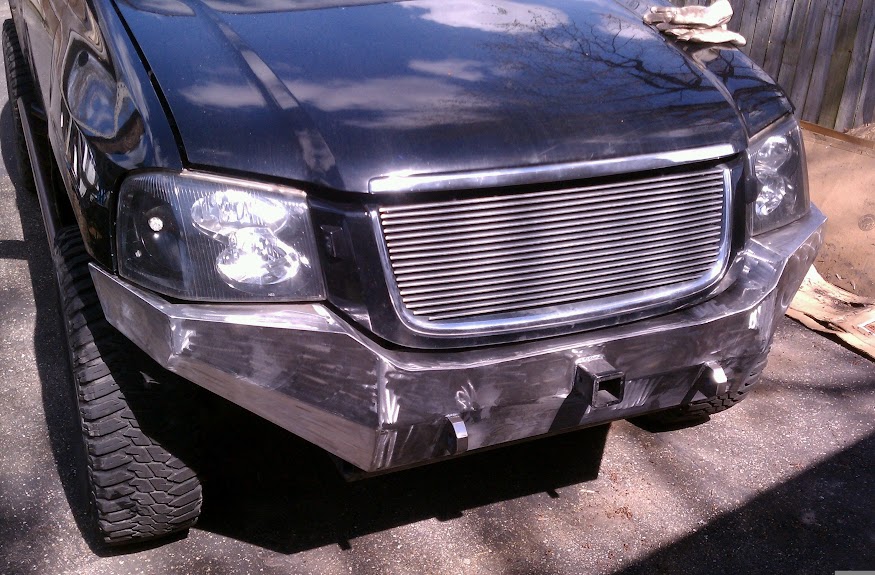
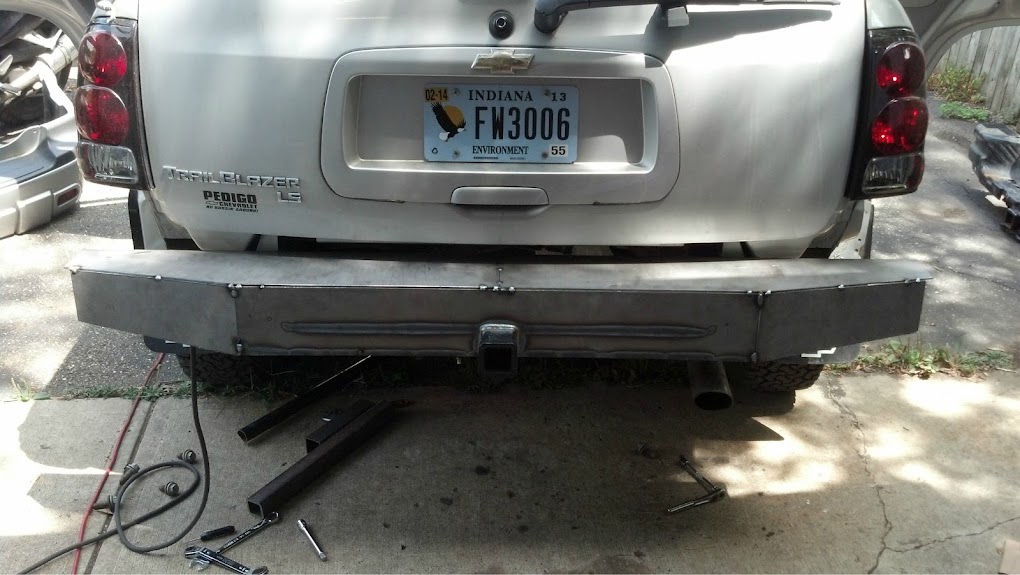
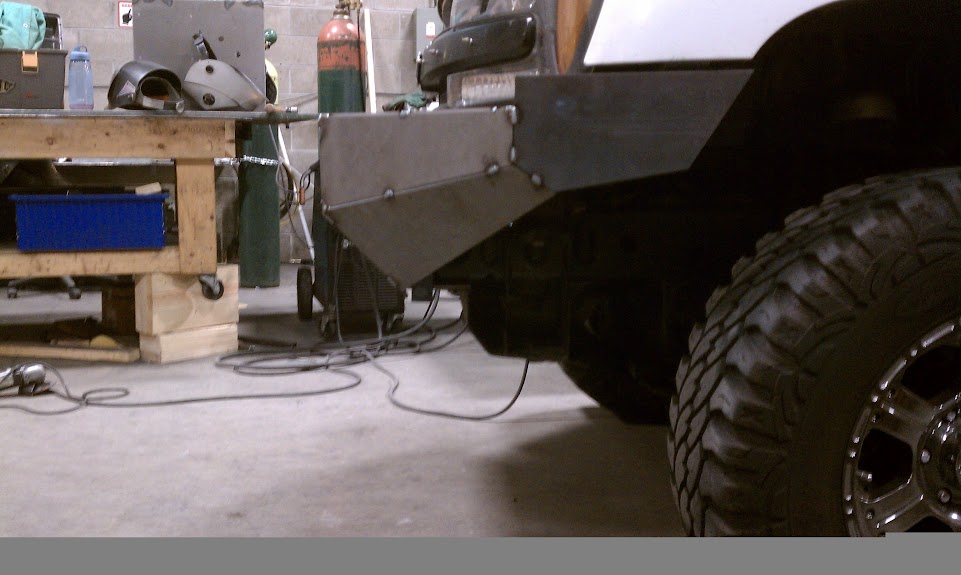
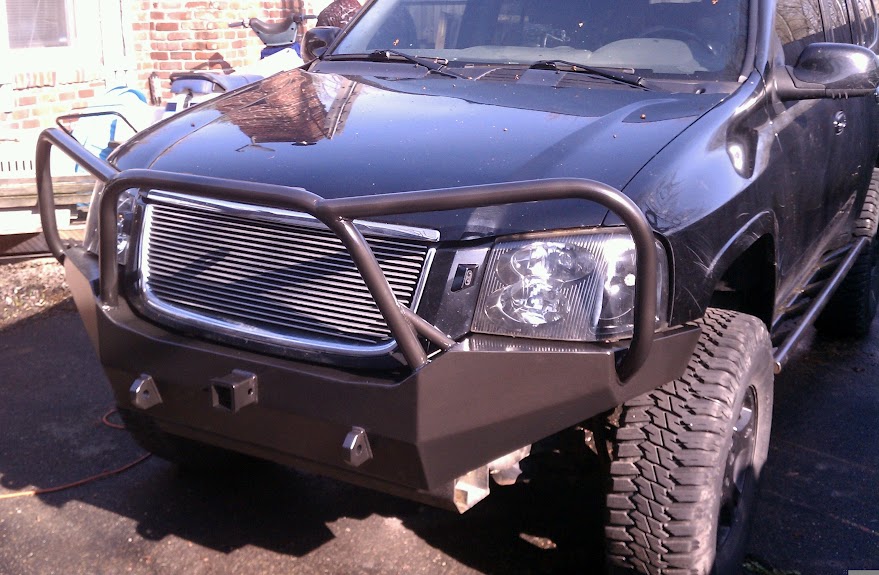
Then another 6 hours and some paint to here:

Image

None of it is really hard. You just have to take it one step at a time, and eventually, it's done.

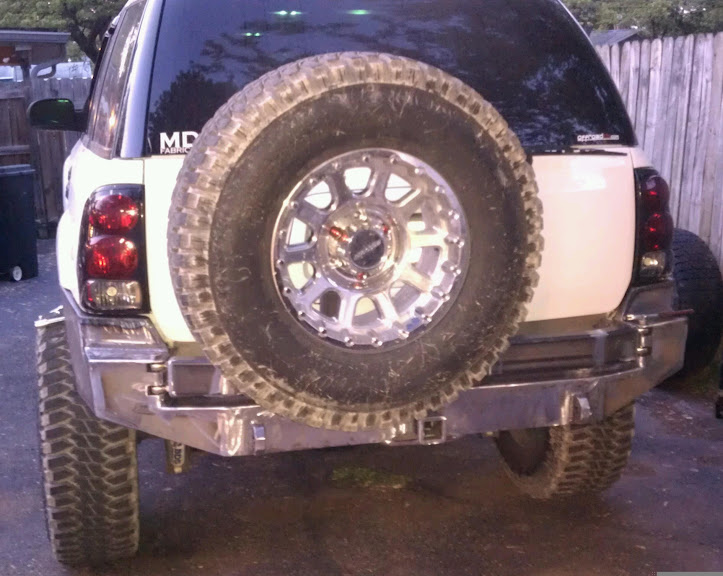
Also, leave ~1/2" from anything on the body, because this is mounted to the frame, and the body moved independantly from the frame. The only place that the bumpers should touch the vehicles, especially in the front, is on the frame. Now, on the rear bumpers, there is a little more flex in the longer "wings" that meet the body, so I do bolt them to the fender mounts in the wheelwell, and it seems to work fine, but that's only because the bumper can flex some, out there, and the frame is a lot stiffer in the rear, being designed to tow, so there's less flex on rears.

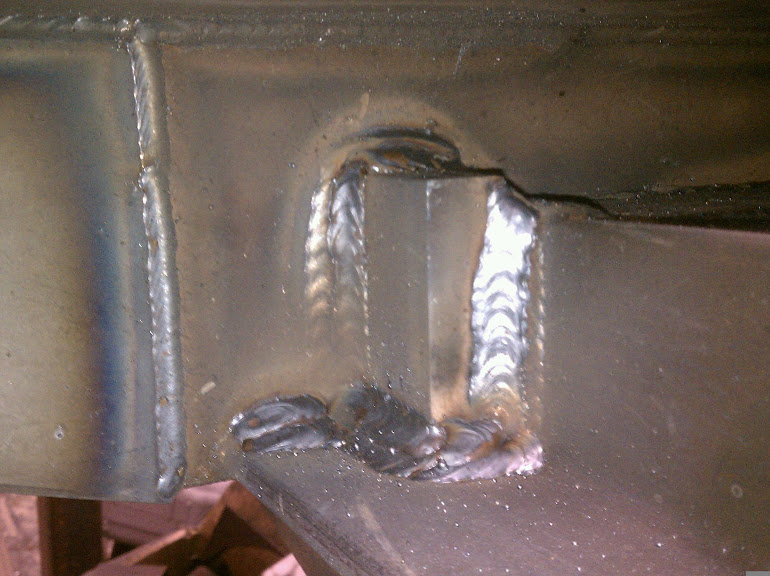
Shackle mounts, I make from 1"x3" bar stock, cut 5" long, drill a 15/16" hole in them 1.25" from the end, with a hole saw in a drill press; then mount them THROUGH the bumper, with the tip 2.5" out from the face of the bumper. I then weld them front and back, single pass in the front, tripple pass in the rear, to both the back side of the front plate, and the under-side of the top mount.

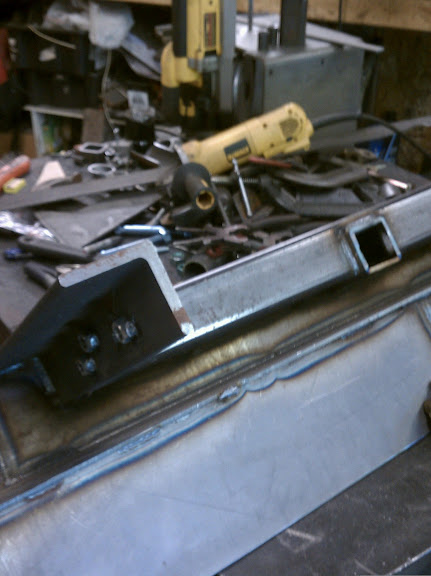
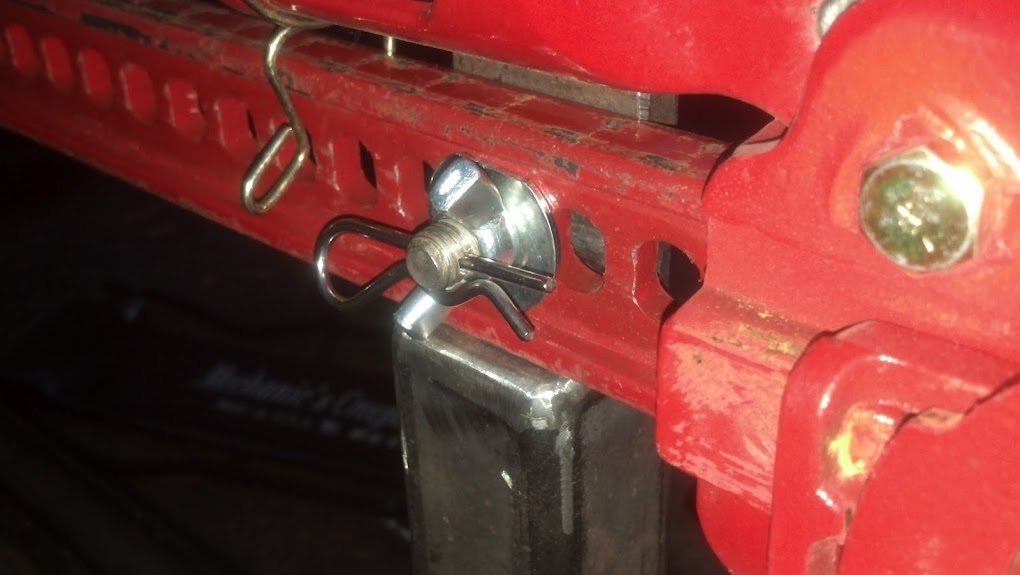
The 2" receiver, I mount on the same plane as the shackle mounts, except it's usually 3-1/4" out from the face. The rear is pretty similar to the shackle mounts, except I also do a pair of braces to the bottom mount of the bumper, in order to stop any vertical flex.

The picture below is of the inside of the bumper, sitting up-side-down on the bench:

Image

Mike
bartonmd
Moderator
 
Posts: 4469
Joined: Wed Sep 09, 2009 9:35 am
Location: IN, Indianapolis
Name: Mike
Vehicle Year: 2007
Vehicle: Chevrolet TrailBlazer
DriveTrain: 4WD w/ G80
Rank: Offroad Rated

by navigator » Wed Jan 30, 2013 11:57 am

Mike, when you are welding on a bumper that is attached to the vehicle do you do anything special with the electronics? I figure you disconnect the negative terminal. Is that correct? Do you do anything more than that?
"Please consider a search before posting. Folks on this site PIONEERED functional offroad use of these trucks."
The answer to many common lift questions can be found
here
My Build Thread
User avatar
navigator
Moderator
 
Posts: 4651
Joined: Wed Mar 09, 2011 10:16 am
Location: NC, Winnabow
Name: Chris
Vehicle Year: 2006
Vehicle: Chevrolet TrailBlazer
DriveTrain: 4WD
Rank: Trail Ready

by bartonmd » Wed Jan 30, 2013 12:14 pm

Here's how I (we) did Kyle's rear bumper, using 5/8" heims for the hinges, and a center-mounted handle/latch:

Image

Image

Image

Image

Image

Image

Image

Standard size shackle mounts, welded into the ends of the mounts that go to the frame:

Image

Image

Image

You want to make sure the top glass can be opened without touching the tire carrier, if possible:

Image

Image

Video of how it works:

bartonmd
Moderator
 
Posts: 4469
Joined: Wed Sep 09, 2009 9:35 am
Location: IN, Indianapolis
Name: Mike
Vehicle Year: 2007
Vehicle: Chevrolet TrailBlazer
DriveTrain: 4WD w/ G80
Rank: Offroad Rated

by bartonmd » Wed Jan 30, 2013 12:16 pm

navigator wrote:Mike, when you are welding on a bumper that is attached to the vehicle do you do anything special with the electronics? I figure you disconnect the negative terminal. Is that correct? Do you do anything more than that?


Actually, Kyle and I disconnected the batteries to start with, but forgot one time, and everything was fine. I normally disconnect batteries of other peoples' vehicles, but Kyle and I have stopped disconnecting our batteries when we weld on our vehicles. It may help that I always ground either on the work, or very close to the work, if I'm welding sliders onto a frame or something, but fingers crossed, we haven't seen any issues.

Mike
bartonmd
Moderator
 
Posts: 4469
Joined: Wed Sep 09, 2009 9:35 am
Location: IN, Indianapolis
Name: Mike
Vehicle Year: 2007
Vehicle: Chevrolet TrailBlazer
DriveTrain: 4WD w/ G80
Rank: Offroad Rated

by navigator » Wed Jan 30, 2013 12:30 pm

thanks Mike, good info. I haven't had to weld on the TB yet. A few months back I welded a hitch on my golfcart and was really nervous with all those batteries. I just unhooked the neg at one end and the pos at the other and all was fine. I'm like you, what little welding I have done I usually have the ground close to where I am welding.
"Please consider a search before posting. Folks on this site PIONEERED functional offroad use of these trucks."
The answer to many common lift questions can be found
here
My Build Thread
User avatar
navigator
Moderator
 
Posts: 4651
Joined: Wed Mar 09, 2011 10:16 am
Location: NC, Winnabow
Name: Chris
Vehicle Year: 2006
Vehicle: Chevrolet TrailBlazer
DriveTrain: 4WD
Rank: Trail Ready

by bartonmd » Wed Jan 30, 2013 12:34 pm

Also, as far as material types and amounts:

For a full custom bumper, front or rear, I usually go through about a 4ft x 5ft sheet of 7ga or 3/16" steel. 7ga is 7.5#/sq-ft and 3/16" is 7.66#/sq.ft. and you should be paying around $1.00 to $1.10 per pound, at today's prices, at a local welding shop. They pay around 1/2 of that, right now.

Mike
bartonmd
Moderator
 
Posts: 4469
Joined: Wed Sep 09, 2009 9:35 am
Location: IN, Indianapolis
Name: Mike
Vehicle Year: 2007
Vehicle: Chevrolet TrailBlazer
DriveTrain: 4WD w/ G80
Rank: Offroad Rated

by bartonmd » Wed Jan 30, 2013 3:46 pm

(this is meant to be tips from everybody, not just me, so feel free to post up stuff you've learned while making your stuff, etc.)
bartonmd
Moderator
 
Posts: 4469
Joined: Wed Sep 09, 2009 9:35 am
Location: IN, Indianapolis
Name: Mike
Vehicle Year: 2007
Vehicle: Chevrolet TrailBlazer
DriveTrain: 4WD w/ G80
Rank: Offroad Rated

by HARDTRAILZ » Wed Jan 30, 2013 4:12 pm

Call Mike....thats what i do.

:cheers: :idea: :mechanic: :safari:
I hate to advocate weird chemicals, alcohol, violence or insanity to anyone...but
they've always worked for me.
User avatar
HARDTRAILZ
Moderator
 
Posts: 6342
Joined: Sat Sep 12, 2009 1:49 am
Location: IN, Batesville
Name: Kyle
Vehicle Year: 2006
Vehicle: Chevrolet TrailBlazer
DriveTrain: 4WD w/ Aftermarket Locker
Rank: Extreme Offroader

by boog2006 » Wed Jan 30, 2013 4:25 pm

I really appreciate this thread. I may actually start some real fabrication projects.
Better to remain silent and be thought a fool than to speak out and remove all doubt. - Abraham Lincoln
Boog2006 Build Thread
User avatar
boog2006
Addict
 
Posts: 688
Joined: Wed Jul 13, 2011 3:09 pm
Location: KY, Paducah
Name: Brent
Vehicle Year: 2006
Vehicle: Chevrolet TrailBlazer
DriveTrain: 4WD
Rank: Offroad Rated

by navigator » Wed Jan 30, 2013 5:59 pm

just a note for noob welders (I'm a noob too) it is a good idea to wear leather boots and gloves.
I don't wear shoes at home much and I have a bad habit of wandering into the shop and finding some small project to do.
I remember when I was welding my hitch on my golf cart I was barefoot and sweating pretty good (the humidity here sucks). Occasionally when welding the hitch I would get a little tingle of a shock I guess it was traveling up through my sweaty hands. Nothing major, just a tickle to know it was there. Just make sure you have rubber soled shoes on, preferably leather boots. Nothing worse than having a piece of hot slag burn a hole in your shoe and get onto your foot!
"Please consider a search before posting. Folks on this site PIONEERED functional offroad use of these trucks."
The answer to many common lift questions can be found
here
My Build Thread
User avatar
navigator
Moderator
 
Posts: 4651
Joined: Wed Mar 09, 2011 10:16 am
Location: NC, Winnabow
Name: Chris
Vehicle Year: 2006
Vehicle: Chevrolet TrailBlazer
DriveTrain: 4WD
Rank: Trail Ready

by Opeth » Wed Jan 30, 2013 8:23 pm

Awesome info here, thanks for taking the time to post this up for us. Now I just need to buy a welder and start practicing.

What are you bending the steel tube with?
User avatar
Opeth
Addict
 
Posts: 846
Joined: Tue Oct 05, 2010 4:46 pm
Location: NY, Solvay
Name: Cody
Vehicle Year: 2006
Vehicle: Chevrolet TrailBlazer
DriveTrain: 4WD
Rank: Trail Ready

by bartonmd » Wed Jan 30, 2013 9:00 pm

Opeth wrote:Awesome info here, thanks for taking the time to post this up for us. Now I just need to buy a welder and start practicing.

What are you bending the steel tube with?


I've got a Pro-Tools 105HD bender that I made a mount and air/hydro setup for:

Image

Image

Image
bartonmd
Moderator
 
Posts: 4469
Joined: Wed Sep 09, 2009 9:35 am
Location: IN, Indianapolis
Name: Mike
Vehicle Year: 2007
Vehicle: Chevrolet TrailBlazer
DriveTrain: 4WD w/ G80
Rank: Offroad Rated

by bartonmd » Wed Jan 30, 2013 10:09 pm

navigator wrote:just a note for noob welders (I'm a noob too) it is a good idea to wear leather boots and gloves.
I don't wear shoes at home much and I have a bad habit of wandering into the shop and finding some small project to do.
I remember when I was welding my hitch on my golf cart I was barefoot and sweating pretty good (the humidity here sucks). Occasionally when welding the hitch I would get a little tingle of a shock I guess it was traveling up through my sweaty hands. Nothing major, just a tickle to know it was there. Just make sure you have rubber soled shoes on, preferably leather boots. Nothing worse than having a piece of hot slag burn a hole in your shoe and get onto your foot!


Yes, PPE...

I like the Tilman 48 MIG welding gloves for welding: http://jtillman.com/products/gloves/mig/48/

I like the Tilman 1410 "driver" gloves for general fabrication and tacking: http://jtillman.com/products/gloves/drivers/1410/

I use a no-name leather apron, and one of those green treated cotton shirts:

Image

Boots, I have the Rocky Ironclad series of steel toe boot, bought by my previous employer (still on the same soles like 8 years later, though they did take a YEAR to break in fully). I can't count the number of times that something's hit the toes, to the point that I can almost see the steel in a few spots. Also, make sure whatever boots you wear have a leather tongue, not a cordura tongue. Sparks get caught in between the laces, and down through the tongue, and onto your foot. These have leather tongues, but I've gone through probably 6-7 sets of laces on them.

For a face shield, the best one I've seen or tried is the Uvex Bionic. It's really lightweight, pretty tight to your face, and extends back under your chin, so it stops the odd-angle grindings. I've got one with a clear and another with a #5 tint for plasma cutting.

http://www.amazon.com/Sperian-Protectio ... vex+bionic
Image

Just in case you think just safety glasses are fine for using cutoff wheels, you might check out this thread:
http://www.pirate4x4.com/forum/shop-too ... hield.html
And see this picture of WITHOUT a face shield in that thread:
Image

For welding hoods, I used the $50 HF auto-darkening hood, and it was fine for about a year. After that, it kind of alternated between really fast switching, and sometimes it would be kind of slow. So, I got a Miller Digital Elite. However, if I had to do it again, I'd probably get the Elite, for less money. The only upgrade from the Elite and the Digital Elite is the cutting/grinding modes, and the rf mode that's supposed to turn a lot better with lot amp TIG. However, I don't alternate between cutting and welding as much as I thought I did, and sometimes I'll leave it on the wrong setting and flash myself.

Image

For pants, I like BDU pants, because they aren't full cotton. Welding in jeans, they get sparks that hit them, and then they start to unravel. BDU pants (or like Carhardt or something synthetic) just get little holes in them, that don't unravel. Also, since they take some heat melting, seems like I don't get burns through them nearly as easily.

ETA: Also, protection of the nose/mouth/lungs. Some welders that I know say that their doctors told them that they can't get MRIs because they have so much metal in their lungs. I use the 3M Low profile 6000-series respirator for grinding/welding. No more black boogers.
http://www.amazon.com/3M-Series-Facepie ... respirator
Image

Also keep in mind that this is the stuff that would be in your lungs:
Image

Mike
bartonmd
Moderator
 
Posts: 4469
Joined: Wed Sep 09, 2009 9:35 am
Location: IN, Indianapolis
Name: Mike
Vehicle Year: 2007
Vehicle: Chevrolet TrailBlazer
DriveTrain: 4WD w/ G80
Rank: Offroad Rated

by Opeth » Wed Jan 30, 2013 10:56 pm

Yea angle grinders aren't a nice thing to have go wild on you. I was using a coarse paint stripping pad on mine removing rust from the under body of my old tuner car. Where he electrical connector passes through the body to the fuel tank, the pad caught on the body's edge ripping the grinder right out of my hand. I was wearing a face mask, respirator , ear plugs, welding gloves and just a t-shirt laying on my back under the car. The grinder bounced off just under where my gloves were protecting my forearm and dropped right into my shirt where it ripped my shirt and snarled itself up till it stopped and couldn't rotate. I left a nice scar across my stomach and forearm, but I used a lot of neosporin and can't see the scars anymore. I'll see if I can dig up some pics.

I dress in more than just t shirts now and try not to lay in the fall path of the grinder.

edit: pictures

Image

Image

Image

What the surface paint stripper looked like before it hit me and the metal edge it caught...

Image
User avatar
Opeth
Addict
 
Posts: 846
Joined: Tue Oct 05, 2010 4:46 pm
Location: NY, Solvay
Name: Cody
Vehicle Year: 2006
Vehicle: Chevrolet TrailBlazer
DriveTrain: 4WD
Rank: Trail Ready

by bartonmd » Wed Jan 30, 2013 11:44 pm

Yep, we were building the rally car in college, and a grinder got away from me, when I wasn't wearing gloves. 7 stitches in the side of my hand, and I was good as new.

Mike
bartonmd
Moderator
 
Posts: 4469
Joined: Wed Sep 09, 2009 9:35 am
Location: IN, Indianapolis
Name: Mike
Vehicle Year: 2007
Vehicle: Chevrolet TrailBlazer
DriveTrain: 4WD w/ G80
Rank: Offroad Rated

by navigator » Thu Jan 31, 2013 8:38 am

we don't always realize how dangerous power tools can be.
I was drilling a piece of flat stock one time drilling with one hand and holding it with the other
when the drill bit good and spun that flat stock around knocking a hunk out of my hand.
"Please consider a search before posting. Folks on this site PIONEERED functional offroad use of these trucks."
The answer to many common lift questions can be found
here
My Build Thread
User avatar
navigator
Moderator
 
Posts: 4651
Joined: Wed Mar 09, 2011 10:16 am
Location: NC, Winnabow
Name: Chris
Vehicle Year: 2006
Vehicle: Chevrolet TrailBlazer
DriveTrain: 4WD
Rank: Trail Ready

by navigator » Fri Feb 01, 2013 11:18 am

Mike, for the rear bumper you have a really nice pic of how you attach the bumper to the frame in the first post.
Do you have anything similar for the front?
I just breezed through 18 pages of your main design thread and didn't see anything.
viewtopic.php?f=35&t=1105&start=340
"Please consider a search before posting. Folks on this site PIONEERED functional offroad use of these trucks."
The answer to many common lift questions can be found
here
My Build Thread
User avatar
navigator
Moderator
 
Posts: 4651
Joined: Wed Mar 09, 2011 10:16 am
Location: NC, Winnabow
Name: Chris
Vehicle Year: 2006
Vehicle: Chevrolet TrailBlazer
DriveTrain: 4WD
Rank: Trail Ready

by bartonmd » Fri Feb 01, 2013 11:25 am

Just in the up-side-down bumper at the bottom of the first post. I just use a plate all the way across the top and a plate all the way across the bottom for the mounts.

Mike
bartonmd
Moderator
 
Posts: 4469
Joined: Wed Sep 09, 2009 9:35 am
Location: IN, Indianapolis
Name: Mike
Vehicle Year: 2007
Vehicle: Chevrolet TrailBlazer
DriveTrain: 4WD w/ G80
Rank: Offroad Rated

by navigator » Fri Feb 01, 2013 11:51 am

ok, I see it what you are talking about. So it basically uses the same 2 bolts that the current bumper support uses to hold it on?
I'm knocking around in my head an idea where I would come in behind the impact bar (or replace the impact bar) with something similar to how you did the rear with a 2 inch receiver coming through the impact bar and the bumper cover. I'll have to look at it more when I get it off and get the body lift installed.
The idea is it would give me a solid recovery point, a place to run my front rack but not have the huge time sync of building a full bumper and getting it to look good.
"Please consider a search before posting. Folks on this site PIONEERED functional offroad use of these trucks."
The answer to many common lift questions can be found
here
My Build Thread
User avatar
navigator
Moderator
 
Posts: 4651
Joined: Wed Mar 09, 2011 10:16 am
Location: NC, Winnabow
Name: Chris
Vehicle Year: 2006
Vehicle: Chevrolet TrailBlazer
DriveTrain: 4WD
Rank: Trail Ready

by HARDTRAILZ » Fri Feb 01, 2013 12:06 pm

That impact bar is not that strong
I hate to advocate weird chemicals, alcohol, violence or insanity to anyone...but
they've always worked for me.
User avatar
HARDTRAILZ
Moderator
 
Posts: 6342
Joined: Sat Sep 12, 2009 1:49 am
Location: IN, Batesville
Name: Kyle
Vehicle Year: 2006
Vehicle: Chevrolet TrailBlazer
DriveTrain: 4WD w/ Aftermarket Locker
Rank: Extreme Offroader

Next

Return to Fab Work