I was removing my broken 4wd disconnect assembly and the intermediate shaft that goes thru the oil pan came out attached to the disconnect. I tapped the end of the shaft and it came out of the disconnect assembly. I am not sure if the intermediate shaft is going back in all the way. I put everything back together, but the CV shaft will not go in all the way (it stays out about 1/2").
My fear is something fell off or is not aligned in the front differential now. Any chance something fell out of place? I removed the diff fill plug on the driver's side and everything looks ok, but I really can't see much.
Hoping for some help before I tear into the front differential.
Intermediate shaft came out attached to disconnet assembly
16 posts
• Page 1 of 1
-

Beamer - Member
- Posts: 84
- Joined: Wed May 18, 2011 9:33 pm
- Location: MD, Westminster
- Name: Chris Beam
- Vehicle Year: 2003
- Vehicle: Chevrolet TrailBlazer
- DriveTrain: 4WD w/ G80
- Rank: Trail Ready
How are you measuring your 1/2" out with the CV shaft? I haven't that apart but I've seen diagrams. It seems more likely the spring clip is resisting going into the diff would be more likely than anything to fall out of place.
It's not how fast you go. It's how quick you get there. Lifted TBSS Build
-

ErikSS - Lifer
- Posts: 2044
- Joined: Fri Apr 26, 2013 5:23 pm
- Location: IL, Flossmoor
- Name: Erik
- Vehicle Year: 2008
- Vehicle: Chevrolet TrailBlazer
- DriveTrain: 4WD w/ Limited Slip
- Rank: Offroad Rated
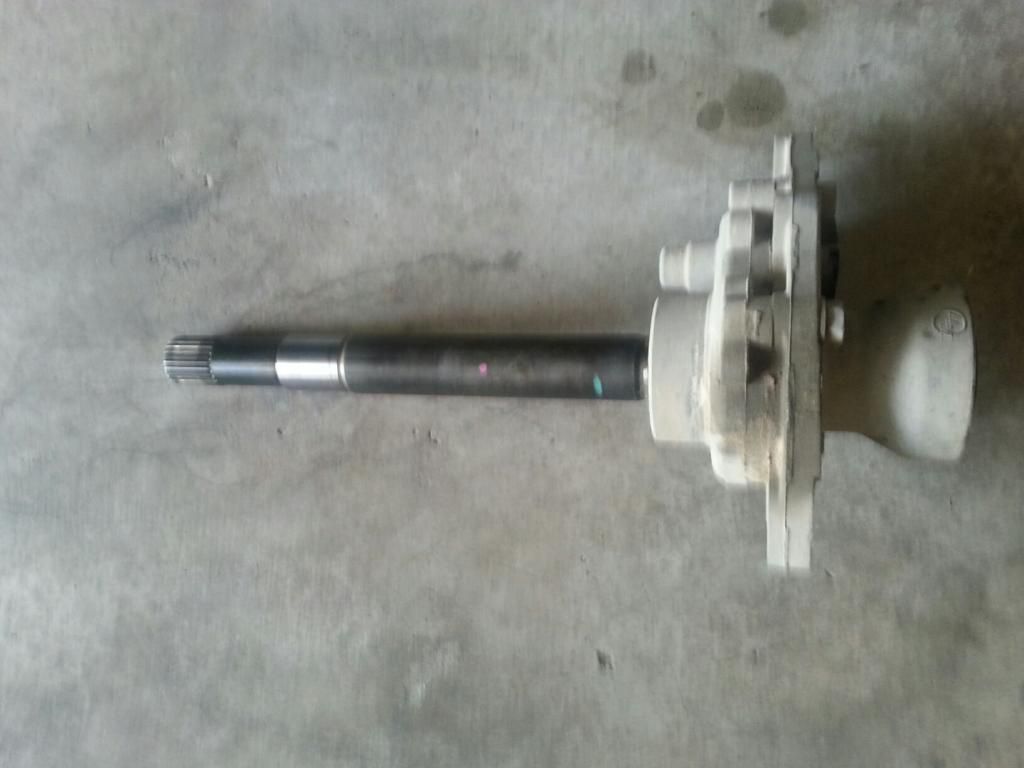
Intermediate shaft stuck with 4wd disconnect.
Shaft back in place looking from passenger side.
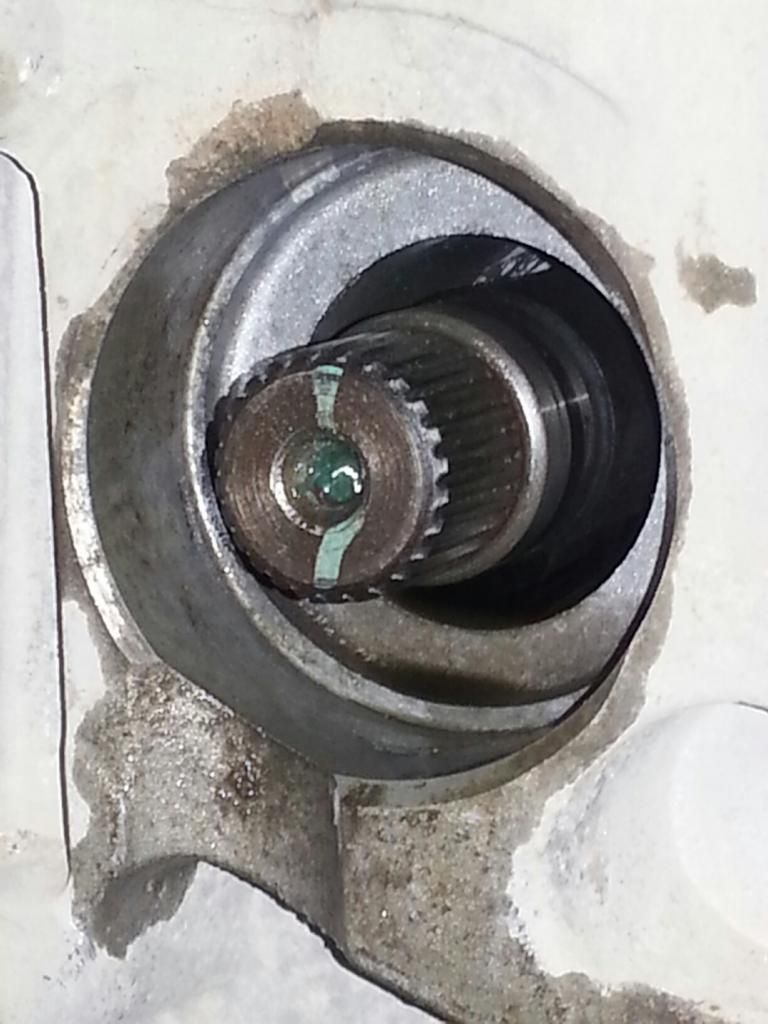
Looking up from the bottom.

Shaft back in place looking from passenger side.

Looking up from the bottom.

-
Beamer - Member
- Posts: 84
- Joined: Wed May 18, 2011 9:33 pm
- Location: MD, Westminster
- Name: Chris Beam
- Vehicle Year: 2003
- Vehicle: Chevrolet TrailBlazer
- DriveTrain: 4WD w/ G80
- Rank: Trail Ready
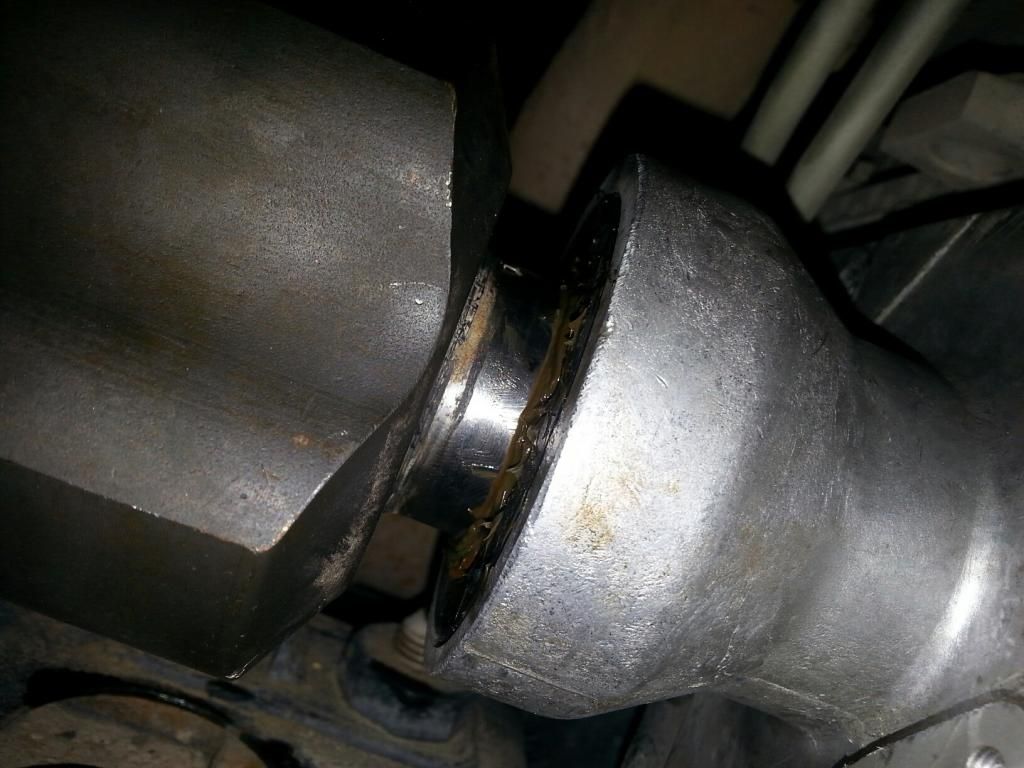
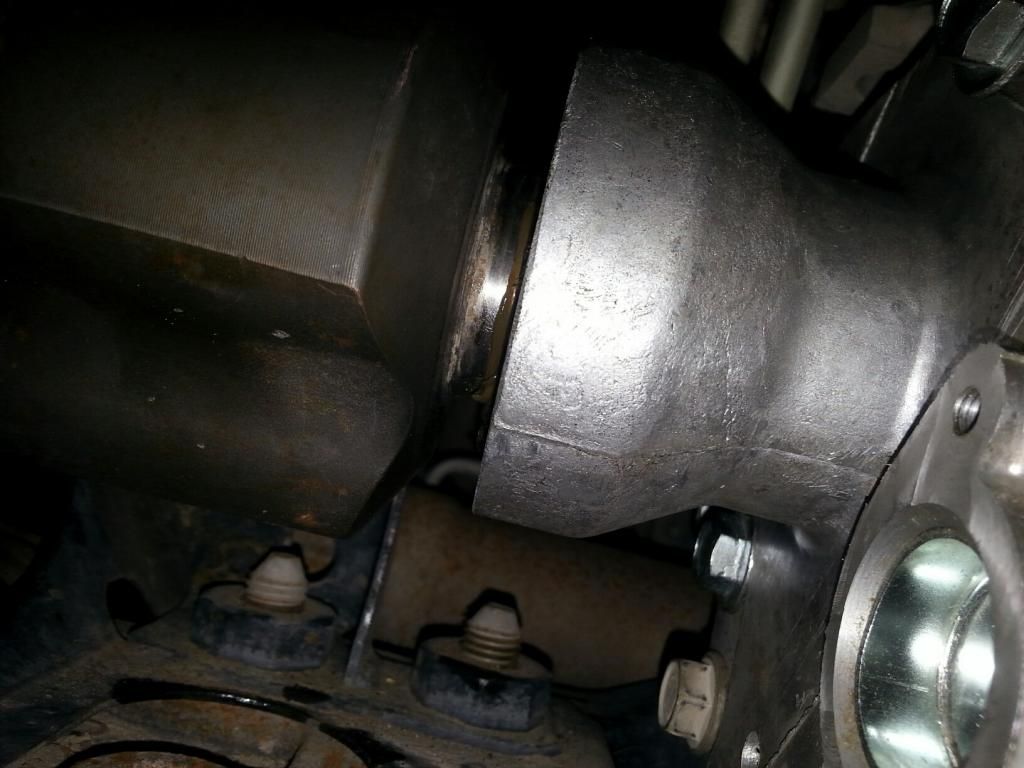
The 1/2" I am talking about is the gap between the tripot housing and the seal face of the disconnect assy. There is visibly 1/2" of the cv shaft from the seal face to the disconnect. I didn't take a pic before I took it back apart.
I am hoping it is just the clip, any advice on how to push the tripot housing in harder or hit with a hammer without damaging the boot or the housing?
I am hoping it is just the clip, any advice on how to push the tripot housing in harder or hit with a hammer without damaging the boot or the housing?
-
Beamer - Member
- Posts: 84
- Joined: Wed May 18, 2011 9:33 pm
- Location: MD, Westminster
- Name: Chris Beam
- Vehicle Year: 2003
- Vehicle: Chevrolet TrailBlazer
- DriveTrain: 4WD w/ G80
- Rank: Trail Ready
The new disconnect went on all the way, the cv shaft went in and I was able to connect the Upper control arm to the UBJ. That is when the tripot still has the 1/2" gap.
-
Beamer - Member
- Posts: 84
- Joined: Wed May 18, 2011 9:33 pm
- Location: MD, Westminster
- Name: Chris Beam
- Vehicle Year: 2003
- Vehicle: Chevrolet TrailBlazer
- DriveTrain: 4WD w/ G80
- Rank: Trail Ready
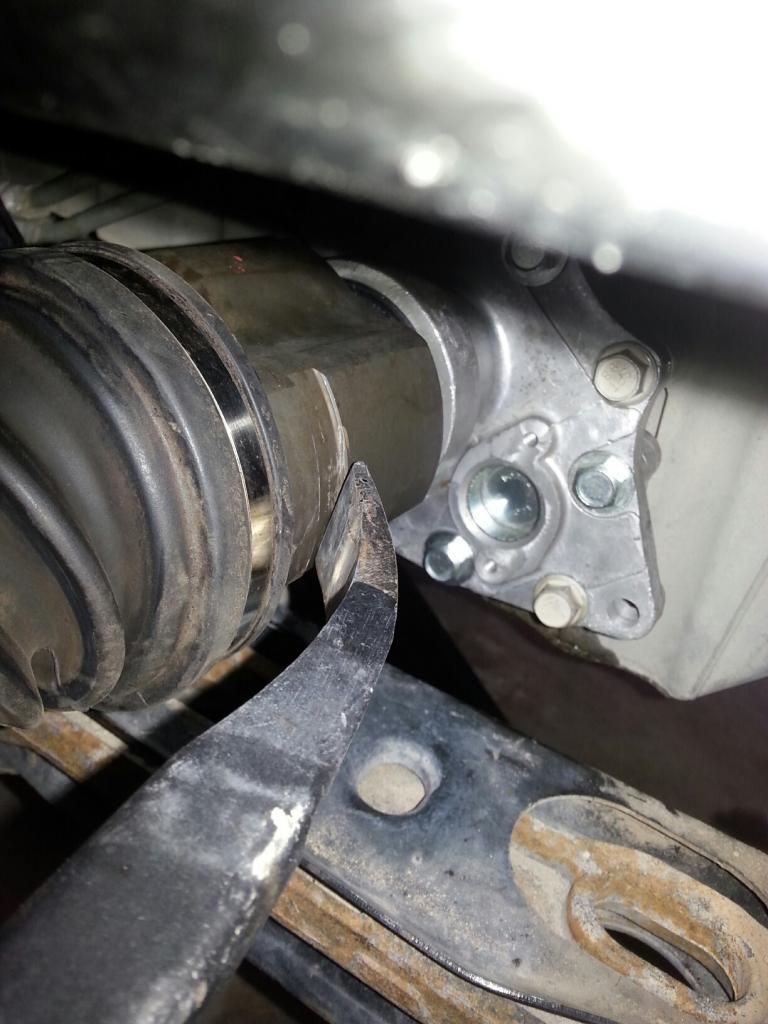
I put it all back together, here is the gap that I am refering to. I really hope it is just the clip, but I don't know a better way to push harder or hit the tripot to get it in all the way.

-
Beamer - Member
- Posts: 84
- Joined: Wed May 18, 2011 9:33 pm
- Location: MD, Westminster
- Name: Chris Beam
- Vehicle Year: 2003
- Vehicle: Chevrolet TrailBlazer
- DriveTrain: 4WD w/ G80
- Rank: Trail Ready
I just slid the disconnect with the cv shaft in it as pictured above away from the oil pan and the cv shaft did not go into the disconnect any further. I think this means it is not interfering with the intermediate shaft, I just need to get more midevil on getting past the c-clip.
-
Beamer - Member
- Posts: 84
- Joined: Wed May 18, 2011 9:33 pm
- Location: MD, Westminster
- Name: Chris Beam
- Vehicle Year: 2003
- Vehicle: Chevrolet TrailBlazer
- DriveTrain: 4WD w/ G80
- Rank: Trail Ready
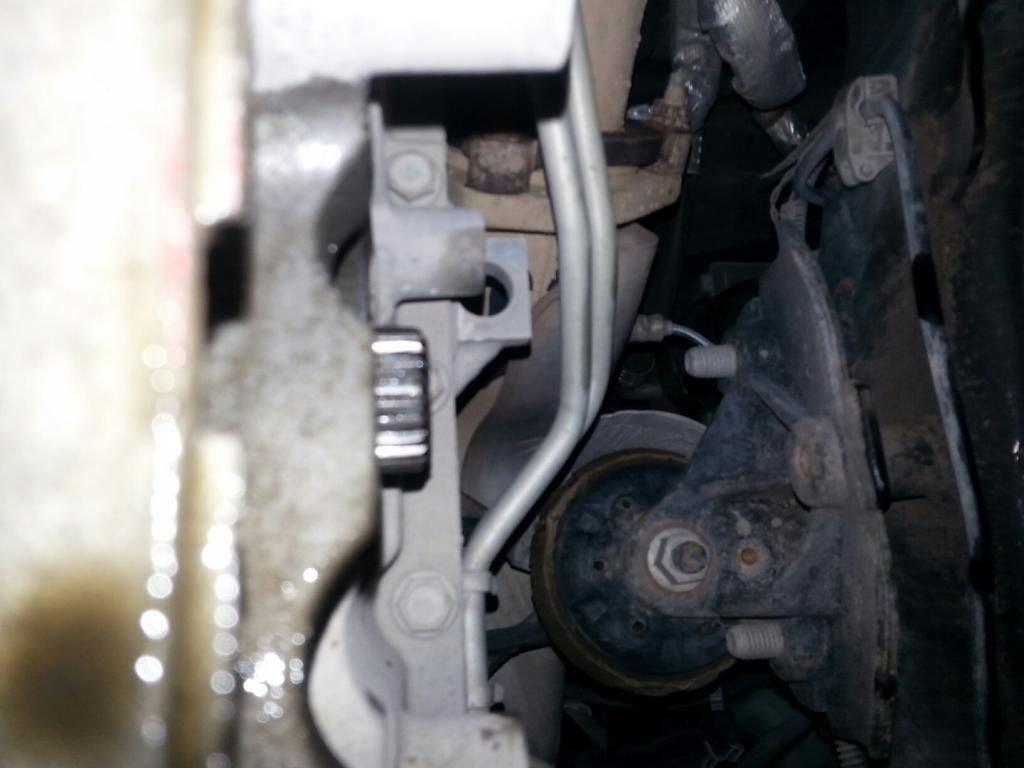
Figured out how to safely hit on the tripot. Used a prybar to catch on the groove on the outside of the tripot housing, the sharp edge of the prybar catches the edge of the groove and a few good hits with a 2lb hammer got it home.
the tools.
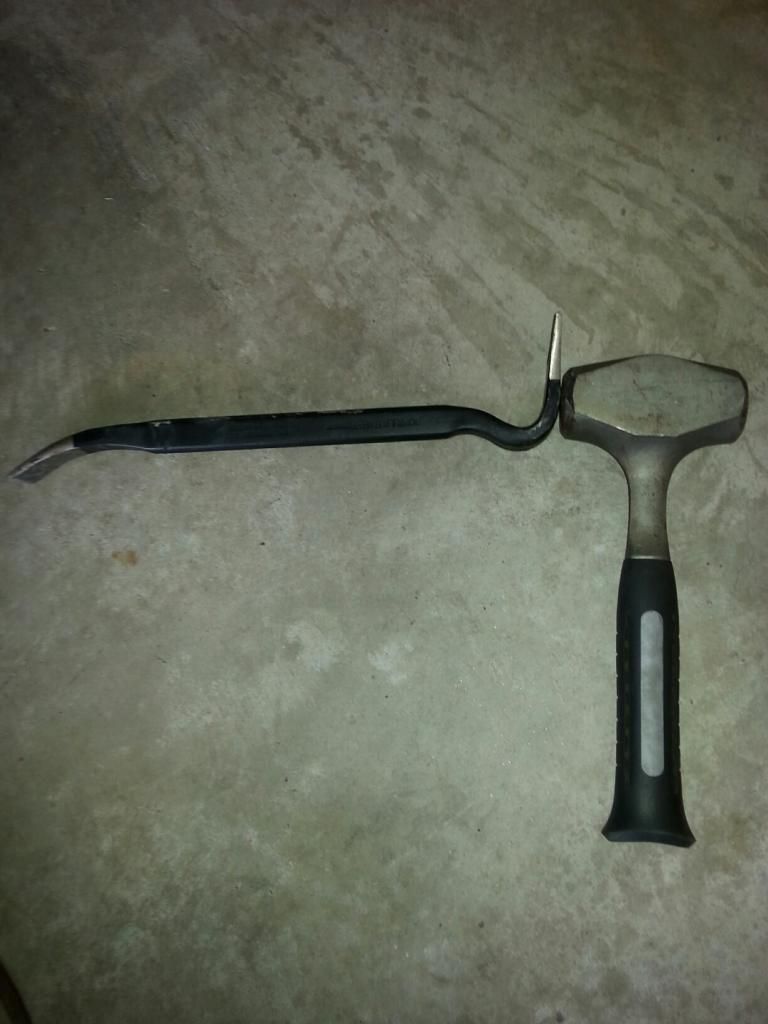
prybar on the edge of the tripot groove.
correct gap.
the tools.

prybar on the edge of the tripot groove.

correct gap.

-
Beamer - Member
- Posts: 84
- Joined: Wed May 18, 2011 9:33 pm
- Location: MD, Westminster
- Name: Chris Beam
- Vehicle Year: 2003
- Vehicle: Chevrolet TrailBlazer
- DriveTrain: 4WD w/ G80
- Rank: Trail Ready
Glad you figured it out.
What I do, is use the tripod joint as a slide hammer. I hold onto the actual shaft of the CV assembly, and ram it into the end of the tripod using it's slip-yolk functionality in my favor.
What I do, is use the tripod joint as a slide hammer. I hold onto the actual shaft of the CV assembly, and ram it into the end of the tripod using it's slip-yolk functionality in my favor.
-

Trail X - Founder
- Posts: 9935
- Joined: Mon Sep 07, 2009 10:22 pm
- Location: VA, Roanoke
- Name: James Downing
- Vehicle Year: 2005
- Vehicle: Chevrolet TrailBlazer
- DriveTrain: 4WD w/ Aftermarket Locker
- Rank: Expedition Guide
Also helps when you have the c clip facing upwards when you re install the shaft. Just future knowledge.
-

Opeth - Addict
- Posts: 846
- Joined: Tue Oct 05, 2010 4:46 pm
- Location: NY, Solvay
- Name: Cody
- Vehicle Year: 2006
- Vehicle: Chevrolet TrailBlazer
- DriveTrain: 4WD
- Rank: Trail Ready
I do the same as James. Just slam it on home.
build thread
All things in moderation, including moderation.
Some people never go crazy... what truly horrible lives they must lead
All things in moderation, including moderation.
Some people never go crazy... what truly horrible lives they must lead
-

v7guy - Moderator
- Posts: 3712
- Joined: Wed Mar 09, 2011 10:17 pm
- Location: NY, long island
- Name: Jason
- Vehicle Year: 2004
- Vehicle: Chevrolet TrailBlazer
- DriveTrain: 4WD
- Rank: Offroad Rated
Good info when I have to do this work. 
2008 TB Radflo coil overs, Z71 rear springs, 2" spacer, skyjacker N8030 shocks, LT285/75R16E Goodyear MTR
My Build ----- MY Youtube Channel
My Build ----- MY Youtube Channel
-

TBYODA - Moderator
- Posts: 1762
- Joined: Mon Apr 01, 2013 9:07 pm
- Location: NY, Rochester
- Name: Robert Sengillo
- Vehicle Year: 2008
- Vehicle: Chevrolet TrailBlazer
- DriveTrain: 4WD w/ Limited Slip
- Rank: Offroad Rated
Opeth wrote:Also helps when you have the c clip facing upwards when you re install the shaft. Just future knowledge.
Do you mean the open part of the clip facing down?
It's not how fast you go. It's how quick you get there. Lifted TBSS Build
-
ErikSS - Lifer
- Posts: 2044
- Joined: Fri Apr 26, 2013 5:23 pm
- Location: IL, Flossmoor
- Name: Erik
- Vehicle Year: 2008
- Vehicle: Chevrolet TrailBlazer
- DriveTrain: 4WD w/ Limited Slip
- Rank: Offroad Rated
I've never had a problem or even though of what way that c clip faces
Sent from my SPH-L720 using Tapatalk
Sent from my SPH-L720 using Tapatalk
-

Moots1288 - Veteran
- Posts: 1964
- Joined: Fri Feb 24, 2012 8:42 pm
- Location: Long island
- Name: Moots
- Vehicle Year: 2006
- Vehicle: GMC Envoy
- DriveTrain: 4WD
- Rank: Offroad Rated
Agreed Matt. What difference does the C clip orientation make Cody?
-
Trail X - Founder
- Posts: 9935
- Joined: Mon Sep 07, 2009 10:22 pm
- Location: VA, Roanoke
- Name: James Downing
- Vehicle Year: 2005
- Vehicle: Chevrolet TrailBlazer
- DriveTrain: 4WD w/ Aftermarket Locker
- Rank: Expedition Guide
Trail X wrote:Agreed Matt. What difference does the C clip orientation make Cody?
Cause the prying motion is up and the c clip would be facing up.. Making the cv easier to remove?
-
Moots1288 - Veteran
- Posts: 1964
- Joined: Fri Feb 24, 2012 8:42 pm
- Location: Long island
- Name: Moots
- Vehicle Year: 2006
- Vehicle: GMC Envoy
- DriveTrain: 4WD
- Rank: Offroad Rated
16 posts
• Page 1 of 1