Offroad Trailblazers and Envoys

Gordinho80's Offroad / Camping Trailer Build

Discussion on how to enjoy the outdoors.

by Gordinho80 » Wed Mar 13, 2013 1:05 pm

Spring is around the corner. Time to start working on the trailer again.

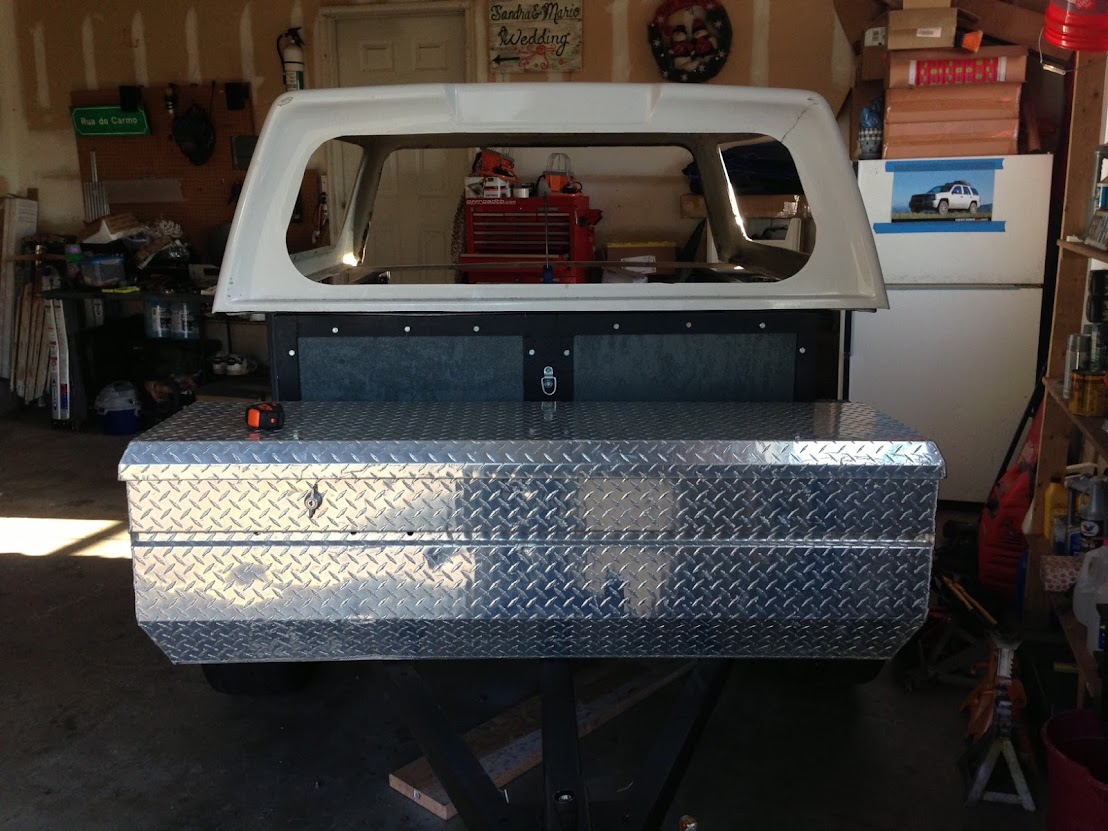
I'm pretty much decided on making the box pictured above into a combination power/storage box.

Image

I am going to divide the box into 2 sections. 1 side will house the battery and the fuse box, perhaps my power inverter as well. The other side will be used for storage.

I am going to keep the 4 wire harness for now, as I don't have brakes on the trailer. On the truck side, I will be running a 0 AWG wire from my battery to the rear of the truck where I will place a distribution block with an ANL fuse to a 4 AWG wire capped with an anderson plug. I am not running a ground from the battery to the plug, I will instead ground the anderson plug at the rear frame. On the trailer side, I am going to run an anderson plug with 4 AWG to the battery, which will also have a fuse. What is the proper way to ground at that point? Do I run the anderson to the battery? To the frame of the trailer?

I am going to use the rear anderson plug on the truck to power the winch as well, when needed back there.

Any glaring issues with my plan?
Mario - Build Thread
User avatar
Gordinho80
Lifer
 
Posts: 2787
Joined: Tue Sep 08, 2009 9:27 am
Location: NJ, Jackson
Name: Mario Almeida
Vehicle Year: Other
Vehicle: Other Vehicle
DriveTrain: 4WD

by fishsticks » Wed Mar 13, 2013 1:08 pm

If you are using the frame as a ground, make sure the battery-frame ground wire is bigger than your hot wire at the plug.

I would probably just run a 0 AWG ground all the way back, if it was my rig.
11 Silverado LTZ - 6.2L/6l80, 2/3 drop, self tuned
85 Hilux - 3RZ, dual cases, caged, 40s, chromo everything
02 TrailBlazer LTZ - 35s, lockers, balls - Gone but not forgotten - Build
User avatar
fishsticks
Moderator
 
Posts: 4356
Joined: Thu Apr 01, 2010 11:30 pm
Location: WA, Vancouver
Name: Donny
Vehicle Year: Other
Vehicle: Other Vehicle
DriveTrain: 4WD w/ Aftermarket Locker
Rank: Extreme Offroader

by Gordinho80 » Wed Mar 13, 2013 1:10 pm

I'm going to run the anderson plug to the battery terminal. I am also going to run a length of 0 AWG from battery to the frame.
Mario - Build Thread
User avatar
Gordinho80
Lifer
 
Posts: 2787
Joined: Tue Sep 08, 2009 9:27 am
Location: NJ, Jackson
Name: Mario Almeida
Vehicle Year: Other
Vehicle: Other Vehicle
DriveTrain: 4WD

by Gordinho80 » Fri Mar 29, 2013 6:42 pm

Picked up the water tank today! 24 gal tank that was taken out of tow behind in order to upgrade to a larger tank. Works for me!!!

Going to mount it inside the trailer towards the front... or section off the tongue box and mount it in there. I'd seal the battery side in case of tank failure. I'm actually liking this idea as I could mount the heater on the lid of the box above the tank! MMMM
Mario - Build Thread
User avatar
Gordinho80
Lifer
 
Posts: 2787
Joined: Tue Sep 08, 2009 9:27 am
Location: NJ, Jackson
Name: Mario Almeida
Vehicle Year: Other
Vehicle: Other Vehicle
DriveTrain: 4WD

by Gordinho80 » Tue Apr 02, 2013 5:39 pm

Image

Image

Image

Should have the 4x6" angle this weekend.
Mario - Build Thread
User avatar
Gordinho80
Lifer
 
Posts: 2787
Joined: Tue Sep 08, 2009 9:27 am
Location: NJ, Jackson
Name: Mario Almeida
Vehicle Year: Other
Vehicle: Other Vehicle
DriveTrain: 4WD

by Gordinho80 » Tue Apr 02, 2013 6:08 pm

Possible water tank location.

I'd have enough room on the other side of the box to mount the battery and fuse panel...

Image

I would drill out the back of the box on the side to place the fill up location. Small piece of hose running inside to a 90* elbow into the tank.

Image

Image

I would mount the pump in front of the tank itself. Very little wiring required. The Eccotemp would mount to the lid of the box, so that when open, it is upright. Would just need to run a hose to the kitchen. I would probably put a spigot underneath the fill point, also on the back side of the box.

Image
Mario - Build Thread
User avatar
Gordinho80
Lifer
 
Posts: 2787
Joined: Tue Sep 08, 2009 9:27 am
Location: NJ, Jackson
Name: Mario Almeida
Vehicle Year: Other
Vehicle: Other Vehicle
DriveTrain: 4WD

by Trail X » Tue Apr 02, 2013 6:15 pm

Planning to cut down the 4x6 angle? 6" seems too long.

Otherwise, I like the water tank plan.
8-) Build Thread | ExPo Build | YouTube Videos
Not all who wander are lost. -Tolkien
User avatar
Trail X
Founder
 
Posts: 9935
Joined: Mon Sep 07, 2009 10:22 pm
Location: VA, Roanoke
Name: James Downing
Vehicle Year: 2005
Vehicle: Chevrolet TrailBlazer
DriveTrain: 4WD w/ Aftermarket Locker
Rank: Expedition Guide

by Gordinho80 » Tue Apr 02, 2013 6:23 pm

4" length would be the horizontal. The cap would hang over the 4x6. I am going to gusset the angle so that it is not just an open piece of angle. Also, the rear section of the angle will house the taillights... its hard to explain. I just have to get the material and go to town!
Mario - Build Thread
User avatar
Gordinho80
Lifer
 
Posts: 2787
Joined: Tue Sep 08, 2009 9:27 am
Location: NJ, Jackson
Name: Mario Almeida
Vehicle Year: Other
Vehicle: Other Vehicle
DriveTrain: 4WD

by Trail X » Tue Apr 02, 2013 6:49 pm

Oh ok. So the 4" will stick out horizontally, and the 6" will hang down, creating a 4x6 box on each side? I like it.
8-) Build Thread | ExPo Build | YouTube Videos
Not all who wander are lost. -Tolkien
User avatar
Trail X
Founder
 
Posts: 9935
Joined: Mon Sep 07, 2009 10:22 pm
Location: VA, Roanoke
Name: James Downing
Vehicle Year: 2005
Vehicle: Chevrolet TrailBlazer
DriveTrain: 4WD w/ Aftermarket Locker
Rank: Expedition Guide

by onelow1ton » Tue Apr 02, 2013 8:20 pm

Looking good , in to see the spring/summer updates
2011 Colorado Z71 Crew Cab 5.3 v8 SASed, 37x12.5x16.5 wrangler MT/R,recentered h1 beadlocks, Doug thorley headers, mbrp exhaust , ARE topper , rtt, x20 10k winch
expo build http://www.expeditionportal.com/forum/t ... rado-build
onelow1ton
Off-Roader
 
Posts: 146
Joined: Tue Oct 06, 2009 9:05 pm
Location: Va, Spotsavania
Name: Kenny
Vehicle Year: Other
Vehicle: Other Vehicle
DriveTrain: 4WD w/ G80

by Gordinho80 » Wed Apr 03, 2013 5:34 pm

JamesDowning wrote:Oh ok. So the 4" will stick out horizontally, and the 6" will hang down, creating a 4x6 box on each side? I like it.

Not a BOX, per say... the green reflects the Angle... I would use flat stock or sheet metal to skin it.

Image
Mario - Build Thread
User avatar
Gordinho80
Lifer
 
Posts: 2787
Joined: Tue Sep 08, 2009 9:27 am
Location: NJ, Jackson
Name: Mario Almeida
Vehicle Year: Other
Vehicle: Other Vehicle
DriveTrain: 4WD

by v7guy » Wed Apr 03, 2013 5:55 pm

could also cut a strip out of the the top and glass it back together. It's relatively easy and would keep it a smidge narrower to help keep it from smacking things. I don't suppose it would take any longer than welding in those triangles the length of the trailer
build thread

All things in moderation, including moderation.
Some people never go crazy... what truly horrible lives they must lead
User avatar
v7guy
Moderator
 
Posts: 3712
Joined: Wed Mar 09, 2011 10:17 pm
Location: NY, long island
Name: Jason
Vehicle Year: 2004
Vehicle: Chevrolet TrailBlazer
DriveTrain: 4WD
Rank: Offroad Rated

by Conner299 » Wed Apr 03, 2013 5:56 pm

Why not build straight down from, from the sides of the topper to the wheel wells? Possibly increase side storage or sleeping space? Or would that just be too much hassle?
I DON'T care what my GMT360 was designed to do, I care about what it can do!
User avatar
Conner299
Addict
 
Posts: 706
Joined: Mon Oct 29, 2012 8:47 am
Location: KY, Louisville
Name: Ed
Vehicle Year: 2005
Vehicle: Chevrolet TrailBlazer
DriveTrain: 4WD
Rank: Trail Ready

by Gordinho80 » Wed Apr 03, 2013 6:36 pm

Jason, do you know how to mess with fiberglass? I've actually thought about doing that as well. I've never worked with fiberglass and I wouldn't really know where to start. I want to make sure it remains waterproof.

Ed, that is an interesting idea. Redoing the walls would be too much hassle, but making side "compartments" is a valid idea. I could use them to house smaller things, perhaps some tools, shovel, axe, hilift. I'm going to look into that, actually. I have a full sheet of 1/8" steel sitting in my shed along with some smaller angle.
Mario - Build Thread
User avatar
Gordinho80
Lifer
 
Posts: 2787
Joined: Tue Sep 08, 2009 9:27 am
Location: NJ, Jackson
Name: Mario Almeida
Vehicle Year: Other
Vehicle: Other Vehicle
DriveTrain: 4WD

by Trail X » Wed Apr 03, 2013 8:42 pm

Agh, flip that green angle over! Think trapezoid!
8-) Build Thread | ExPo Build | YouTube Videos
Not all who wander are lost. -Tolkien
User avatar
Trail X
Founder
 
Posts: 9935
Joined: Mon Sep 07, 2009 10:22 pm
Location: VA, Roanoke
Name: James Downing
Vehicle Year: 2005
Vehicle: Chevrolet TrailBlazer
DriveTrain: 4WD w/ Aftermarket Locker
Rank: Expedition Guide

by Gordinho80 » Wed Apr 03, 2013 9:24 pm

I GOT IT!!! This goes back to an idea that JD gave me originally as well. I guess I just need to see it to really appreciate it...

Image

Image

Image

Image

Side boxes running the length of the trailer. They would start at the top frame and run all the way down to the top portion of the fender. I'm thinking 4x6 angle might be a little too much for a box frame, though. What about heavy duty plywood boxes? Would be a little easier to cut out and put together. Alternatively, I can get some smaller angle to make the frame out of? Only reason I'm doubting the 4x6 as a frame is because it would be about 13' on each side of 3/8" thick 4x6 angle! Thats a lot of weight
Mario - Build Thread
User avatar
Gordinho80
Lifer
 
Posts: 2787
Joined: Tue Sep 08, 2009 9:27 am
Location: NJ, Jackson
Name: Mario Almeida
Vehicle Year: Other
Vehicle: Other Vehicle
DriveTrain: 4WD

by Diacom » Wed Apr 03, 2013 10:06 pm

Make your frames for the weight support, then use aluminum panels to fill.
Diacom
Addict
 
Posts: 882
Joined: Fri Jul 23, 2010 9:08 pm
Location: NV, Yerington
Name: Noel
Vehicle Year: 2003
Vehicle: Chevrolet TrailBlazer
DriveTrain: 4WD w/ Aftermarket Locker

by Trail X » Thu Apr 04, 2013 9:05 am

Do you have access to sheeting that might be lighter? Something like 10 gauge would be plenty with a little gusseting. 3/8 is insanity.

I'd bet that your plywood box with angle frame would end up being heavier than a light gauge steel box.
8-) Build Thread | ExPo Build | YouTube Videos
Not all who wander are lost. -Tolkien
User avatar
Trail X
Founder
 
Posts: 9935
Joined: Mon Sep 07, 2009 10:22 pm
Location: VA, Roanoke
Name: James Downing
Vehicle Year: 2005
Vehicle: Chevrolet TrailBlazer
DriveTrain: 4WD w/ Aftermarket Locker
Rank: Expedition Guide

by Conner299 » Thu Apr 04, 2013 9:11 am

Something else to possibly look into... A fairing for the front of that big ol' air scoop... Sorry, I mean topper. Something possibly that flips up to give access to the tool box. Just an idea.
I DON'T care what my GMT360 was designed to do, I care about what it can do!
User avatar
Conner299
Addict
 
Posts: 706
Joined: Mon Oct 29, 2012 8:47 am
Location: KY, Louisville
Name: Ed
Vehicle Year: 2005
Vehicle: Chevrolet TrailBlazer
DriveTrain: 4WD
Rank: Trail Ready

by Gordinho80 » Thu Apr 04, 2013 11:24 am

Ok... So I've been talking to neighbor (who has been my steel supplier for this whole project)... Looking at the following...

Option 1:
4x6" angle ran along the top of the trailer frame front to back. I would run the 6" length horizontally to get a deeper box, more suitable for shovel, ax, hilift... Then, take the sheet steel I have which is like 3/16" I think, and cut 2 8" strips lengthwise. Notch and bend to make like a 6" C Channel, then bend and weld that to form a 16"x63"x16" U shape. This would be the sides and bottom of the box. I would use the rear flanges to bolt and weld it to the trailer frame. Then I would just need to make doors. The remaining piece of sheet steel would be enough to make 2 16" tall doors that I would get some smaller tube to frame.

Option 2:
He's checking to see if he can get me some thinner walled C channel, 6" wide, which I would make the entire box frame out of. It would be strong enough to support the cap, lighter than using the 4x6 all around, and less work than notching and bending flanges in sheet steel. I would still make the doors out of sheet steel and smaller tube.

I'm leaning toward option 2, to be honest. Hopefully I can get some thinner C to use.

Ed, I plan on making a thin plywood or plexi fairing for the front of the trailer. I would put some pin tabs at the top of the cap where I would secure the top of the fairing to. I would also put a couple of tabs in the tool box as well. While driving, the fairing would be locked into these tabs. Once at camp, I would remove pins and store the fairing inside the trailer, probably along the top of the cap with tabs up on the ceiling.
Mario - Build Thread
User avatar
Gordinho80
Lifer
 
Posts: 2787
Joined: Tue Sep 08, 2009 9:27 am
Location: NJ, Jackson
Name: Mario Almeida
Vehicle Year: Other
Vehicle: Other Vehicle
DriveTrain: 4WD

PreviousNext

Return to Camping / Survival