Offroad Trailblazers and Envoys

Big Silverado Mirrors installed

If its been completed, and doesn't fit into another category, stick it here.
Forum rules
Threads must fully document the modification with pictures and verbiage in the first post.
Threads that do not meet this criteria may be moved or deleted.

by RimoniManu » Sun Apr 08, 2012 10:03 pm

I've been wanting to do this mod for a while cause I hate how small the TB side mirrors are. I bought a pair of mirrors from craigslist for $20. The mirrors came off a 2005 Silverado 2500hd, they are power and heated.
Removal was very easy. Very carefully pry up the power window switch assembly. There's no screws holding it down, it just snaps into place. Disconnect the mirror wire harness.
In this picture the mirror connector is the third from the left:
Image

Next, according to Chilton you need to removed the entire door panel. There are two bolts that hold the panel on the door, which you can see one when you remove the power window switch assembly and the other is hidden.
Here are the two bolts circled:
Image

You don't need to remove the door panel though. It takes too long and you may break some of the snaps that hold the panel to the door. All you need to do is pry the corner where the mirror is located just enough to get to the bolts. Remove the foam insulation and remove the three bolts. When you're pulling the mirror off and it feels like its getting hung up on something, look inside where you removed two of the bolts and there is a small "hook" holding the mirror.
This is where the hook is:
Image

Now it's time for the fun part of wiring the new mirrors. Don't cut any wires until you have figured out exactly how you want to do it. The mirrors I bought only had about 3 inches of wire left from when the guy cut them, so it just depends on you and your new mirrors. That being said I also don't know what type of mirrors you're getting and what style of plug they have, that's what makes this so fun isn't it.

I've looked and looked, even went to a Chevy dealer and with no luck I was unable to find a wiring diagram of our TB mirrors. So I had to do it the hard way. While I was on an offroading trip I lost traction and slid into a tree and somewhat crushed my passenger mirror. It still worked but the plastic was cracked and the cover had fallen off, so what I did was I cut it open for all of you too see.
Here's what's left:
Image

Here are the important parts. Just an FYI, my TB is a 2002 EXT so you may not have all the options mine does. The mirror(those two prongs on the mirror are for the heated mirrors only), the mirror housing along with the mirror adjusting motor, and what I'm holding is what the the mirror mounts onto and allows the motor to adjust the mirror angle.
Image

This is the back of the motor. If you were to take off your own mirror glass you would have to remove the motor in order to get to these wires.
Image

The insides of the motor. When this is in the housing it's not laying up and down like in the picture, it's turned about 45 degrees. Inside there are two electric motors, one gear per motor, and above the motors is a Printed circuit board. The PCB is for the memory mirrors.
Image

Here's a picture showing how the mirror attachment fits in the motor housing.
Image

This is what the mirror physically attaches to. The two straight legs are actually plastic screws. When you want to adjust your mirror up/down/left/right the motor spins the gear, making the leg screw up and down. The other two square looking legs are for the PCB board/memory feature.
Image

Just to give a better idea of what I'm talking about, you can see how it fits together.
Image

Here are all the wires that you'd find inside the mirror housing. From left to right you have, PCB connector for memory mirrors, electric motor connector, turn signal connector, and the two black wires are heated mirror connectors.
Image

The mirror connector has two rows, labeled A and B, and eight rows, labeled 1 through 8.
Image

I made this diagram according to the row and column labels found on the connector. To figure out what wires did what it was just a process of elimination and testing with a voltmeter. Here is what I found
Image
You'll notice that there is only one red wire on the connector but there are two red wires that connect to the electric motors. Thats because inside the mirror housing the wire splits into two.

I was unable to find a wiring diagram for my new silverado mirrors so I just had to guess and try things out. I could tilt the mirror glass to look behind and see which wires went where so that helped. Easiest thing for you to do is find a diagram for your mirror. If you can't find one you'll just have to try things out and see what it does. The mirrors I bought the driver mirror was wired slightly different than the passenger mirror. Here's what I found and yes it works, and for the driver side because the stock connector only has one red wire(the up/down/left/right (-)), I connected the two yellow together.
Image

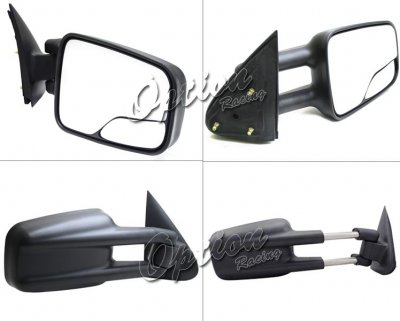
One problem I faced and you will face too is that the bolt holes to attach your new mirror wont match up. This is my new mirror and I layed my stock backing foam on it to see where the holes lined up. Two are very close but one is off about an inch.
Image

To figure out where i needed to drill a hole I placed the backing foam from my new mirror where it would mount like this picture. And yes I know the foam in the picture is from my stock mirrors, I forgot to take a picture when I did that.
Image

Another problem I encountered was where I needed to drill the hole. It's hard to explain exactly what I mean so I'll just show you.
Image

The bolt will be too close to the door frame that I wouldn't be able to install the nut. To get around this I cut a little of the frame.
Image

I also filed the top bolt hole a little so I could rotate the mirror to fit the lines of the vehicle, that way it looked stock. Now that it was time to install my new mirror I had a decision to make; to use the new mirrors backing foam or use the stock foam. Here's why I had to decide:
Image

There's a gap and it doesn't look appealing.
Image

After all the hard work I'm very pleased with the final result. I love the bigger mirrors and have full functionality, plus if you didn't know any better you'd think they were stock.
Image

Image

Here's a comparison of what stock view looks like vs new view:
Image

Image

Hope you like the mod. It's actually very easy. I did the hard part of figuring out the wiring, now all you need to do is re-wire and figure the mounting. Happy modding.
Last edited by RimoniManu on Mon Apr 09, 2012 12:17 pm, edited 2 times in total.
RimoniManu
Off-Roader
 
Posts: 138
Joined: Sat Sep 18, 2010 3:56 pm
Location: WA, Kent
Name: Ray
Vehicle Year: 2002
Vehicle: Chevrolet Trailblazer EXT
DriveTrain: 4WD w/ Aftermarket Locker

by Mudwheelin » Sun Apr 08, 2012 10:20 pm

Wow nice job man! Not crazy about that gap though. Any idea how you could fill that in a bit?
Markmc 2.5 lift, 2"Markmc body lift. Markmc 1.5 spacers, 33" Dynapro MT's, exhaust, EMT cams, CAI, Chipped, Light Bar. T.L. Guards
Build Thread:
viewtopic.php?f=25&t=2349
User avatar
Mudwheelin
Trail-Blazer
 
Posts: 441
Joined: Tue May 31, 2011 11:47 pm
Location: Calgary, AB
Name: Christian
Vehicle Year: 2007
Vehicle: Chevrolet TrailBlazer
DriveTrain: 4WD w/ G80

by RimoniManu » Sun Apr 08, 2012 10:33 pm

Let me go take a pic real quick
RimoniManu
Off-Roader
 
Posts: 138
Joined: Sat Sep 18, 2010 3:56 pm
Location: WA, Kent
Name: Ray
Vehicle Year: 2002
Vehicle: Chevrolet Trailblazer EXT
DriveTrain: 4WD w/ Aftermarket Locker

by RimoniManu » Sun Apr 08, 2012 10:39 pm

Here is how I have it right now. I'll probably do something a little different though. I may try and fit my cut up mirror around it somehow.
Image
RimoniManu
Off-Roader
 
Posts: 138
Joined: Sat Sep 18, 2010 3:56 pm
Location: WA, Kent
Name: Ray
Vehicle Year: 2002
Vehicle: Chevrolet Trailblazer EXT
DriveTrain: 4WD w/ Aftermarket Locker

by Nakashige » Sun Apr 08, 2012 10:43 pm

black silicone or sand-able body filler
Nakashige
Vendor
 
Posts: 832
Joined: Sat May 21, 2011 12:00 pm
Location: MA, Worcester
Name: Ben Caesar
Vehicle Year: 2003
Vehicle: Chevrolet TrailBlazer
DriveTrain: 4WD

by Mudwheelin » Sun Apr 08, 2012 10:50 pm

That looks much better now. Nice install dude. I like the look of them.
Markmc 2.5 lift, 2"Markmc body lift. Markmc 1.5 spacers, 33" Dynapro MT's, exhaust, EMT cams, CAI, Chipped, Light Bar. T.L. Guards
Build Thread:
viewtopic.php?f=25&t=2349
User avatar
Mudwheelin
Trail-Blazer
 
Posts: 441
Joined: Tue May 31, 2011 11:47 pm
Location: Calgary, AB
Name: Christian
Vehicle Year: 2007
Vehicle: Chevrolet TrailBlazer
DriveTrain: 4WD w/ G80

by RimoniManu » Sun Apr 08, 2012 11:04 pm

Thanks, the gap looks ok, but still gonna try and make it flow better. I'll post a pic when I get it done.
RimoniManu
Off-Roader
 
Posts: 138
Joined: Sat Sep 18, 2010 3:56 pm
Location: WA, Kent
Name: Ray
Vehicle Year: 2002
Vehicle: Chevrolet Trailblazer EXT
DriveTrain: 4WD w/ Aftermarket Locker

by Trail X » Mon Apr 09, 2012 8:33 am

Mirrors look good!

Although, maybe you should have spent that money on new tires!?!
8-) Build Thread | ExPo Build | YouTube Videos
Not all who wander are lost. -Tolkien
User avatar
Trail X
Founder
 
Posts: 9935
Joined: Mon Sep 07, 2009 10:22 pm
Location: VA, Roanoke
Name: James Downing
Vehicle Year: 2005
Vehicle: Chevrolet TrailBlazer
DriveTrain: 4WD w/ Aftermarket Locker
Rank: Expedition Guide

by hobbstisdaman » Mon Apr 09, 2012 12:07 pm

I like. Have you ever posted on here about your snorkel install? Would love to see about it.
Shoot, Move, Communicate. Build Thread
User avatar
hobbstisdaman
Trail-Blazer
 
Posts: 319
Joined: Fri Feb 17, 2012 11:15 am
Location: GA, Dawsonville
Name: Grant
Vehicle Year: 2007
Vehicle: Chevrolet TrailBlazer
DriveTrain: 4WD
Rank: Trail Ready

by RimoniManu » Mon Apr 09, 2012 12:07 pm

Hahaha!! Couldn't pass up on a set of mirrors for $20. I do have a new set of tires though.....36" military hummer tires along with the 16.5" double beadlock rims. Just finishing up my axle build and then I'll be putting them on.
RimoniManu
Off-Roader
 
Posts: 138
Joined: Sat Sep 18, 2010 3:56 pm
Location: WA, Kent
Name: Ray
Vehicle Year: 2002
Vehicle: Chevrolet Trailblazer EXT
DriveTrain: 4WD w/ Aftermarket Locker

by RimoniManu » Mon Apr 09, 2012 12:09 pm

I posted on trailvoy about my snorkel build. Haven't been on that site for a while though.
RimoniManu
Off-Roader
 
Posts: 138
Joined: Sat Sep 18, 2010 3:56 pm
Location: WA, Kent
Name: Ray
Vehicle Year: 2002
Vehicle: Chevrolet Trailblazer EXT
DriveTrain: 4WD w/ Aftermarket Locker

by fishsticks » Mon Apr 16, 2012 1:11 pm

I'll admit, some of your ideas just make me :facepalm:.


This one I like. Well done.
11 Silverado LTZ - 6.2L/6l80, 2/3 drop, self tuned
85 Hilux - 3RZ, dual cases, caged, 40s, chromo everything
02 TrailBlazer LTZ - 35s, lockers, balls - Gone but not forgotten - Build
User avatar
fishsticks
Moderator
 
Posts: 4356
Joined: Thu Apr 01, 2010 11:30 pm
Location: WA, Vancouver
Name: Donny
Vehicle Year: Other
Vehicle: Other Vehicle
DriveTrain: 4WD w/ Aftermarket Locker
Rank: Extreme Offroader

by RimoniManu » Mon Apr 16, 2012 1:16 pm

fishsticks wrote:I'll admit, some of your ideas just make me :facepalm:.


This one I like. Well done.


Lmao you must be talking about from trailvoy lol. Just dreamin stuff up. But thanks for the compliment.
RimoniManu
Off-Roader
 
Posts: 138
Joined: Sat Sep 18, 2010 3:56 pm
Location: WA, Kent
Name: Ray
Vehicle Year: 2002
Vehicle: Chevrolet Trailblazer EXT
DriveTrain: 4WD w/ Aftermarket Locker

by Mudwheelin » Mon Apr 16, 2012 7:45 pm

Good eyes on the tires James. Just noticed that lol. I would really like a write up on how you did that snorkel! Looks great man. Have you figured out that gap issues with the mirrors yet?
Markmc 2.5 lift, 2"Markmc body lift. Markmc 1.5 spacers, 33" Dynapro MT's, exhaust, EMT cams, CAI, Chipped, Light Bar. T.L. Guards
Build Thread:
viewtopic.php?f=25&t=2349
User avatar
Mudwheelin
Trail-Blazer
 
Posts: 441
Joined: Tue May 31, 2011 11:47 pm
Location: Calgary, AB
Name: Christian
Vehicle Year: 2007
Vehicle: Chevrolet TrailBlazer
DriveTrain: 4WD w/ G80

by Dirtyd » Wed Jun 27, 2012 1:08 am

LOVE IT!

Would Silverado extended mirrors like these work the same?

Image

Image
You Only Live Once
User avatar
Dirtyd
Member
 
Posts: 53
Joined: Mon Apr 02, 2012 11:21 pm
Location: MN, Prior Lake
Name: Dave G
Vehicle Year: 2008
Vehicle: Chevrolet TrailBlazer
DriveTrain: 4WD

by mikekey » Wed Jun 27, 2012 8:23 am

I love this mod. The gap fitment isn't too terrible and could be corrected with a properly cut piece of rubber and glue.

I personally want to do this, I don't have the best of vision and the mirrors on our TB are only slightly more usable IMO than the horrible mirrors on my Corvette which are utterly useless.

Time to search ebay and see if I can snag a set.
Once lifted 03 Trailblazer on 35's, gave it up to travel the USA with my family.
User avatar
mikekey
Lifer
 
Posts: 2585
Joined: Sat Jan 15, 2011 4:08 am
Location: North America
Name: Mike
Vehicle Year: 2003
Vehicle: Chevrolet TrailBlazer
DriveTrain: 4WD w/ G80
Rank: Expedition Rated

by cbbryan » Sun Jul 01, 2012 5:33 pm

Very Nice! I want to do this now. I wonder if they any similar to what my buddy had on his RAM 2500? They could be turned vertical or horizontal; a pretty neat feature I believe could come in handy?
User avatar
cbbryan
Trail-Blazer
 
Posts: 270
Joined: Tue Sep 22, 2009 2:26 pm
Location: MS, Amory
Name: Chris
Vehicle Year: 2005
Vehicle: Chevrolet TrailBlazer
DriveTrain: 4WD

by RimoniManu » Thu Jul 26, 2012 1:35 am

Sorry I havent been on here for a while; Dirty the install would be very similar. You'd just have to measure the bolt holes and drill a hole or two and then rewire if they're electric.
RimoniManu
Off-Roader
 
Posts: 138
Joined: Sat Sep 18, 2010 3:56 pm
Location: WA, Kent
Name: Ray
Vehicle Year: 2002
Vehicle: Chevrolet Trailblazer EXT
DriveTrain: 4WD w/ Aftermarket Locker

by Cable810 » Thu Jul 26, 2012 9:38 am

Dirtyd wrote:LOVE IT!

Would Silverado extended mirrors like these work the same?

Image

Image


I know Kuchar did that with the mirrors you linked to!
The FIRST Solid Axle Swapped Trailblazer in Presque Isle County MI
My Build
The Roadie wrote:Research, plan your mods, fund the plan, then GO DO THEM. THEN WHEEL IT.
User avatar
Cable810
Veteran
 
Posts: 1989
Joined: Thu Feb 09, 2012 6:43 pm
Location: MI, Rogers City
Name: Caleb
Vehicle Year: 2002
Vehicle: Chevrolet TrailBlazer
DriveTrain: 4WD w/ Aftermarket Locker
Rank: Offroad Rated

by Nakashige » Thu Jul 26, 2012 1:29 pm

Might be doing this and putting tow mirrors on the duramax
Nakashige
Vendor
 
Posts: 832
Joined: Sat May 21, 2011 12:00 pm
Location: MA, Worcester
Name: Ben Caesar
Vehicle Year: 2003
Vehicle: Chevrolet TrailBlazer
DriveTrain: 4WD

Next

Return to Completed Modifications

cron