Offroad Trailblazers and Envoys

Cooling System Upgrades Part II: Radiator

If its been completed, and doesn't fit into another category, stick it here.
Forum rules
Threads must fully document the modification with pictures and verbiage in the first post.
Threads that do not meet this criteria may be moved or deleted.

by Jon A » Wed Jan 23, 2013 4:28 pm

Image

First, if you haven’t read this thread: http://forums.offroadtb.com/viewtopic.php?f=27&t=3955 please do as there are many general cooling system subjects addressed in it as well as explanations of why I’m doing what I’m doing that I won’t repeat here.

So, the radiator. As many have noticed, we don’t have any better aftermarket radiators available for this platform. Ron Davis makes a couple for the SS, and I’m sure he’d move the outlet to the other side for enough money, but they’re already extremely expensive. Even more disturbing is the number of failures I’ve read about on what has to be a relatively small number produced. But if you want a “bolt in” installation as painless as possible, he’s probably your best bet (though it won’t be painless to your pocketbook). Other companies could surely custom make one but it’s not likely to be cheap. A local shop making one so they can simply make it to fit your vehicle may be the cheaper than having one of the big aftermarket companies do it to spec but could vary widely from shop to shop in both cost and quality.

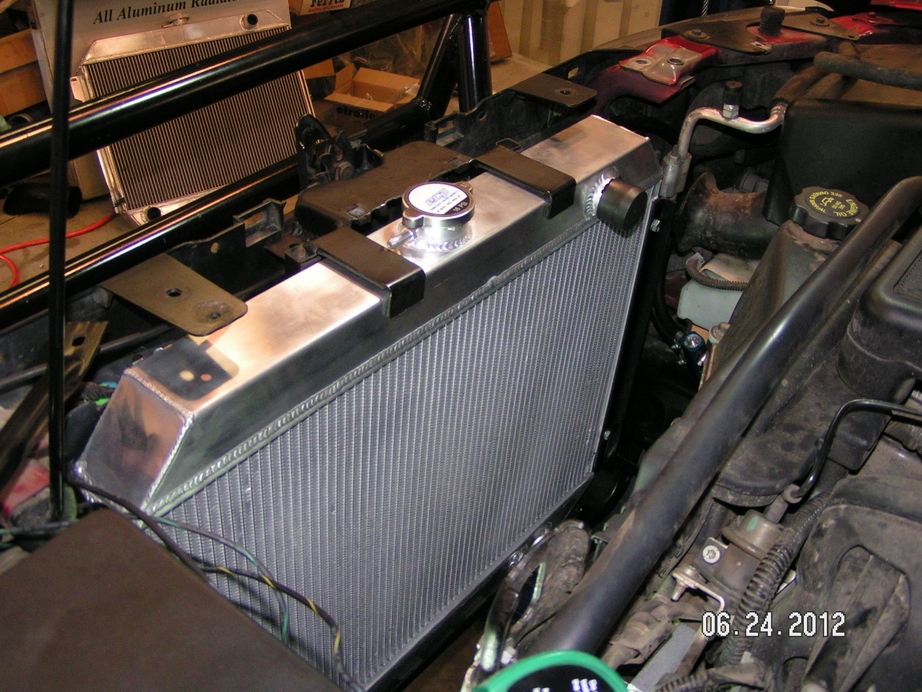
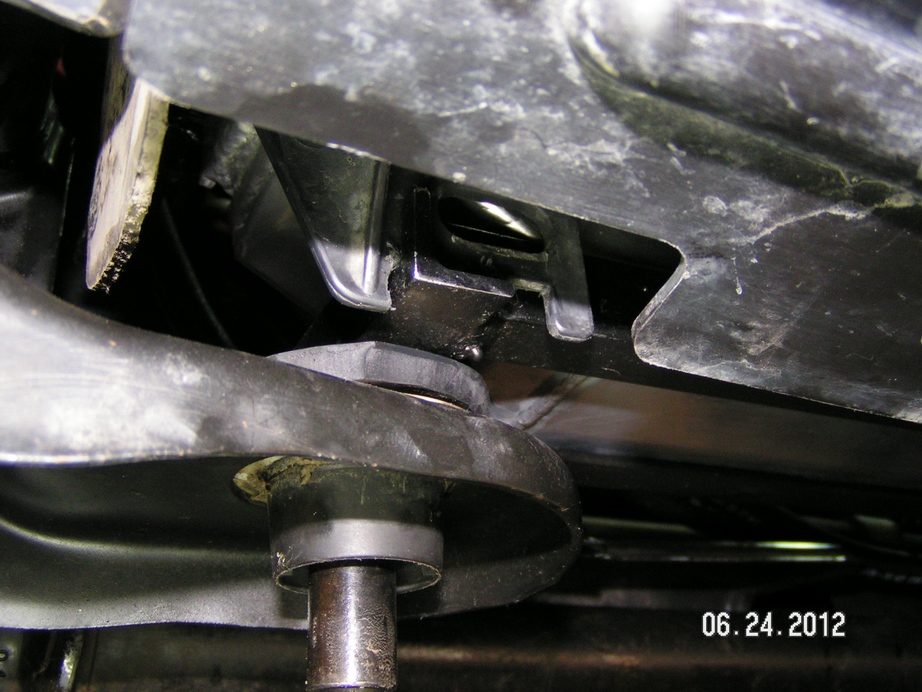
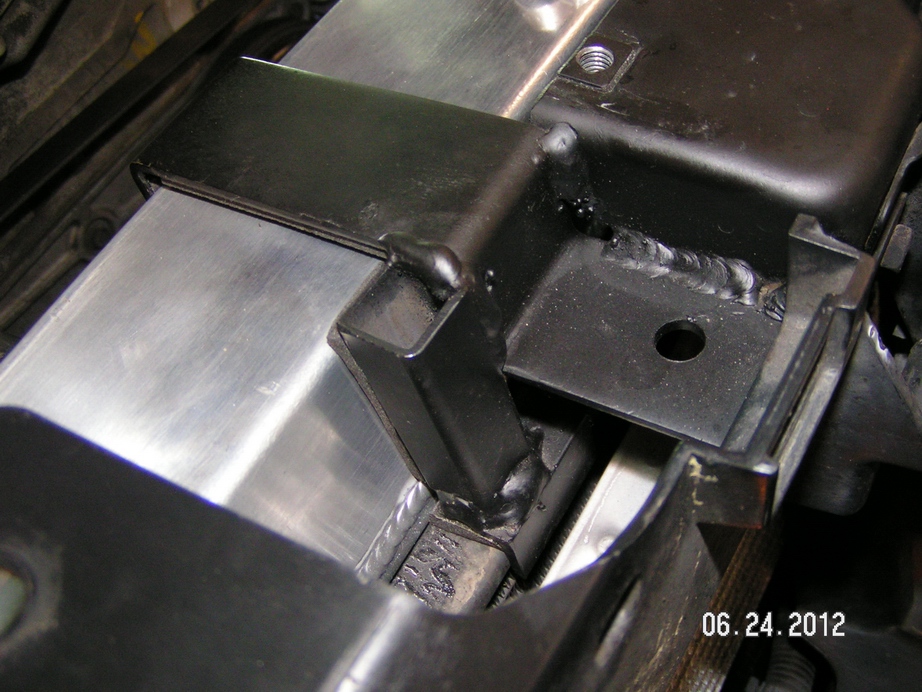
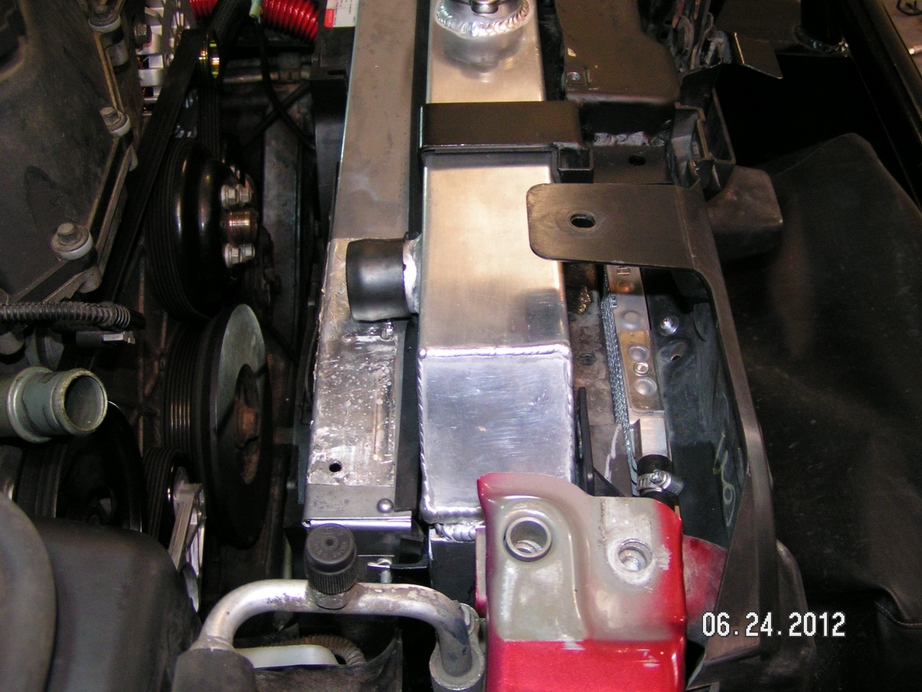
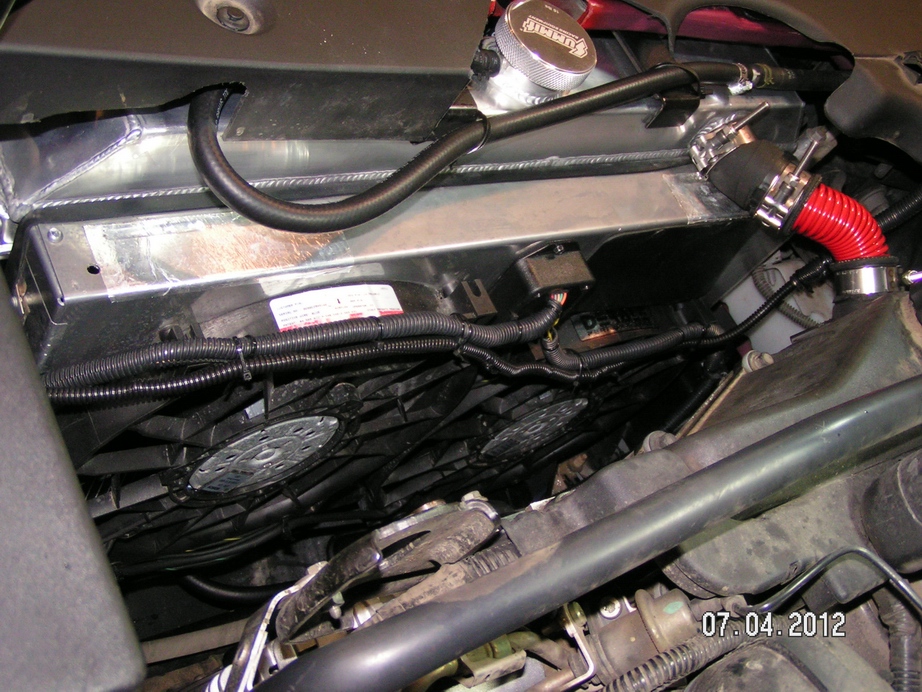
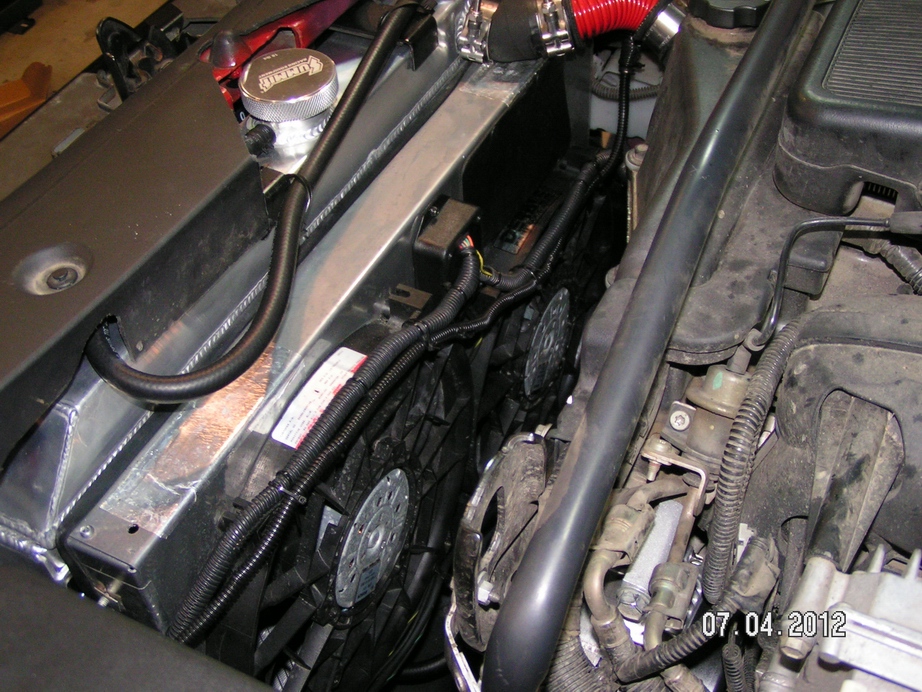
Since there are so many decent aftermarket radiators on the market, I was convinced I could come up with something for much less even if it took a bit of fabricating to install. My 550 HP Camaro street/race car might “rate” a really expensive radiator but I really didn’t feel it should be necessary to spend that much money to keep this puny little 4.2 cool. The stock radiator is so tiny, the bar isn’t exactly very high to find an aftermarket radiator that is dramatically better. So I began looking for radiators on the market that were similar in overall size to our stock radiator. We’re basically looking for a downflow radiator, with the inlet on the passenger’s side and outlet on the driver’s side, with a core roughly 18” high by 27” wide. Unfortunately we can’t really make it taller or wider but we’re free on thickness (as long as the stock fan is removed) within reason.

I found that there are quite a few that are close. In particular, many late 60’s and early 70’s Mopars came with radiators almost exactly that size and they have tons of aftermarket units available. So if you accept it’ll take a little fabrication to install, we really have a large selection from which to choose. As with the fans, the one I chose and the way I chose to install it, etc, certainly isn’t the only correct way to do it but it should give those looking to do the same thing some valuable guidance.

There are what seems to be dozens of companies having “custom looking” aluminum radiators made in China (where many stock replacement radiators are made anyway) at what is likely the same factory, just with slightly differing options depending upon who was importing them. I found that the “factory code” 375 denoted a radiator fitment that works for us. If you search Ebay for “radiator” “375” you’ll see what I mean.

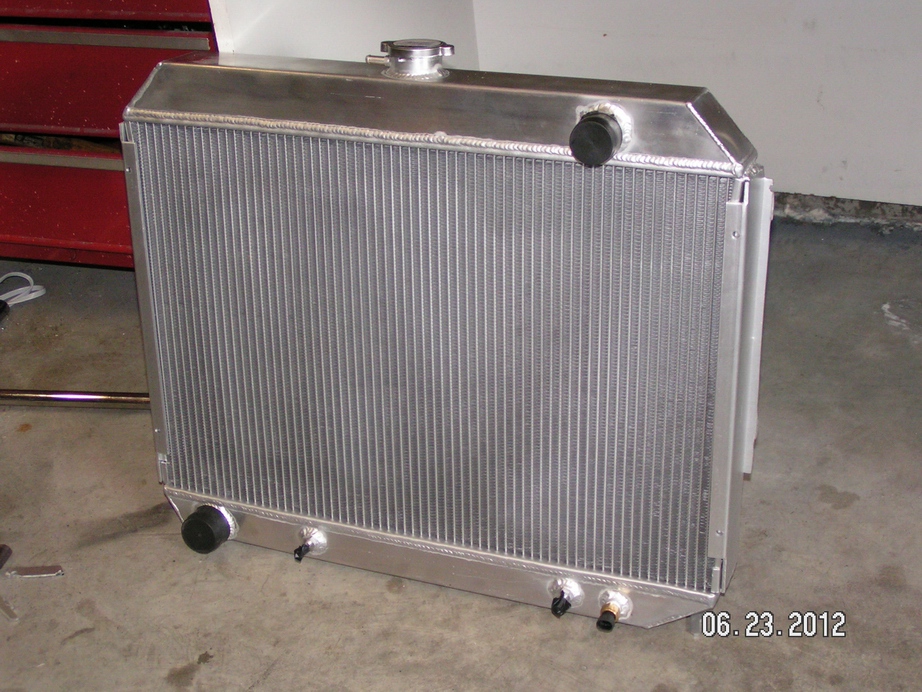
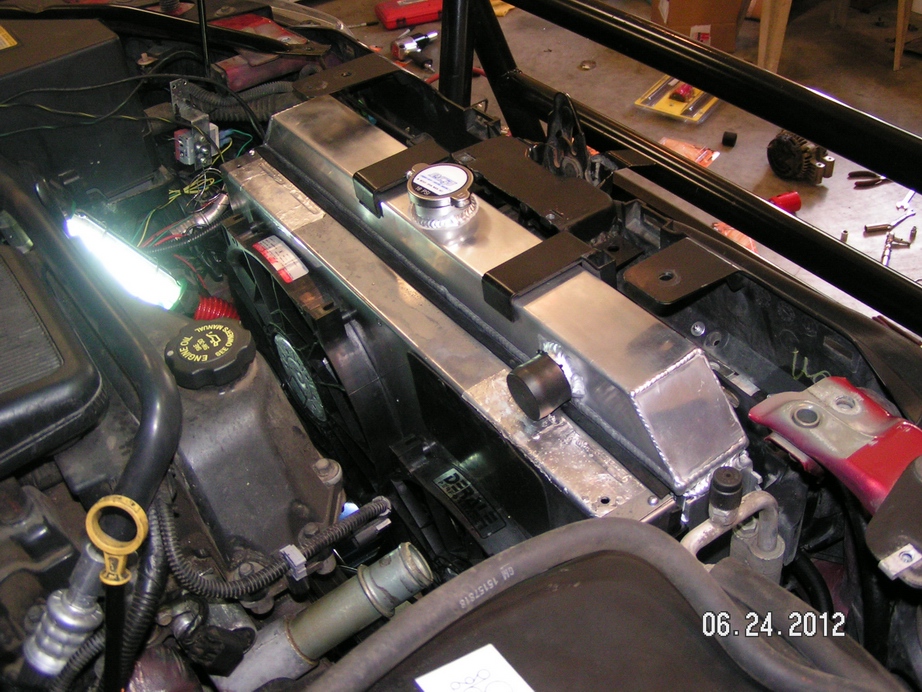
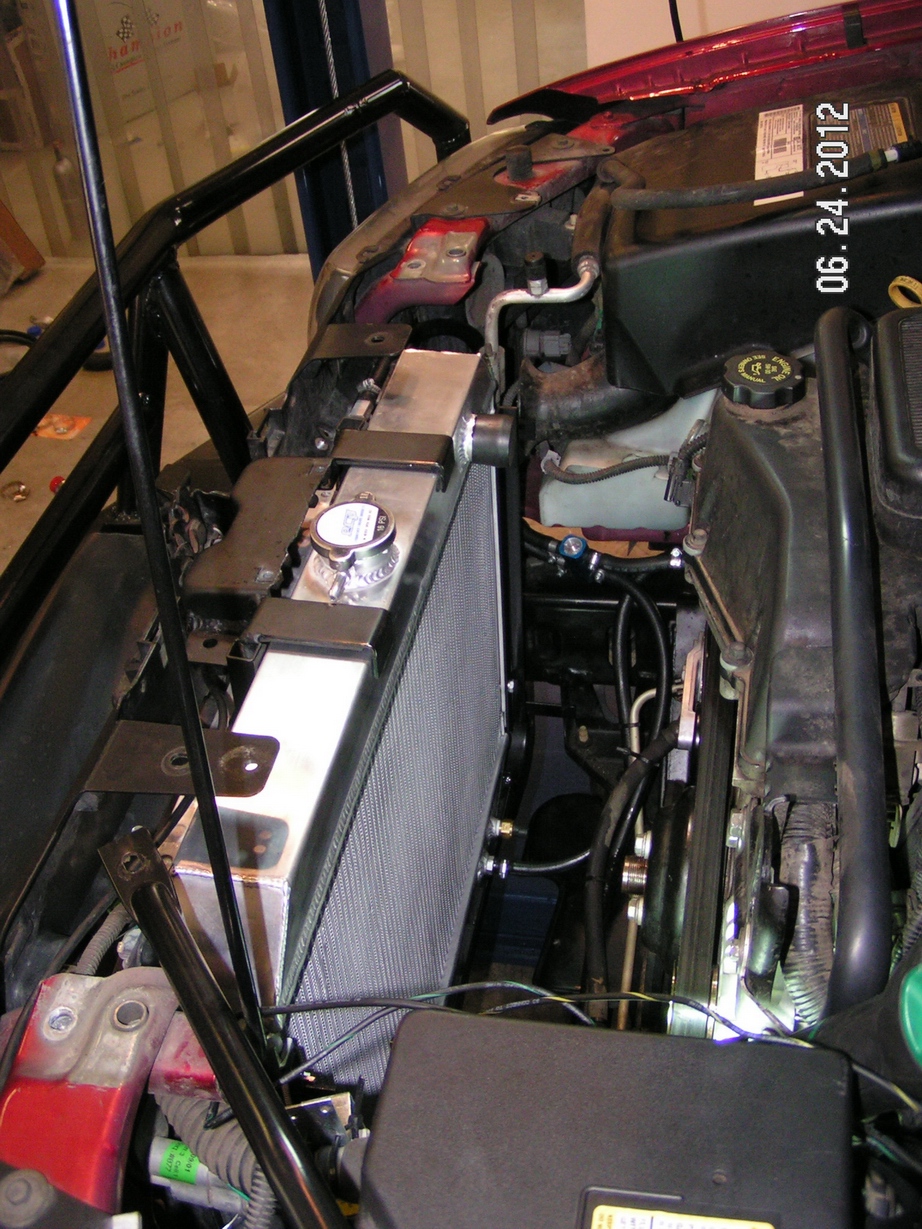
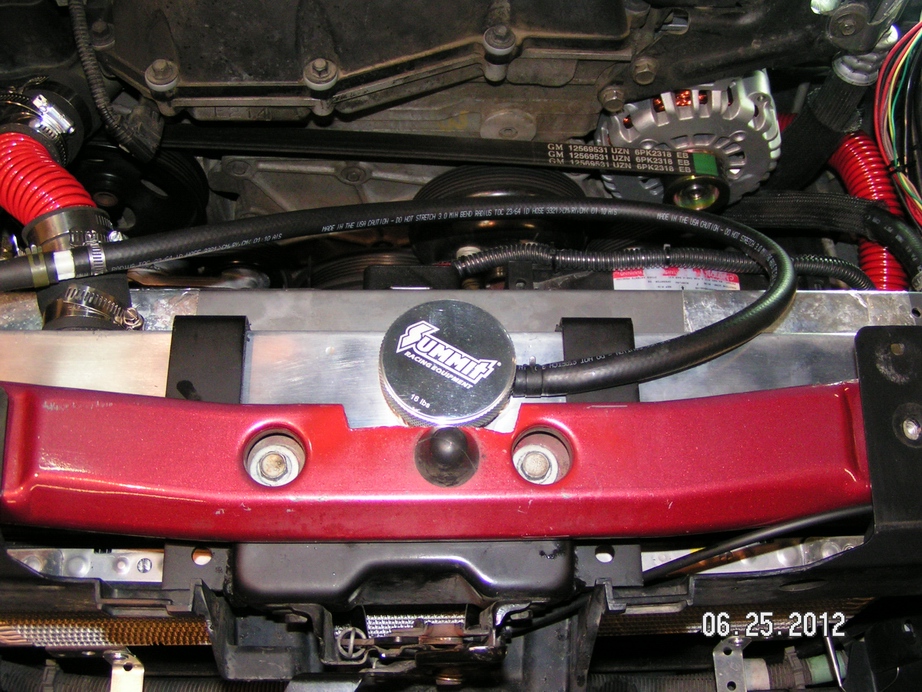
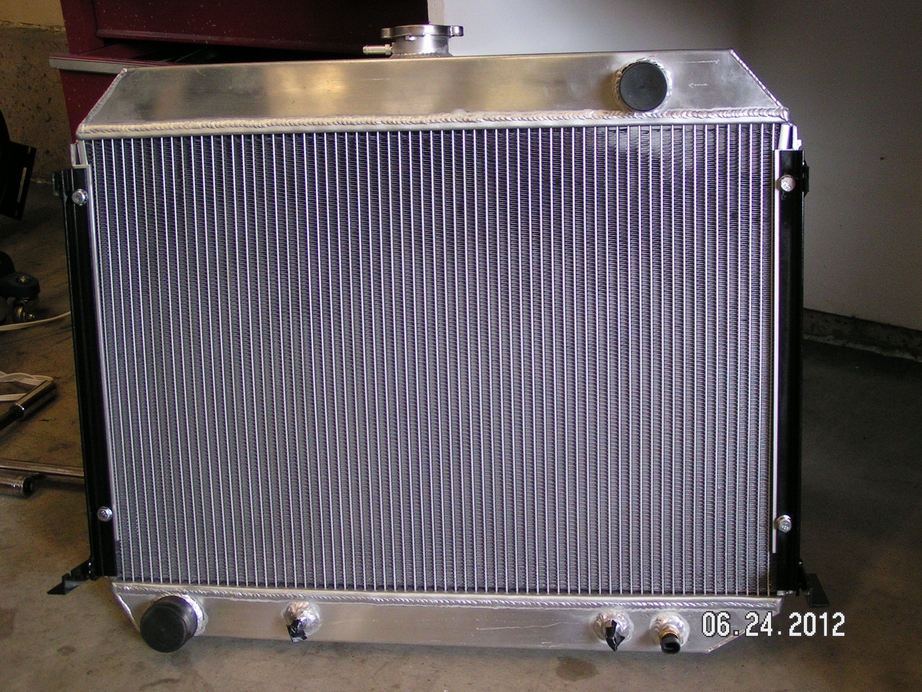
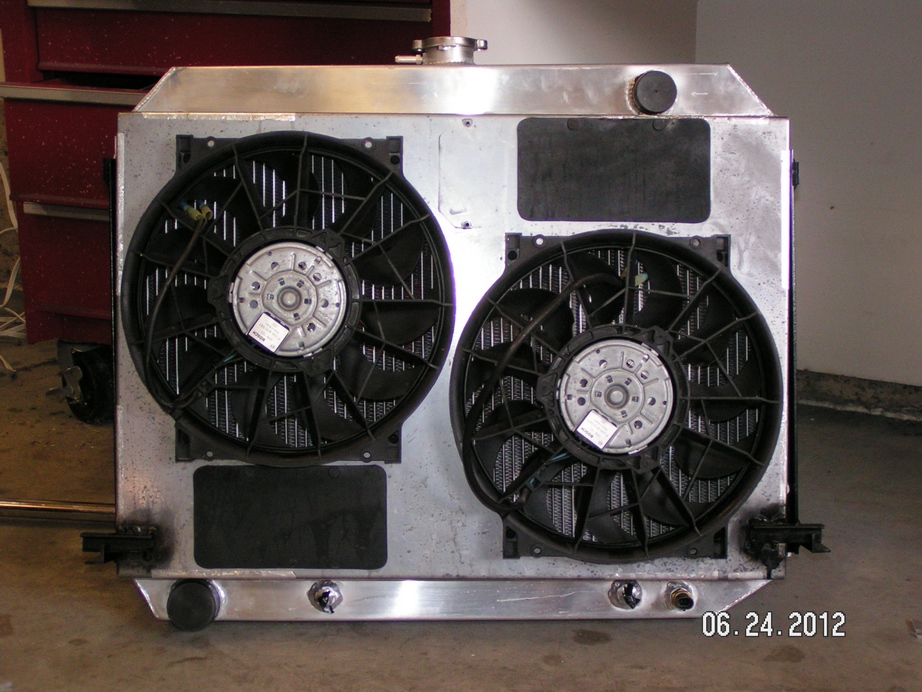
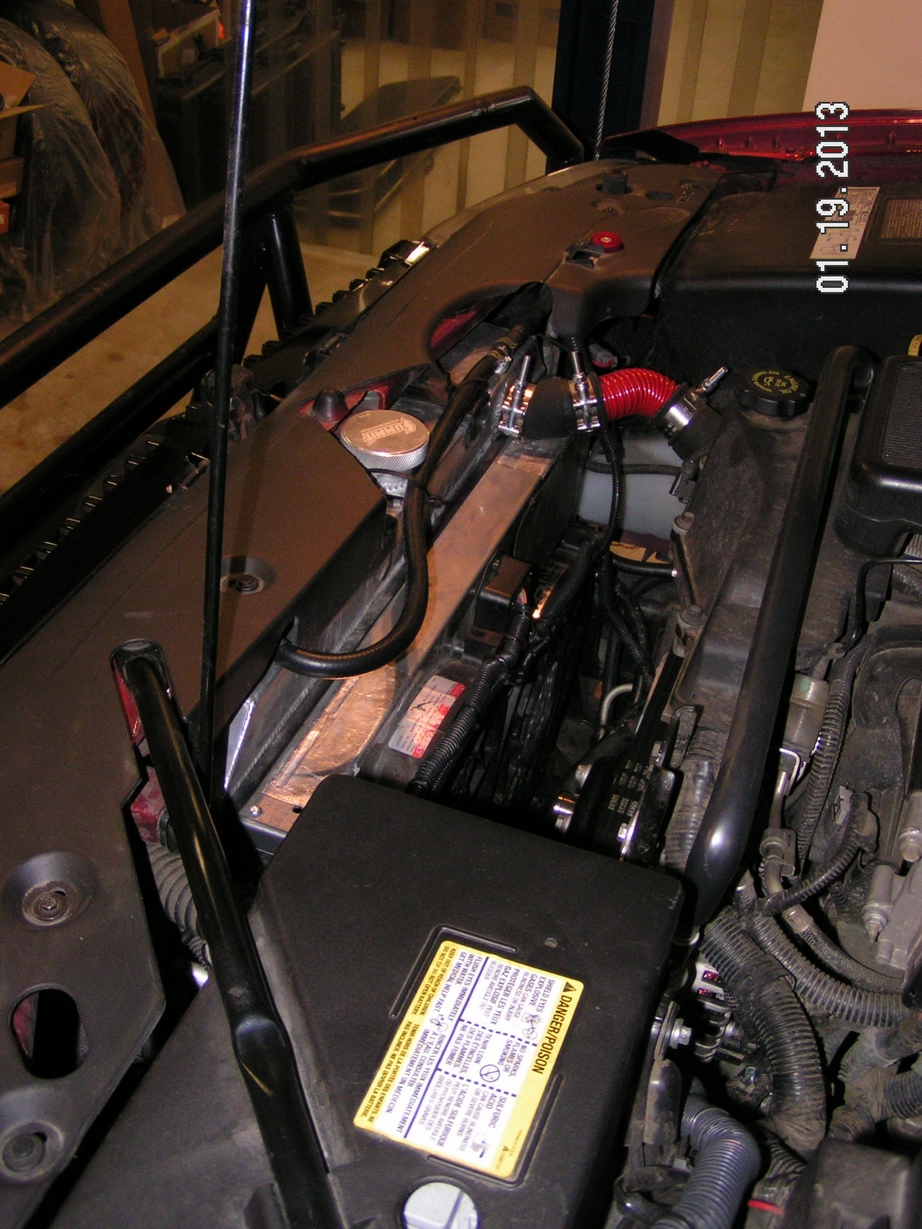
Here is the radiator I ended up with:

http://www.ebay.com/itm/Mopar-Big-Block ... 4a&vxp=mtr

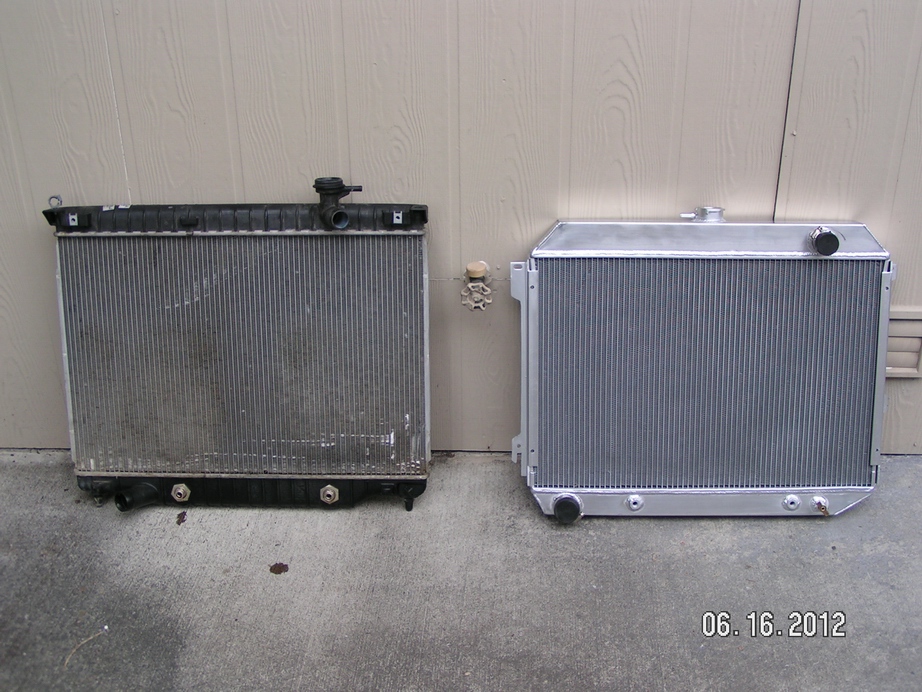
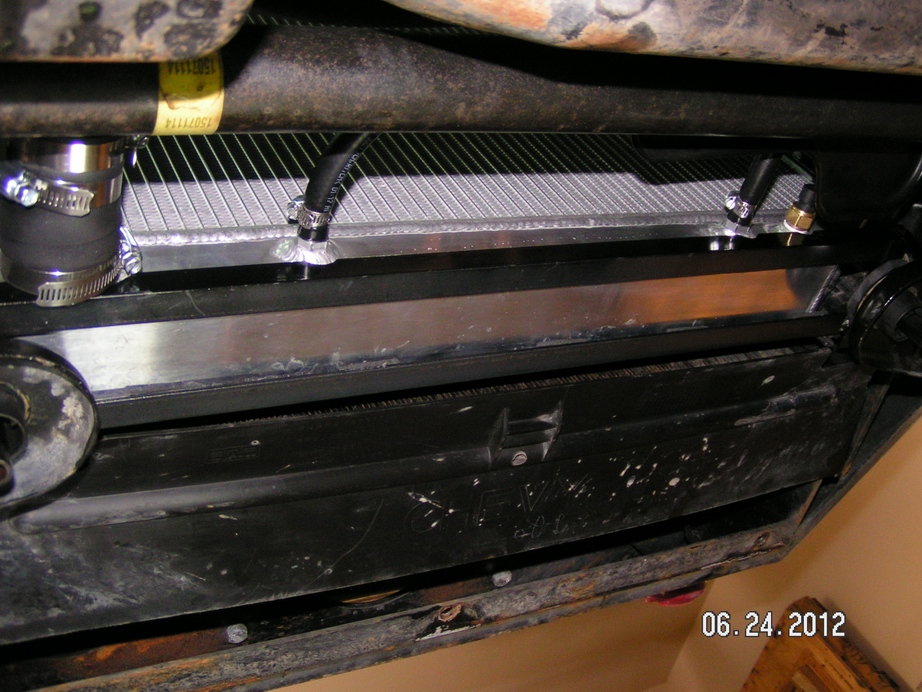
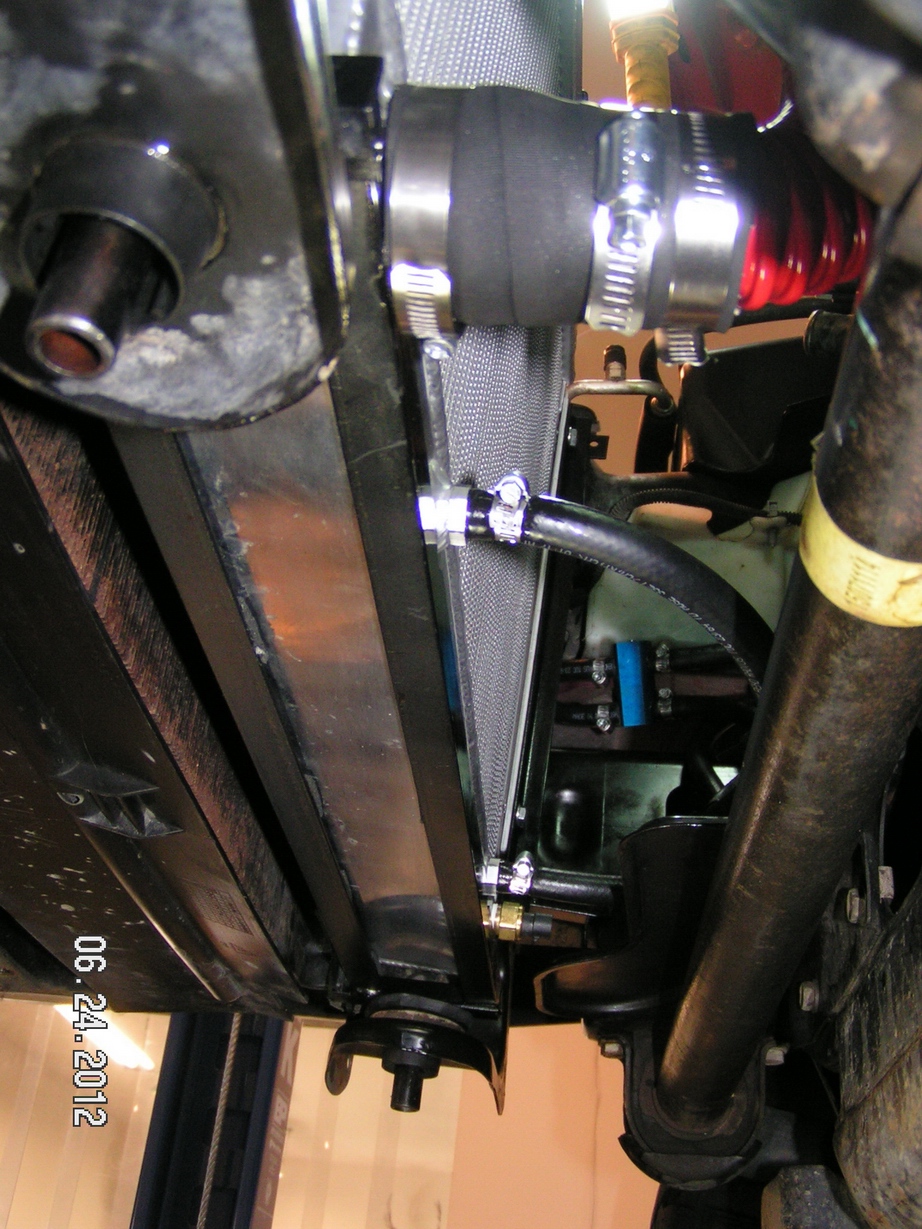
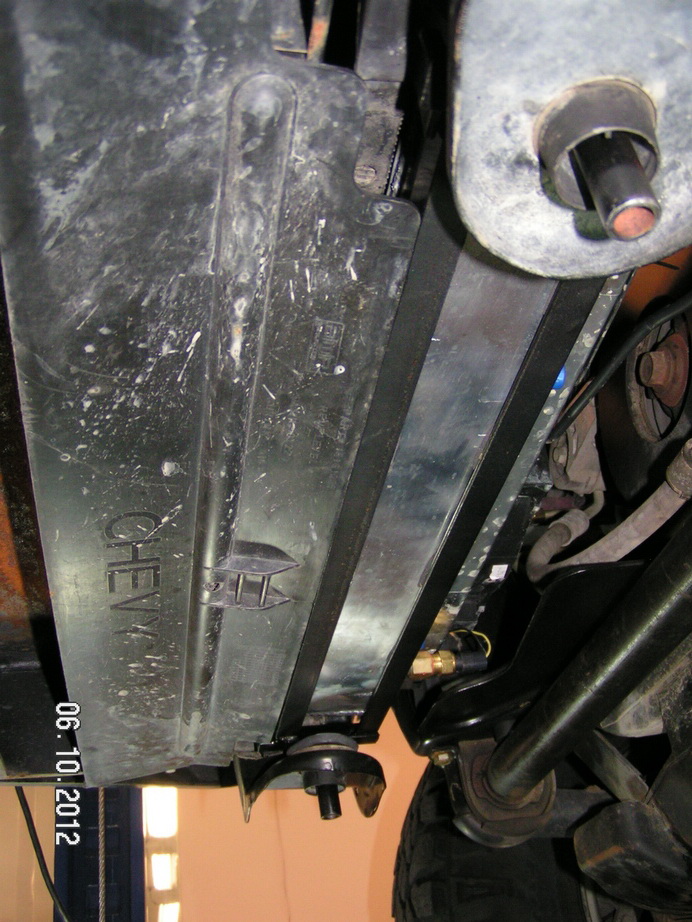
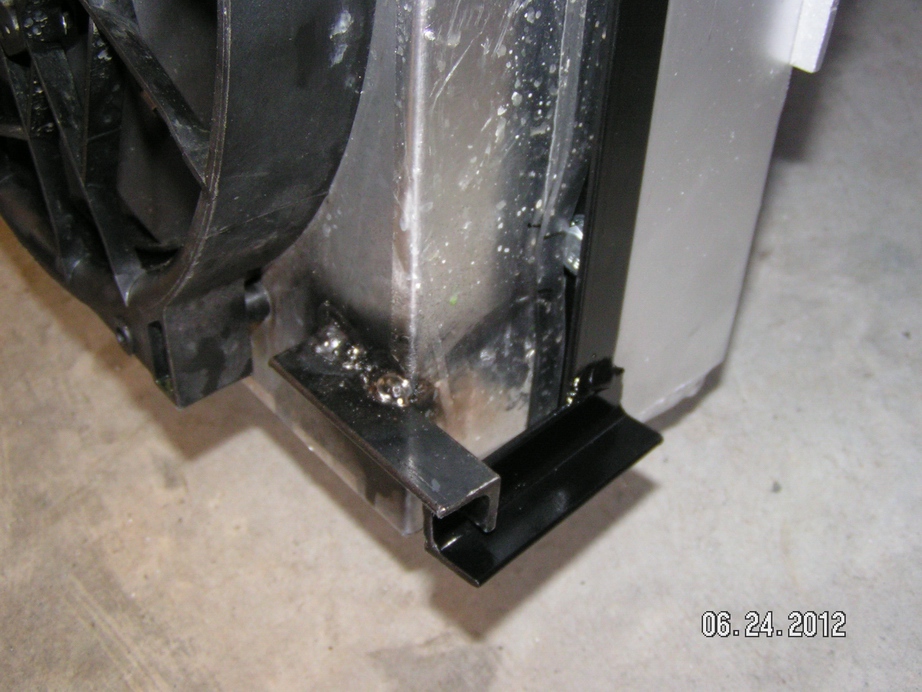
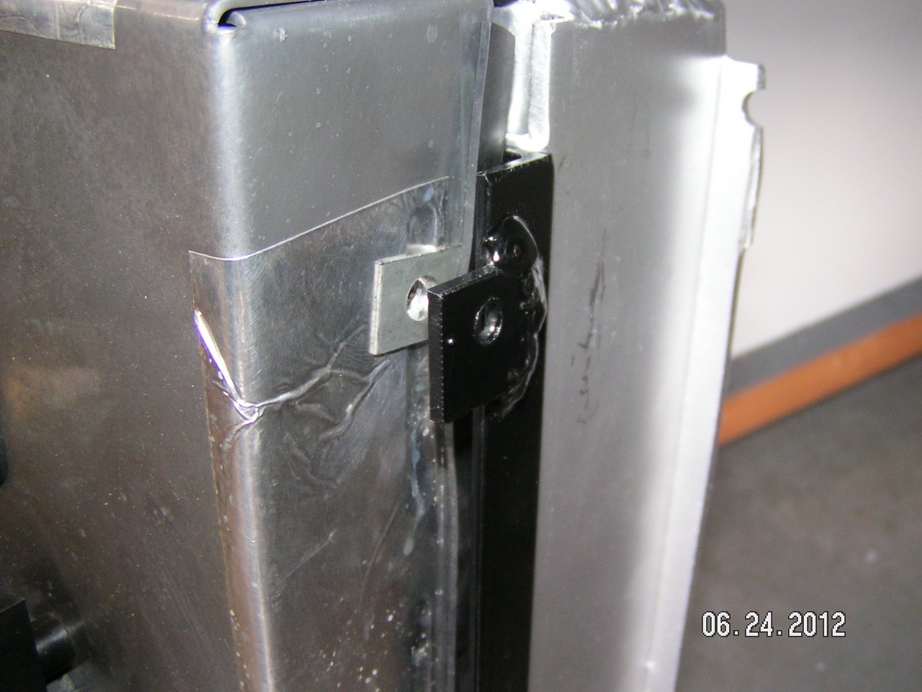
Here it is shown next to stock (it’s really not shorter like that—it’s sitting at more of an angle):

Image

Image

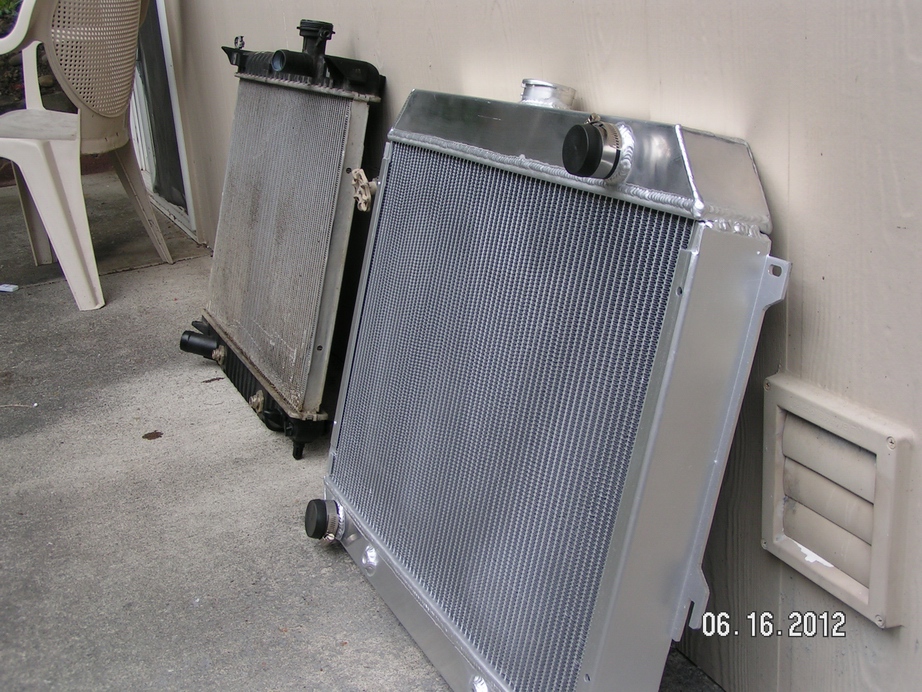
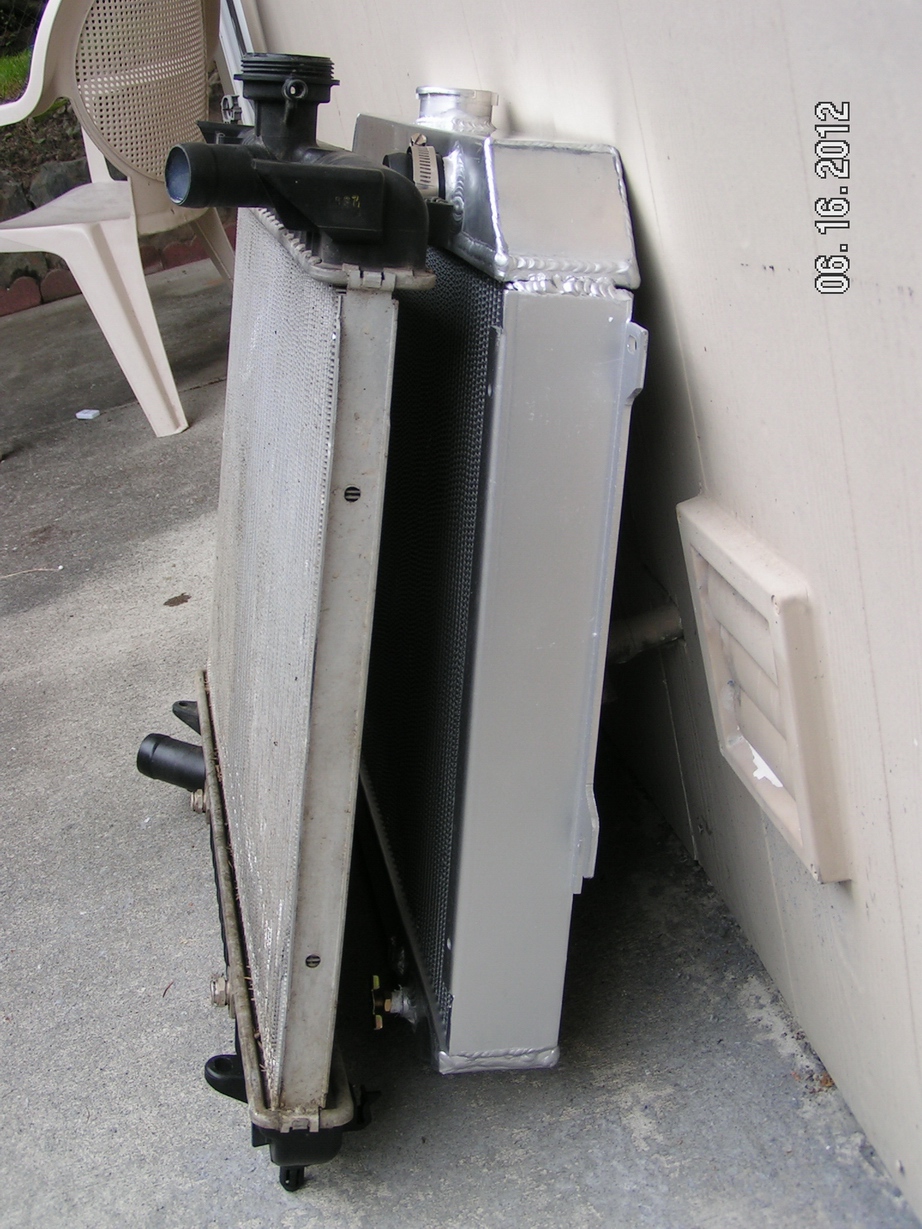
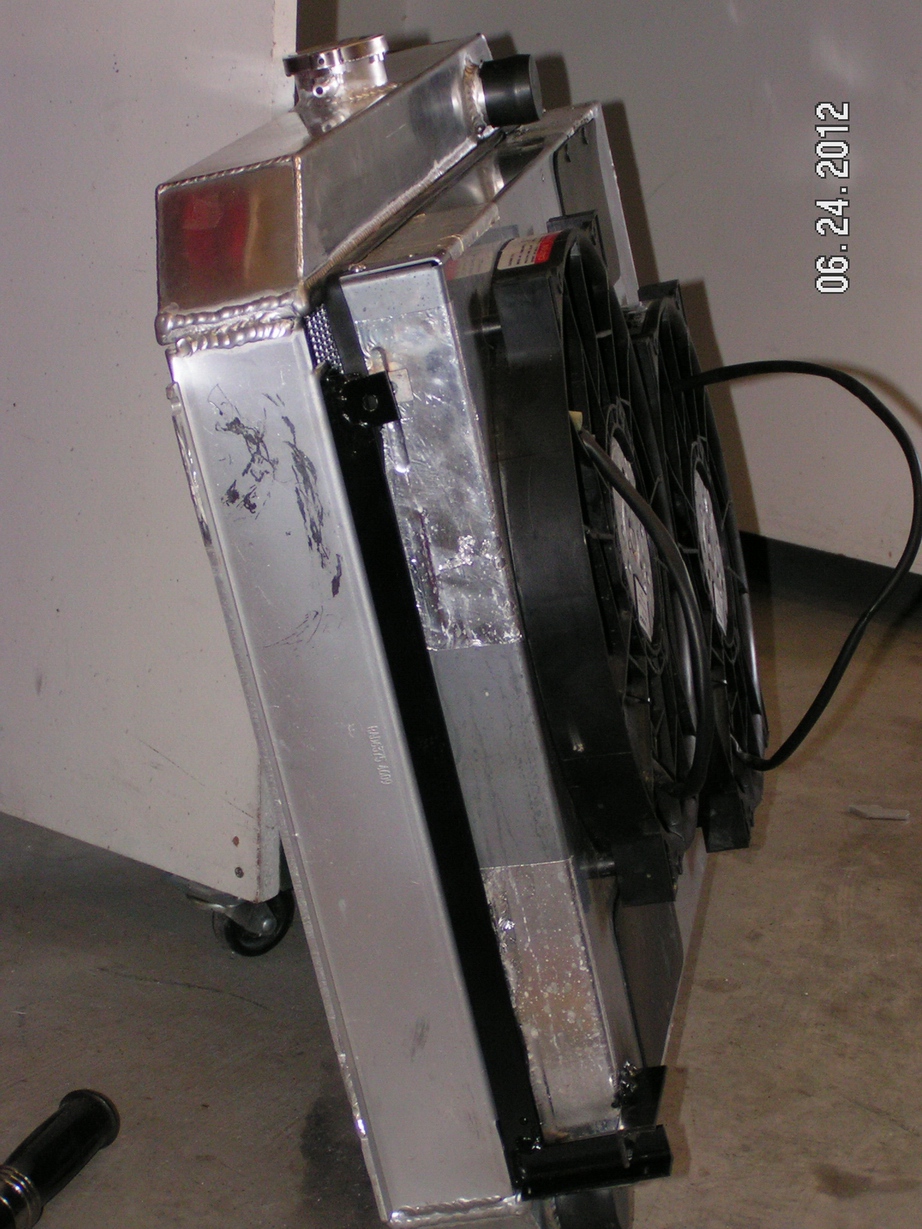
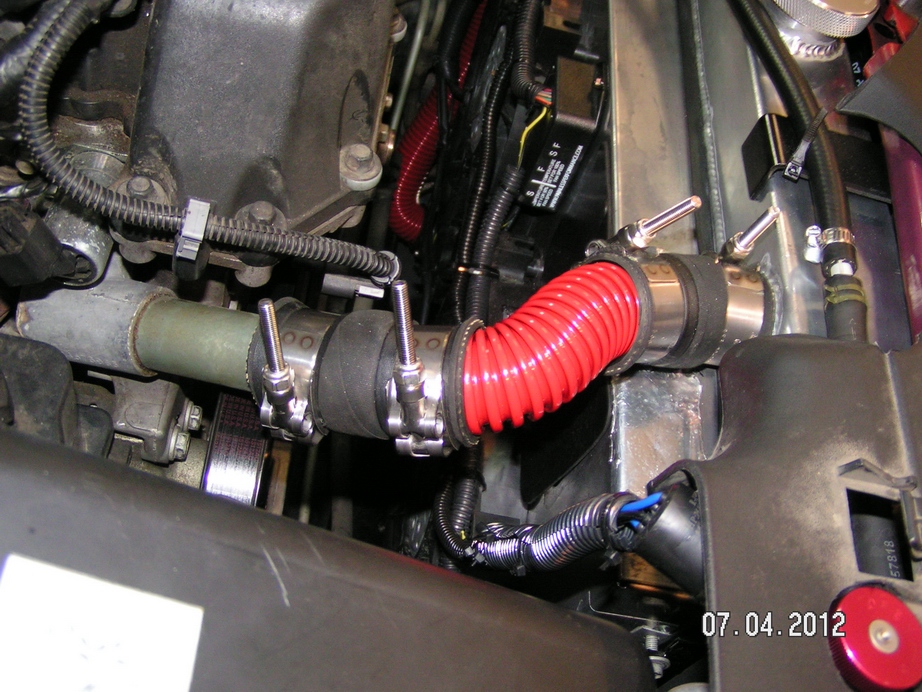
It holds 1 ¾ gallons of water compared with a hair over ¾ gallon stock. Here’s a thickness comparison:

Image

It’s a two row with 1” rows which is a very standard size across the industry used in countless racecars and other high performance applications and my back of the napkin calculations deemed it should be adequate.

Image

Much of what he says on that page about the number of rows is true, but much is advertising of course. You could have a three row with 1” rows and it would be much superior but I do think most of those coming from China will have smaller rows and not be any better. If you want significantly better cooling than this, I think you had better bite the bullet and get a Griffin two row with 1.25” or 1.5” rows (and it should be higher quality as well) or equivalent from some other company—I wouldn’t expect any of the three or four row units on ebay with smaller rows to be any better. If you do get one with more rows, verify the size of the rows and make sure they add up to 2” or more total—many won’t.

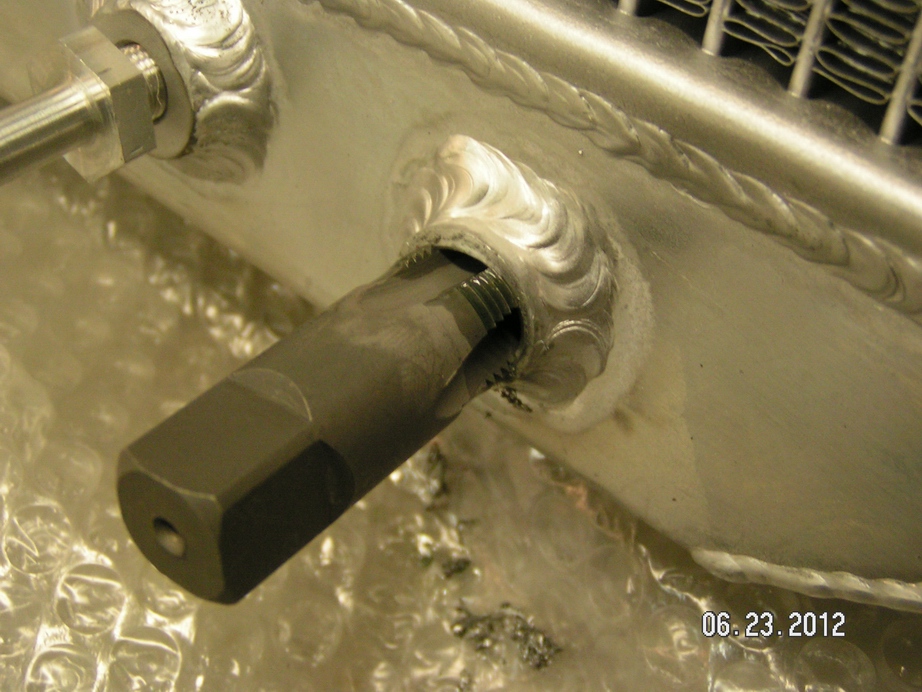
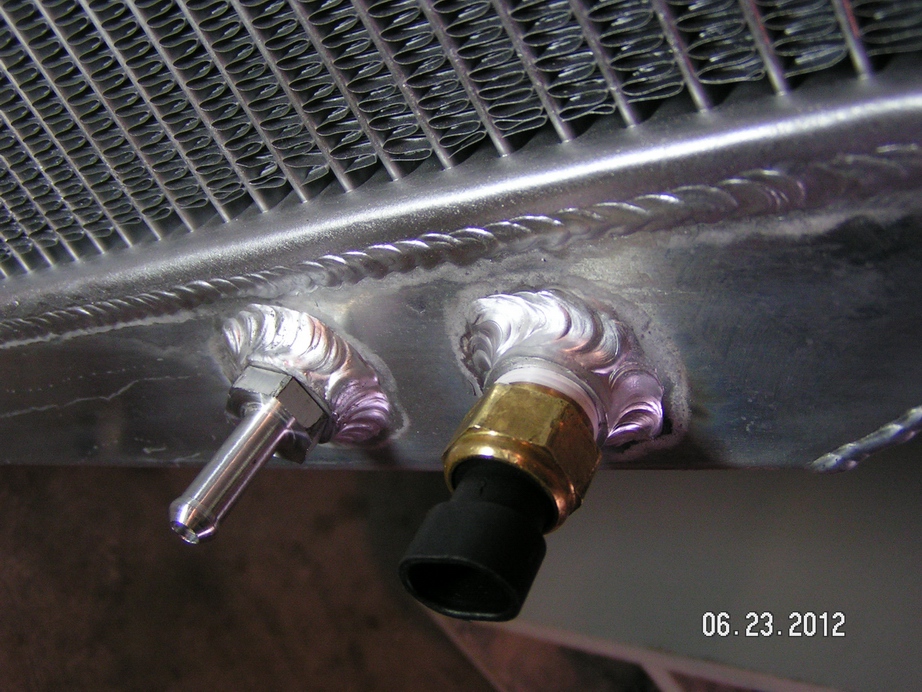
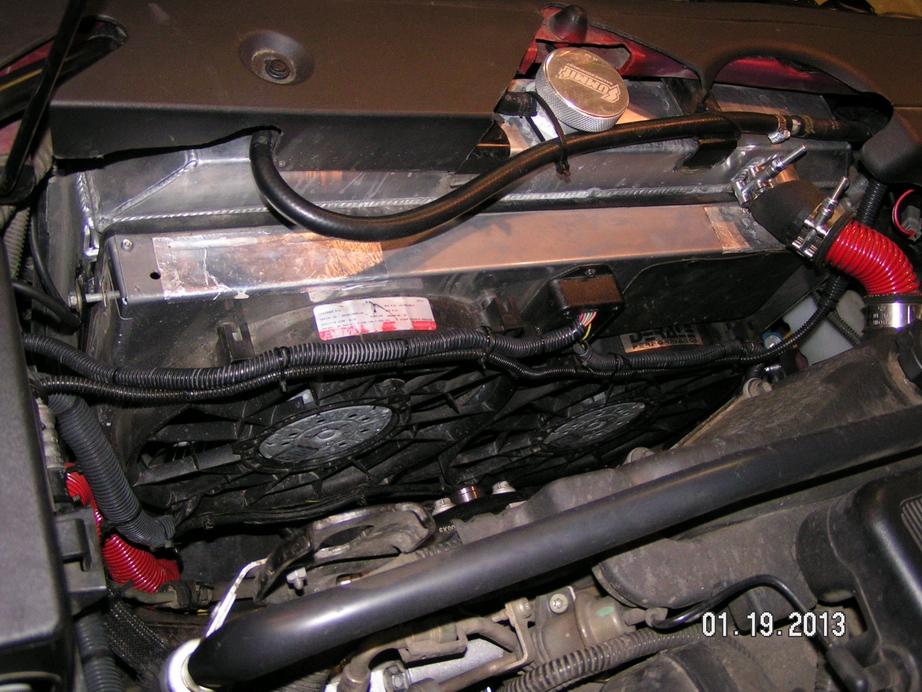
I was quite pleased with the quality of this radiator for the price; the welds aren’t quite as nice and pretty as the ones on the BeCool in my Camaro but overall it looked pretty good. It sure looks less fragile than the stock one, that’s for sure. But only time will tell on its durability, I’ve had it on less than a year so I can’t say too much about that yet.

Image

Image

I can confirm this particular one comes with a plate-style transmission cooler vs. the simple “tube in a tube” type on many of the other brands (such as Champion, etc). Though if you get a decent aftermarket tranny cooler that point is largely moot. I’m currently bypassing the radiator’s cooler anyway and using only an external cooler with a thermostat.

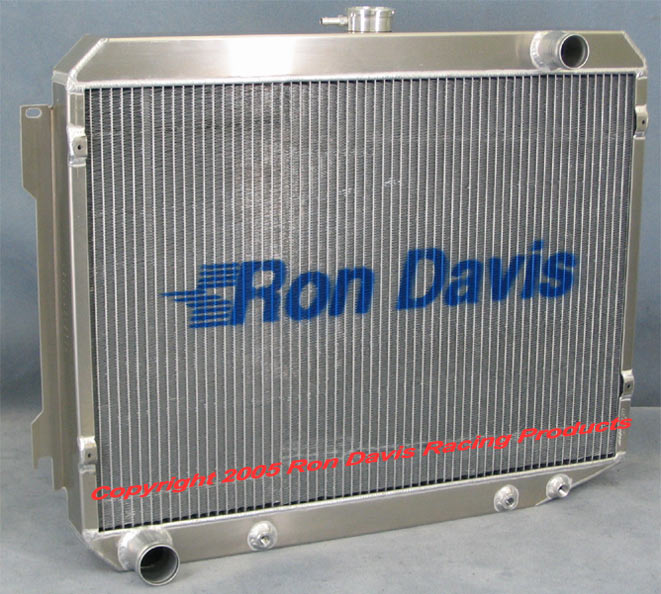
If being made in China gives you the willies, there are plenty of other choices out there. Here’s pretty much the exact same thing by Ron Davis (which is likely much cheaper than his Trailblazer radiator):

Image

Though as I said, given then number of failures I think I feel safer using the one made in China. A number of these brands that have been around a while (Champion, etc) actually have fairly decent durability reps if you do some googling.

Griffen makes a ton that are very close in size. Here’s one:

http://www.summitracing.com/parts/GRI-5-266GB-FAX/

Also available with 1.25” and 1.5” rows:

http://www.summitracing.com/parts/GRI-5-566GB-FAX/ ,

http://www.summitracing.com/parts/GRI-5-866GB-FAX/

And this one:

http://www.summitracing.com/parts/GRI-5-871GA-FAX/

A slightly wider core and different brackets, also available in other thicknesses. I think that’s the one I’d get (though probably just the 1.25” tubes) if I went with a Griffin, but please do your own measuring/planning using the exterior dimensions from Griffin before buying. They’re very close in size to the one I got but I can’t guarantee they’ll fit exactly like mine. Though once you’re paying that much, you may ask Griffin to at least put the correct inlet and outlet sizes on to simplify installation. Also, I think I’d get a Griffin without a tranny cooler as I really think the in-tank tranny cooler isn’t worth the trouble once you have a decent aftermarket cooler with thermostat (though that’s a subject for another thread) so you could save some money there. So as I said, there are lots of options available for people to choose the quality and cooling capability they feel they need or want.

So how much does a guy need? Is the one I got adequate? Most unfortunately, and it pisses me off greatly, even with all the testing I did in extremely harsh conditions last summer, I still cannot answer that question with 100% certainty.

I thought I could for a while, and the answer was “NO.” During the most extreme testing (sustained 80 MPH Second gear pulls up steep, long mountain passes in 100+ temps) the cooling system was failing to get the job done. However, I later discovered I had a faulty thermostat during all that time—the stupid thing would only open “a crack” and no farther, no matter how hot it got. So naturally, not allowing an increase in coolant flow rate with increased temps (which is its function) was like tying one of the cooling system’s arms behind its back. All those results have to be thrown out.

While this did have one beneficial side effect of making the cooling system hyper-sensitive so the effectiveness of other changes I made to the system could be measured easily (such as changes to airflow, etc), it makes all those test where the results were “less than adequate” meaningless.

Unfortunately, by the time I figured this out and replaced the thermostat the hot weather was done for the year so there was no way to re-do the tests. I was able to do some “room temperature” testing and the results were dramatically better compared with tests done in the same conditions with the faulty thermostat. So I’m very sure it’s “fixed” but I can’t guarantee it’ll pass those same tests until I actually try. So right now, I’m about 80-90% sure this radiator will get the job done no matter what I throw at it next summer, but I can’t guarantee it until it gets hot next summer and I confirm it.

What I can confirm is how well it did in the tests it did well in. If it passed a test with flying colors with a bad thermostat, it’ll only be better with a good thermostat (which is obviously not true visa versa).

In a good demonstration of radiator effectiveness, the exact test I mentioned in the Fan thread—70 MPH, level ground, 80 degrees, fans shut off—it passed easily. Where the stock radiator would send the temps rocketing toward the red, with the only change being the radiator it would stay right at 205+/- in the exact same conditions. With a hot tranny cooler and the AC on, it would run a few degrees warmer but still be stable close to 210 as long as the ground was level (and this was with the faulty thermostat and before any airflow improvements). That’s about as apples to apples as it gets comparing radiators. So it’s clearly a much better radiator than stock.

However, even with the new radiator in the above conditions, add an incline just enough to make the converter unlock (with stock programming and 33’s you don’t need much of an incline) and the temps would climb unless the fans were turned on. But with the fans it was no problem of course.

In extreme temps it did very well at lower speeds/RPM. Where many have problems in extremely hot weather in city driving/stuck in traffic type situations this setup performed beautifully. Even in legit 100+ temps in the shade, in those conditions this setup easily kept the engine temps right in the 205+/- degree range regulated by the thermostat, even with the A/C cranked—which was always nice and cold. So, success there. In these types of conditions this setup proved to clearly be much better than stock.

The only real problems were at high speeds going up steep hills. Pretty much no matter what I was doing, all I had to do was slow down to 60 MPH and it would be fine. But with 33’s, all the added weight and tremendous increase in air resistance I’ve added to the thing, the higher speeds are quite a chore for this little engine. Maintaining them up a steep mountain pass really makes it work. As I said with the new thermostat I’ve only been able to test this in “room temperature” conditions and it has done very well so I think it’ll still do well in hot weather but I can’t say that with 100% certainty yet.

The first test above proves the radiator is vastly superior, so (even with inferior fans) at high speeds where the fans don’t matter as much anymore it should be a much improved setup over stock, exactly what I was aiming for. Unfortunately I’ll need to wait for hot weather to return to prove it 100%.

So I can’t say this radiator/fan setup will get the job done for everybody, I’ll have to see how good it is in the hot weather to give a more informed opinion. If you can’t wait, I’d say if you live in the desert and/or have temp issues mainly at low speed/high RPM towing heavy loads where the loss of fan power will hurt you more, you may want to be safe and go with the 2.5” thick Griffin at least. Installation of the 3” thick might be a bit trickier but I’m still pretty sure it could be done. But that’s such ridiculous overkill I find it hard to believe any use would need that much radiator even with the electric fans. One nice thing about the Ebay radiator I got is it’s so cheap if one has to toss it for a better one you’re not out much money.

But for probably 95% of users out there, I’m quite confident this radiator/fan setup will get the job done. More testing next summer will give me a better idea about the last 5%. Durability-wise, it’ll be a while before I can say too much. I’ve had it on about 6 months now and it hasn’t leaked a drop, so far so good. That has included several 1600 mile highway trips in summer and winter as well as some pretty rough offroading. I also pressure tested the entire system a couple times by letting the engine heat up to the edge of the danger zone with no ill effects. But it is a cheap radiator, so if it doesn’t last forever I won’t be too surprised. There are plenty of more expensive units out there for those who want them, though I have a feeling there aren’t too many people here these days that want to drop such big money on a radiator.
Last edited by Jon A on Wed Jan 23, 2013 4:45 pm, edited 1 time in total.
Jon A
Member
 
Posts: 81
Joined: Wed Jun 16, 2010 4:59 am
Location: Everett, WA
Name: Jon Aadland
Vehicle Year: 2002
Vehicle: Chevrolet TrailBlazer
DriveTrain: 4WD w/ G80

by Jon A » Wed Jan 23, 2013 4:32 pm

The installation:

I used the factory mounting locations by making a bracket to support the bottom of the radiator. After figuring it all out it ended up pretty simple. Made from ¾” by 1/8” angle iron, it’s a simply a rectangle with two corners extending a bit extra forward for the condenser and tubular pegs to sit in the stock mount. The ends look like this:

Image

(Those tubes were too long and got cut down at a later date as they were contacting my skidplate.)

They go on like this:

Image

Image

Image

Image

Notches cut to help clearance where the bottom hose and tranny cooler connects:

Image

Leave space (make it wider than the radiator tank by a ways) for foam-rubber padding:

Image

Image

It supports the bottom tank like so:

Image

Image

With the stock air scoop back in place:

Image

You can see as a final adjustment I spaced it up just a bit with some thick rubber washers (cut from Fernco Pipe Couplings).

The condenser slides into those slots that were made:

Image

The passenger’s side tab isn’t flat, it needed to be flattened so it would sit level:

Image

Image

The brackets on the side need to be cut off:

Image

On the top, I used the stock hood latch, just modified a bit:

Image

I cut off the front and added brackets to the side. Those I got from a Summit “universal” mounting kit but making them out of simple angle would have been just as easy. To hold the top of the condenser I put square tubular supports with small angles on the end to support the top. Don’t forget the padding!

Image

It works like this:

Image

Image

Image

You need to cut a notch in the crossbrace to clear the new radiator cap location:

Image
Jon A
Member
 
Posts: 81
Joined: Wed Jun 16, 2010 4:59 am
Location: Everett, WA
Name: Jon Aadland
Vehicle Year: 2002
Vehicle: Chevrolet TrailBlazer
DriveTrain: 4WD w/ G80

by Jon A » Wed Jan 23, 2013 4:36 pm

Here’s how I mounted the fans. There are a million different ways to do it this is just one. One thing you might want to keep in mind is simply bolting it on may make it difficult to remove as bolts near the bottom of the radiator are sort of hard to get to when in the vehicle (especially with skids, etc,). I wanted to be able to undo two bolts from the top and just lift it out if needed.

The mounting holes on this particular radiator are just spaced wrong to directly bolt to a bracket mounted on the shroud so this is the approach I took:

Image

I made a one-piece bracket for each side. It’s tricky as there isn’t much space behind those holes but you can tap them. I tapped them 5/16” IIRC, then used shortened bolts to attach the bracket.

The bottom of the bracket has a support with a notch cut into it:

Image

Image

This allows the mounting bolts to the radiator to mainly only need to worry about shear instead of a smaller separate bracket at the bottom causing a prying moment on the holes. You can’t make the lower tank support the weight of the fans as you can with the stock radiator.

Image

Then an angle is added to the fan shroud:

Image

Putting those angles on the side of the shroud closer to the radiator would have worked and been better, but I was planning to do something else at first and there wouldn’t have been clearance. Then when I figured this out I had already put the angles on the shroud…as I said there are million ways to do it.

If I was set up to weld aluminum this would have been dramatically easier as you can just weld brackets to the sides of the radiator.

Where the bolts go in at the top:

Image

The whole unit (not bolted down tight in this pic)

Image

The inlet and outlet of this radiator are ever so slightly too close together for this fan shroud so you need to put them on slightly cocked:

Image

Installed

Image

It goes in like this:

Image

Image

Tapped the drain hole 3/8 NPT for the temp sender:

Image

Image

Cleaning the chips out is a pain but it can be done with a little patience.
Unfortunately the stock hoses won’t fit. I used these:

Image

There may be a cheaper/better way out there but I couldn’t find one. The various adapters those hoses come with will work for three of the four connections. You need an additional bigger connecter for the 1.75” outlet.

Image

Again, if I could weld aluminum it may have been worth the effort to cut off the inlet and outlet and install the correct sizes so the factory hoses would work. It would have greatly simplified the installation—and those hoses aren’t cheap.

I also replaced the worm-style clamps which I don’t like very much with these:

Image

They’re a pain to get on there (when the right size), it’s much easier to do get them around the hoses before you put them together, then you can put them where they need to be. Once they’re on there they give much peace of mind.

I think that's about it. Hopefully that'll give those who would like to upgrade radiators some confidence that it can be done and provide a useful guide on how to do it. As I said before, there are many ways to skin a cat but hopefully this will get the ball rolling for those with cooling issues.

Some more finished pics:

Image

Image

Image

Image

Image
Jon A
Member
 
Posts: 81
Joined: Wed Jun 16, 2010 4:59 am
Location: Everett, WA
Name: Jon Aadland
Vehicle Year: 2002
Vehicle: Chevrolet TrailBlazer
DriveTrain: 4WD w/ G80

by bartonmd » Wed Jan 23, 2013 5:17 pm

That's awesome, man! Nice install!

Sucks about the timing of the bad stat, though! I know around here, it was a pretty record summer for heat last summer, so it was the perfect time to test cooling systems! Some summers, we never hit 90F, and last summer we had a bunch of days over 100F.

To the cost, the $189 that that radiator runs is exactly what a stock radiator runs, locally (though you can get them online, cheaper), so it's really not bad at all!

Mike

Mike
bartonmd
Moderator
 
Posts: 4469
Joined: Wed Sep 09, 2009 9:35 am
Location: IN, Indianapolis
Name: Mike
Vehicle Year: 2007
Vehicle: Chevrolet TrailBlazer
DriveTrain: 4WD w/ G80
Rank: Offroad Rated

by Jon A » Wed Jan 23, 2013 5:51 pm

Thanks man. Yeah, the thermostat pissed me off. After all that effort and money to improve the cooling system only to have more and more problems really stunk. Before I figured it out the whole project seemed like a failure—“Do I really need a 3” thick Griffen? What the heck is going on here!?!”

This radiator still may prove to be less than optimum, but it’s sure as hell going to do better than it did last summer!
Jon A
Member
 
Posts: 81
Joined: Wed Jun 16, 2010 4:59 am
Location: Everett, WA
Name: Jon Aadland
Vehicle Year: 2002
Vehicle: Chevrolet TrailBlazer
DriveTrain: 4WD w/ G80

by Karo » Fri Mar 01, 2013 7:26 pm

Awesome, that is a real cool installation!
I have to re read it, my main question is how have you bleeded the air out after changing so many parts on the cooling system?
Karsten
User avatar
Karo
Trail-Blazer
 
Posts: 342
Joined: Fri Sep 11, 2009 3:02 am
Location: Berlin Germany 52°30'35.16"N, 13°15'31.99"E
Name: Karsten
Vehicle Year: 2002
Vehicle: Chevrolet TrailBlazer
DriveTrain: 4WD w/ G80
Rank: Trail Ready

by buxmont » Thu Mar 14, 2013 3:46 pm

Jon A, thanks for that awesome write up. Just finished mine and the truck is finally back to normal running temps when towing my popup! The e-fan I used is from pcm for less.

Sent from my SGH-T999 using Tapatalk 2
Attachments
uploadfromtaptalk1363290361301.jpg
uploadfromtaptalk1363290351012.jpg
uploadfromtaptalk1363290287839.jpg
buxmont
Newbie
 
Posts: 1
Joined: Tue Feb 19, 2013 6:27 pm
Name: Lee Perry
Vehicle Year: 2003
Vehicle: Chevrolet TrailBlazer
DriveTrain: 4WD w/ G80

by Trail X » Mon Mar 18, 2013 12:55 pm

Wow, great emulation Lee.

Glad to see Jon's writeup is already doing some good!
8-) Build Thread | ExPo Build | YouTube Videos
Not all who wander are lost. -Tolkien
User avatar
Trail X
Founder
 
Posts: 9935
Joined: Mon Sep 07, 2009 10:22 pm
Location: VA, Roanoke
Name: James Downing
Vehicle Year: 2005
Vehicle: Chevrolet TrailBlazer
DriveTrain: 4WD w/ Aftermarket Locker
Rank: Expedition Guide

by Jon A » Tue Apr 16, 2013 3:17 pm

buxmont wrote:Just finished mine....

Nice job! I like the hoses you used--they look like they'd be much less a PITA than the ones I did. I'm glad it's helping your temp issues--that radiator is a pretty big improvement over stock. Congrats.

I am a little concerned that your efan may have trouble keeping up when weather gets hotter though. That fan is only about 1/2 as powerful as the Derales I'm using and I'm not a fan (no pun intended) of the shroud design. Hopefully you'll be OK but if you have issues that'd be the next area on my list to upgrade.
Karo wrote:Awesome, that is a real cool installation!
I have to re read it, my main question is how have you bleeded the air out after changing so many parts on the cooling system?

Thanks! I didn't really do anything special. I typically fill the radiator, start the engine and keep filling until it won't take any more then cap it. Make sure you have water in the overflow and let the engine heat up until the thermostat opens and shut it down. Often then if you had air it'll suck water in from the overflow. After it cools, check to make sure the radiator is full (completely, there should be no air at all in it). Then keep an eye on the level in the overflow over the next few heat cycles as you naturally should be as well as checking for leaks, etc.

The second time around I was even using a Motorad thermostat which lacks the air bleed hole at the top of the thermostat housing and it made no difference.
Jon A
Member
 
Posts: 81
Joined: Wed Jun 16, 2010 4:59 am
Location: Everett, WA
Name: Jon Aadland
Vehicle Year: 2002
Vehicle: Chevrolet TrailBlazer
DriveTrain: 4WD w/ G80

by mason10198 » Sat Jul 14, 2018 4:09 pm

I'm up next to follow along on this cooling adventure...
I spent a while looking, so for anyone wondering about the more expensive Griffin version (1.25" tubes vs. 1.00") of the eBay radiator used, here it is on Summit Racing.
Griffin ExactFit 5-70004
Griffin ExactFit COMBO CU-70004
It's WAY overpriced so I probably won't use it... Also worth mentioning, I've been searching for another slightly taller (1-3") radiator for use with a body lift, and couldn't find anything. Looks like the "375" fitment is as close as we have to work with.
User avatar
mason10198
Moderator
 
Posts: 504
Joined: Thu Sep 17, 2015 11:49 pm
Location: AR, Bryant
Name: Mason
Vehicle Year: 2005
Vehicle: Chevrolet TrailBlazer
DriveTrain: 4WD w/ Aftermarket Locker
Rank: Offroad Rated

by mason10198 » Sat Jul 28, 2018 8:17 pm

Allow me to be the next runner up. Using the PCMofNC efan kit because I already had it and figured I'd try it before dropping cash on the stuff for a Derale setup. I'll edit this post on my compute later with links and proper dialogue. ImageImageImageImageImageImageImageImage
User avatar
mason10198
Moderator
 
Posts: 504
Joined: Thu Sep 17, 2015 11:49 pm
Location: AR, Bryant
Name: Mason
Vehicle Year: 2005
Vehicle: Chevrolet TrailBlazer
DriveTrain: 4WD w/ Aftermarket Locker
Rank: Offroad Rated

by mason10198 » Sat Aug 11, 2018 2:44 pm

So... I got the radiator installed, with the PCMofNC efan kit, 180 degree thermo-switch on the rad output controlling the fan. Now, truck runs hotter than it did with stock rad and same efan. Overheating on highway if AC is on. I guess the efan isnt good enough? Bad shroud design blocking too much airflow? I'm using the exact same rad as Jon, so it shouldn't be the issue. Coolant thermostat is new and working. Holds 200 at idle in 80 degree weather. Around 215 driving without AC. Got up to 230-235 with AC on highway.

The way I rigged the shroud on the rad, it's only spaced back like half an inch from the core. I did my best. Anyone got any thoughts, other than just get better fan(s)?
Image
User avatar
mason10198
Moderator
 
Posts: 504
Joined: Thu Sep 17, 2015 11:49 pm
Location: AR, Bryant
Name: Mason
Vehicle Year: 2005
Vehicle: Chevrolet TrailBlazer
DriveTrain: 4WD w/ Aftermarket Locker
Rank: Offroad Rated

by Flyingfischer5 » Sat Aug 11, 2018 3:24 pm

When I first installed my efan kit way back in the day I was having overheating problems as well while driving. I used a 4" hole saw and cut holes in each corner of the fan shroud to let air flow through while driving. Works awesome now and holds around 200 sitting still or driving. It may not be the right route but it worked for me and haven't had a over heating problem since doing it. I'll go snap a pic of what I did.
User avatar
Flyingfischer5
Off-Roader
 
Posts: 153
Joined: Sun Feb 21, 2010 9:43 pm
Location: Spokane, WA
Name: Craig
Vehicle Year: 2004
Vehicle: Chevrolet TrailBlazer
DriveTrain: 4WD

by Flyingfischer5 » Sat Aug 11, 2018 3:30 pm

Like I said it might not be the right solution but it has worked for me.

Another thought is the fan might not have enough pull for the thicker radiator. ImageImage

Sent from my MHA-L29 using Tapatalk
User avatar
Flyingfischer5
Off-Roader
 
Posts: 153
Joined: Sun Feb 21, 2010 9:43 pm
Location: Spokane, WA
Name: Craig
Vehicle Year: 2004
Vehicle: Chevrolet TrailBlazer
DriveTrain: 4WD

by mason10198 » Sat Aug 11, 2018 3:38 pm

Hm... That will increase air while driving, but while idling it makes it harder for the fan to pull air through the rad because air wants to come in from those holes
User avatar
mason10198
Moderator
 
Posts: 504
Joined: Thu Sep 17, 2015 11:49 pm
Location: AR, Bryant
Name: Mason
Vehicle Year: 2005
Vehicle: Chevrolet TrailBlazer
DriveTrain: 4WD w/ Aftermarket Locker
Rank: Offroad Rated

by Flyingfischer5 » Sat Aug 11, 2018 4:06 pm

mason10198 wrote:Hm... That will increase air while driving, but while idling it makes it harder for the fan to pull air through the rad because air wants to come in from those holes
Yeah since you have your shroud set back it probably would pull from the holes. I got mine practically against my radiator so it doesn't pull from the holes during idle.

Just thought I'd show my fix for my problems.

Or one other thought is going to the ls1 efans. That setup has two fans.
User avatar
Flyingfischer5
Off-Roader
 
Posts: 153
Joined: Sun Feb 21, 2010 9:43 pm
Location: Spokane, WA
Name: Craig
Vehicle Year: 2004
Vehicle: Chevrolet TrailBlazer
DriveTrain: 4WD

by mason10198 » Sun Aug 12, 2018 4:46 pm

I'm sure I'm going to end up with the same dual Derale fans as Jon here. Powerful, just expensive...
Here's one other thing I found strange. After driving it around and getting it hot, and then parking, I was feeling the air coming out of the fan, and the air coming from the passenger side half of the fan is hot, as it should be, but about 3/4 of the area of the drivers side half of the fan is blowing cold, normal, untouched air. Both top and bottom tanks are evenly hot across their length.
User avatar
mason10198
Moderator
 
Posts: 504
Joined: Thu Sep 17, 2015 11:49 pm
Location: AR, Bryant
Name: Mason
Vehicle Year: 2005
Vehicle: Chevrolet TrailBlazer
DriveTrain: 4WD w/ Aftermarket Locker
Rank: Offroad Rated

by Flyingfischer5 » Sun Aug 12, 2018 6:09 pm

Hmmmmm, Maybe get one of those laser temp readers and do some scans all over the radiator. Maybe got some clogs going on. Sounds strange
User avatar
Flyingfischer5
Off-Roader
 
Posts: 153
Joined: Sun Feb 21, 2010 9:43 pm
Location: Spokane, WA
Name: Craig
Vehicle Year: 2004
Vehicle: Chevrolet TrailBlazer
DriveTrain: 4WD

by mason10198 » Sun Aug 12, 2018 9:00 pm

Welp, always double check for air. I got impatient and only burped it once before driving, and just got another whole gallon into it. No wonder it was running hot LOL.

That explains the uneven temps behind the fan. The water was going into the rad and going straight down on the inlet side, the "cold" side was just full of air. It's evenly hot all the way around now.

I still plan on upgrading fans in the future. I'm just going to keep this one for the time being as long as it works good enough.
User avatar
mason10198
Moderator
 
Posts: 504
Joined: Thu Sep 17, 2015 11:49 pm
Location: AR, Bryant
Name: Mason
Vehicle Year: 2005
Vehicle: Chevrolet TrailBlazer
DriveTrain: 4WD w/ Aftermarket Locker
Rank: Offroad Rated

by Flyingfischer5 » Sun Aug 12, 2018 10:55 pm

Good to hear that found the possible problem!

Also I got a question for you. Do you know by any chance the thread size on the thermostat switch they include in these efan kits. I think mine went bad and need a replacement.
User avatar
Flyingfischer5
Off-Roader
 
Posts: 153
Joined: Sun Feb 21, 2010 9:43 pm
Location: Spokane, WA
Name: Craig
Vehicle Year: 2004
Vehicle: Chevrolet TrailBlazer
DriveTrain: 4WD

Next

Return to Completed Modifications