Hello
I just once with the subject of sleeping and working around the car that came out then.

Do not really remember exactly how I came up with the idea once to spend the night on the car roof, but then somehow I was just fascinated with the idea so I've been seriously considering it.
But when I then the price expectations of brands and China have seen me then but a little deterred by the idea (Oops, China is also brand ne:: wink). Ok I thought I must not necessarily be entirely new, but the used car still have a hefty price. Add to this the evil which I with my height of 2 meters to 2 meters good versions omit them time and so can then be left even less acceptable ways for me.
Well for the time trial and the time to invest gaudi have to camp out on the roof is so much to me but then not in question.
I Google something others have done with such an approach idea, I searched but no matter what language I found that I completely did not even my hand.
Actually, the ne clear statement that they are not talking about a very simple subject / project, but that has still not deterred me from my own idea that may now be building.
Well, I thought to myself then I just continue tents next to the car.
TENTS!
But is also determined on the car, I said yes, the idea has somehow captivated me and so impressed that I still can not get away from her.
So I looked at the designs of the venal variants, some began to weigh what computing could cost me the fun way and time would be burned up.
Oh yes yes I'm still the Opel Corsa and comes to me with his umbrella against stress load of 100 Kg.
So I have my plan, then swung in the direction I would not build my car roof tent, but a platform on the roof of the car to be camping with my existing tent.
I also have the acquisition cost limit of time so loose at 200, - Euros set. If I were to invest more I thought to myself, well then I can save even one sale and the time.
The extent of my tent (Intrepid CHANGE TL, 2 man tent) are about 1.6 m wide and 3.8 m long, the roof is OPEL Corsa B still not even half as large.
So I thought that that
When I take a bottom plate 12 mm thick screen printing plate, the water is hard to prosecute almost all, so I'm somewhat on the surface once it is opened and the rest of the missing still attached to a metal frame. The board dimensions are 2 x 1.5 x 1.5 m. The total height of the structure should yield so about 14 inches when folded.
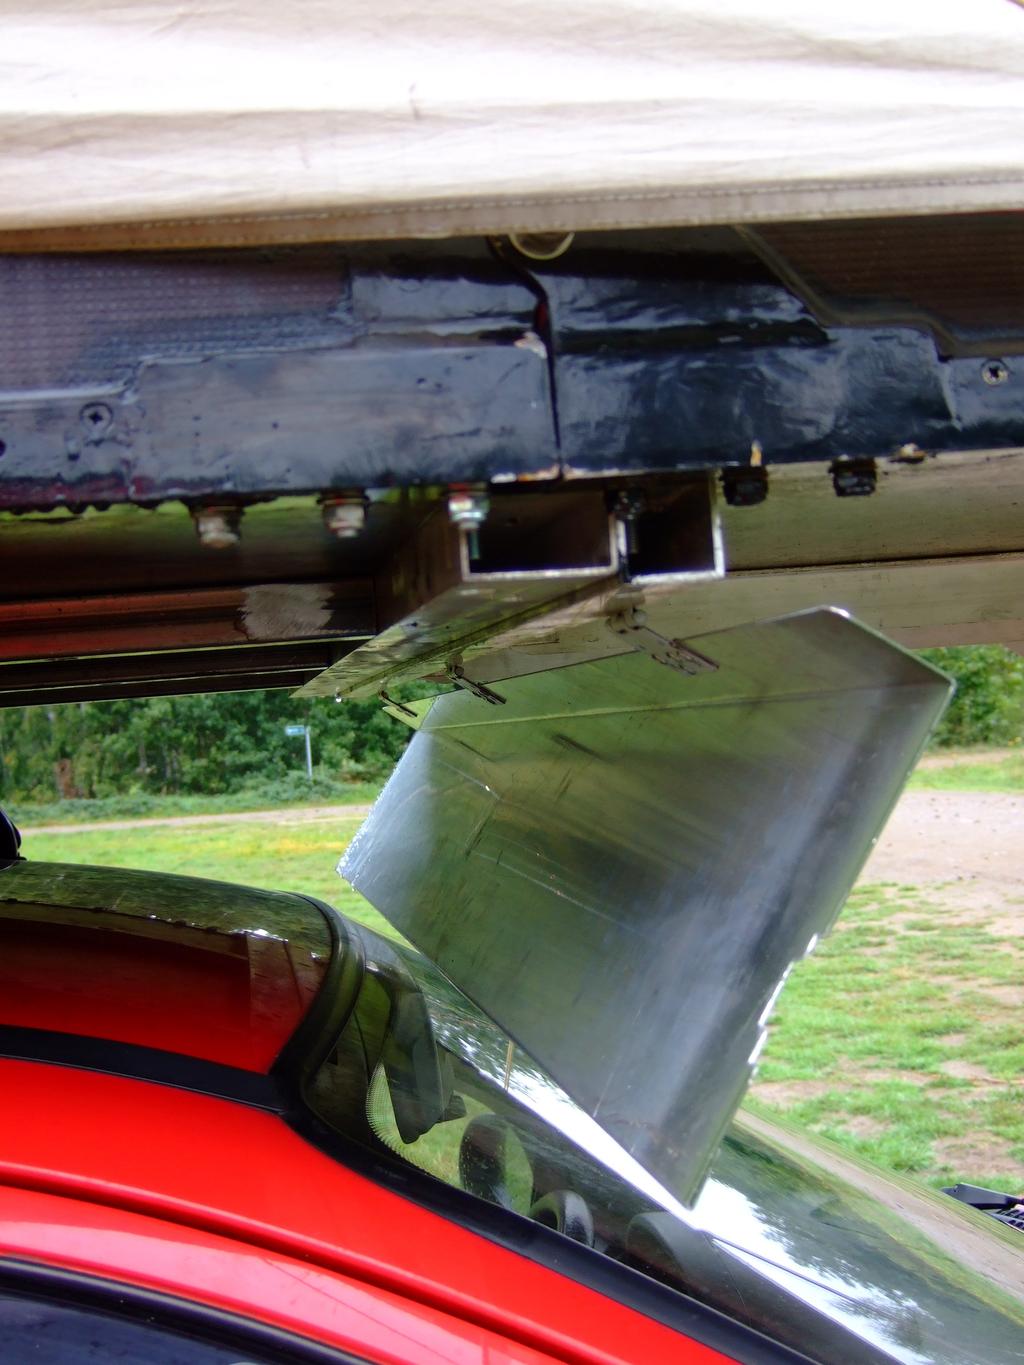
To connect the base plate securely to the car I built a support structure made ​​of metal tube 30 x 30 cm.
This design is based on the original Vauxhall roof rack and is bolted to six points with it.

Because, unfortunately, the front roof rack is about 2 inches deep and a few twists degree I have worked spacers so that the disk (assuming the car is straight) is inline with the ground.

The lower base plate, I then with about 22 carriage bolts M 6 x 25 bolted to the substructure.
Thus, the lower base plate super stable, no matter where one stands on her she does not bend or warp.
At the bottom plates, I then left and right side panels of 6 cm height screwed around by Road map to an even greater stability to the tent provide lateral guidance and therefore it to build a box.
The hinge is designed for exactly this level and of course homemade

Thus, the upper base plate firmly and securely located on the lower base plate I screwed on both sides and trunk locks, two additional hints to solve it by hanging was still a lock.

In order to treat the condition in zusammengekappten upper base plate also has a stabilizing support structure and to keep the weight as low as possible I have made ​​of aluminum - built T 40 x 40 x 4 is a substructure

If the upper base plate is folded it with the front side of the lower base plate. The upper floor plate will now be held only on the hinge pivot points and the faces of the panels starts from the whole load. So I go to an area of ​​3 x 1.5 meters.
So that the whole load alone caught only on the faces of the panels and will allow the two abutting edge in the unfolded state, a sub-structure to get and does not sag, I Increases the front side down, and underpinned the abutting edges. This happened again with aluminum tubing


Now I had the idea of ​​this box also to the front and rear so I Worn to the tent or sleeping pad as well as the inside can keep.
So I'm screwed back a recessed wood panel (Set back so they do not expire with the tent in the oblique crashes). and that box in front with a self-sealed aluminum sheet folded away and then capped it with two U-locks and metal flat iron.


This I will probably remove the front and back again to the air resistance on the drive to reduce
Now in its open position, the upper> now holds the front bottom plate portion alone on the hinge pivot points and the larger front surface. Without the burden goes with stress but also of two kinds of people + me is too risky. Therefore I have the floor now free hanging plate part with two unfolded based on the ground supported.


These posts will be fixed with a side brace to the underside of the bottom plate so attached

And placed at ground level with an adjustable bottom stamp, it can be better aligned irregularities.


I actually had it once before and this type of roof construction on a separate bracket which is below the cross beam mounted to intercept the car. Therefore the quest only go up to the lower bumper height. The bracket I'm built, but think of this insanely long after massive mount again strayed
Since my tent is now longer than the existing ground surface to the front I had to build a framework where I can then wind down the tent on it. This ensures survived but even in bad weather got in a reasonably dry.

The aluminum frame, I then split in two for better storage options.

And so fastened to the bottom plate.

Since I am in my workshop does not have the ability to weld aluminum and the only reason why the project would not extend to any other workshop I have decided on an aluminum U-profile and reinforced the corners with a metal part inside.
To which I could then also two shots for the tent pole arc welding.

On this picture you can see also that I have placed at the front end of the wooden board as an aluminum U-profile so I avoid splintering the wood edge, which makes it all the more pleasant to use.


To the eyes, I can now wind down the tent and all equally to the ground.


To climb to the tent now: wink: I've decided to aluminum ladders. They attached to the bottom plate with a strap so that it can not slip away and then eventually falls onto the hood and as the bottom plate is also moving. (When loaded it bends to approximately 1-2 cm in diameter) can also be the ladder is a little move to the right or left.

Since I have the whole so I built the head in the room you'll move the car, I had to halve it in assembled condition still stable but have, which I then solved Sun


So the bottom plate is now ready, now, the tent can be established.
I have back at each corner a little hack to the rear exterior mounted offset where the tent is suspended.

The aluminum tubes are then inserted into the tent channels.

The whole tent is pulled forward and the front aluminum tube inserted into this receptacle.

And then with lace at the front braced aluminum frame. The frame is then exhausted to the ground again.

The other two aluminum tube bends easily be set up so that they adhere to the outside walls.
I also have yet to see how well the two images so ne art rain gutter installed in that I have screwed a second printing plate wood bar. there may also collect rain water and condensation and arrives not at the sub-floor tent. And on the first attempt turned out that this was a good idea. All interfaces and disk connections I've also bonded with Sikaflex and Sealed.


Thus, the tent is now with the front and rear points of Guyed alone.
But to achieve a better wind stability I have extended the anchor lines to the ground and stuck in the ground with pegs. Ok this is still not 100 percent like I imagine that for the first attempt but it has worked extremely well.


I guess the whole structure around 60 - a 70 Kg aggregated from the materials I have used so.
Now the cost accounting;-( (
The wooden screen printing plate 12 mm, 3 x 1.5 meters and another piece for different parts === cost € 92.33
(Back to the car under construction, hinges, luggage locks) all metal parts were also available for free == 0.00 €
The total Alumaterial including aluminum ladder I have at the junkyard for scrap aluminum price +
a little extra worried. My new asking price would have destroyed, Ok. === 41.00 €
Self-locking nuts screws + washers + === 10.17 €
Sikaflex === 9.40 €
And it does not mount on the car's front-mounted crossbars === 14.00 €
=== Total 166.90 €
To assemble the structure on the roof of the car I thought to myself can not think of something fancy.
And that's the easy way!


So I hope you liked it, maybe not for everyone - be a woman thing but to me it was fun to build it.
With the accounting issues I am more than satisfied, ok it is still a lot to be changed or even created what it needs but in general the roof tent to use so already.
greeting
the Christian


