After reading this thread on the OS http://forums.trailvoy.com/showthread.php?t=33209
I'm going to see how it works and build my own.
Only difference in the parts I ordered is I picked one of these
http://www.amazon.com/Masterbuilt-HFTB- ... 417&sr=8-1
instead of the Suroco unit AlekG used.
I'll be sure to take notes and pictures and post more after the weekend and let you know how it went.
Hitch Mounted Spare going on this weekend
61 posts
• Page 1 of 4 • 1, 2, 3, 4
-

snowmirage - Off-Roader
- Posts: 232
- Joined: Sun Jun 26, 2011 12:13 pm
- Location: MD, Baltimore
- Name: Brandon
- Vehicle Year: 2003
- Vehicle: Chevrolet TrailBlazer
- DriveTrain: 4WD w/ G80
I just saw that CBI is now offering a basic rear tire carrier for $189.
http://cbioffroadfab.com/product_info.p ... cts_id=117
Just another reasonably priced option.
http://cbioffroadfab.com/product_info.p ... cts_id=117
Just another reasonably priced option.
-

Trail X - Founder
- Posts: 9935
- Joined: Mon Sep 07, 2009 10:22 pm
- Location: VA, Roanoke
- Name: James Downing
- Vehicle Year: 2005
- Vehicle: Chevrolet TrailBlazer
- DriveTrain: 4WD w/ Aftermarket Locker
- Rank: Expedition Guide
I might be selling mine in the near future... 
Mario - Build Thread
-

Gordinho80 - Lifer
- Posts: 2787
- Joined: Tue Sep 08, 2009 9:27 am
- Location: NJ, Jackson
- Name: Mario Almeida
- Vehicle Year: Other
- Vehicle: Other Vehicle
- DriveTrain: 4WD
JamesDowning wrote:I just saw that CBI is now offering a basic rear tire carrier for $189.
http://cbioffroadfab.com/product_info.p ... cts_id=117
Just another reasonably priced option.
wow thats a good deal. First i've seen of it as well
-
snowmirage - Off-Roader
- Posts: 232
- Joined: Sun Jun 26, 2011 12:13 pm
- Location: MD, Baltimore
- Name: Brandon
- Vehicle Year: 2003
- Vehicle: Chevrolet TrailBlazer
- DriveTrain: 4WD w/ G80
JamesDowning wrote:I just saw that CBI is now offering a basic rear tire carrier for $189.
http://cbioffroadfab.com/product_info.p ... cts_id=117
Just another reasonably priced option.
Bookmarked for future.

-
Flying Monkey - Addict
- Posts: 597
- Joined: Wed Apr 13, 2011 3:09 pm
- Location: GA, Ringgold
- Name: Chris
- Vehicle Year: 2004
- Vehicle: Chevrolet TrailBlazer
- DriveTrain: 4WD
- Rank: Trail Ready
snowmirage wrote:After reading this thread on the OS http://forums.trailvoy.com/showthread.php?t=33209
I'm going to see how it works and build my own.
Only difference in the parts I ordered is I picked one of these
http://www.amazon.com/Masterbuilt-HFTB- ... 417&sr=8-1
instead of the Suroco unit AlekG used.
I'll be sure to take notes and pictures and post more after the weekend and let you know how it went.
I had looked at the Masterbuilt part when putting together the needed parts to build a tire carrier. I decided against it as it's design is really to hold up the basket/rack when empty rather than an arm with a tire mounted. Seemed a bit light in guage of steel.
Let us know if it is in fact strong enough to hold a larger tire.
- Diacom
- Addict
- Posts: 882
- Joined: Fri Jul 23, 2010 9:08 pm
- Location: NV, Yerington
- Name: Noel
- Vehicle Year: 2003
- Vehicle: Chevrolet TrailBlazer
- DriveTrain: 4WD w/ Aftermarket Locker
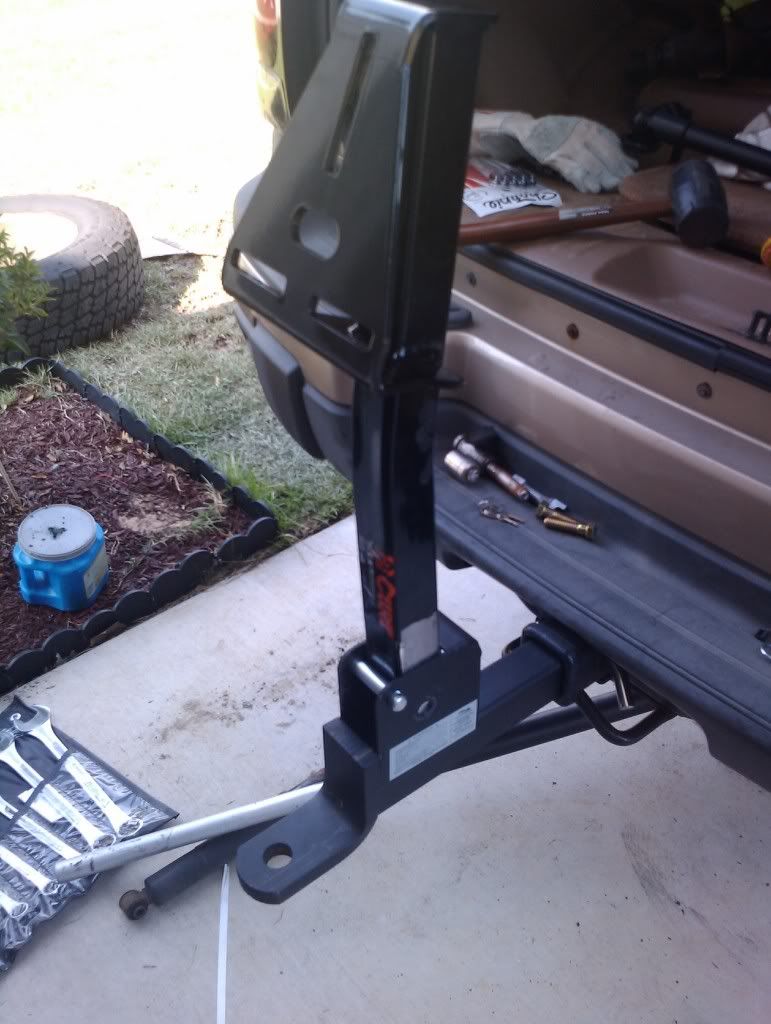
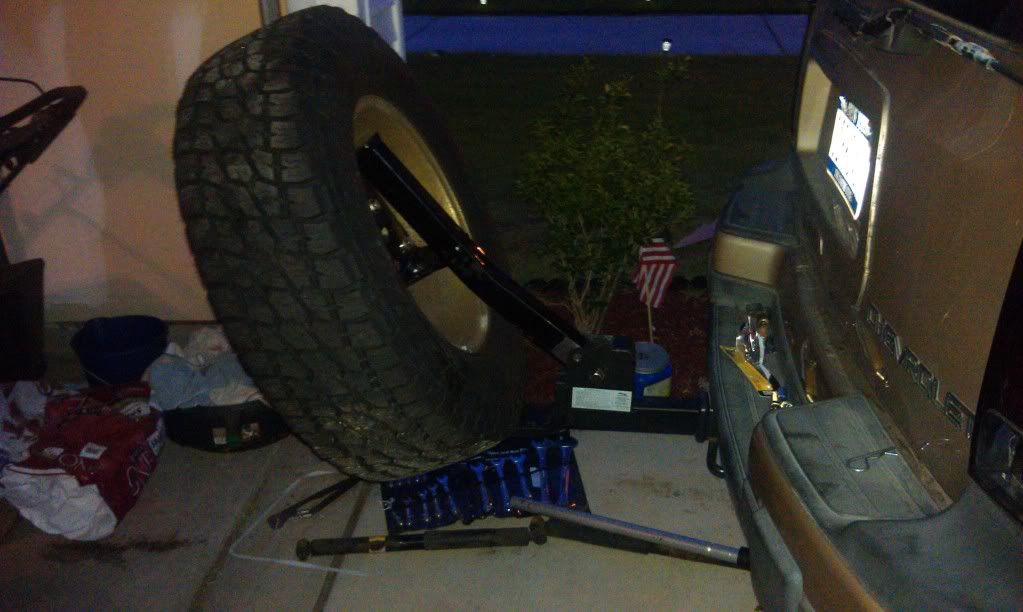
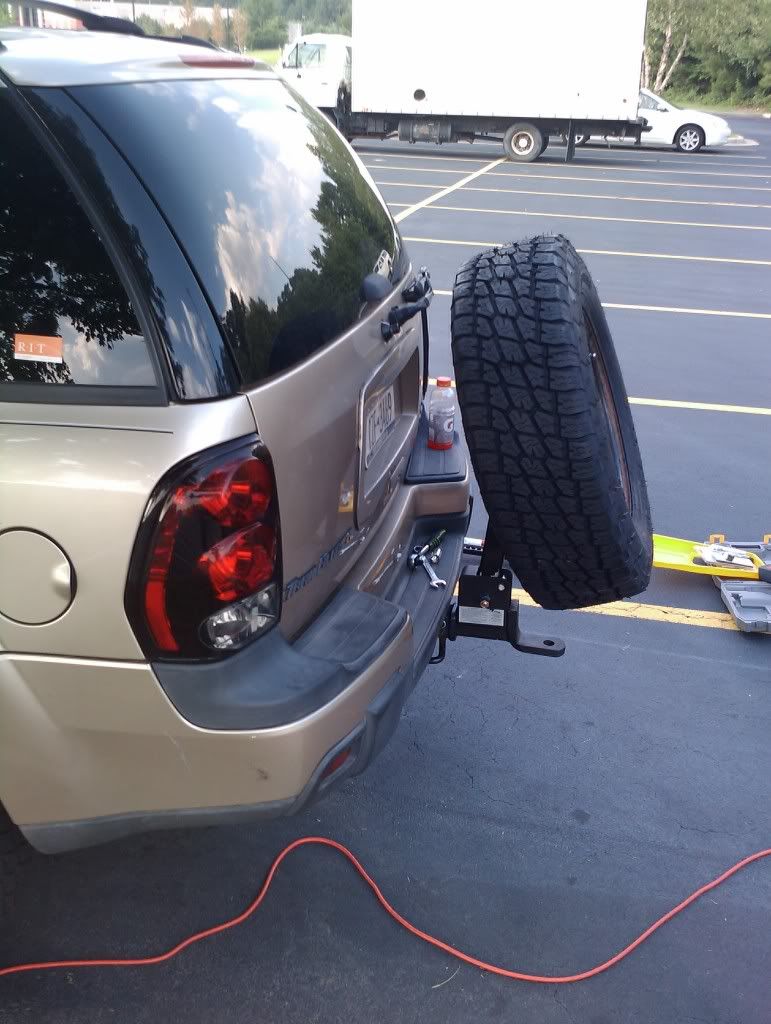
I haven't done much more than some test fitting with one of the wheel off the truck so far (my full size spare come's in tomorrow) but here's what we've got so far.
The masterbuilt seems like it will to do the job well, Clearance is probably more of an issue than the other models (as far as folding down) see pictures below, but I expected that going in. I went with the masterbuilt because I wanted some place to put a shackle, or ball if I really needed.
Before we dive into the fun....First a bit of advice.... when you drive 4hrs to a friends place to have him help you with a project like this make sure you dont leave the keys for your hitch at home... otherwise you'll be using this on your hitch lock...
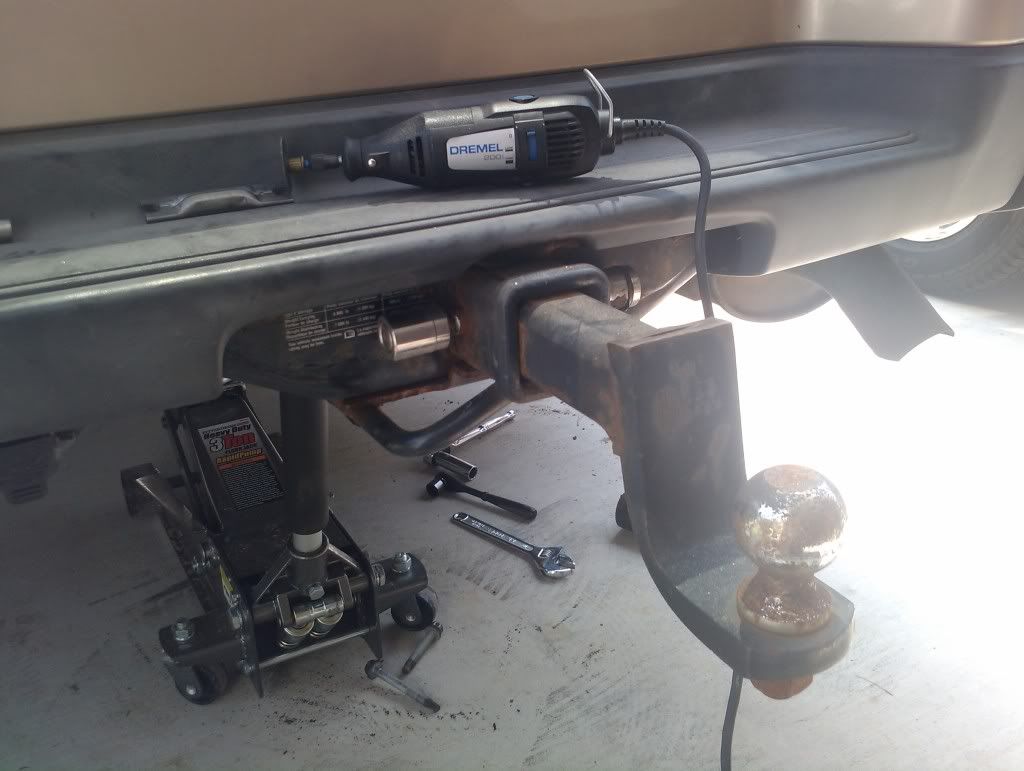
Here is where we decided to make the cut on the carrier, you'd be suprized what you can do with a dremel but it sure took a while lol.
Test fitting the carrier in the masterbuilt unit. Was a very snug fit had to grind down the sides of the carrier, take off the paint and a bit more to get it to slide in. And cleaned up the area we cut off.
It took some significant grinding to trim it, $39 lowes angle grinder well worth the money.
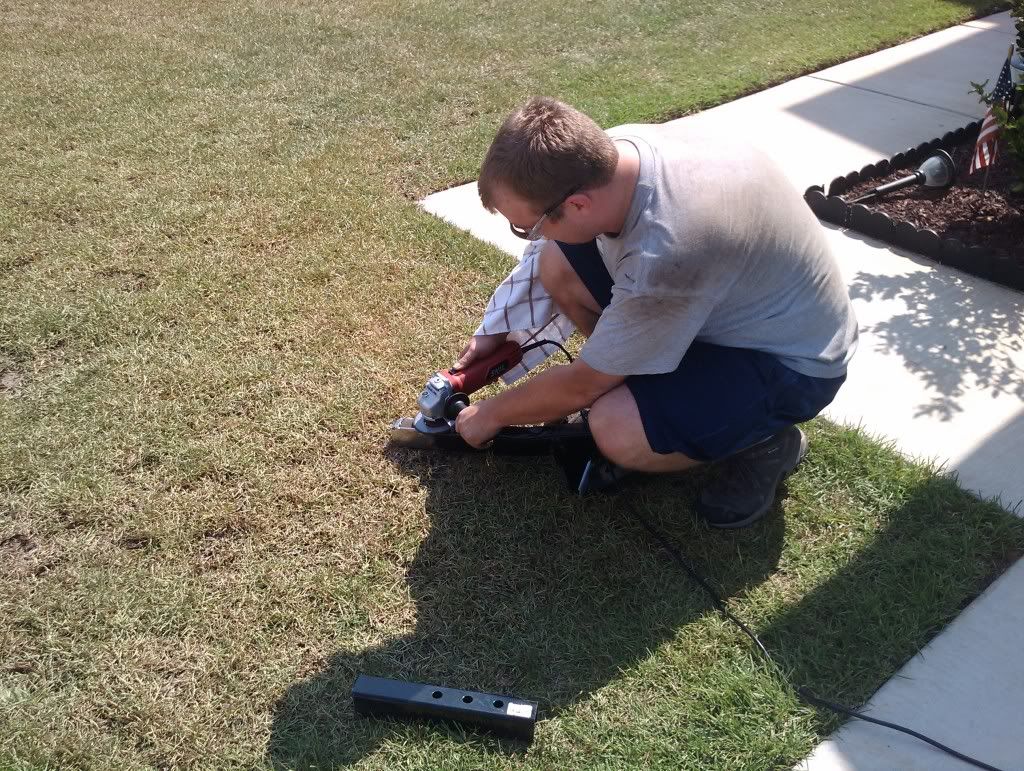
Eventually we got it to fit
Drilling the 5/8 inch hole in the carrier was probably the most challenging part. We could not find a 5/8 inch drill bit at the local hardware store so we ended up using a 1/2 bit and got a spacer to put around a half inch bolt to make things fit. (I'll get some more detailed pictures of it later for those interested). I'd highly recommend picking up a Uni-bit for something like this once you break through the steel a little bit its very hard to get the rest of the way the bit just binds up. Another one of those having the right tools for the job makes something that would be a PINA a breeze.
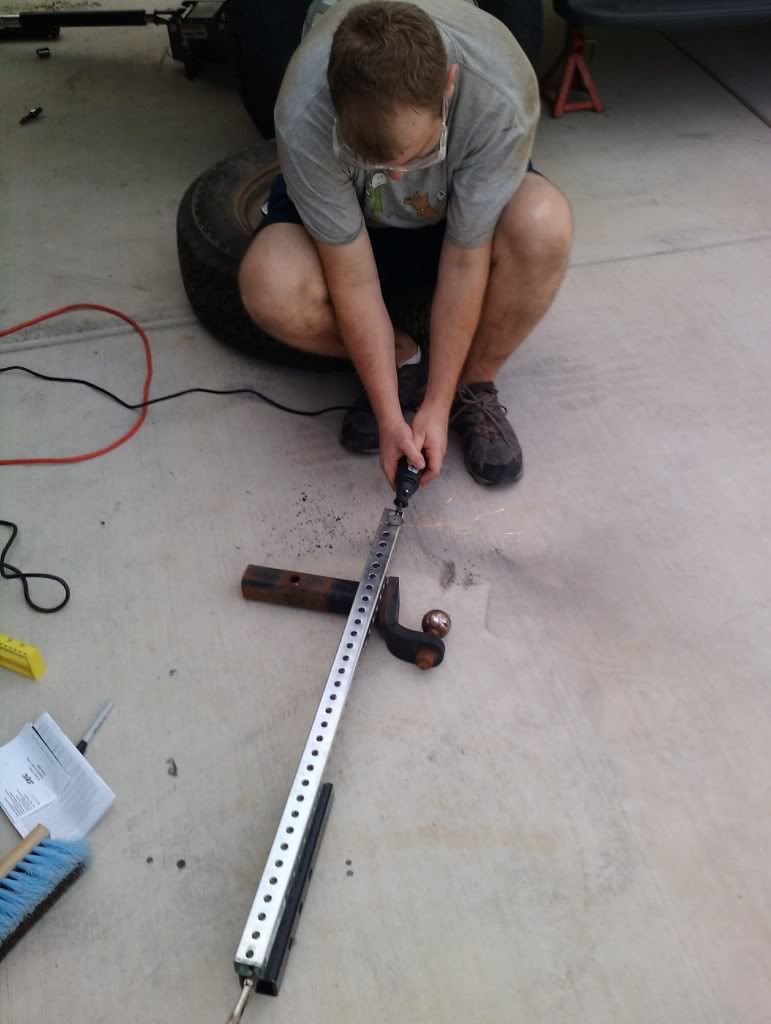
I really didnt want to pick up a 32" wheel and tire over and over for mock up so /cheer for large cardboard boxes.

The distance from the tire to the windshield wiper was going to cause issues when fully uprite. As expected I needed to space the wheel out further on the carrier. To do this I cut up some 1" (I think it was 1 inch) square box steel from lowes and made six total spacers then just used the uni-bit to drill out the holes that were there a bit larger to fix the mounting hardware. Which by the way also took a while to cut with the dremel lol but it got the job done We had to keep sticking the dremel in my friends freezer to keep it form over heating, it was 104 or so that day and we were working the poor little guy awfully hard lol but he pulled through!

Tire when fully folded down, with the spacers I put on.
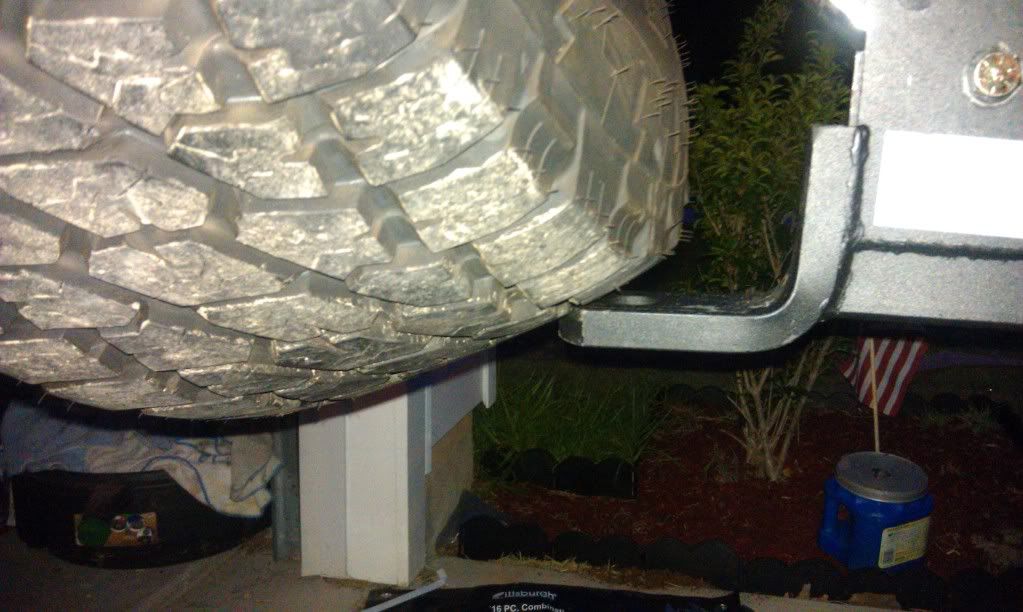
And some of the end result, sorry it was dark I'll get some better pictures once I get the full size spare on there.
I think I am going to cut a whole in the part that goes into the receiver to allow it to slide closer to the vehicle. Other than that and some paint I am very happy with it. It would be nice if it could fold down flat or at least a bit more than it does but it works
After we got done on sunday my friend and I went to find a place to test if I really do have the G80 in the rear. And I do
Also put on some new shocks this weekend I'll have some pics in another thread.
The masterbuilt seems like it will to do the job well, Clearance is probably more of an issue than the other models (as far as folding down) see pictures below, but I expected that going in. I went with the masterbuilt because I wanted some place to put a shackle, or ball if I really needed.
Before we dive into the fun....First a bit of advice.... when you drive 4hrs to a friends place to have him help you with a project like this make sure you dont leave the keys for your hitch at home... otherwise you'll be using this on your hitch lock...
Here is where we decided to make the cut on the carrier, you'd be suprized what you can do with a dremel but it sure took a while lol.
Test fitting the carrier in the masterbuilt unit. Was a very snug fit had to grind down the sides of the carrier, take off the paint and a bit more to get it to slide in. And cleaned up the area we cut off.
It took some significant grinding to trim it, $39 lowes angle grinder well worth the money.
Eventually we got it to fit
Drilling the 5/8 inch hole in the carrier was probably the most challenging part. We could not find a 5/8 inch drill bit at the local hardware store so we ended up using a 1/2 bit and got a spacer to put around a half inch bolt to make things fit. (I'll get some more detailed pictures of it later for those interested). I'd highly recommend picking up a Uni-bit for something like this once you break through the steel a little bit its very hard to get the rest of the way the bit just binds up. Another one of those having the right tools for the job makes something that would be a PINA a breeze.
I really didnt want to pick up a 32" wheel and tire over and over for mock up so /cheer for large cardboard boxes.
The distance from the tire to the windshield wiper was going to cause issues when fully uprite. As expected I needed to space the wheel out further on the carrier. To do this I cut up some 1" (I think it was 1 inch) square box steel from lowes and made six total spacers then just used the uni-bit to drill out the holes that were there a bit larger to fix the mounting hardware. Which by the way also took a while to cut with the dremel lol but it got the job done
Tire when fully folded down, with the spacers I put on.
And some of the end result, sorry it was dark I'll get some better pictures once I get the full size spare on there.
I think I am going to cut a whole in the part that goes into the receiver to allow it to slide closer to the vehicle. Other than that and some paint I am very happy with it. It would be nice if it could fold down flat or at least a bit more than it does but it works
After we got done on sunday my friend and I went to find a place to test if I really do have the G80 in the rear. And I do
Also put on some new shocks this weekend I'll have some pics in another thread.
Last edited by snowmirage on Mon Jul 25, 2011 11:22 am, edited 1 time in total.
-
snowmirage - Off-Roader
- Posts: 232
- Joined: Sun Jun 26, 2011 12:13 pm
- Location: MD, Baltimore
- Name: Brandon
- Vehicle Year: 2003
- Vehicle: Chevrolet TrailBlazer
- DriveTrain: 4WD w/ G80
Looking good but be very very careful offroad your exit angle is shot now, and if you go up a steep hill and need to back down you'll run a high risk of it digging in the ground and you get to be the first TB to do a backflip. My regular hitch dug in my first time up a steep hill at the flats and thankfully someone warned me.
IF THE FISH STOP BITING... HUNT FOR SHELLS!!!
-

NC_IslandRunner - Moderator
- Posts: 3022
- Joined: Fri Dec 03, 2010 4:49 pm
- Location: NC, Sanford
- Name: Rory
- Vehicle Year: 2004
- Vehicle: Chevrolet TrailBlazer
- DriveTrain: 4WD w/ G80
- Rank: Offroad Rated
Looks like overall a productive day of learning!
I can't imagine doing all of that work with a dremmel! You guys are persistant! For the future, get a cutoff wheel for the grinder and your cuts will go a lot faster. How many dremmel wheels did you go through? Also, I wouldn't put it in the freezer anymore... two reasons. You're thermally cycling the crap out of the components, which isn't really good for them. If there is a microcrack in any of the parts, it will get bigger and bigger with the extreme cycling. Also - have you ever come from inside the house with sunglasses on on a hot day? You know how they fog up? You're doing the same thing to the internal parts of the dremmel and just inviting water into the tool.
The hardware store didn't have a 5/8" drill bit? You need to find a new hardware store!
The spacers are interesting... though I'm curious why it was needed, I don't recall AlekG mentioning using any, but maybe his different wheels made the difference.
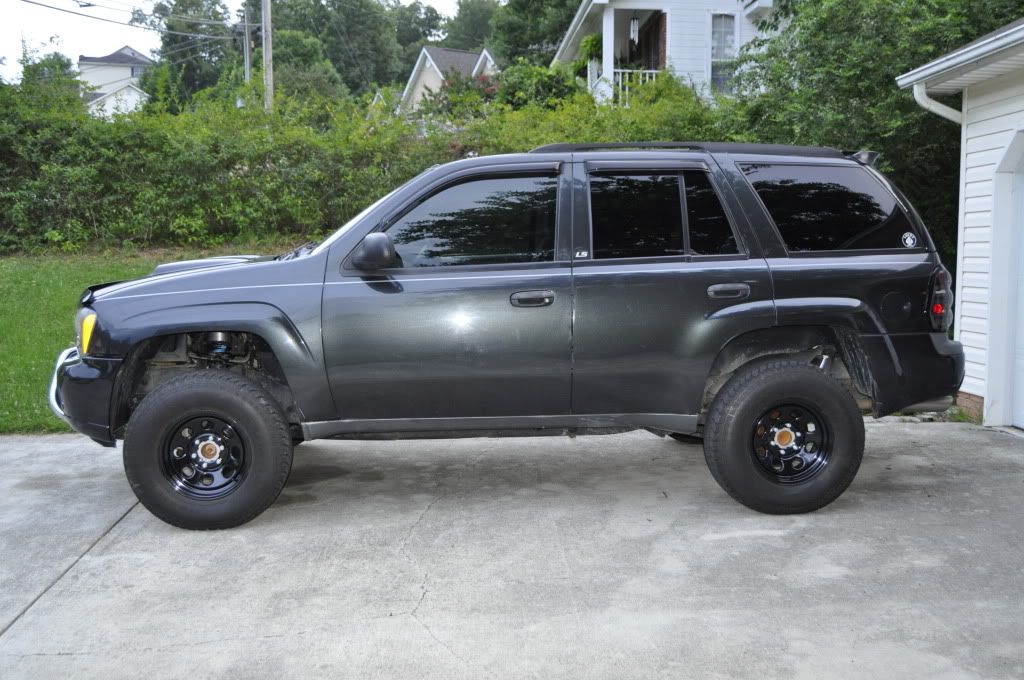
Congrats on getting the job done - especially on a 104 degree day. Lets see a picture from the side... that seems to be a good measure of how close the tire is and how compact the setup is. Maybe there's room for a hilift to mount back there too now?
I can't imagine doing all of that work with a dremmel! You guys are persistant! For the future, get a cutoff wheel for the grinder and your cuts will go a lot faster. How many dremmel wheels did you go through? Also, I wouldn't put it in the freezer anymore... two reasons. You're thermally cycling the crap out of the components, which isn't really good for them. If there is a microcrack in any of the parts, it will get bigger and bigger with the extreme cycling. Also - have you ever come from inside the house with sunglasses on on a hot day? You know how they fog up? You're doing the same thing to the internal parts of the dremmel and just inviting water into the tool.
The hardware store didn't have a 5/8" drill bit? You need to find a new hardware store!
The spacers are interesting... though I'm curious why it was needed, I don't recall AlekG mentioning using any, but maybe his different wheels made the difference.
Congrats on getting the job done - especially on a 104 degree day. Lets see a picture from the side... that seems to be a good measure of how close the tire is and how compact the setup is. Maybe there's room for a hilift to mount back there too now?
-
Trail X - Founder
- Posts: 9935
- Joined: Mon Sep 07, 2009 10:22 pm
- Location: VA, Roanoke
- Name: James Downing
- Vehicle Year: 2005
- Vehicle: Chevrolet TrailBlazer
- DriveTrain: 4WD w/ Aftermarket Locker
- Rank: Expedition Guide
It isn't clear from the picture, with the tire on can you use the hitch with a standard trailer, Is there enough room?
"Please consider a search before posting. Folks on this site PIONEERED functional offroad use of these trucks."
The answer to many common lift questions can be found here
My Build Thread
The answer to many common lift questions can be found here
My Build Thread
-

navigator - Moderator
- Posts: 4651
- Joined: Wed Mar 09, 2011 10:16 am
- Location: NC, Winnabow
- Name: Chris
- Vehicle Year: 2006
- Vehicle: Chevrolet TrailBlazer
- DriveTrain: 4WD
- Rank: Trail Ready
JamesDowning wrote:Looks like overall a productive day of learning!
I can't imagine doing all of that work with a dremmel! You guys are persistant! For the future, get a cutoff wheel for the grinder and your cuts will go a lot faster. How many dremmel wheels did you go through? Also, I wouldn't put it in the freezer anymore... two reasons. You're thermally cycling the crap out of the components, which isn't really good for them. If there is a microcrack in any of the parts, it will get bigger and bigger with the extreme cycling. Also - have you ever come from inside the house with sunglasses on on a hot day? You know how they fog up? You're doing the same thing to the internal parts of the dremmel and just inviting water into the tool.
The hardware store didn't have a 5/8" drill bit? You need to find a new hardware store!
The spacers are interesting... though I'm curious why it was needed, I don't recall AlekG mentioning using any, but maybe his different wheels made the difference.
Congrats on getting the job done - especially on a 104 degree day. Lets see a picture from the side... that seems to be a good measure of how close the tire is and how compact the setup is. Maybe there's room for a hilift to mount back there too now?
Ya to start the day off all I had was the dremel. I wasnt really expecting to have shave down the sides of of the carrier to get it to fit and after failing to find a way to do that with the dremel I decided to just go buy the grinder instead of going at it old school with some sand paper... (ya right lol). And it was only after we got back from the hardware store we realized we should have bought a cut off wheel for it instead of falling back on the dremel. I think on the carrier we went through 2 blades, we were basically cutting through the weld though so it was easier. Then another 3 or 4 I think on the spacers.
And ya I certainly wouldnt normally do the bit with the freezer, but we were hot tired and aggravated and just wanted to get done.
We checked Lowes and another and the largest either had was a half inch, of course if I had been smart I would have just forked over the $40 for the uni-bit I ended up buying anyway made things so much easier.
When i get it mounted up hopefully later today I'll get some more pictures of the spacing and everything and try to demonstrate why I needed them.
navigator wrote:It isn't clear from the picture, with the tire on can you use the hitch with a standard trailer, Is there enough room?
Yes I'd be able to put a ball on there and use it to tow, but it would further limit how far down the tire could fold. I suspect it would still fold down enough to open the rear hatch with out issues but I haven't tested it yet. I'll try to soon and get back to you.
NC_IslandRunner wrote:Looking good but be very very careful offroad your exit angle is shot now, and if you go up a steep hill and need to back down you'll run a high risk of it digging in the ground and you get to be the first TB to do a backflip. My regular hitch dug in my first time up a steep hill at the flats and thankfully someone warned me.
Ya very good point, thats one of the reasons I want to try to redrill the part that slides into the receiver to be able to slide it further back into the hitch, to get a bit more clearance. That and for aesthetic reasons.
-
snowmirage - Off-Roader
- Posts: 232
- Joined: Sun Jun 26, 2011 12:13 pm
- Location: MD, Baltimore
- Name: Brandon
- Vehicle Year: 2003
- Vehicle: Chevrolet TrailBlazer
- DriveTrain: 4WD w/ G80
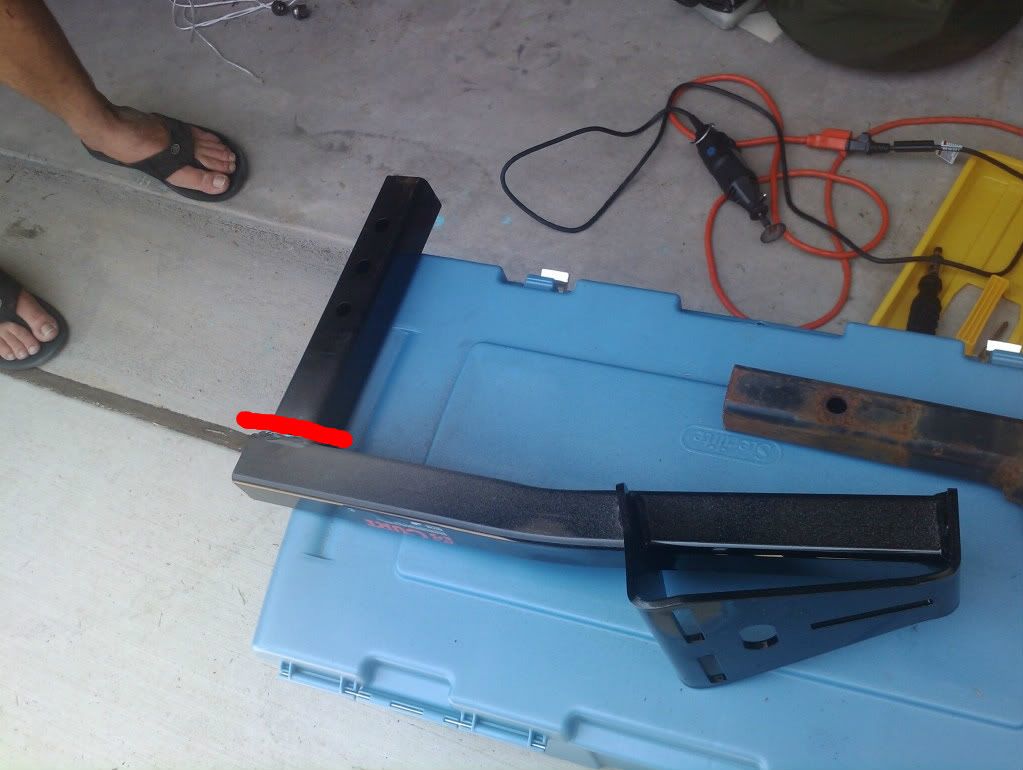
I think I came up with a pretty easy way to mount the High-Lift on there as long as I have enough clearance.
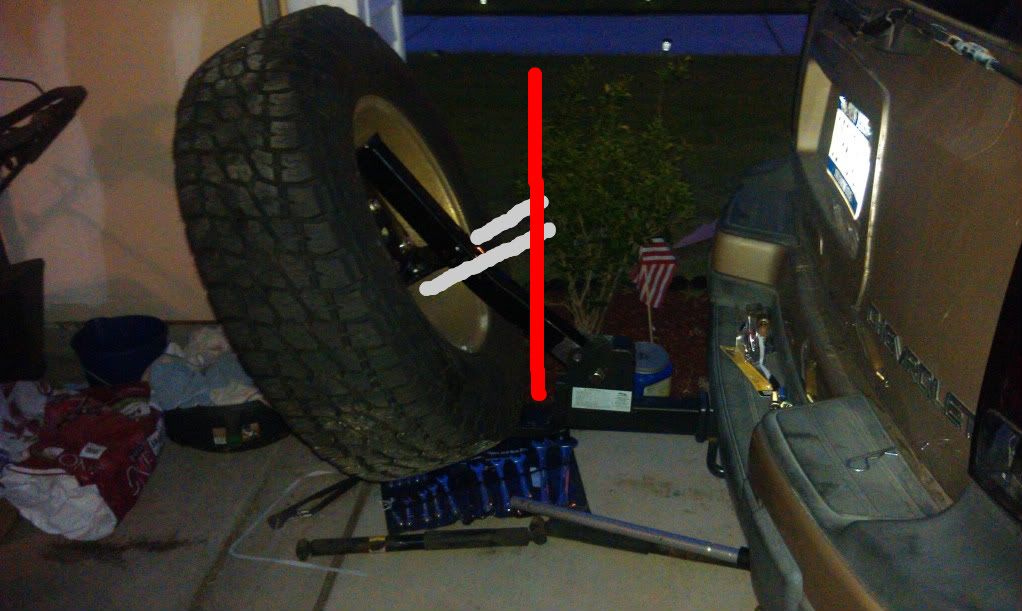
The Gray on there will be some more of the steel you saw me cut up above for the spacers I made. I actually have about 2 or 3 feet of that left. It already has holes in it so less drilling for me /cheer!
Then the high-lift (the red) can mound across two of those.
I'll try to keep it as tucked up next to the tire as I can.
But before I do any of that I think I need to redrill the receiver like I mentioned and slide it in further, just haven't had a chance to.
-
snowmirage - Off-Roader
- Posts: 232
- Joined: Sun Jun 26, 2011 12:13 pm
- Location: MD, Baltimore
- Name: Brandon
- Vehicle Year: 2003
- Vehicle: Chevrolet TrailBlazer
- DriveTrain: 4WD w/ G80
Just came to mind... What did you use for wheel nuts? I hope not regular hex nuts, as they could eat into your wheel's nut mating surface.
-
Trail X - Founder
- Posts: 9935
- Joined: Mon Sep 07, 2009 10:22 pm
- Location: VA, Roanoke
- Name: James Downing
- Vehicle Year: 2005
- Vehicle: Chevrolet TrailBlazer
- DriveTrain: 4WD w/ Aftermarket Locker
- Rank: Expedition Guide
I did use regular hex nuts but I have a large washer under it. I have spare lug nuts but there was some reason why we didnt use them..... but at the moment I cant for the life of me remember why....
I should have a chance to take a bunch more detailed pictures in sunlight later today after work.
I should have a chance to take a bunch more detailed pictures in sunlight later today after work.
-
snowmirage - Off-Roader
- Posts: 232
- Joined: Sun Jun 26, 2011 12:13 pm
- Location: MD, Baltimore
- Name: Brandon
- Vehicle Year: 2003
- Vehicle: Chevrolet TrailBlazer
- DriveTrain: 4WD w/ G80
Finished building it all today. I was able to slide the receiver all the way into the hitch and still have the clearance i wanted. Much happier with the fit now.
Also got the highlift mounted up. Sorry I dont have any pics yet, once agian it was dark by the time I finished. And my dam phone doesnt have a flash. I'll try to snap a bunch before work in the morning.
I am INSANLY happy with how this has turned out.
Still to do....
Grind down the sharp edges on all the steel I cut
Paint
Find Bolts for the wheel with more threads to allow me to use two nuts one to hold the spacers on there, and another for the wheel.
Replace the hitch lock I cut off....
By the way the work I did today was completed in my local Lowes hardware store parking lot. Running my drill and cut off wheel from a power inverter in my truck drew some odd looks from employees and customers especially when the sparks started to fly lol
-
snowmirage - Off-Roader
- Posts: 232
- Joined: Sun Jun 26, 2011 12:13 pm
- Location: MD, Baltimore
- Name: Brandon
- Vehicle Year: 2003
- Vehicle: Chevrolet TrailBlazer
- DriveTrain: 4WD w/ G80
Nice! Always cool seeing people build their stuff!
I hear ya on that... When I met Mike in VA for TECORE, I was also picking up my bumper and I needed to grind down the sleeves flush on the frame that the bumper bolts go thru. Picked up a cheap Wal*Mart angle grinder and plugged it in outside at a gas station in that parking lot. Ton of sparks and loud, pretty funny but it worked out!
snowmirage wrote:By the way the work I did today was completed in my local Lowes hardware store parking lot. Running my drill and cut off wheel from a power inverter in my truck drew some odd looks from employees and customers especially when the sparks started to fly lol
I hear ya on that... When I met Mike in VA for TECORE, I was also picking up my bumper and I needed to grind down the sleeves flush on the frame that the bumper bolts go thru. Picked up a cheap Wal*Mart angle grinder and plugged it in outside at a gas station in that parking lot. Ton of sparks and loud, pretty funny but it worked out!
Build Thread
Back to stock, had fun while it lasted...
Back to stock, had fun while it lasted...
- janesy86
- Veteran
- Posts: 1291
- Joined: Thu Sep 10, 2009 2:29 pm
- Location: MA, Salem
- Name: Nick Janes
- Vehicle Year: 2007
- Vehicle: Chevrolet TrailBlazer
- DriveTrain: 4WD w/ G80
- Rank: Offroad Rated
snowmirage wrote:Find Bolts for the wheel with more threads to allow me to use two nuts one to hold the spacers on there, and another for the wheel.
While you're at it, replace your spacers and use the new fully threaded bolts as spacers.
You'd need 4 nuts per bolt. Bolt goes through the slot - nut immediately on the other side of the carrier's sheet steel. Then put two nuts 4" (or whatever you'd like) up the bolt to act as the spacer. One will support a washer that your wheel will lay on, the other will act as a jam nut. Then the last nut holds on the wheel.
For a good bolt resource, try Mcmaster.com. They should have what you're looking for.
-
Trail X - Founder
- Posts: 9935
- Joined: Mon Sep 07, 2009 10:22 pm
- Location: VA, Roanoke
- Name: James Downing
- Vehicle Year: 2005
- Vehicle: Chevrolet TrailBlazer
- DriveTrain: 4WD w/ Aftermarket Locker
- Rank: Expedition Guide
Thanks for the tip again james I'll have to take a look at that.
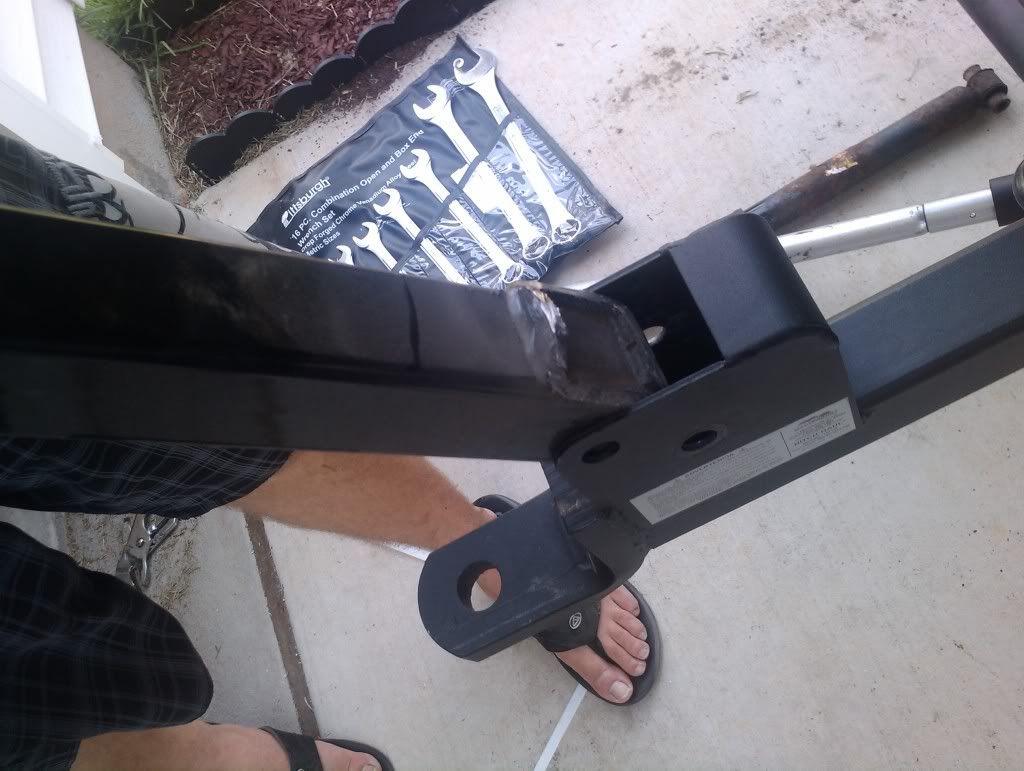
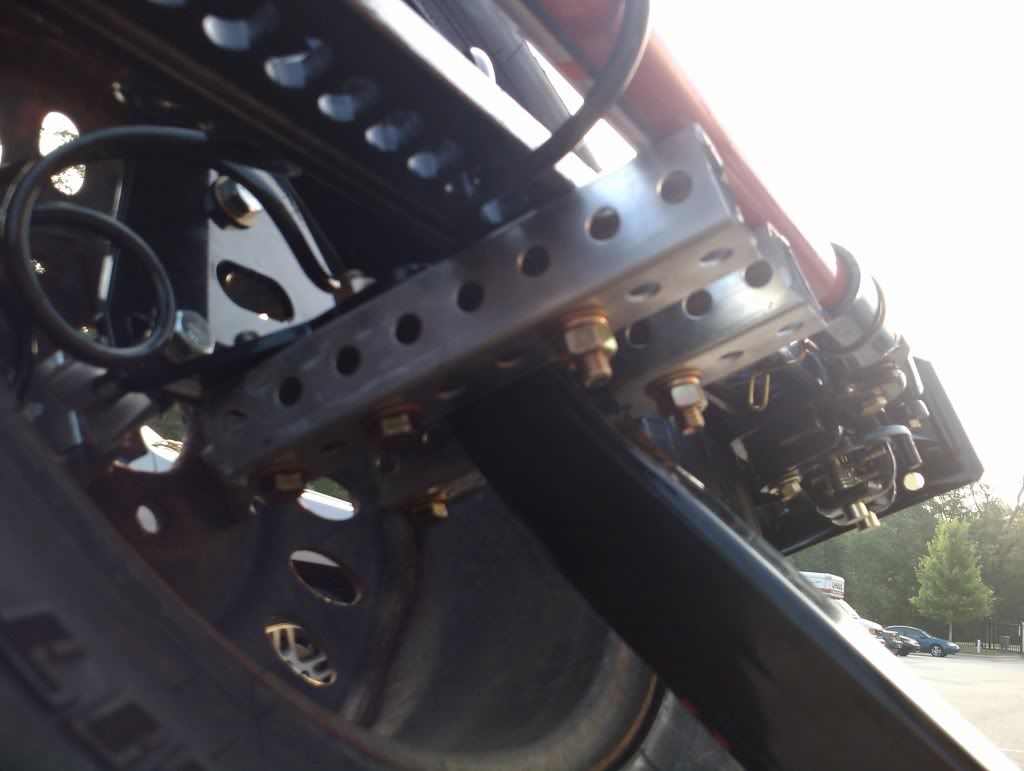
And now for a bit more show and tell!
Relocating the receiver further back into the hitch. Tightened things up nicely and still have great clearance.
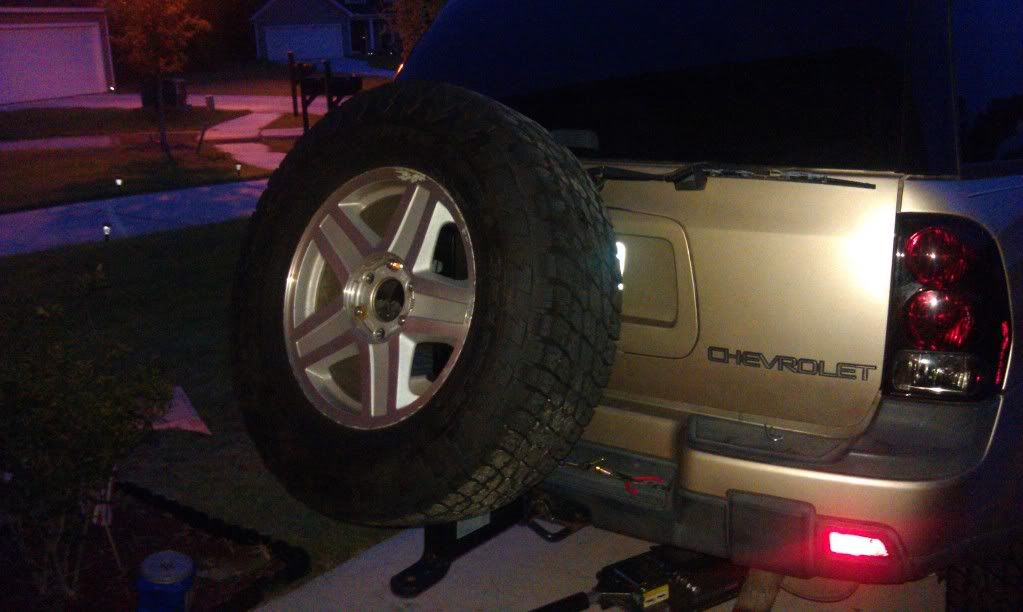
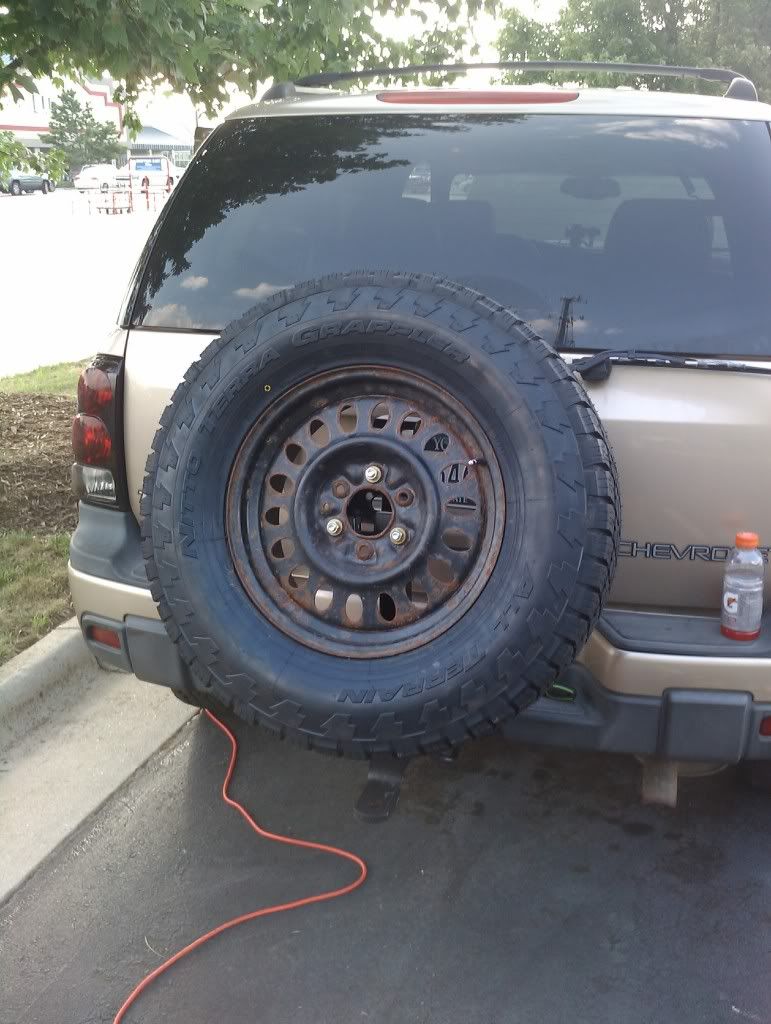
From the back. I am very happy with how low this ended up sitting. I expected it to be right in the middle of the rear window almost and I'd just have to deal with not seeing anything out the back, but this turned out great. If anything I kind of wish I could raise it up a few inches that might allow the tire to clear the tongue to allow it to fold down more. But I cant think of anyway to accomplish that easily.
I think the rest of these might be from this morning as I rushed out the door for work Sorry if they're I didnt hold the camera still
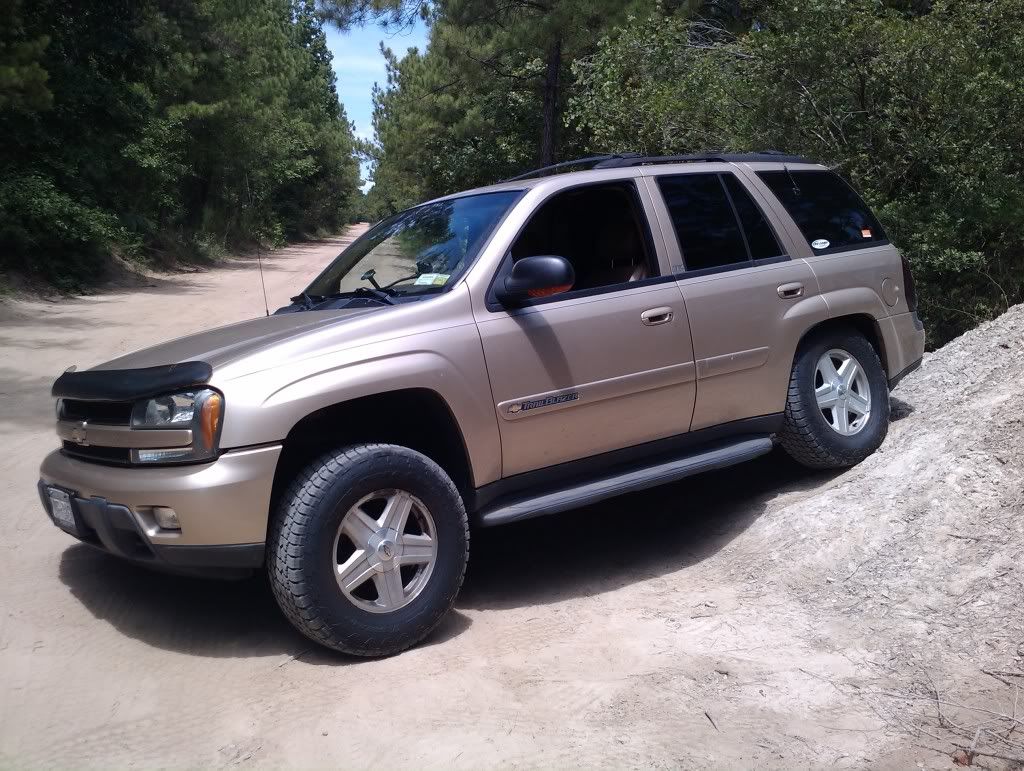
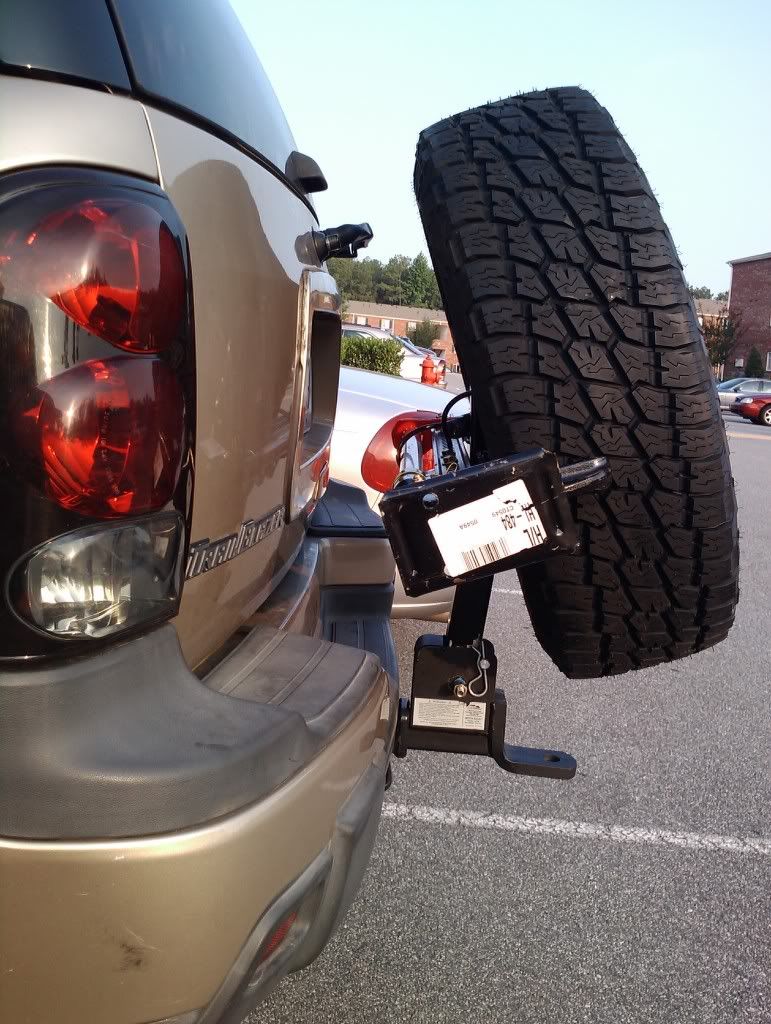
From the side. High lift mounted! Its like it was made for it
From the other side folded down
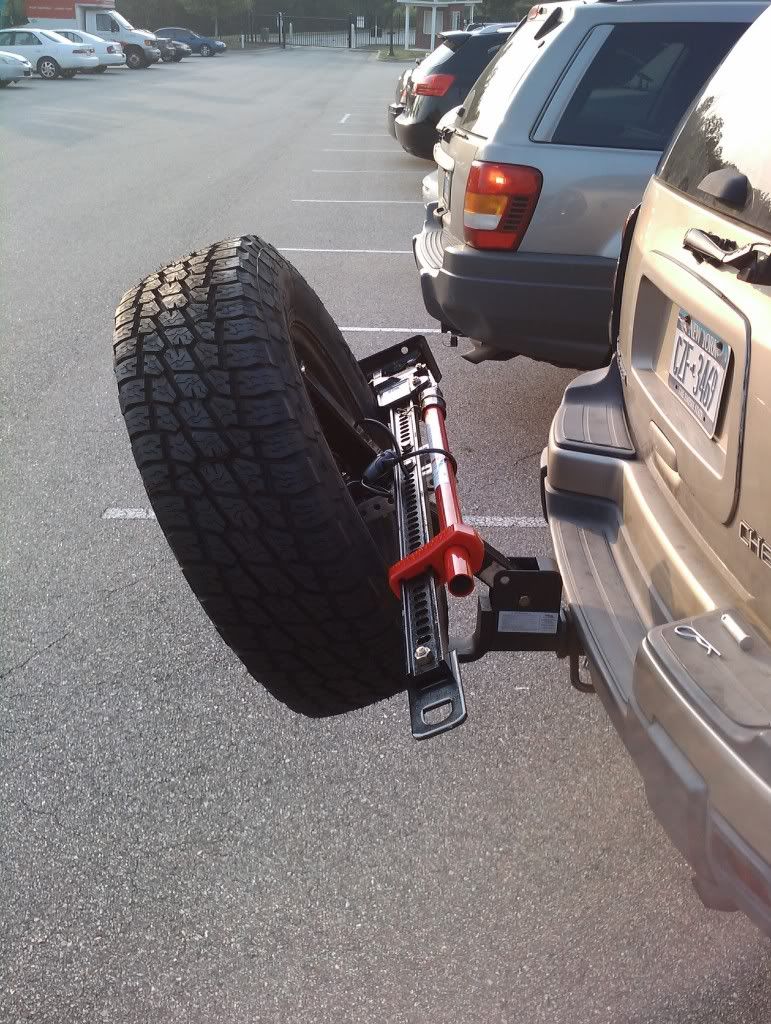
A few shocks of how I mounted the High lift.

As I said I am very happy with how it turned out. I just need to complete a few finishing touches as I mentioned. It was a great bang for the buck project. And believe me if I can do half of it in the Lowes parking lot ANYONE can do it.
Quick off the top of my head list of parts / tools needed.
Curt Spare Tire Carrier
Masterbuilt Folding Receiver Bar
Hitch Tightener (I have yet to put this on)
Misc. Nuts Bolts Washers from local hardware store
Angle Grinder + cut off wheel (You can do it with a dremel if you REALLY want to... lol)
Drill with a "Uni-bit" or step bit such as this from lowes
1 Inch box steel which I again picked up about 3 feet of from lowes
If anyone would like more detail / pictures or has questions just let me know.
And now for a bit more show and tell!
Relocating the receiver further back into the hitch. Tightened things up nicely and still have great clearance.
From the back. I am very happy with how low this ended up sitting. I expected it to be right in the middle of the rear window almost and I'd just have to deal with not seeing anything out the back, but this turned out great. If anything I kind of wish I could raise it up a few inches that might allow the tire to clear the tongue to allow it to fold down more. But I cant think of anyway to accomplish that easily.
I think the rest of these might be from this morning as I rushed out the door for work Sorry if they're I didnt hold the camera still
From the side. High lift mounted! Its like it was made for it
From the other side folded down
A few shocks of how I mounted the High lift.
As I said I am very happy with how it turned out. I just need to complete a few finishing touches as I mentioned. It was a great bang for the buck project. And believe me if I can do half of it in the Lowes parking lot ANYONE can do it.
Quick off the top of my head list of parts / tools needed.
Curt Spare Tire Carrier
Masterbuilt Folding Receiver Bar
Hitch Tightener (I have yet to put this on)
Misc. Nuts Bolts Washers from local hardware store
Angle Grinder + cut off wheel (You can do it with a dremel if you REALLY want to... lol)
Drill with a "Uni-bit" or step bit such as this from lowes
1 Inch box steel which I again picked up about 3 feet of from lowes
If anyone would like more detail / pictures or has questions just let me know.
-
snowmirage - Off-Roader
- Posts: 232
- Joined: Sun Jun 26, 2011 12:13 pm
- Location: MD, Baltimore
- Name: Brandon
- Vehicle Year: 2003
- Vehicle: Chevrolet TrailBlazer
- DriveTrain: 4WD w/ G80
Overall not bad, and probably a good learning experience. I'm sure you started to learn what works and what doesn't (the dremmel).
The 4 nut/bolt idea came from a conversation with Mario, so he should really get the credit for that.
The hi-lift carrier turned out fairly well for being an afterthought. Looks sturdier than I imagined. Just make sure it's on there good - maybe even use some locktite on those mounting bolts. Again, a good solution for you may be to run the two hi-lift mounting bolts up from below, and securing them to the steel tubes with a nut. Then place the hi-lift on top of that nut, and secure with a wing nut. That way you won't need a wrench to remove the hi-lift.
-
Trail X - Founder
- Posts: 9935
- Joined: Mon Sep 07, 2009 10:22 pm
- Location: VA, Roanoke
- Name: James Downing
- Vehicle Year: 2005
- Vehicle: Chevrolet TrailBlazer
- DriveTrain: 4WD w/ Aftermarket Locker
- Rank: Expedition Guide
I guess I can take credit for the spacer idea... LOL. It would allow you to lock the bolts in place so that they don't dangle when you take the wheel off.
I agree with James on the Hi-Lift mount. Looks pretty good. I also like his idea of threading the bolt from the bottom and adding a nut to secure it to the box steel.

I have to admit, when I saw your using a dremel for the carrier, I was very worried. Overall, though, I think you did a pretty good job.
Regarding the hitch tightener... you may not be able to mount it from the outside since you moved the carrier that far in to the receiver. You might have to mount it from the back side... which should still work.
I agree with James on the Hi-Lift mount. Looks pretty good. I also like his idea of threading the bolt from the bottom and adding a nut to secure it to the box steel.
I have to admit, when I saw your using a dremel for the carrier, I was very worried. Overall, though, I think you did a pretty good job.
Regarding the hitch tightener... you may not be able to mount it from the outside since you moved the carrier that far in to the receiver. You might have to mount it from the back side... which should still work.
Mario - Build Thread
-
Gordinho80 - Lifer
- Posts: 2787
- Joined: Tue Sep 08, 2009 9:27 am
- Location: NJ, Jackson
- Name: Mario Almeida
- Vehicle Year: Other
- Vehicle: Other Vehicle
- DriveTrain: 4WD
61 posts
• Page 1 of 4 • 1, 2, 3, 4