Ya i'd have to unbolt it but I dont switch them out that often and even if I do I keep my tools right in my truck anyway.
I am trying to find a picture of the trailblazer hitch from underneath it looking up to see if I can make this work. Cant get out to look my truck until this evening. I thought I had seen some but cant remember where.... hmmm
Hitch Mounted Spare going on this weekend
61 posts
• Page 3 of 4 • 1, 2, 3, 4
-

snowmirage - Off-Roader
- Posts: 232
- Joined: Sun Jun 26, 2011 12:13 pm
- Location: MD, Baltimore
- Name: Brandon
- Vehicle Year: 2003
- Vehicle: Chevrolet TrailBlazer
- DriveTrain: 4WD w/ G80
http://i909.photobucket.com/albums/ac29 ... hop2-1.jpg
is probably the closest I can find, its from Chevycrews build, he relocated the hitch obviously but its the stock unit as long as there isnt to much back there causing interference or something I think this should work.
is probably the closest I can find, its from Chevycrews build, he relocated the hitch obviously but its the stock unit as long as there isnt to much back there causing interference or something I think this should work.
-
snowmirage - Off-Roader
- Posts: 232
- Joined: Sun Jun 26, 2011 12:13 pm
- Location: MD, Baltimore
- Name: Brandon
- Vehicle Year: 2003
- Vehicle: Chevrolet TrailBlazer
- DriveTrain: 4WD w/ G80
There isn't anything back there that would interfere. If the carrier sticks out of the back of the receiver, then you CAN use the bracket back there.
Mario - Build Thread
-

Gordinho80 - Lifer
- Posts: 2787
- Joined: Tue Sep 08, 2009 9:27 am
- Location: NJ, Jackson
- Name: Mario Almeida
- Vehicle Year: Other
- Vehicle: Other Vehicle
- DriveTrain: 4WD
snowmirage wrote:http://i909.photobucket.com/albums/ac297/Chevycrew_album/4CRAWLIN/bodychop2-1.jpg
is probably the closest I can find, its from Chevycrews build, he relocated the hitch obviously but its the stock unit as long as there isnt to much back there causing interference or something I think this should work.
I even went out and looked at that before I posted. With the hitch in stock location, and the spare tire gone, there is plenty of room to do this.
I want to build something like this, but, my spare is 42" tall! Good luck keeping ground clearance and seeing out the back window.
If I build one, Ill start with a 12" receiver extention form harbor freight. then build off it. No need to remove to use the hitch then.
-

chevycrew - Veteran
- Posts: 1088
- Joined: Tue Mar 08, 2011 2:42 pm
- Location: UT, Salt Lake City
- Name: Steve
- Vehicle Year: 2002
- Vehicle: Chevrolet TrailBlazer
- DriveTrain: 4WD
- Rank: Trail Ready
With such a large tire... wouldn't you be better off with a swing out design?
Mario - Build Thread
-
Gordinho80 - Lifer
- Posts: 2787
- Joined: Tue Sep 08, 2009 9:27 am
- Location: NJ, Jackson
- Name: Mario Almeida
- Vehicle Year: Other
- Vehicle: Other Vehicle
- DriveTrain: 4WD
Ya even with me 32" tire thats a lot of weight back there, you could probably find away to make it work though.
-
snowmirage - Off-Roader
- Posts: 232
- Joined: Sun Jun 26, 2011 12:13 pm
- Location: MD, Baltimore
- Name: Brandon
- Vehicle Year: 2003
- Vehicle: Chevrolet TrailBlazer
- DriveTrain: 4WD w/ G80
Gordinho80 wrote:With such a large tire... wouldn't you be better off with a swing out design?
Most swingouts won't hold up either, 200 lbs is a ton for a single swingout spindle setup.
Really needs to be poisen spyder swing down design using 2 pivot points, then when closed has 4 mount points.
-
chevycrew - Veteran
- Posts: 1088
- Joined: Tue Mar 08, 2011 2:42 pm
- Location: UT, Salt Lake City
- Name: Steve
- Vehicle Year: 2002
- Vehicle: Chevrolet TrailBlazer
- DriveTrain: 4WD
- Rank: Trail Ready
chevycrew wrote:Gordinho80 wrote:With such a large tire... wouldn't you be better off with a swing out design?
Most swingouts won't hold up either, 200 lbs is a ton for a single swingout spindle setup.
Really needs to be poisen spyder swing down design using 2 pivot points, then when closed has 4 mount points.
Was just about to mention that setup...
Build Thread
Back to stock, had fun while it lasted...
Back to stock, had fun while it lasted...
- janesy86
- Veteran
- Posts: 1291
- Joined: Thu Sep 10, 2009 2:29 pm
- Location: MA, Salem
- Name: Nick Janes
- Vehicle Year: 2007
- Vehicle: Chevrolet TrailBlazer
- DriveTrain: 4WD w/ G80
- Rank: Offroad Rated
The Mega spindle from AtoZ Fabrication is 1.5"... Zach at AtoZ said it would hold a larger tire without issue, not sure about 42", though. Some of the spindles I've come across say they are rated for 1000lbs or more.
Mario - Build Thread
-
Gordinho80 - Lifer
- Posts: 2787
- Joined: Tue Sep 08, 2009 9:27 am
- Location: NJ, Jackson
- Name: Mario Almeida
- Vehicle Year: Other
- Vehicle: Other Vehicle
- DriveTrain: 4WD
I would guess that the design using the Dana 60 spindle would hold up, after all it works on have trucks. I remember reading that the one based on the Dana 44 spindle would fatigue the bearings after a certain amount of time is the reason to go with the 60 with such a large tire.
- Diacom
- Addict
- Posts: 882
- Joined: Fri Jul 23, 2010 9:08 pm
- Location: NV, Yerington
- Name: Noel
- Vehicle Year: 2003
- Vehicle: Chevrolet TrailBlazer
- DriveTrain: 4WD w/ Aftermarket Locker
Sorry to the OP.
Thread hijack over.
Thread hijack over.
-
chevycrew - Veteran
- Posts: 1088
- Joined: Tue Mar 08, 2011 2:42 pm
- Location: UT, Salt Lake City
- Name: Steve
- Vehicle Year: 2002
- Vehicle: Chevrolet TrailBlazer
- DriveTrain: 4WD
- Rank: Trail Ready
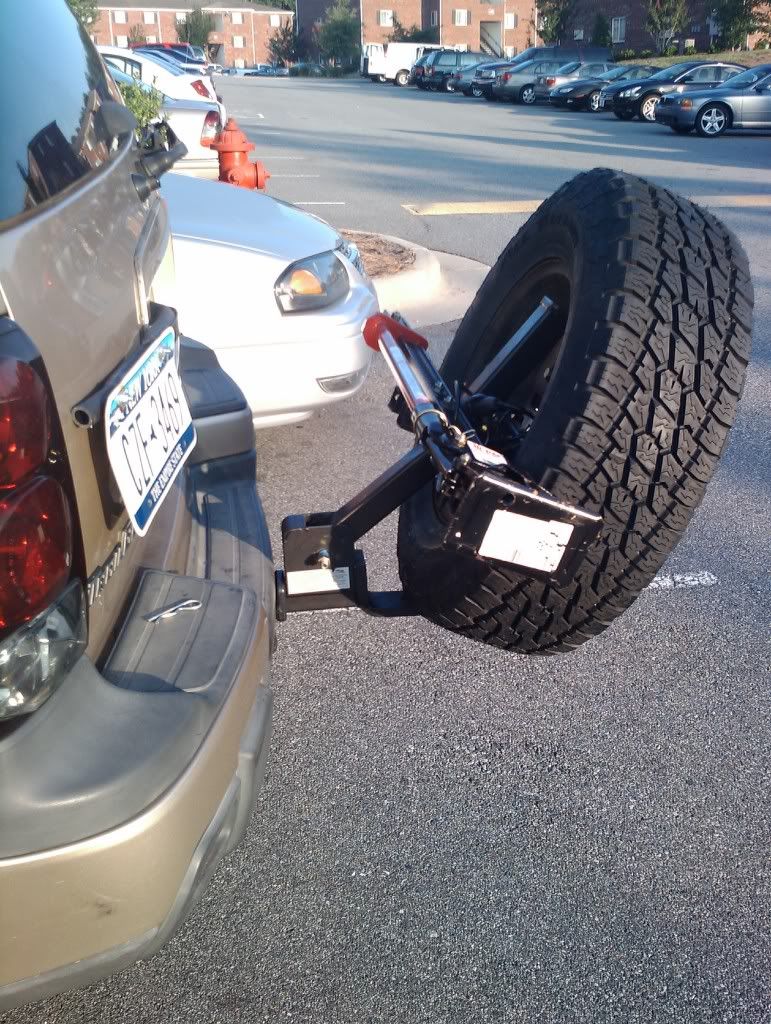
I did manage to get the tightener I had setup on the back side of the hitch as a few of you mentioned and it's working great. There is still a bit of play in it but it seems to almost all be where it folds down. I'll see if I can come up with some kind of shim for that after I get back from vacation next week. there is very little side to side play but when I hit the breaks or step on the gas hard / go up / down a hill I can see / hear the tire mount moving a 1/2" or so.
-
snowmirage - Off-Roader
- Posts: 232
- Joined: Sun Jun 26, 2011 12:13 pm
- Location: MD, Baltimore
- Name: Brandon
- Vehicle Year: 2003
- Vehicle: Chevrolet TrailBlazer
- DriveTrain: 4WD w/ G80
I am about to order some new bolts for this with longer threads as we had discussed
Does anyone know what size / thread count the stock lug nuts take? Would be easier if I can get bolts they will thread on to.
I just hope the site that was mentioned mcmaster.com has fully threaded bolts long enough in that size. I'm away on vacation so I'm going to go to Lowes and take some measurements on that steel I used for the spacers tonight then order online and hopefully get them before I get home this weekend so I can finish it up before work Monday.
-
snowmirage - Off-Roader
- Posts: 232
- Joined: Sun Jun 26, 2011 12:13 pm
- Location: MD, Baltimore
- Name: Brandon
- Vehicle Year: 2003
- Vehicle: Chevrolet TrailBlazer
- DriveTrain: 4WD w/ G80
M12x1.5 I think.
-

Trail X - Founder
- Posts: 9935
- Joined: Mon Sep 07, 2009 10:22 pm
- Location: VA, Roanoke
- Name: James Downing
- Vehicle Year: 2005
- Vehicle: Chevrolet TrailBlazer
- DriveTrain: 4WD w/ Aftermarket Locker
- Rank: Expedition Guide
Thread Size: M12-1.5
Length: 41.5mm
Shoulder Length: 8mm
Length: 41.5mm
Shoulder Length: 8mm
-

djthumper - Moderator
- Posts: 2702
- Joined: Wed Mar 24, 2010 6:04 pm
- Location: NV, Las Vegas
- Name: Larry
- Vehicle Year: 2006
- Vehicle: Chevrolet TrailBlazer
- DriveTrain: 4WD
- Rank: Offroad Rated
Thanks for the info ordered some bolts / nuts from mcmaster.com I'll post some pics when I get everthing painted and mounted backup.
-
snowmirage - Off-Roader
- Posts: 232
- Joined: Sun Jun 26, 2011 12:13 pm
- Location: MD, Baltimore
- Name: Brandon
- Vehicle Year: 2003
- Vehicle: Chevrolet TrailBlazer
- DriveTrain: 4WD w/ G80
The new bolts came in this weekend and I managed to get time sunday to finish things up.
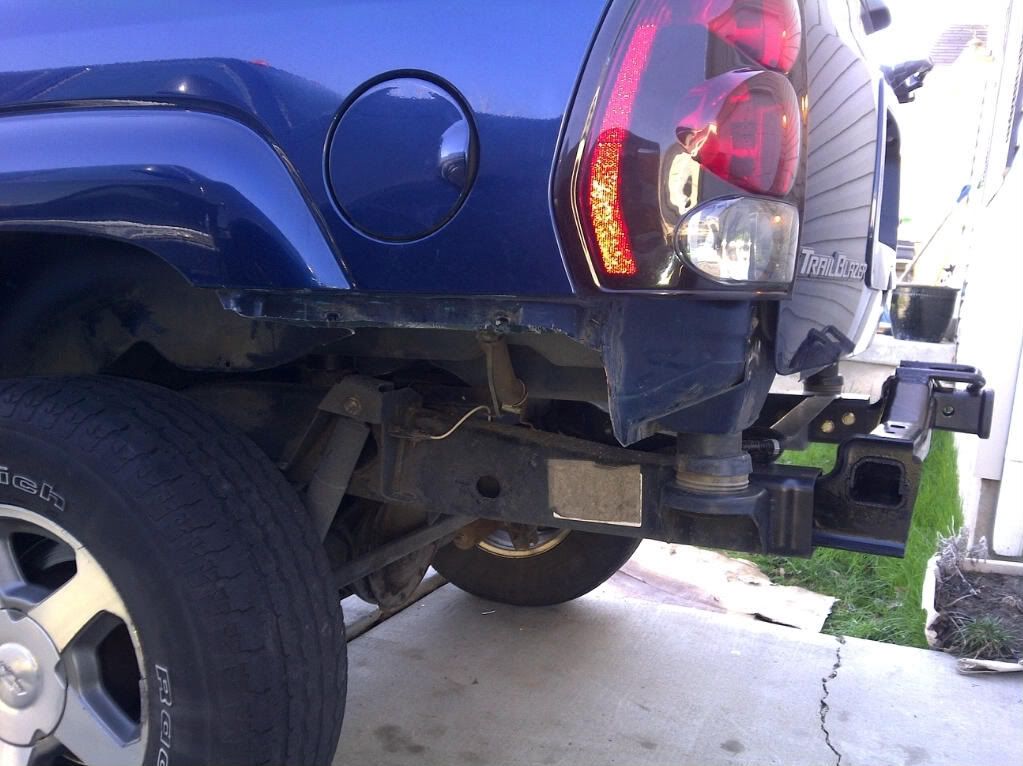
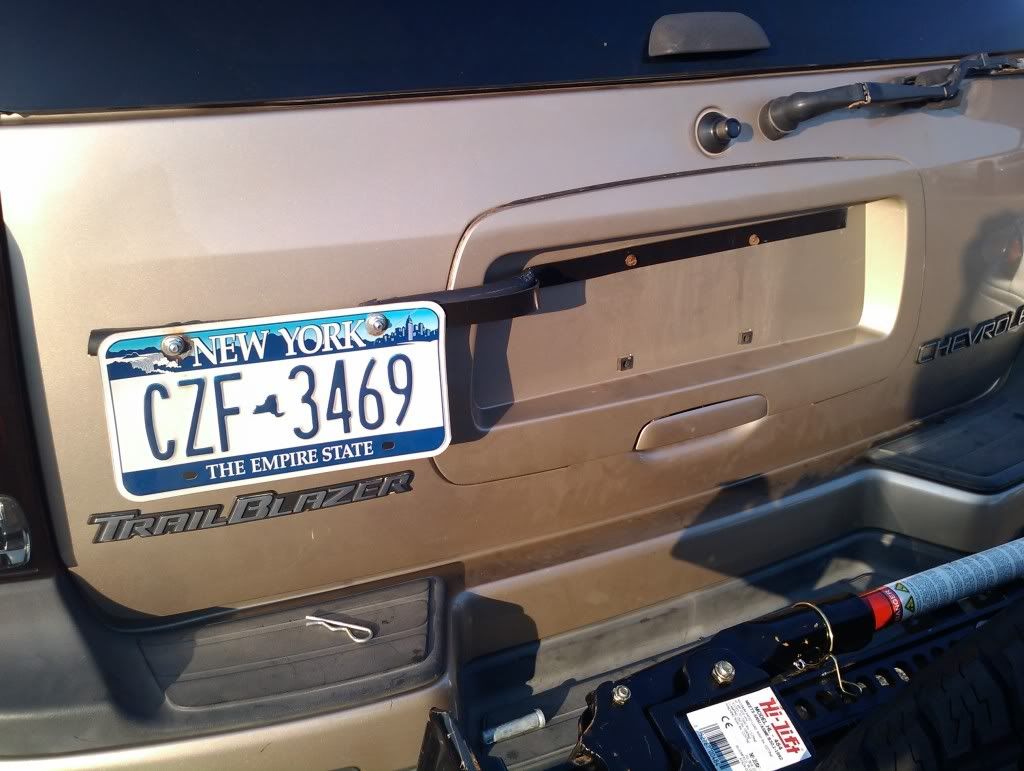
I used some Rustoleum to paint everything and also fabbed up a licence plate relocation bracket. Its ugly but functional it was VERY hot and I just wanted to get done. I am sure I can improve on it someday.
I used a thin piece of steel I picked up from lowes and just bent it by hand to a rough shape drilled some holes and mounted it up. I added a piece of rubber tube to the the back of the bracket behind the licence plate to keep it from scratching the paint and rattling around.
I still need to relocate the light for the plate but I rand out of time.
Here's a few pics sorry for the bad lighting it was early on my way out the door to work this morning, once again I didnt finish it up till well after dark last night.
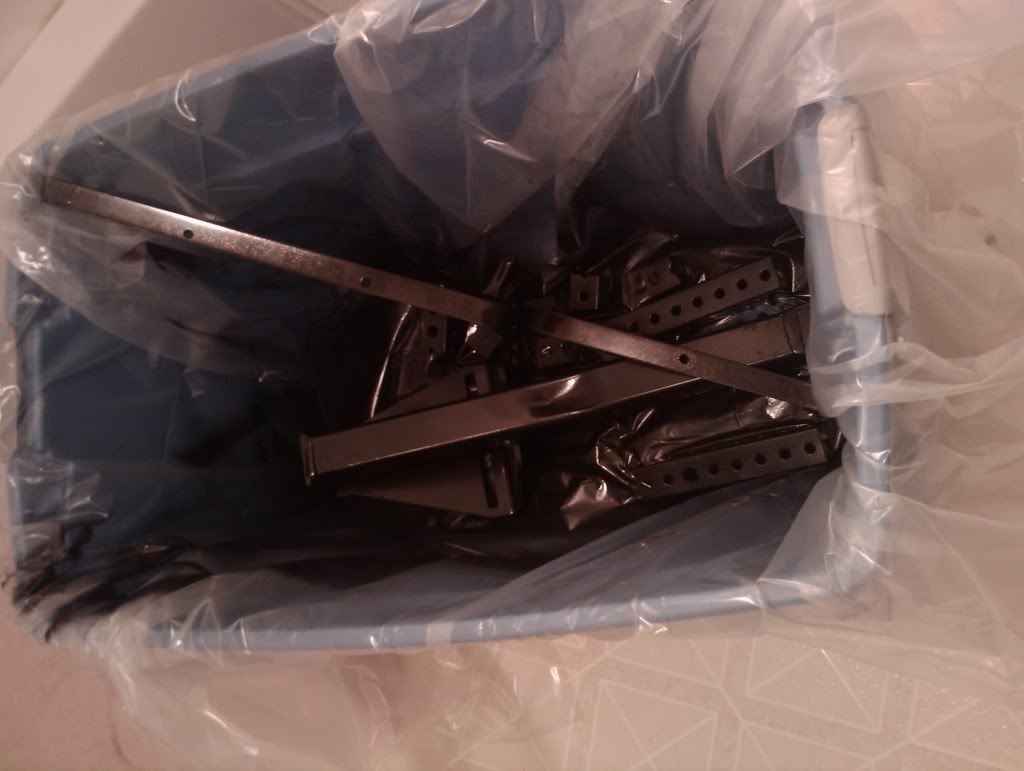
I painted the stuff outside my apartment door on a balcony in a bucket lined with a plastic drop cloth from the hardware store. It worked pretty well, it was hard to get to all sides of the parts of course I had to wait for a coat to dry then flip and do the other side repeating that process 3 or 4 times. Then dragged the bucket into my apt and put it in the bathroom with the vent fan on for a few hours to let it dry. I really half assed the paint job to be honest I barely took the time to remove stickers on the parts. But if needed I can always redo it later. Wanted to get some paint on there before heading to the beach this weekend the salt would the bare metal alive lol.
I used some Rustoleum to paint everything and also fabbed up a licence plate relocation bracket. Its ugly but functional it was VERY hot and I just wanted to get done. I am sure I can improve on it someday.
I used a thin piece of steel I picked up from lowes and just bent it by hand to a rough shape drilled some holes and mounted it up. I added a piece of rubber tube to the the back of the bracket behind the licence plate to keep it from scratching the paint and rattling around.
I still need to relocate the light for the plate but I rand out of time.
Here's a few pics sorry for the bad lighting it was early on my way out the door to work this morning, once again I didnt finish it up till well after dark last night.
I painted the stuff outside my apartment door on a balcony in a bucket lined with a plastic drop cloth from the hardware store. It worked pretty well, it was hard to get to all sides of the parts of course I had to wait for a coat to dry then flip and do the other side repeating that process 3 or 4 times. Then dragged the bucket into my apt and put it in the bathroom with the vent fan on for a few hours to let it dry. I really half assed the paint job to be honest I barely took the time to remove stickers on the parts. But if needed I can always redo it later. Wanted to get some paint on there before heading to the beach this weekend the salt would the bare metal alive lol.
-
snowmirage - Off-Roader
- Posts: 232
- Joined: Sun Jun 26, 2011 12:13 pm
- Location: MD, Baltimore
- Name: Brandon
- Vehicle Year: 2003
- Vehicle: Chevrolet TrailBlazer
- DriveTrain: 4WD w/ G80
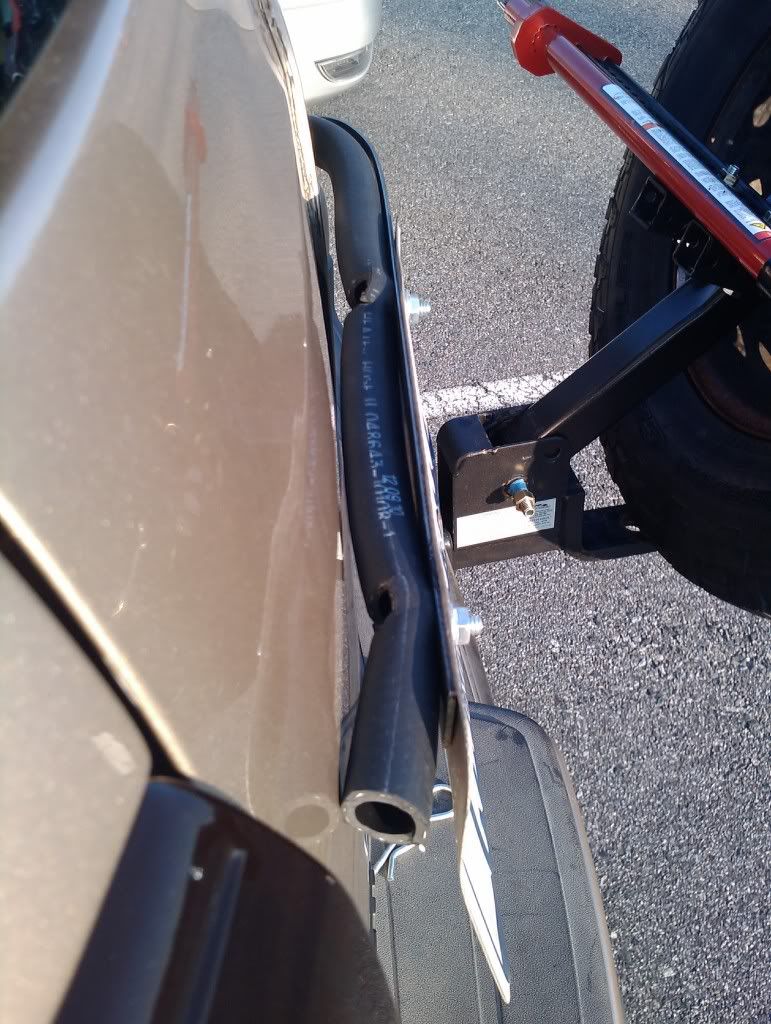
The last thing I think I need for this project is a way to keep the tire mount from sliding forward and back. Its not a lot of play 1/8" maybe? I haven't measured it yet.
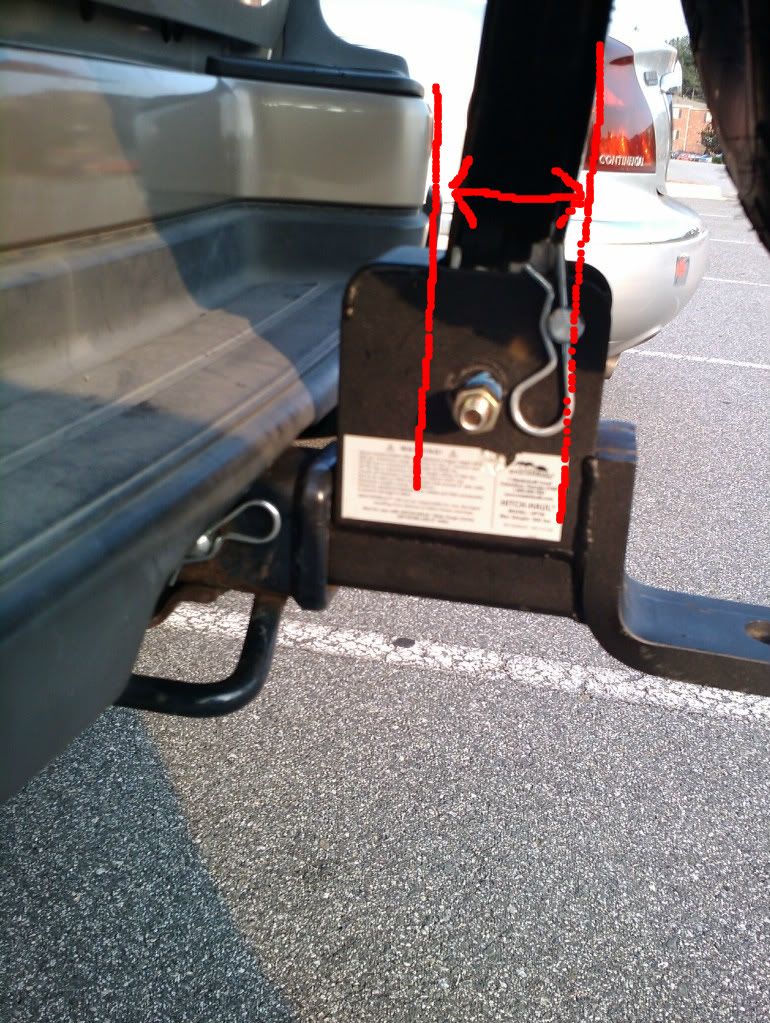
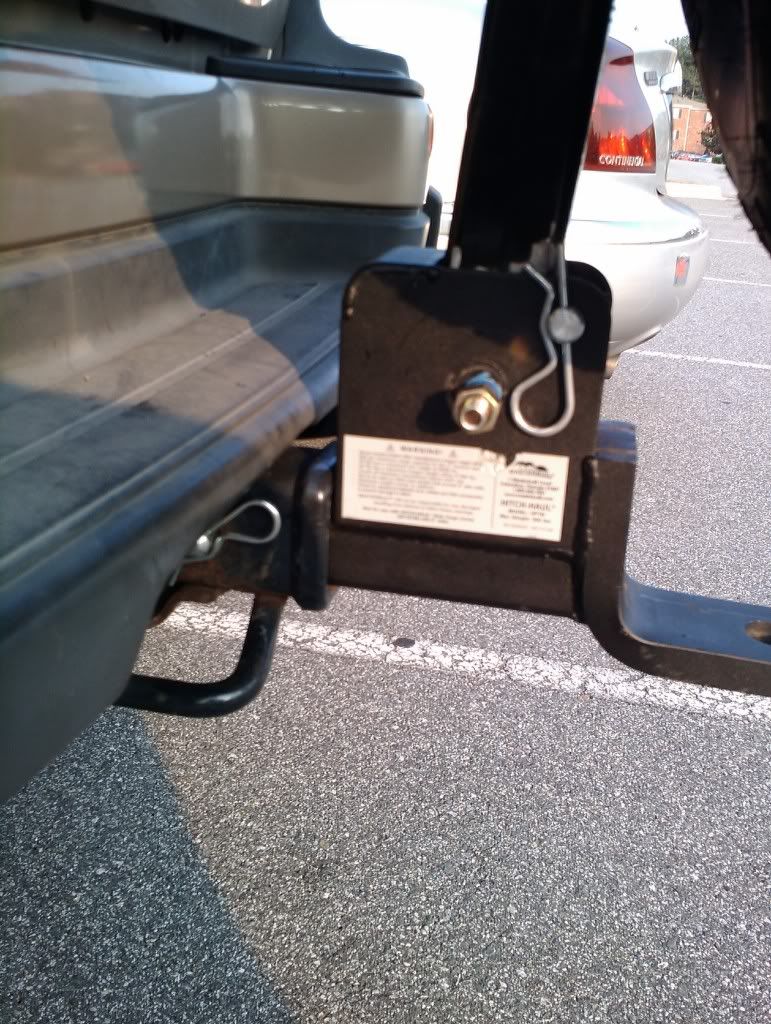
That hopefully illustrates where the play is. I am trying to think of something I can use to keep that from moving around.
I am afraid that if this thing clanks around back and forth that over time It'll start fatiguing welds some place either on the unit or on the hitch.
I'll have to check out the HW store tonight and see what I can come up with. Any ideas?
Also anyone who ran a similar setup for any extended period of time did you have any issues with things breaking?
-
snowmirage - Off-Roader
- Posts: 232
- Joined: Sun Jun 26, 2011 12:13 pm
- Location: MD, Baltimore
- Name: Brandon
- Vehicle Year: 2003
- Vehicle: Chevrolet TrailBlazer
- DriveTrain: 4WD w/ G80
You could drill a hole through the middle and insert a pin like the one holding it up, this should take care the problem and you may not even need the other pin so you could just move it over.
IF THE FISH STOP BITING... HUNT FOR SHELLS!!!
-

NC_IslandRunner - Moderator
- Posts: 3022
- Joined: Fri Dec 03, 2010 4:49 pm
- Location: NC, Sanford
- Name: Rory
- Vehicle Year: 2004
- Vehicle: Chevrolet TrailBlazer
- DriveTrain: 4WD w/ G80
- Rank: Offroad Rated
Shims. Get something like large fender washers, and see how many fill the majority of the gap. Place them so the hole is a bit above or below the rear lip and then sink a self tapping screw to hold them in place.
-
Trail X - Founder
- Posts: 9935
- Joined: Mon Sep 07, 2009 10:22 pm
- Location: VA, Roanoke
- Name: James Downing
- Vehicle Year: 2005
- Vehicle: Chevrolet TrailBlazer
- DriveTrain: 4WD w/ Aftermarket Locker
- Rank: Expedition Guide
61 posts
• Page 3 of 4 • 1, 2, 3, 4