Offroad Trailblazers and Envoys

winch carrier and rear Tire carrier

Any special projects involving a decent amount of fab work (bumpers, sliders, roof racks, etc)

by Karo » Wed Mar 23, 2011 4:51 pm

mikepeters1983 wrote:I would JD but some of us are not as lucky to be sitting state side or new our truck right now to do that let alone even have a cold :cheers: . Some of us are not even close to our rides. But measurements is take can be sent to have it fabbed up while we are gone and ready for the person when we get back. But I am just saying you know

Ahh, have seen it on the left side after reading your post (Location: AZ but right now in Afghan )
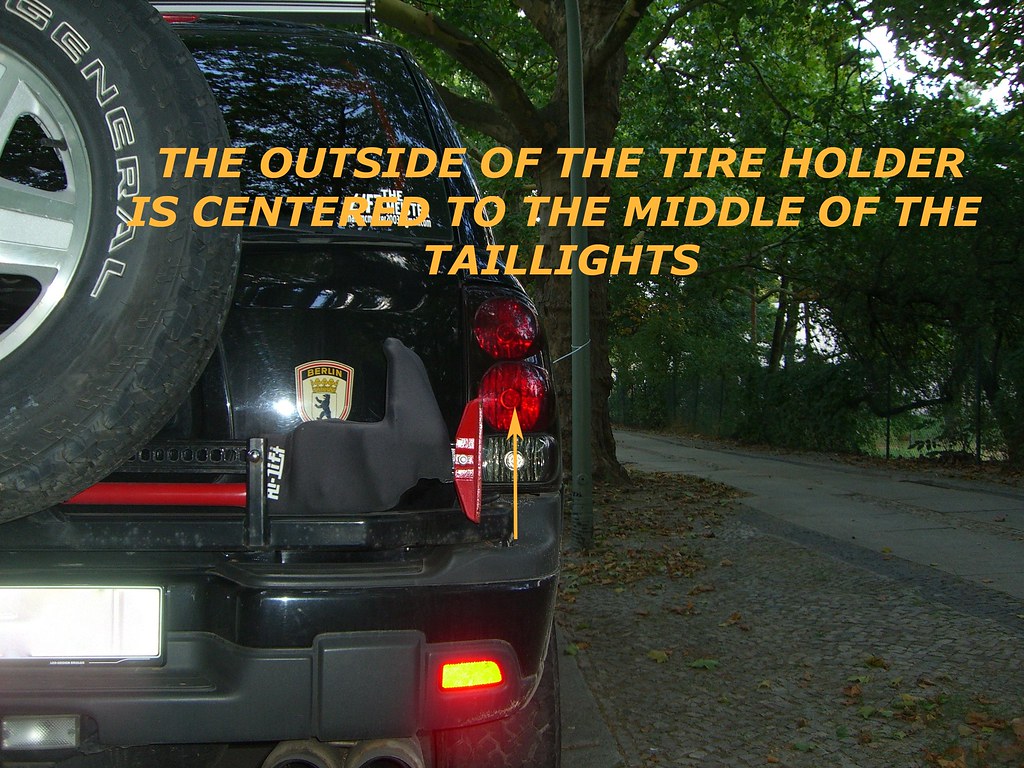
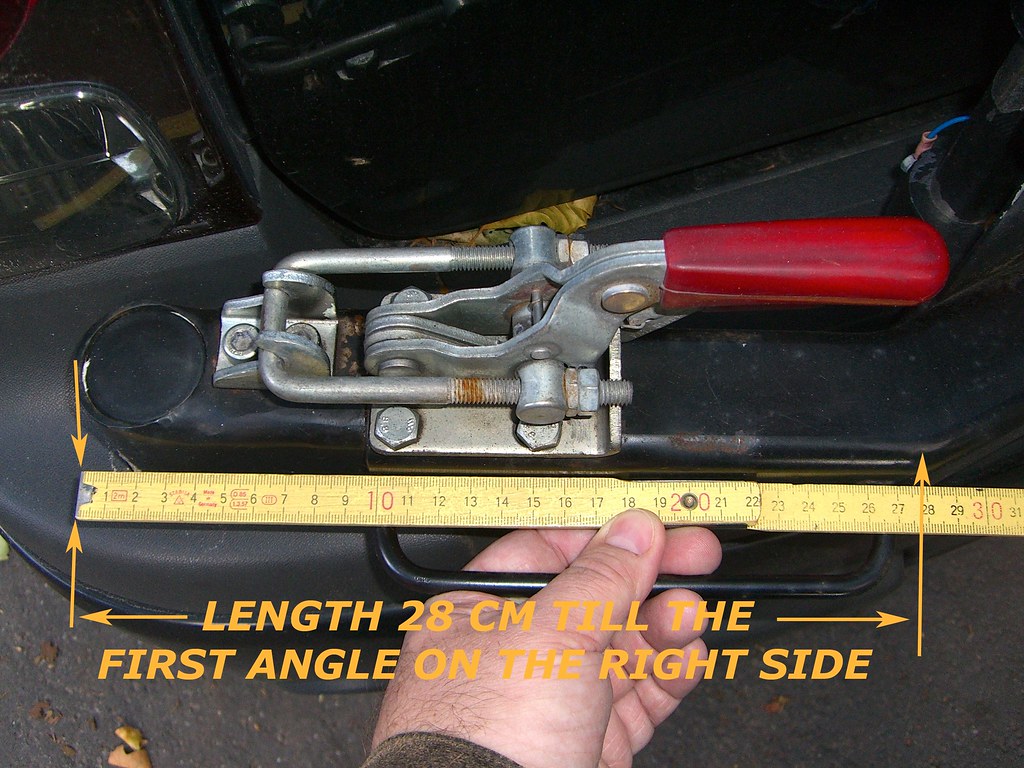
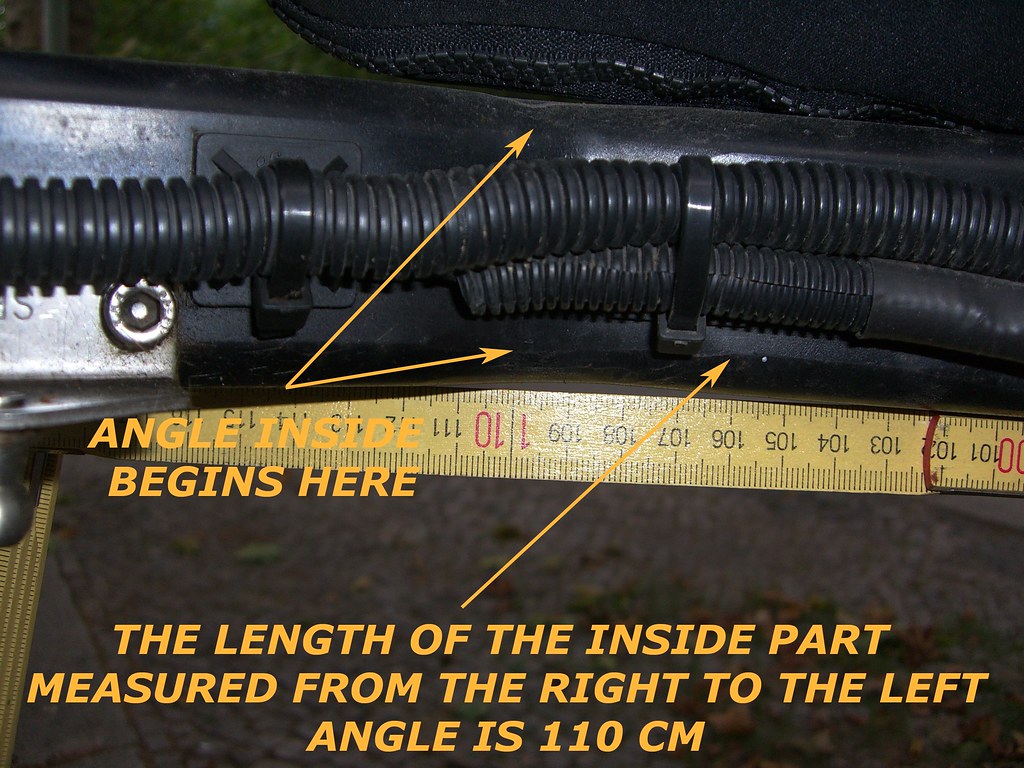
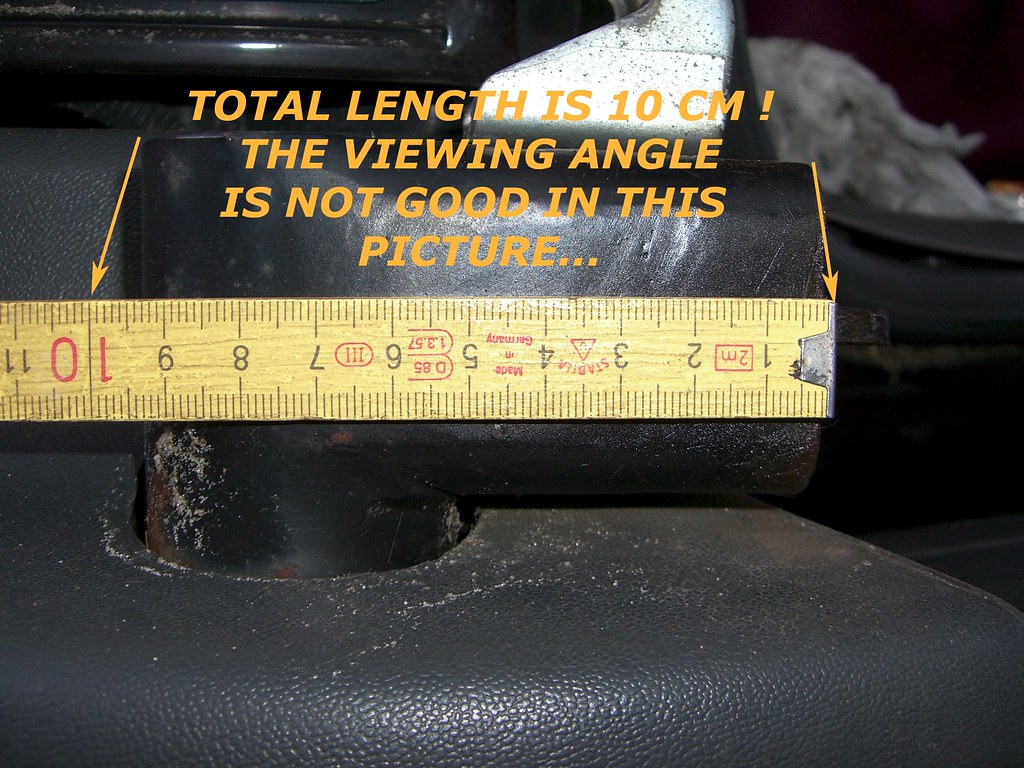
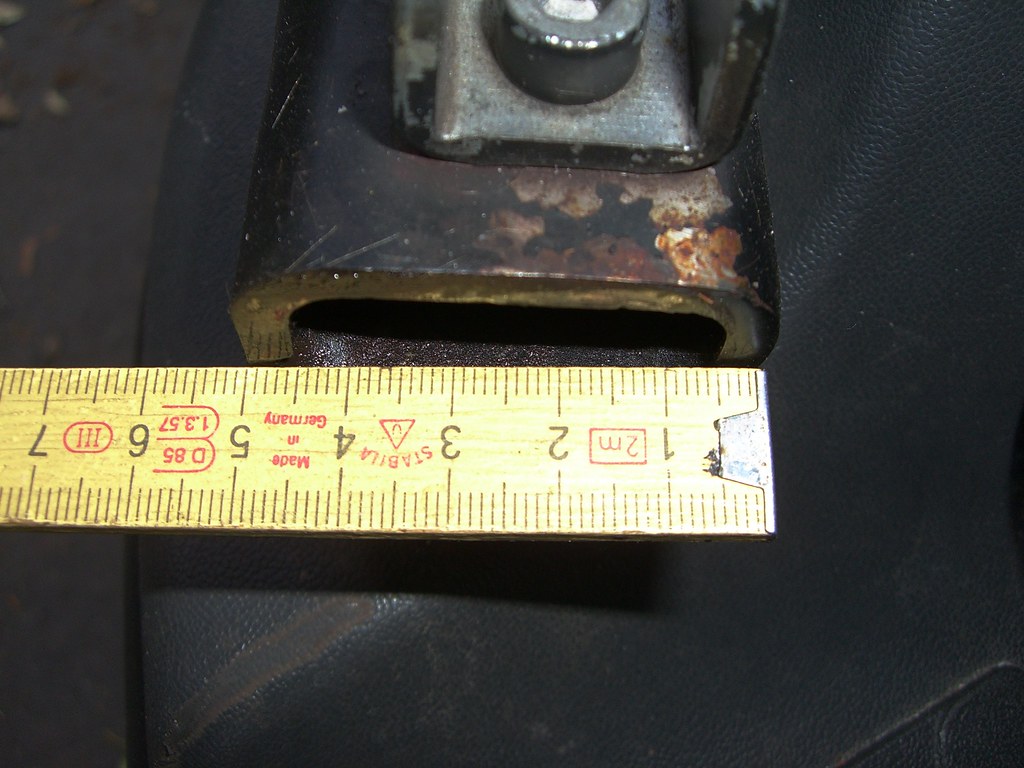
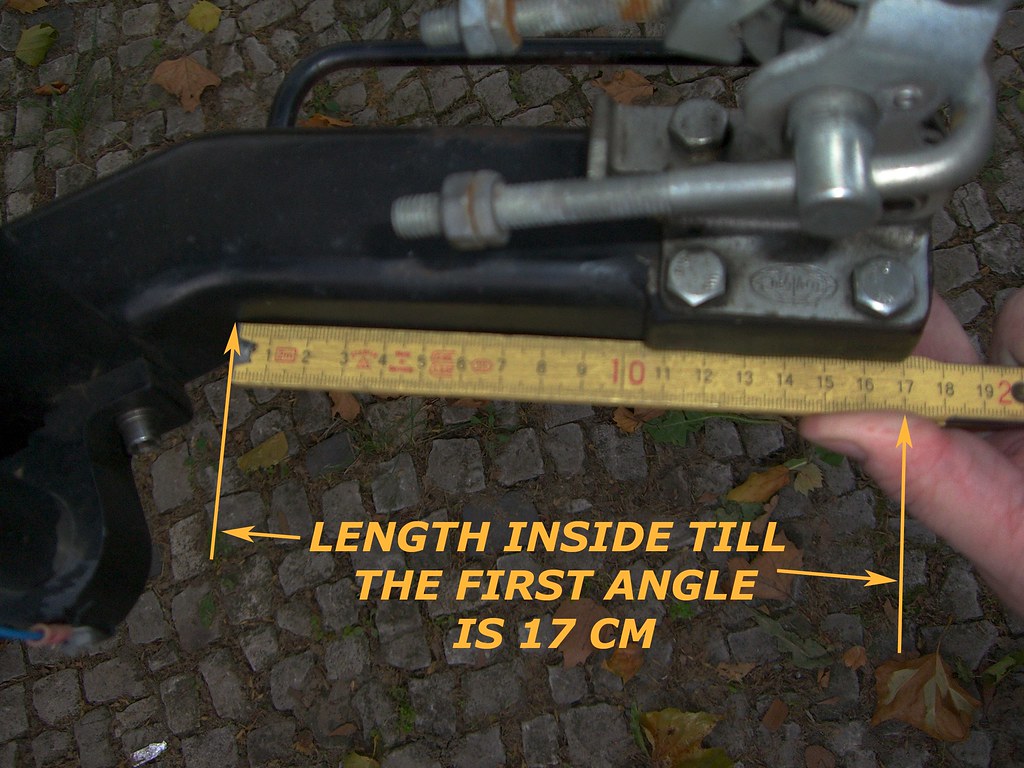
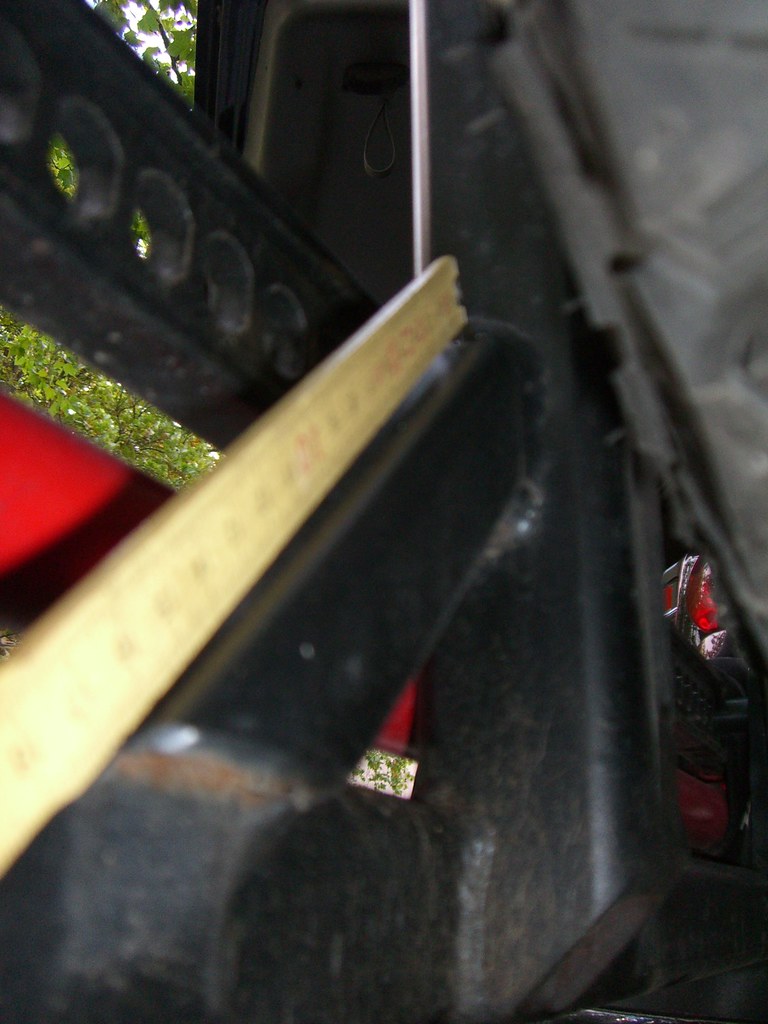
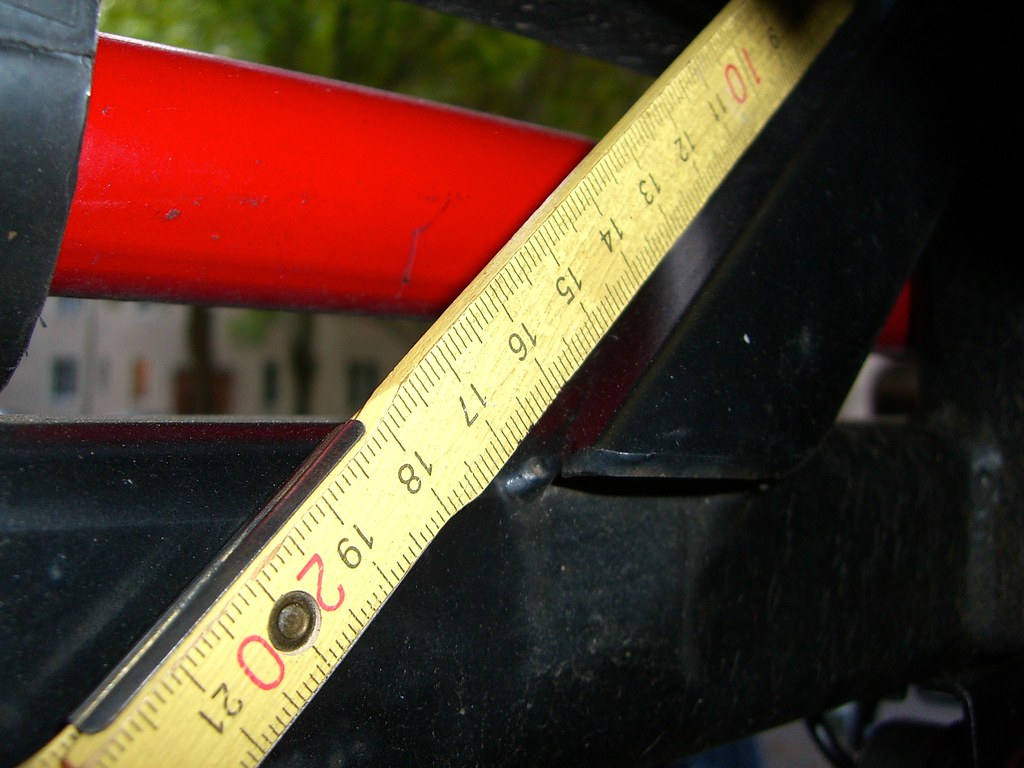
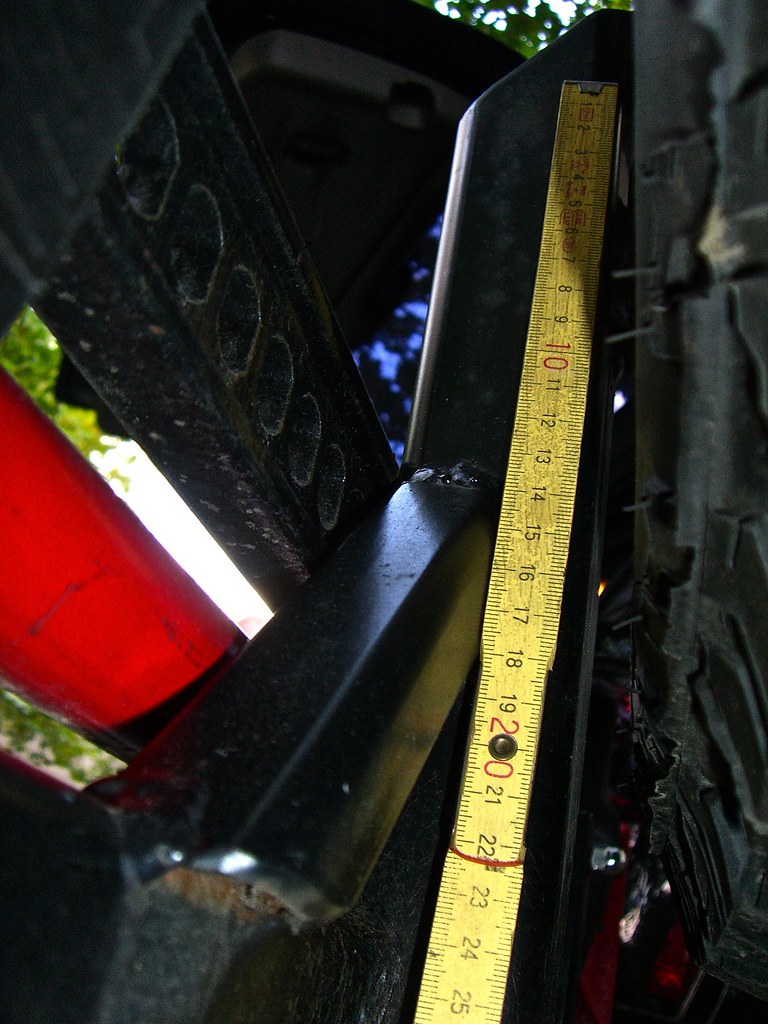
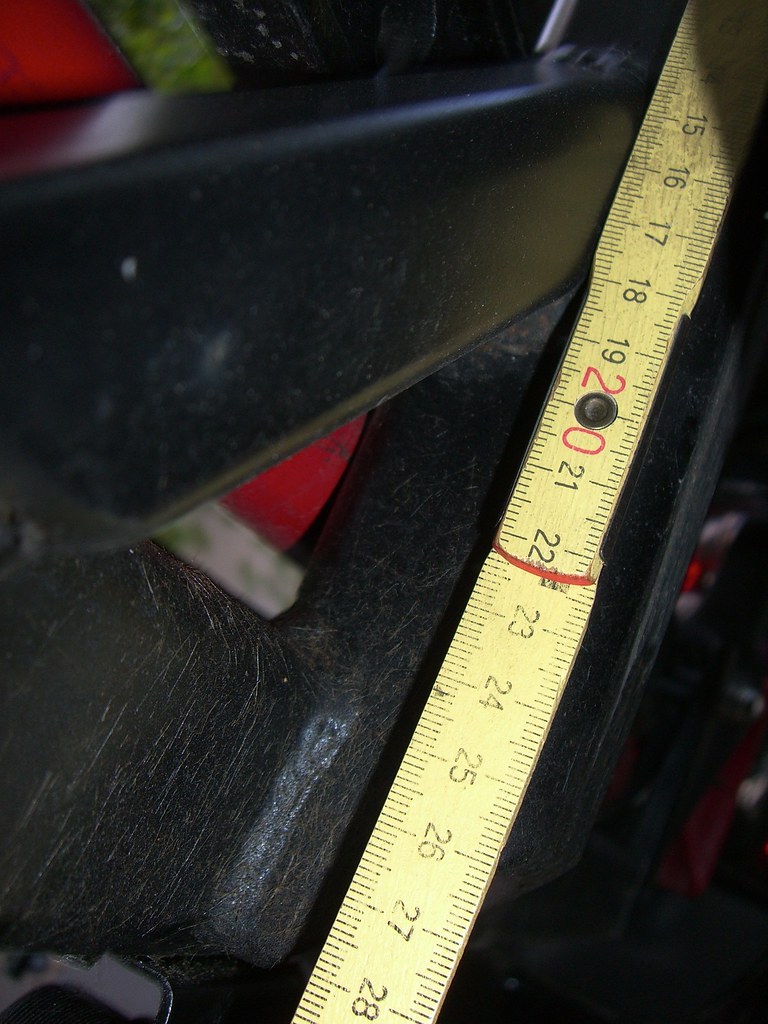
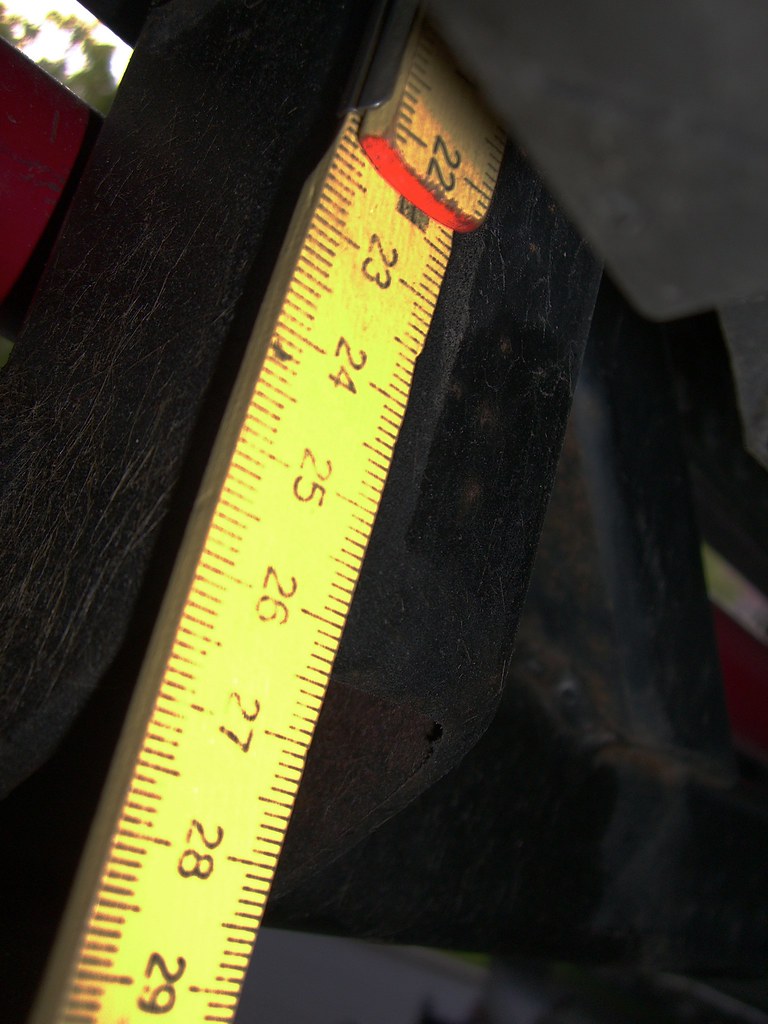
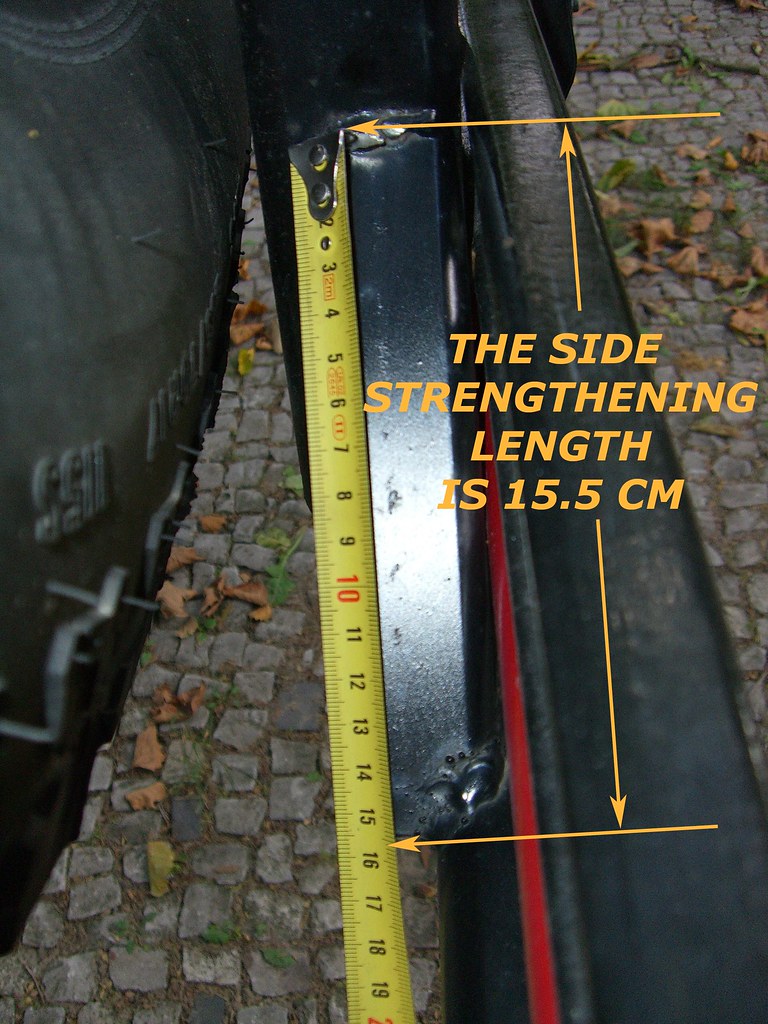
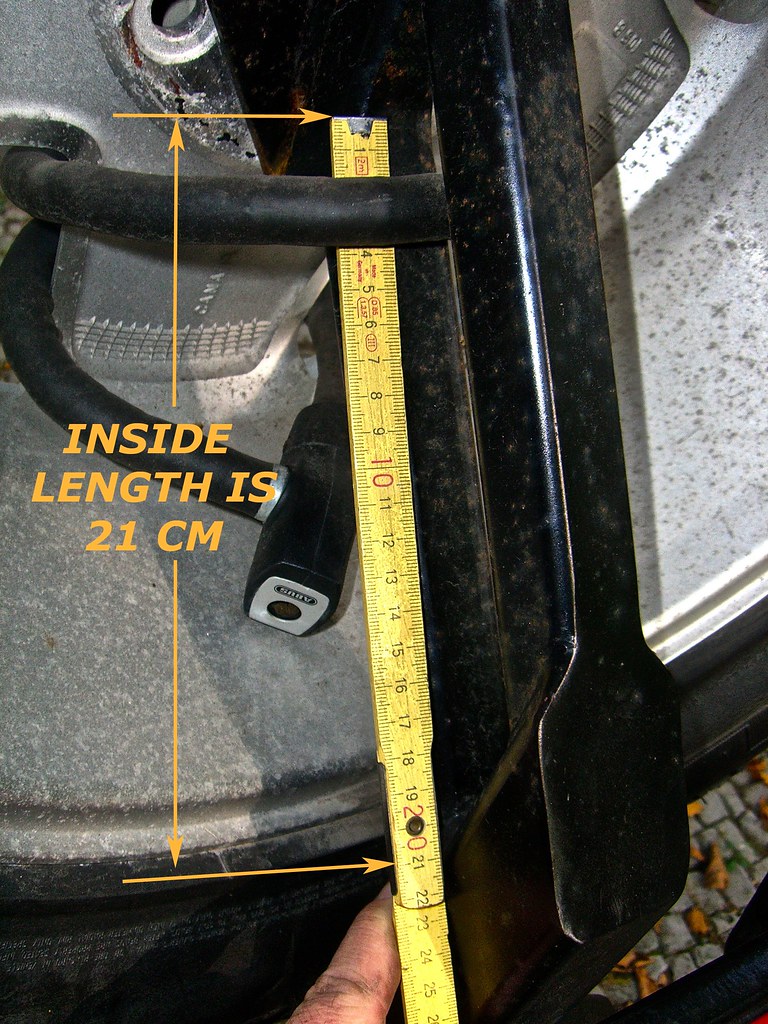
I´ll do my very best.. :cheers:

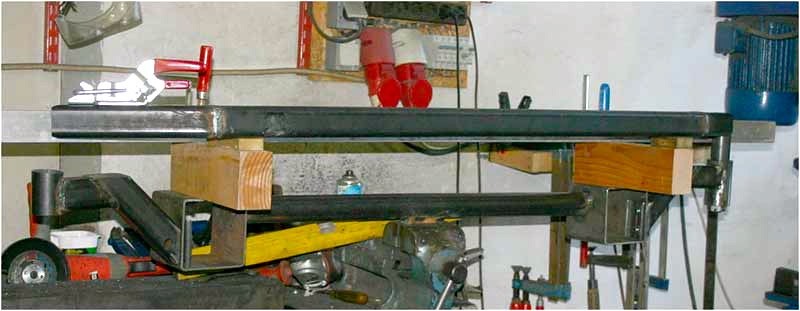
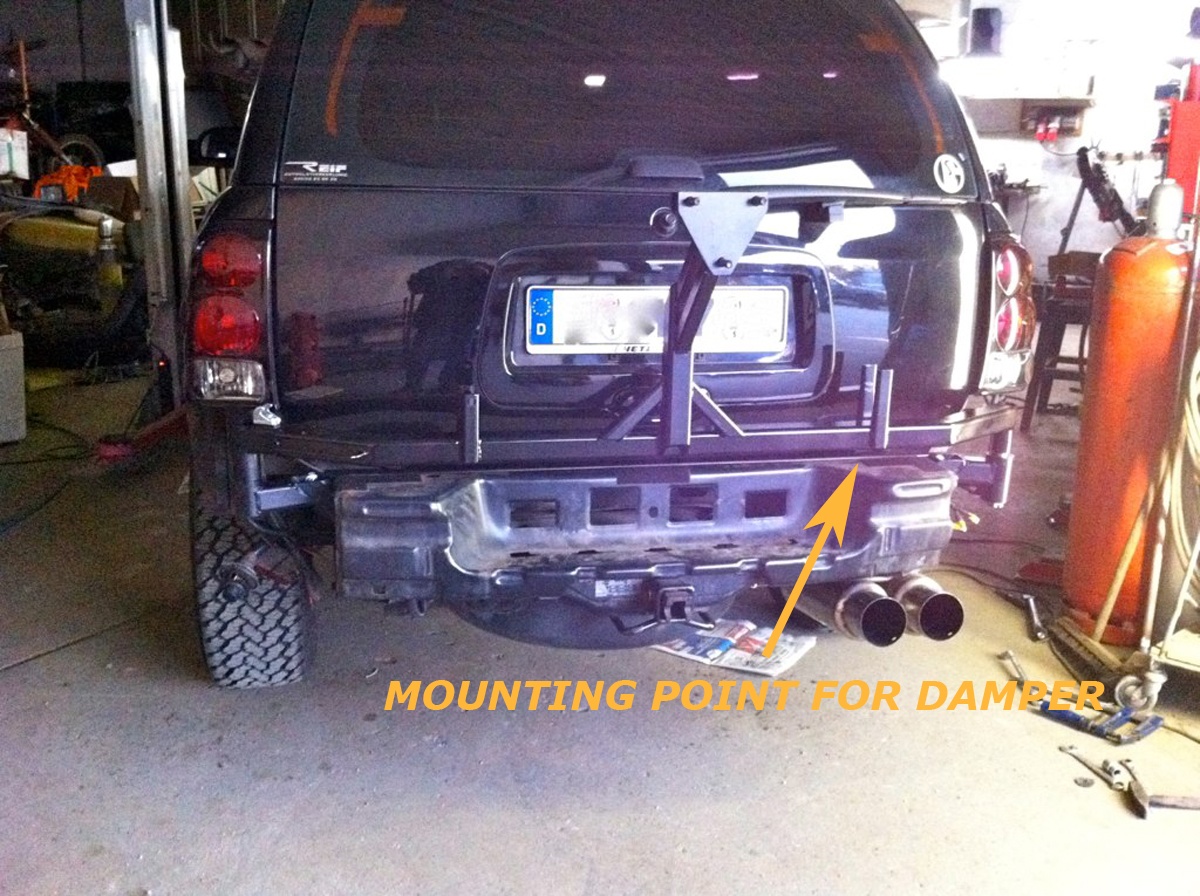
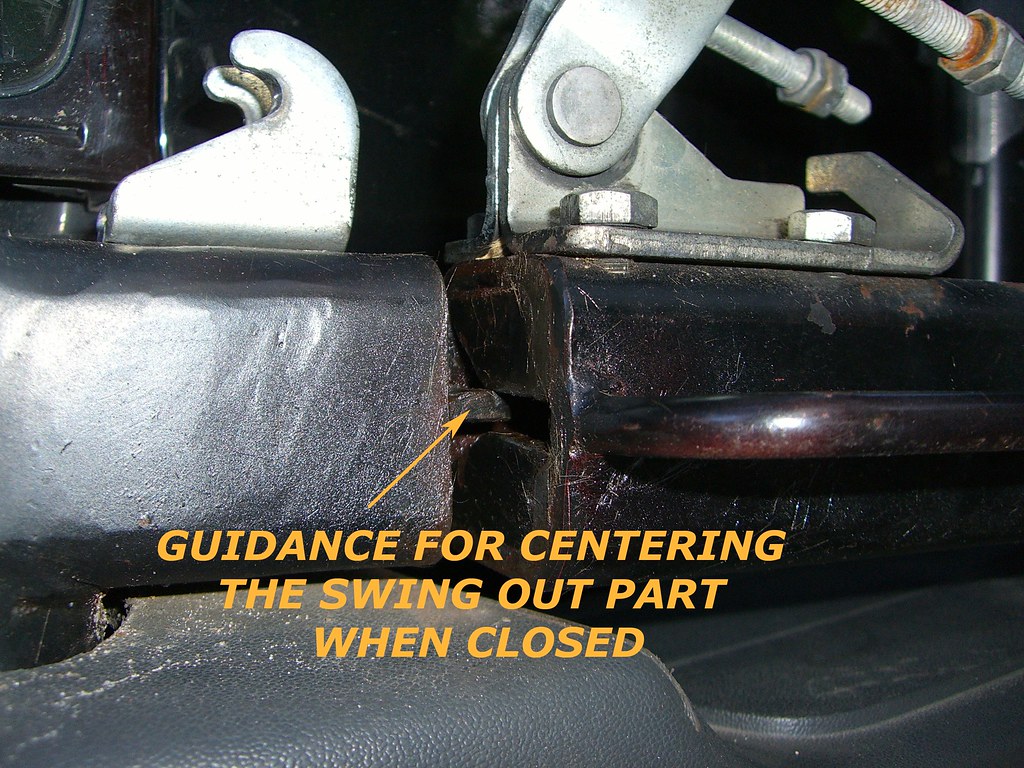
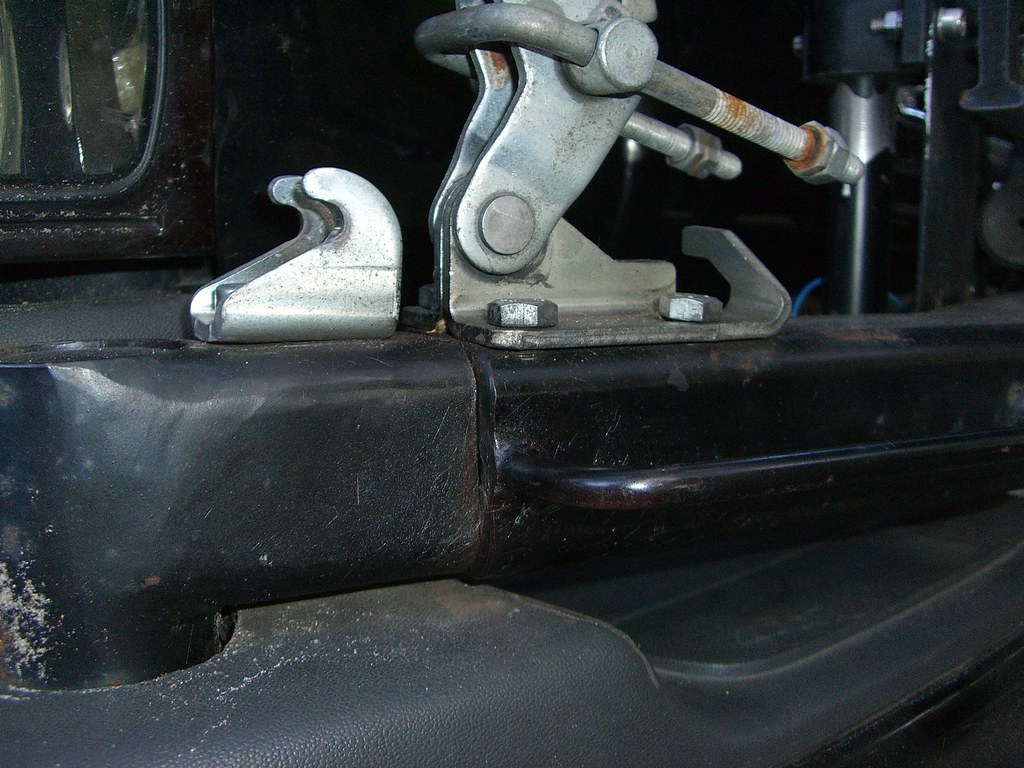
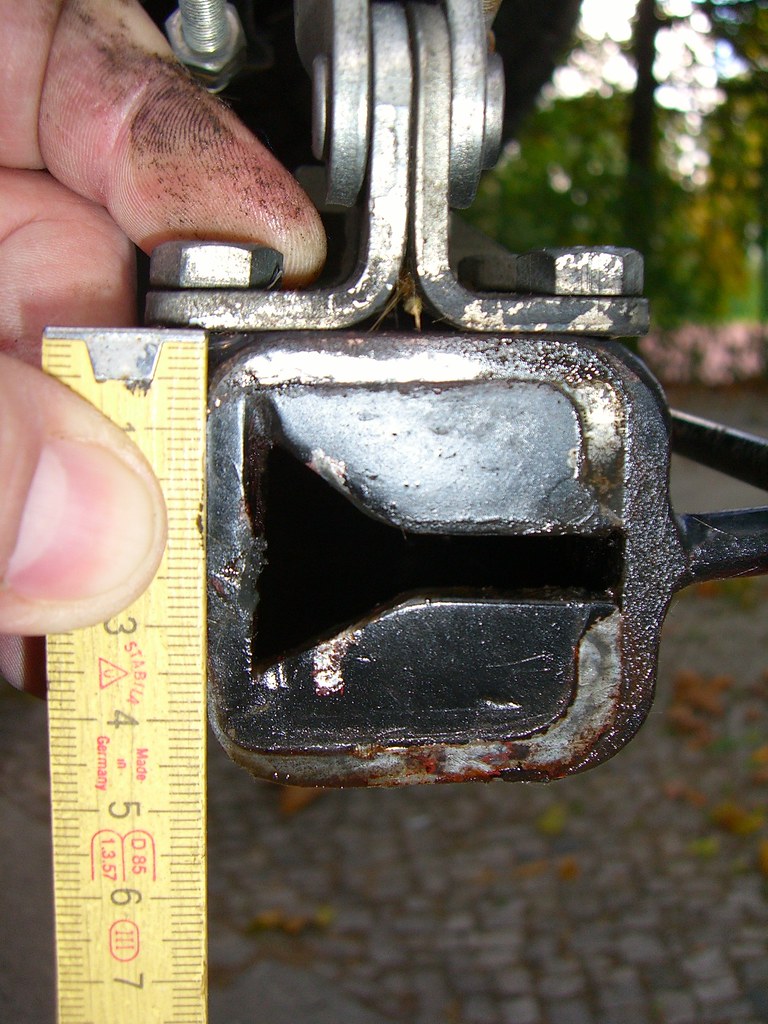
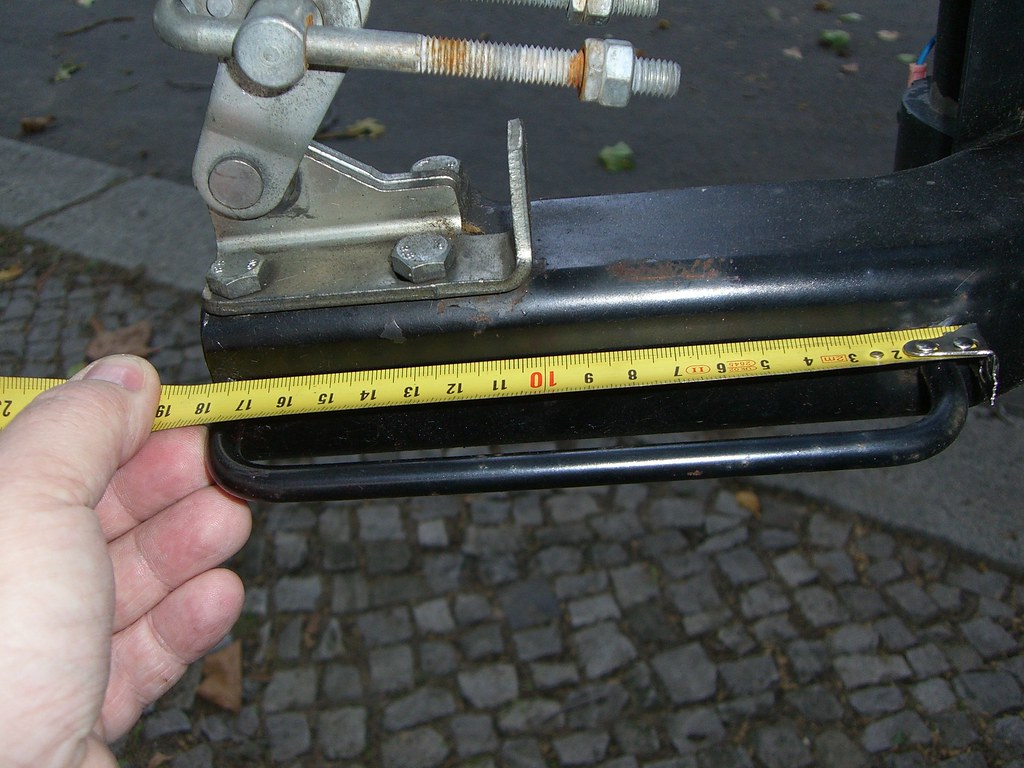
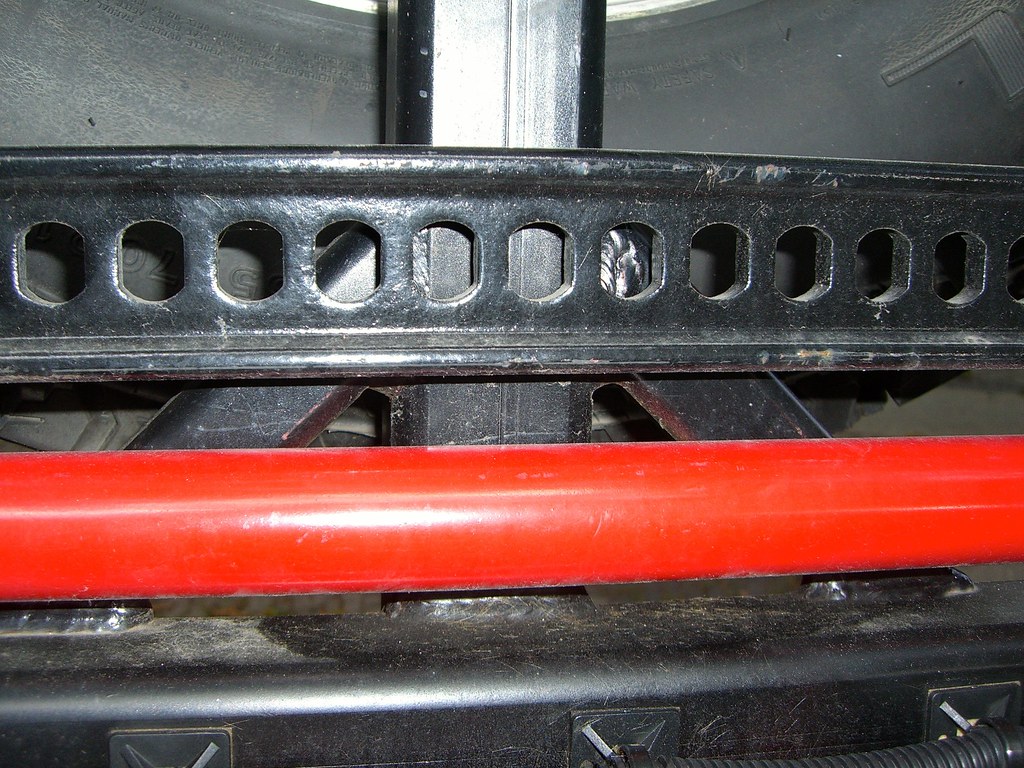
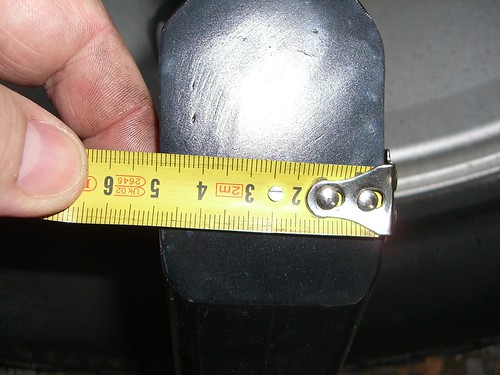
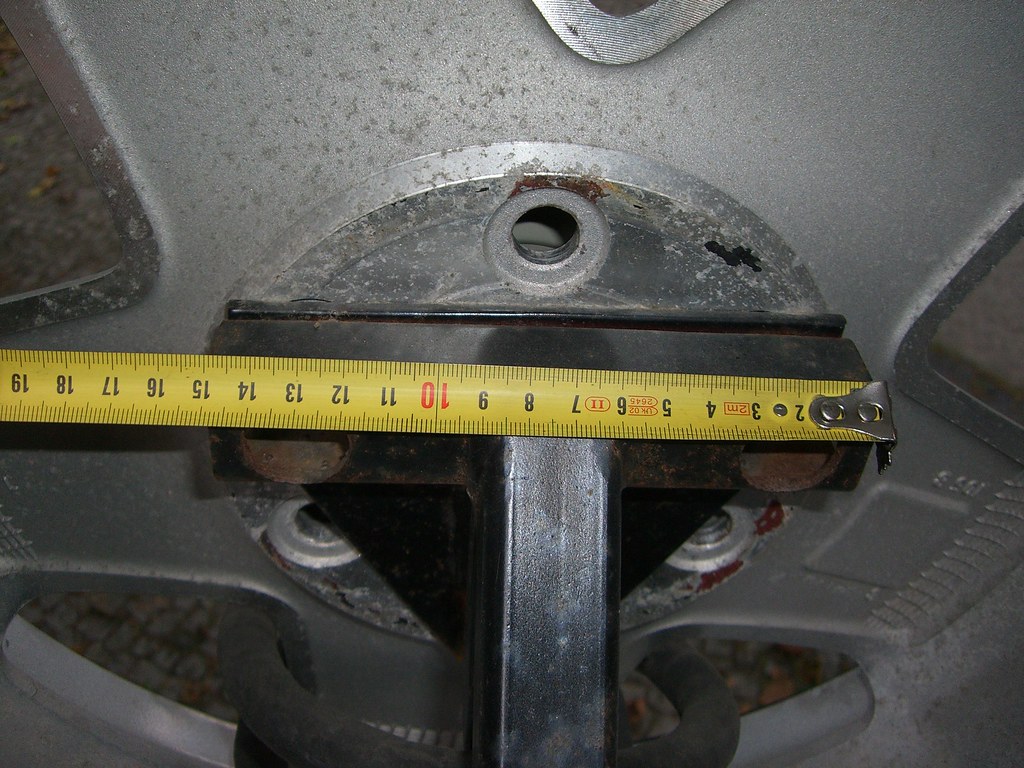
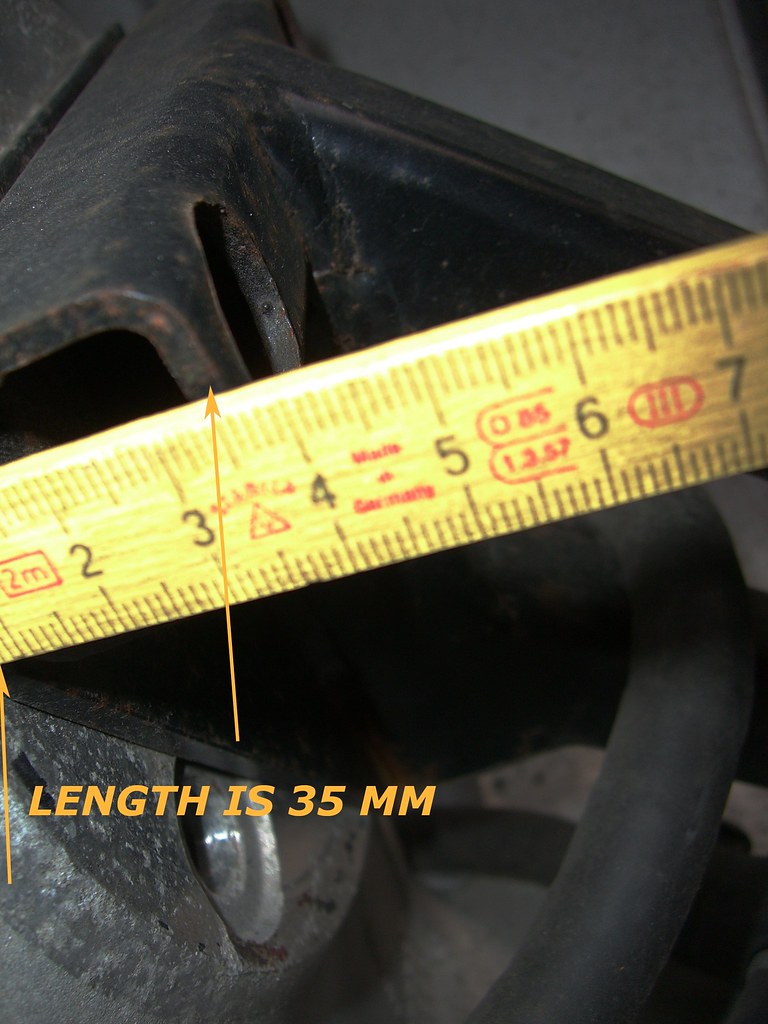
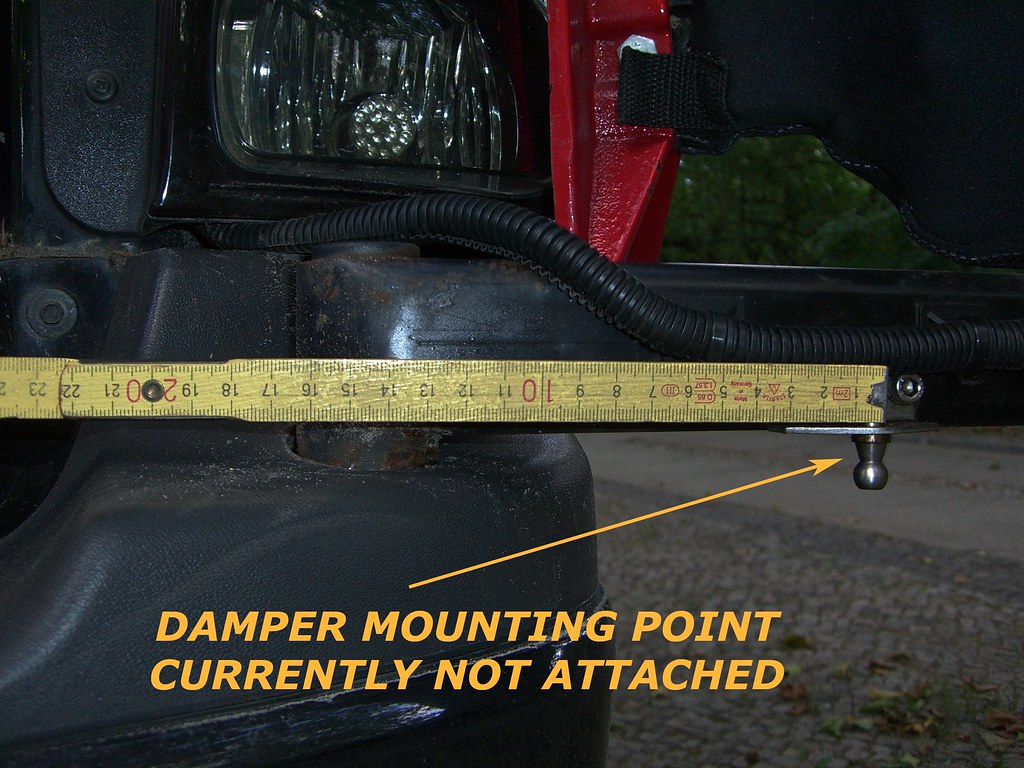
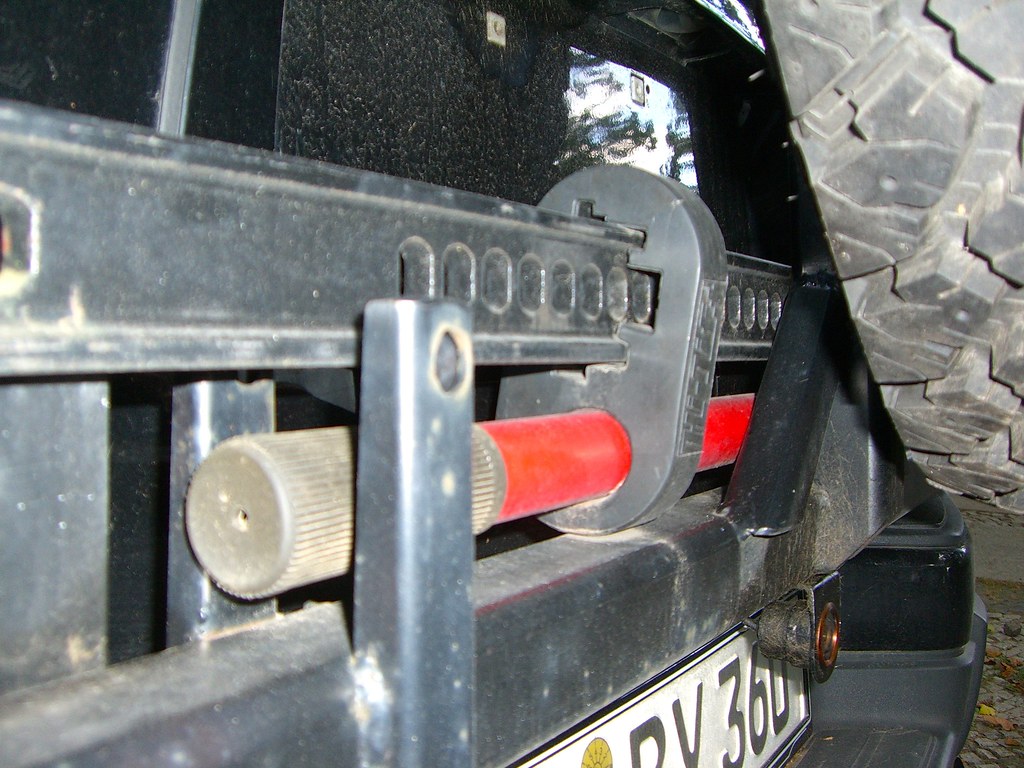
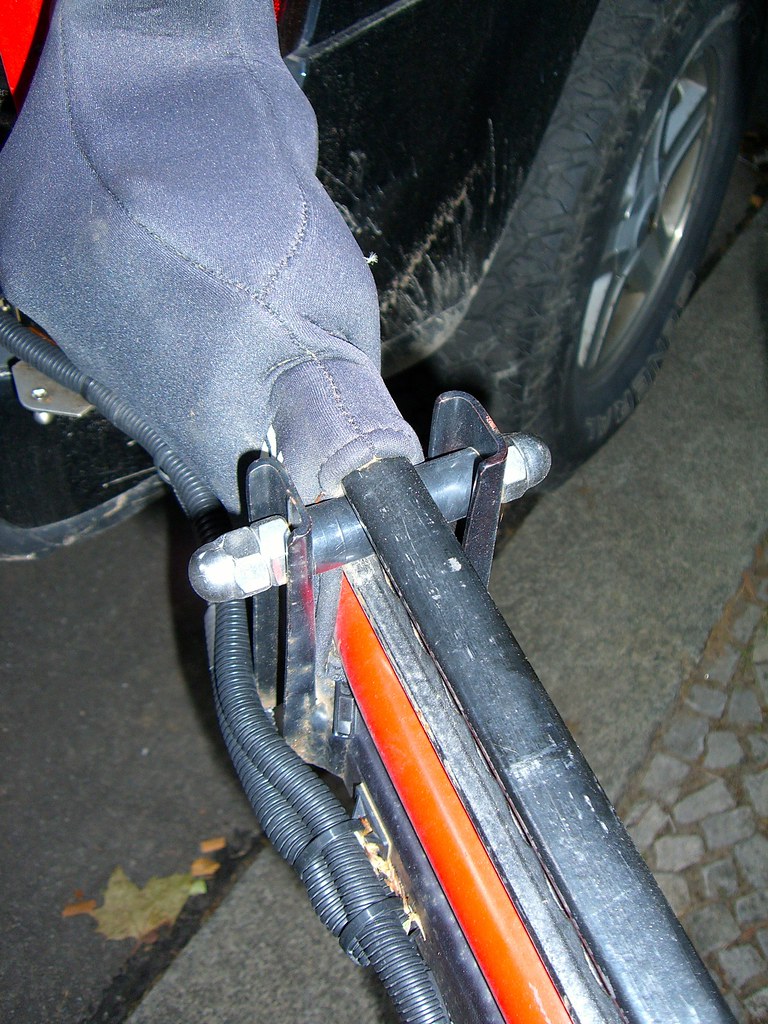
@JD: fairlead will be mounted direct to the Waag (you can see 2 mounting points at the Waag) and to the winch. Difficult to describe..
Karsten
Last edited by Karo on Wed Feb 13, 2013 10:00 am, edited 2 times in total.
User avatar
Karo
Trail-Blazer
 
Posts: 342
Joined: Fri Sep 11, 2009 3:02 am
Location: Berlin Germany 52°30'35.16"N, 13°15'31.99"E
Name: Karsten
Vehicle Year: 2002
Vehicle: Chevrolet TrailBlazer
DriveTrain: 4WD w/ G80
Rank: Trail Ready

by janesy86 » Wed Jun 01, 2011 2:45 pm

Karo, just wondering since I'm eventually thinking similar placement for a winch, but have you noticed any overheating with the winch where it is, blocking the radiator? And have to say again, nice work, well thought out for sure! :cheers:
Build Thread
Back to stock, had fun while it lasted...
janesy86
Veteran
 
Posts: 1291
Joined: Thu Sep 10, 2009 2:29 pm
Location: MA, Salem
Name: Nick Janes
Vehicle Year: 2007
Vehicle: Chevrolet TrailBlazer
DriveTrain: 4WD w/ G80
Rank: Offroad Rated

by Karo » Wed Jun 01, 2011 3:43 pm

No heat problems so far.

Nice looking bumper & waag combo on your Trailblazer, as you have a different kind of grill in the front you get much more air to cool even with a winch! :cheers:
Karsten
User avatar
Karo
Trail-Blazer
 
Posts: 342
Joined: Fri Sep 11, 2009 3:02 am
Location: Berlin Germany 52°30'35.16"N, 13°15'31.99"E
Name: Karsten
Vehicle Year: 2002
Vehicle: Chevrolet TrailBlazer
DriveTrain: 4WD w/ G80
Rank: Trail Ready

by janesy86 » Wed Jun 01, 2011 4:38 pm

Karo wrote:No heat problems so far.


Thanks for the feedback Karsten, when my wallet allows time for a winch, I'll try this location for sure. I don't want to have it on a receiver/ sticking out so far, so this will be the only location I can think of.

Also I saw the pic on the OS with lights mounted up, I may have to steal that idea as well. I want to keep them and that's a great spot to mount them.


Karo wrote:Nice looking bumper & waag combo on your Trailblazer, as you have a different kind of grill in the front you get much more air to cool even with a winch! :cheers:
Karsten


Thanks for the compliment, and yea possibly the different grille will allow for the extra air flow..


Nick
Build Thread
Back to stock, had fun while it lasted...
janesy86
Veteran
 
Posts: 1291
Joined: Thu Sep 10, 2009 2:29 pm
Location: MA, Salem
Name: Nick Janes
Vehicle Year: 2007
Vehicle: Chevrolet TrailBlazer
DriveTrain: 4WD w/ G80
Rank: Offroad Rated

by snowmirage » Fri Jul 22, 2011 1:19 pm

Your setup is truly amazing. Well done and thank you for taking the extra time to document what you have and share it with the rest of us for inspiration and ideas! Its greatly appreciated.

I am sure we all hope that someday we have the garage, tools, and skill to try projects like this :) I know I do!
User avatar
snowmirage
Off-Roader
 
Posts: 232
Joined: Sun Jun 26, 2011 12:13 pm
Location: MD, Baltimore
Name: Brandon
Vehicle Year: 2003
Vehicle: Chevrolet TrailBlazer
DriveTrain: 4WD w/ G80

by navigator » Fri Feb 01, 2013 11:29 am

Hi Karo, I was reviewing your thread and noticed that all the images are broken. Can you update them at some point?
"Please consider a search before posting. Folks on this site PIONEERED functional offroad use of these trucks."
The answer to many common lift questions can be found
here
My Build Thread
User avatar
navigator
Moderator
 
Posts: 4651
Joined: Wed Mar 09, 2011 10:16 am
Location: NC, Winnabow
Name: Chris
Vehicle Year: 2006
Vehicle: Chevrolet TrailBlazer
DriveTrain: 4WD
Rank: Trail Ready

by Karo » Mon Feb 11, 2013 3:43 pm

navigator wrote:Hi Karo, I was reviewing your thread and noticed that all the images are broken. Can you update them at some point?


I have tried to edit the post and get that error message when embedding the pictures:
"It was not possible to determine the dimensions of the image."

The pictures are hosted on flickr.
When replying to the thread it is possible to embed that picture like this:

Image

What I´m doing wrong? :scratch:
User avatar
Karo
Trail-Blazer
 
Posts: 342
Joined: Fri Sep 11, 2009 3:02 am
Location: Berlin Germany 52°30'35.16"N, 13°15'31.99"E
Name: Karsten
Vehicle Year: 2002
Vehicle: Chevrolet TrailBlazer
DriveTrain: 4WD w/ G80
Rank: Trail Ready

by navigator » Mon Feb 11, 2013 5:14 pm

when I copy the URL from your old images and paste into another tab it wants me to log into icloud.
when I try it from the pic above, it opens it in flickr.
"Please consider a search before posting. Folks on this site PIONEERED functional offroad use of these trucks."
The answer to many common lift questions can be found
here
My Build Thread
User avatar
navigator
Moderator
 
Posts: 4651
Joined: Wed Mar 09, 2011 10:16 am
Location: NC, Winnabow
Name: Chris
Vehicle Year: 2006
Vehicle: Chevrolet TrailBlazer
DriveTrain: 4WD
Rank: Trail Ready

by Karo » Mon Feb 11, 2013 5:52 pm

Yes that is correct, pictures on icloud are away. Therefore i had put them on flickr.
When embedding the flickr img url it tells me the error message about the image size as posted above.
So it is not possible to edit the post with the new image url from flickr.
Any idea?
User avatar
Karo
Trail-Blazer
 
Posts: 342
Joined: Fri Sep 11, 2009 3:02 am
Location: Berlin Germany 52°30'35.16"N, 13°15'31.99"E
Name: Karsten
Vehicle Year: 2002
Vehicle: Chevrolet TrailBlazer
DriveTrain: 4WD w/ G80
Rank: Trail Ready

by navigator » Tue Feb 12, 2013 8:59 am

I see what you mean now.
I tried to use your URL from your most recent pic and update your first post and saw the error in the preview tab.
Maybe James knows what might be going on.

Another thought is to load all the pics directly to offroadtb.com
"Please consider a search before posting. Folks on this site PIONEERED functional offroad use of these trucks."
The answer to many common lift questions can be found
here
My Build Thread
User avatar
navigator
Moderator
 
Posts: 4651
Joined: Wed Mar 09, 2011 10:16 am
Location: NC, Winnabow
Name: Chris
Vehicle Year: 2006
Vehicle: Chevrolet TrailBlazer
DriveTrain: 4WD
Rank: Trail Ready

by Gordinho80 » Tue Feb 12, 2013 10:42 am

What is the URL for the main folder where your pics are on Flickr?
Mario - Build Thread
User avatar
Gordinho80
Lifer
 
Posts: 2787
Joined: Tue Sep 08, 2009 9:27 am
Location: NJ, Jackson
Name: Mario Almeida
Vehicle Year: Other
Vehicle: Other Vehicle
DriveTrain: 4WD

by Trail X » Tue Feb 12, 2013 2:59 pm

Karsten, an error of "It was not possible to determine the dimensions of the image." normally means that there is an image in your post that has a broken link. Sorry, the error messages are not very clear sometimes.

Basically the software is trying to tell you that at least one of your photo links are broken. Normally, one error message shows up for each broken link. So if you have 5 broken image links in your post, you'll get 5 of those error messages (if I recall). So if you have 5 images in your post, but one link is broken, it will give you only a single error message. Either way, it will not allow you to post or edit a post while you have a broken image link - it won't even display a preview of the working images. Take a look at all of your image links in your edited post, and see if there's something fishy with one of them.

Hope this helps.
8-) Build Thread | ExPo Build | YouTube Videos
Not all who wander are lost. -Tolkien
User avatar
Trail X
Founder
 
Posts: 9935
Joined: Mon Sep 07, 2009 10:22 pm
Location: VA, Roanoke
Name: James Downing
Vehicle Year: 2005
Vehicle: Chevrolet TrailBlazer
DriveTrain: 4WD w/ Aftermarket Locker
Rank: Expedition Guide

by Karo » Wed Feb 13, 2013 7:25 am

James that has helped.. I only edited for the test the first picture, so it is clear that it shows the error message.
Edited the first post and now it shows up the pictures. :cheers:

Will do the others later..
Thanks to all.
Karsten
User avatar
Karo
Trail-Blazer
 
Posts: 342
Joined: Fri Sep 11, 2009 3:02 am
Location: Berlin Germany 52°30'35.16"N, 13°15'31.99"E
Name: Karsten
Vehicle Year: 2002
Vehicle: Chevrolet TrailBlazer
DriveTrain: 4WD w/ G80
Rank: Trail Ready

by navigator » Wed Feb 13, 2013 9:19 am

looks great Karsten!
"Please consider a search before posting. Folks on this site PIONEERED functional offroad use of these trucks."
The answer to many common lift questions can be found
here
My Build Thread
User avatar
navigator
Moderator
 
Posts: 4651
Joined: Wed Mar 09, 2011 10:16 am
Location: NC, Winnabow
Name: Chris
Vehicle Year: 2006
Vehicle: Chevrolet TrailBlazer
DriveTrain: 4WD
Rank: Trail Ready

by VelociJuris » Wed Feb 20, 2013 3:36 am

Great work
VelociJuris
Cruiser
 
Posts: 10
Joined: Tue Jan 01, 2013 3:40 pm
Name: Matthew
Vehicle Year: 2007
Vehicle: GMC Envoy
DriveTrain: 4WD

by VelociJuris » Thu Mar 07, 2013 9:05 pm

Wow nice job!
VelociJuris
Cruiser
 
Posts: 10
Joined: Tue Jan 01, 2013 3:40 pm
Name: Matthew
Vehicle Year: 2007
Vehicle: GMC Envoy
DriveTrain: 4WD

by Darkrider_LS » Sun Apr 14, 2013 1:32 pm

Do you happen to have any close up pics of the hinge on the tire carrier? cant really see where its mounted.
Darkrider_LS
Cruiser
 
Posts: 32
Joined: Thu Nov 22, 2012 2:47 am
Name: Chris
Vehicle Year: 2008
Vehicle: Chevrolet TrailBlazer
DriveTrain: 4WD

by Karo » Wed Oct 02, 2013 3:49 pm

I have to update this thread with some more informations about the dimensions of the carrier. Some guys have asked me in the past if i can take some measurements.
So I have taken some more pictures with more details.

The complete pictures taken can be found here on Flickr for reference (pictures are much bigger):
http://www.flickr.com/photos/83431476@N05/sets/72157636123084976/

Here are the pictures edited with photoshop for the measurements in higher quality like above:
http://www.flickr.com/photos/83431476@N05/sets/72157636123690245/

Okay first let me say that the measurements are not complete and that I have to remove the rear bumper somewhere in the future to get measurements from the parts behind the bumper. So this will be my first answer about the measurements and others will follow but please don´t push me as I have not really much time with 2 kids and another baby girl will follow in october. Feel free to ask for some more details if you are missing something, but look at the pictures int the Flickr Albums first please.

Okay here we go, the first pictures shows what is under or behind the bumper, I haven´t taken any measurements so far. I have to remove the bumper for adding a kind of plate on the top of the reinforcement bar with the hitch in it on the top of the right side to stiffen up the mounting point of the damper for the swing out part. Oh man that sounds complicated but it isn´t..

Image

Image

You can see the hinge is mounted on the right side with the nut facing dow. I wouldn´t have wanted it to cover the rear taillight, so I went this way.
In the next picture you can see I have marked the middle of the taillights with some tape to get the measurements for both sides of the carrier ending in that position.

Image

Image

Image

The outside parts of the carrier left and right are angled, the middle part has a length of 110cm.

Image

Image

The part on the left side which mounts to the frame and that holds the fastener for the destaco is pictured here:

Image

Image

Image

Image

Image

The left side of the swing out part is shown in this picture with the destaco mounted:

Image

Image

For the guys that have some taillight guards I have the information that these won´t fit if the destaco is mounted on top of the swing out. You have to mount them on the side where the grip is mounted on mine. I have to change that somewhere in the future to get my taillight guards mounted.

Image

Image

The extended part for the tire holder some more pictures:

Image

Image

Image

Image

Image

Image

Image

Image

Image

Image

Image

Image

Image

Image

Image
Last edited by Karo on Wed Oct 02, 2013 4:10 pm, edited 1 time in total.
User avatar
Karo
Trail-Blazer
 
Posts: 342
Joined: Fri Sep 11, 2009 3:02 am
Location: Berlin Germany 52°30'35.16"N, 13°15'31.99"E
Name: Karsten
Vehicle Year: 2002
Vehicle: Chevrolet TrailBlazer
DriveTrain: 4WD w/ G80
Rank: Trail Ready

by Karo » Wed Oct 02, 2013 4:08 pm

I have mounted my rear view camera, the CB firestick Antenna and the High Lift to the carrier. The high Lift is rattle free, no voice from the back.

Image

Image

Image

Image

Image

If you have a bigger tire size you must extend the part where the rim mounts to the holder, my idea was to get a additional wheel hub spacer / adapter and have a spare on trails.
In germany we have no chance to mount a jerry can to the holder it is not street legal here. I only could mount it to my roof carrier with some special holder. So I never had to mount it to the tire carrier, but i don´t think it will be to difficult. If you build some similar carrier take your own measurements!

So feel free to discuss what can be done better as I will make some changes to the carrier later.
Karsten
User avatar
Karo
Trail-Blazer
 
Posts: 342
Joined: Fri Sep 11, 2009 3:02 am
Location: Berlin Germany 52°30'35.16"N, 13°15'31.99"E
Name: Karsten
Vehicle Year: 2002
Vehicle: Chevrolet TrailBlazer
DriveTrain: 4WD w/ G80
Rank: Trail Ready

by RyansTBLS » Wed Oct 02, 2013 7:21 pm

Amazing! :awesome:
The problem with the Trailblazer is, people think you know what you're doing.
User avatar
RyansTBLS
Addict
 
Posts: 623
Joined: Sun Feb 12, 2012 7:00 pm
Location: OR, La Grande
Name: Ryan
Vehicle Year: 2006
Vehicle: Chevrolet TrailBlazer
DriveTrain: 4WD
Rank: Trail Ready

PreviousNext

Return to Fab Work