Offroad Trailblazers and Envoys

Mason10198's Build ~ 2005 Chevy Trailblazer LS

These are lifted trucks and have posted trip reports showing travel on non-stock passable trails.

Moderator: navigator

by mason10198 » Thu Sep 24, 2015 1:03 am

. :flex dirty: :flex dirty: :flex dirty: .

2005 Chevrolet Trailblazer LS
4x4 w/ Eaton E-Locker & 4.56 Gearing

CURRENT PROGRESS
(as of July 2017)

CLICK HERE FOR PHOTO ALBUM

DSC_3105.jpg

Suspension // Drivetrain Modifications:
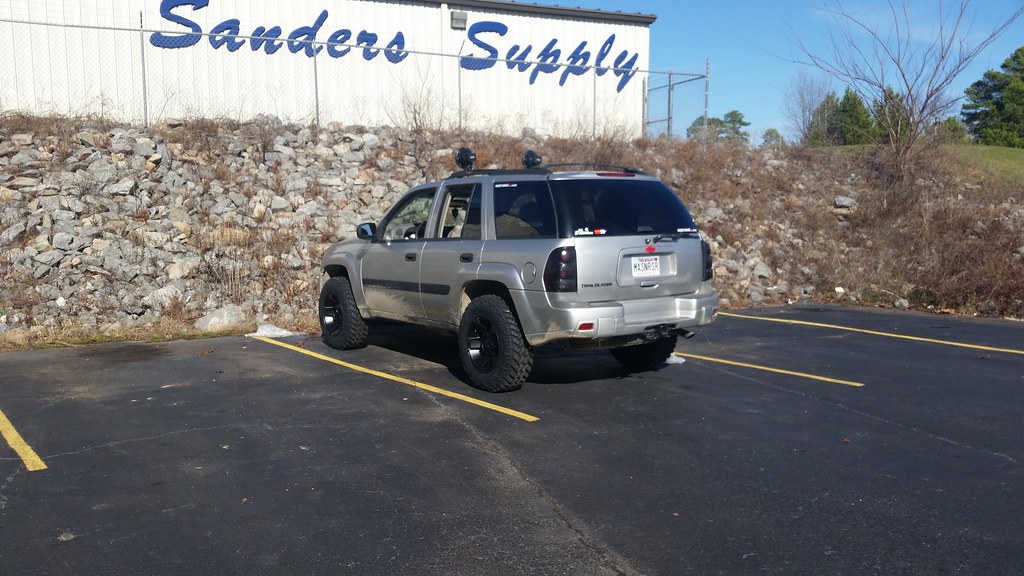
    35/12.5/17 BFG KM3's on 17x9 KMC Rockstar XD811's
    MarkMC's 1.5 Wheel Spacers
    MarkMC's 3" Suspension Lift
    GM '87 Front Coil Springs
    GM Z71 Tahoe Rear Coil Springs
    Fox Racing 2.0 Rear Shocks
    Massive Speed Systems Rear Control Arms/Panhard
    8.6" EXT Axle Swap
    Both differentials - complete overhaul and rebuilt w/ 4.56
    USPowertrain AWD Disconnect
    Flipped UCAs
    Hayden Transmission Oil Cooler
    Custom Swaybar Quick-Disconnects
AWD Disconnect Rebuild
Suspension Bushings - Prothane
Engine Modifications:
    Custom Tune ~ PCMofNC
    Oversized MOPAR Radiator & Mech. Fan Combo
    H/O 250A Alternator
    "Big 3 Upgrade"
Exterior Modifications:
    Home-Built MDB Steel Winch Bumper
    Homemade Rear Swing Bumper
    Modded BlueOx Towing Baseplate
    MarkMC's 3" Body Lift
    50" LED Bar (Mike JR's Brackets)
    LED Rock Lights
    3' Firestik II
    PA System
    Fender trimming for 35" tires
    Home-made steel oilpan skidplate (basic replica of MDB design)
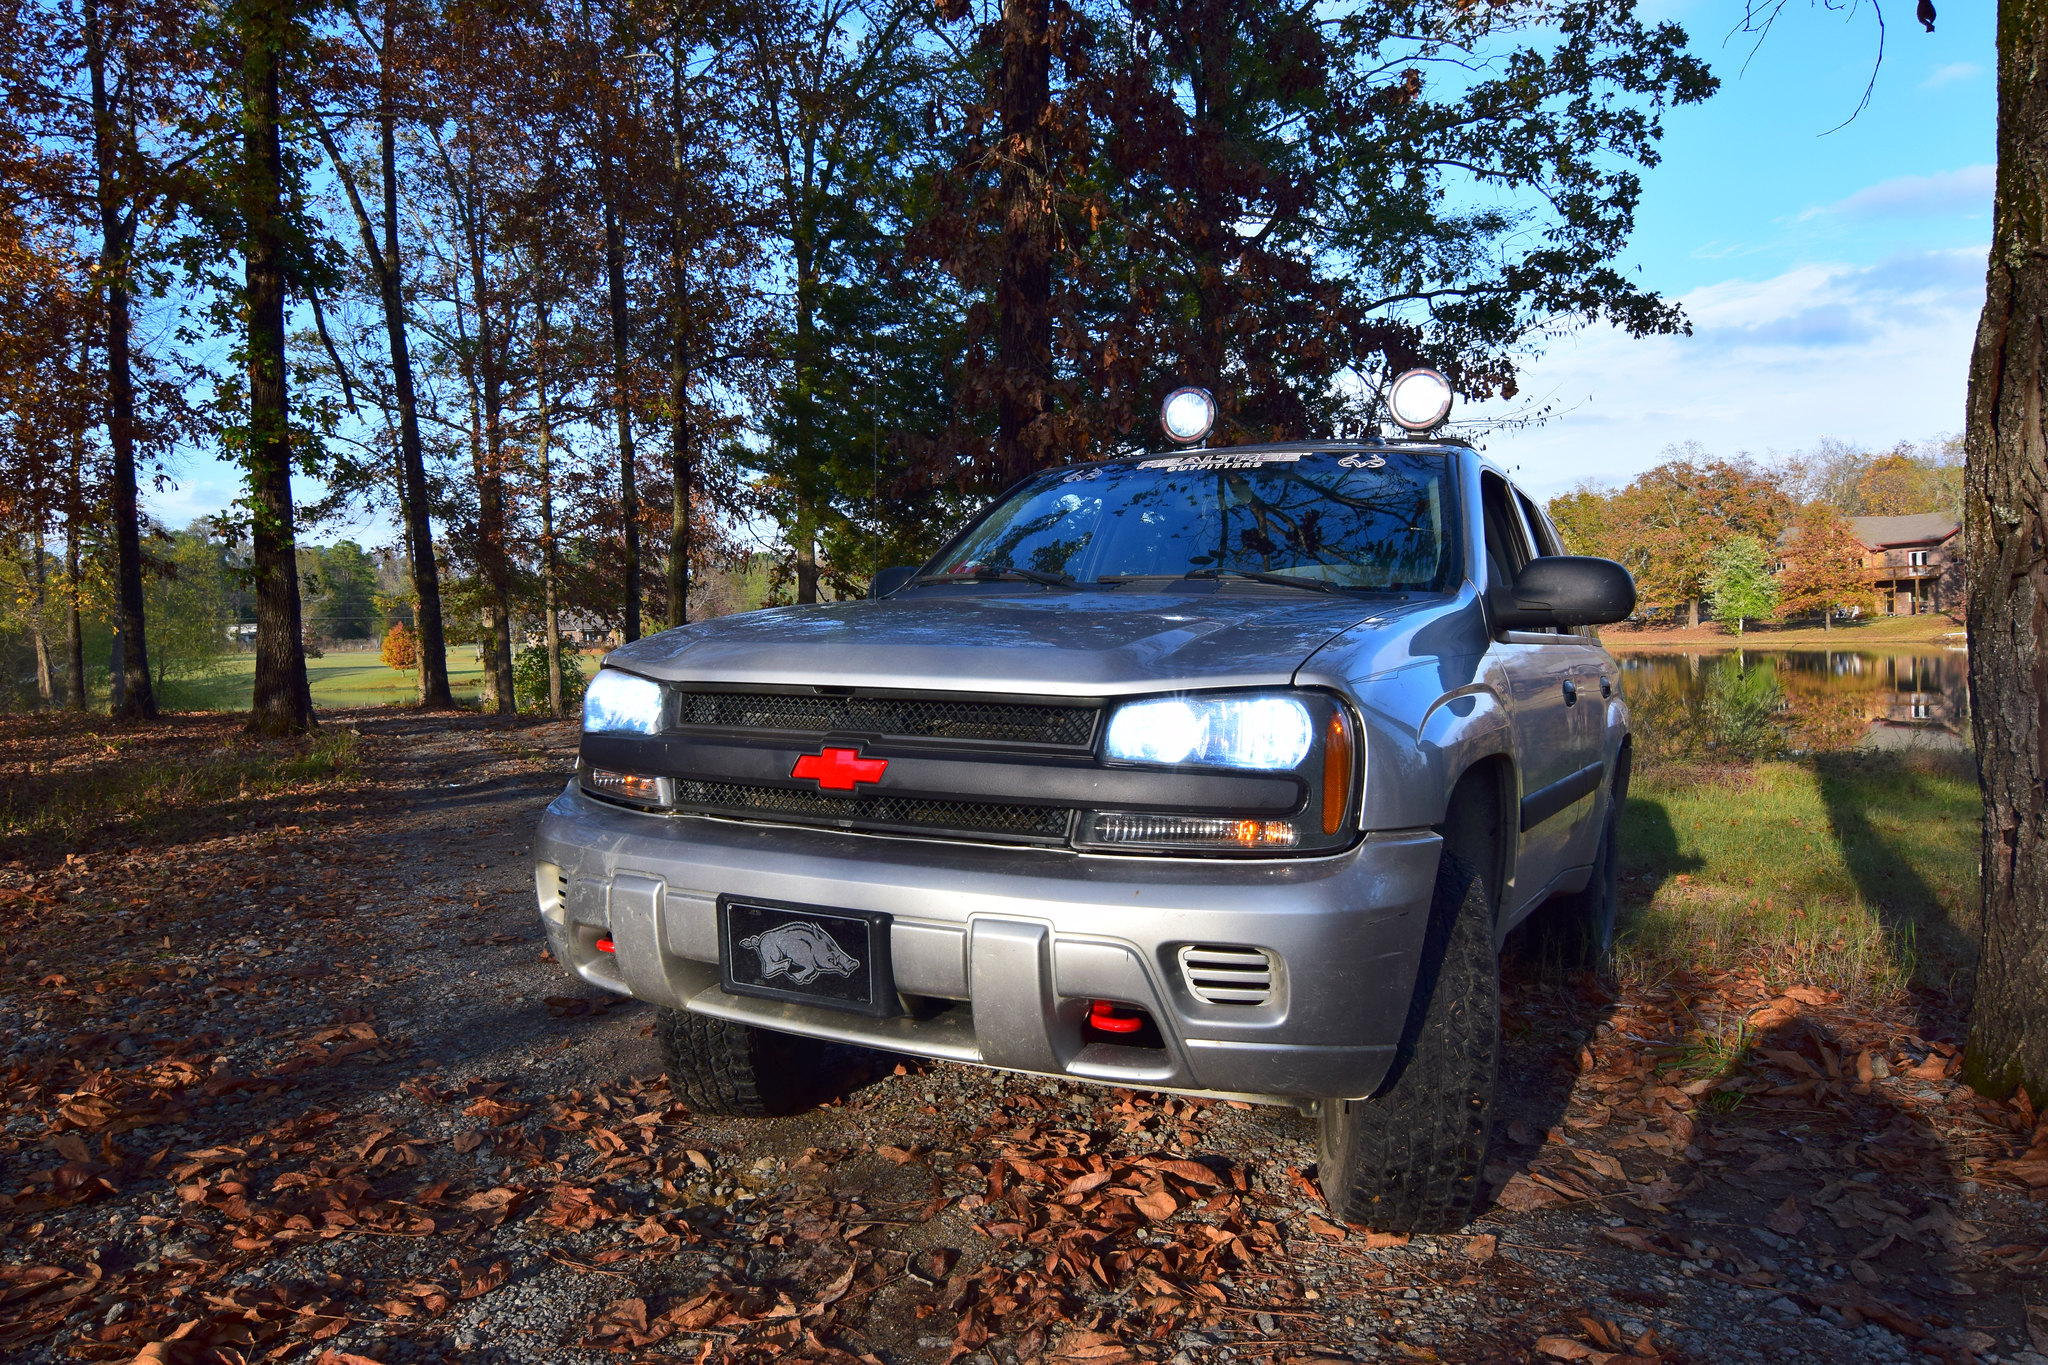
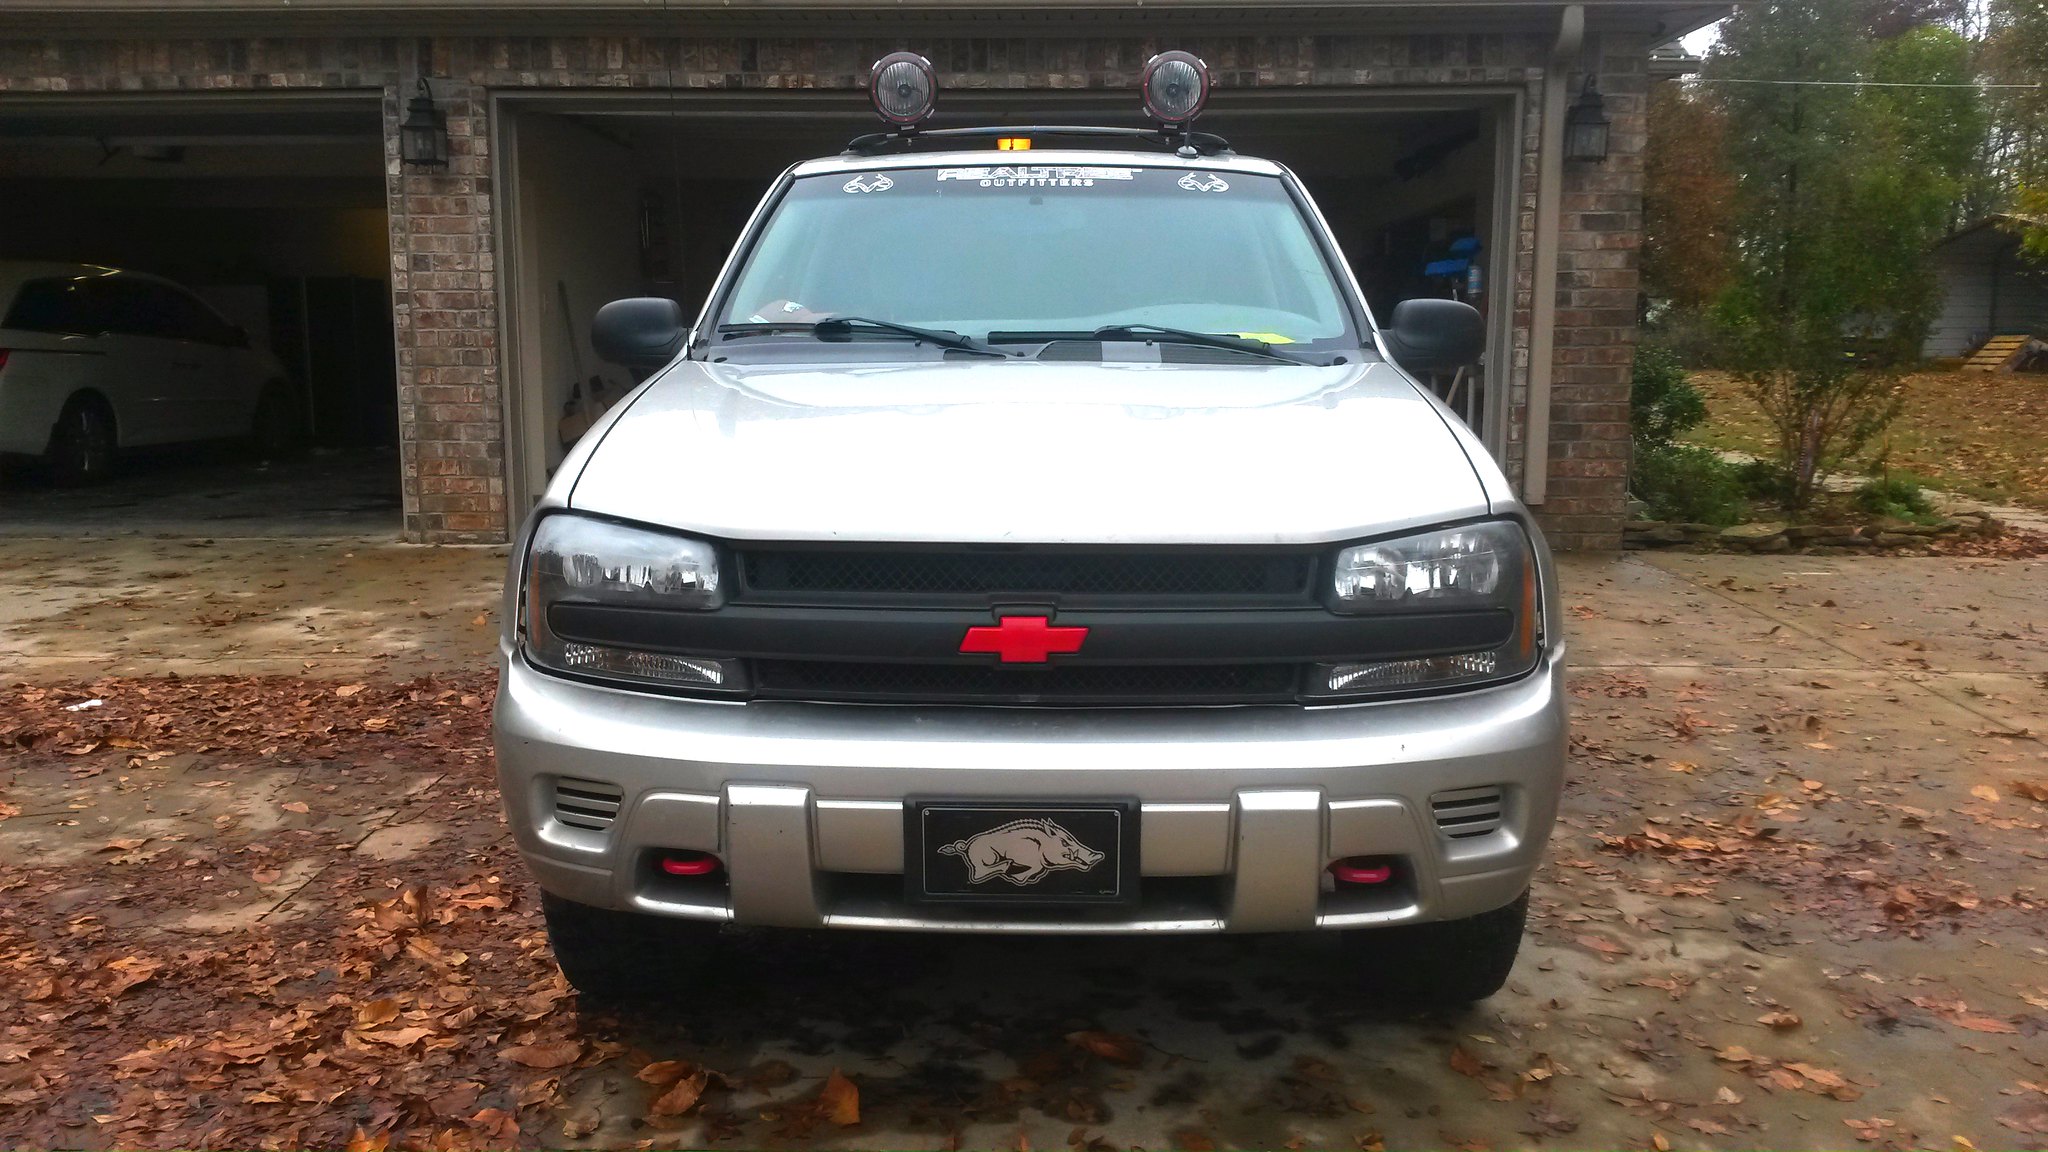
    Realtree Outfitters windshield decal
    Chrome/trim painted flat black w/ red accents
Interior Modifications:
    ALL NEW CARPET (June 2017)
    Cobra 29 LX CB Unit
    Elocker Controller Switch
    ScanGaugeII
    Complete Custom LED Lighting Conversion
    JVC Head Unit
    2x10in Crossfire Subwoofers @ 500w RMS each
    Misc. GoPro Mounts on windshield, rear windows, passenger seat, etc.
    Lots of trim/paneling painted black (I know... but it looks cool!)
Electrical Modifications:
    Dual Battery Setup
    Custom Quad-Beam headlight mod
    Duracell AGM starting battery
Recovery:
    Smittybilt X20 Series 10,000LB Winch (front bumper)
    Badland 9,000LB Receiver-Mounted Winch (quick-disconnectable)
    D-ring Shackles on Bumper
    Various Tree & Tow Straps
    Trucker chains
    And WAY too much gear and tools to list here
Last edited by mason10198 on Mon Oct 26, 2015 12:51 am, edited 17 times in total.
User avatar
mason10198
Moderator
 
Posts: 504
Joined: Thu Sep 17, 2015 11:49 pm
Location: AR, Bryant
Name: Mason
Vehicle Year: 2005
Vehicle: Chevrolet TrailBlazer
DriveTrain: 4WD w/ Aftermarket Locker
Rank: Offroad Rated

by mason10198 » Thu Sep 24, 2015 11:30 am

This was right before driving off the lot
1.jpg
1.jpg (36.72 KiB) Viewed 43554 times

2.jpg
2.jpg (34.32 KiB) Viewed 43554 times

New 245 Delta A/Ts on the way home from lot
3.jpg

4.jpg

Next, gutted out interior and did some major cleaning. The previous owner wasn't vert clean lol
5.JPG

Painted the bowtie for some accent
6.jpg

Installed DD JVC Unit
8.jpg

Installed HID headlights
9.jpg

10.jpg
Last edited by mason10198 on Tue Sep 29, 2015 11:56 pm, edited 1 time in total.
User avatar
mason10198
Moderator
 
Posts: 504
Joined: Thu Sep 17, 2015 11:49 pm
Location: AR, Bryant
Name: Mason
Vehicle Year: 2005
Vehicle: Chevrolet TrailBlazer
DriveTrain: 4WD w/ Aftermarket Locker
Rank: Offroad Rated

by mason10198 » Tue Sep 29, 2015 9:46 am

Painted my rims and center pop-covers black. Instructions can be found here.

20150927_104132.jpg

20150928_214821.jpg
User avatar
mason10198
Moderator
 
Posts: 504
Joined: Thu Sep 17, 2015 11:49 pm
Location: AR, Bryant
Name: Mason
Vehicle Year: 2005
Vehicle: Chevrolet TrailBlazer
DriveTrain: 4WD w/ Aftermarket Locker
Rank: Offroad Rated

by mason10198 » Wed Sep 30, 2015 1:34 pm

Just finished installing marks 3in lift spacers. Can't really tell much by the pictures, but in person it looks wonderfully great!
uploadfromtaptalk1443634396493.jpg
uploadfromtaptalk1443634363091.jpg


~Sent from Tapatalk for Android~
User avatar
mason10198
Moderator
 
Posts: 504
Joined: Thu Sep 17, 2015 11:49 pm
Location: AR, Bryant
Name: Mason
Vehicle Year: 2005
Vehicle: Chevrolet TrailBlazer
DriveTrain: 4WD w/ Aftermarket Locker
Rank: Offroad Rated

by mason10198 » Mon Oct 05, 2015 9:51 am

After lifting the suspension, the front CV shafts stressed out and started leaking on both sides. On the drivers side, Diff fluid was everywhere, and on the passenger side there was grease slinging all over everything.
DSC_0001 (1).JPG
drivers side

DSC_0004.JPG
passenger side


I purchased new CV shafts and oil seals to fix this. I got the drivers side shaft installed okay, and proceeded to remove the shaft on the passenger side to do the same thing. When I pulled the shaft, all of the bearings fell out of the 4WD disconnect housing and I could visibly see that it was toast.
DSC_0010 (1).JPG
4WD disconnect bearings are toast

I wasn't in the mood to get inside that thing, so I called some local stores to see if I could just pick up the entire disconnect housing. The cheapest I could find it was $700, and that was a no-can-do for me. I pulled up the 4WD Disconnect Rebuild Page, and searched up the seals and bearings I would need to rebuild it. I got the parts and tore into it, and here's a pic of (whats left of) the bearings I found.
DSC_0014.JPG
bad passenger side bearing (left) vs okay drivers side bearing (right)

I took the whole thing apart, degreased it, and rebuilt the entire housing with new seals and bearings.
DSC_0015.JPG
cleaning the parts

DSC_0016.JPG
mostly reassembled & greased

DSC_0017.JPG
other half greased and ready to be put back together

Got it put back together, bolted back on the truck, and then installed the new shaft. Put everything back on the truck, refilled the diff fluid, drove it around on the road, and then switched into A4WD, 4HI and 4LO successfully. Drove around in my 7 acre yard in all modes and confirmed everything was working properly. I also realized that I had fixed a clicking/vibrating noise in the diff that I had been hearing on forceful turns ever since I had purchased the truck. Its been two days now, and I see no wet spots around the shafts. No leaking!!! :excited: :woot:
User avatar
mason10198
Moderator
 
Posts: 504
Joined: Thu Sep 17, 2015 11:49 pm
Location: AR, Bryant
Name: Mason
Vehicle Year: 2005
Vehicle: Chevrolet TrailBlazer
DriveTrain: 4WD w/ Aftermarket Locker
Rank: Offroad Rated

by mason10198 » Thu Oct 22, 2015 12:19 am

Just hacked off the exhaust resonator, replaced with straight pipe and new tail.
Sounds more like a truck now, a bit deeper pitch and a slight rumble. Not much louder, but sounds much nicer.
Also a slightly noticeable increase in throttle response, probably due to removal of the massive buildup/blockage of dirt/deposits in the piping that I replaced.


User avatar
mason10198
Moderator
 
Posts: 504
Joined: Thu Sep 17, 2015 11:49 pm
Location: AR, Bryant
Name: Mason
Vehicle Year: 2005
Vehicle: Chevrolet TrailBlazer
DriveTrain: 4WD w/ Aftermarket Locker
Rank: Offroad Rated

by mason10198 » Sun Oct 25, 2015 1:31 am

Mounted two 7in. HID wide beam spotlights to the existing OEM crossbar. These things were cheap, but they are huge and have a nice beam pattern. they focus the light beams while also extending the range (width) of your vision.
uploadfromtaptalk1445751069944.jpg
uploadfromtaptalk1445751053003.jpg
uploadfromtaptalk1445751036723.jpg


~Sent from Tapatalk for Android~
User avatar
mason10198
Moderator
 
Posts: 504
Joined: Thu Sep 17, 2015 11:49 pm
Location: AR, Bryant
Name: Mason
Vehicle Year: 2005
Vehicle: Chevrolet TrailBlazer
DriveTrain: 4WD w/ Aftermarket Locker
Rank: Offroad Rated

by mason10198 » Sun Nov 01, 2015 6:34 pm

Repainted trim boards and lettering with Rustoleum flat black enamel. Accented bowties, tow hooks, and calipers with bright red enamel. Also smoke tinted the tail lights. Personally, I think this looks absolutely gorgeous.


User avatar
mason10198
Moderator
 
Posts: 504
Joined: Thu Sep 17, 2015 11:49 pm
Location: AR, Bryant
Name: Mason
Vehicle Year: 2005
Vehicle: Chevrolet TrailBlazer
DriveTrain: 4WD w/ Aftermarket Locker
Rank: Offroad Rated

by mason10198 » Sat Dec 26, 2015 11:02 pm

I have been doing alot of work recently, mainly getting ready for bigger tires (33's). Also just some minor maintenance.

    Changed all fluids, switched to full synthetics (completely flushed transmission oil system @ home, SEE END OF POST)
    Replaced busted CV boot
    Installed new transmission cooler
    Installed Scangauge II and programmed for trans temp reading
    Fabricated a *very* simple transmission skidplate based off of the measurements shown HERE
    New upper and lower balljoints on frontend
    New liftgate struts
    K&N washable intake air filter
    repaired a minor radiator leak
    ...and last but not least, 255/75/17 Nitto Trail Grapplers on 17" KMC Rockstar XD811s

I'm SUPER happy with the outcome of my build so far. She's come so much farther than I ever thought she would at the time of purchase, and I never would have gotten this far without this awesome site or my fellow ORTB'ers! :excited:

Image
Image
Image
Image

HERES how I flushed my transmission oil system AT HOME WITHOUT a fancy flushing machine.
https://www.youtube.com/watch?v=qvXzYlTHvow
User avatar
mason10198
Moderator
 
Posts: 504
Joined: Thu Sep 17, 2015 11:49 pm
Location: AR, Bryant
Name: Mason
Vehicle Year: 2005
Vehicle: Chevrolet TrailBlazer
DriveTrain: 4WD w/ Aftermarket Locker
Rank: Offroad Rated

by mason10198 » Mon Feb 08, 2016 4:22 pm

Built a homemade replica of MDBs oilpan skid and got it bolted up no problems. More specific thread can be found here.
Image

Also... got a brand new CB unit!! :excited: Bought a Cobra 29LX from amazon on a great warehouse deal. Almost half off just for damaged package! Unit had nothing wrong with it whatsoever. Anywho, bought the unit, a 3' Firestik II, and a Firestik door jab mount with 18' fire ring cable. Mounted the firestik behind the rear window above taillight on the drivers side, and it's been working great there. Drilled a hole in the body (ouch!..) and ran the antenna cable up and through the roof support frame, away from other wires to reduce interference and increase performance. Also went ahead and bought a cheap Pyle PA horn since the CB has a PA function, and mounted in to the side of the battery cover under the hood. Its not super loud but good enough to hear clear with engine running. Not amazing, but pretty good for a 12 dollar horn.
Attachments
24901776805_feaa4a0abf_o.jpg
20160204_152937_24783606352_o.jpg
DSC_0002.jpg
20160204_211821_24533904939_o.jpg
20160207_110852_24901510215_o.jpg
User avatar
mason10198
Moderator
 
Posts: 504
Joined: Thu Sep 17, 2015 11:49 pm
Location: AR, Bryant
Name: Mason
Vehicle Year: 2005
Vehicle: Chevrolet TrailBlazer
DriveTrain: 4WD w/ Aftermarket Locker
Rank: Offroad Rated

by mason10198 » Thu May 26, 2016 6:19 pm

Got MarkMC's 3in body lift installed! It was surprisingly easy, took me all of 4 hours. The hardest part was cutting up the frame in the rear to work with the bumper relocation brackets, but it all worked great in the end! (no pun intended) I love how she looks. Just about need running boards to get in now. I think the best thing about this body lift is the AMAZING amount of working space you get out of it. There is so much more room to service stuff under the hood and in the fenders, it's ridiculous.
DSC_0050.jpg

DSC_0053.jpg

DSC_0056.jpg


After the lift, the tailpipe was hanging way down under there, and looked like complete trash. What to do? Chop it off, of course!
DSC_0054.jpg


Also had a heck of a fun time after I got stranded in a mudhole due to a broken shift fork in my 4x4 disconnect. The thing got trashed and replaced with an AWD disconnect from USPowertrain. The assembly is stout and works great. To keep the 4x4 service light from coming on I just left the old electric actuator plugged in and zip tied it up to the frame.
DSC_0059.jpg
User avatar
mason10198
Moderator
 
Posts: 504
Joined: Thu Sep 17, 2015 11:49 pm
Location: AR, Bryant
Name: Mason
Vehicle Year: 2005
Vehicle: Chevrolet TrailBlazer
DriveTrain: 4WD w/ Aftermarket Locker
Rank: Offroad Rated

by mason10198 » Thu Jul 20, 2017 9:29 pm

!!!!!TOTAL REBUILD!!!!!
I blew the motor while offroading by going in some water that was WAY too deep.... stupid right?
Complete rebuild. New engine, new transmission, new front and rear diffs/axles, new interior carpet, lots of replaced parts.

Unfortunately, I'm way too lazy to even attempt to talk about everything I did up until the end of the rebuild. Instead, I will forward you to the original rebuild thread, WHICH CAN BE FOUND HERE, and include a couple of pictures. All of my pictures can be found in my TB album. You can find a link to that album at the very top of this thread, right above the latest pic of the rig.
Attachments
IMG_20170404_204123045.jpg
IMG_20170526_120714940.jpg
IMG_20170524_213450617.jpg
IMG_20170520_220431704.jpg
IMG_20170520_115800651_HDR.jpg
IMG_20170520_110744061_HDR.jpg
Attach18907_20170530_093349.jpg
Attach18089_20170524_001913.jpg
Attach18088_20170524_001900.jpg
User avatar
mason10198
Moderator
 
Posts: 504
Joined: Thu Sep 17, 2015 11:49 pm
Location: AR, Bryant
Name: Mason
Vehicle Year: 2005
Vehicle: Chevrolet TrailBlazer
DriveTrain: 4WD w/ Aftermarket Locker
Rank: Offroad Rated

by mason10198 » Mon Aug 13, 2018 7:07 pm

Homemade steel swing-out rear bumper completed 8/13/18
ImageImageImage
User avatar
mason10198
Moderator
 
Posts: 504
Joined: Thu Sep 17, 2015 11:49 pm
Location: AR, Bryant
Name: Mason
Vehicle Year: 2005
Vehicle: Chevrolet TrailBlazer
DriveTrain: 4WD w/ Aftermarket Locker
Rank: Offroad Rated


Return to Offroad Rated Builds