Offroad Trailblazers and Envoys

DirtyBacon's front diff swap (pic heavy)

G80, GU6, GT4, GT5, WTF? This section is for gearing and driveline stuff.

by DirtyBacon04 » Mon Jun 23, 2014 7:33 pm

Well, since I had to do it again, I figured I would actually photo and document my process. This time, I didnt have a full 4 point lift, shop full of tools, and experience mechanics to help. So this process should be easy to relate to. (but that's the only part of this that is easy) This is a expidited walk-through, and I'll be adding more detailed info in the next couple days. There are several ways to do this, and this is how i did it this time. It sucks, entirely, but I did it by myself with common hand tools.

I'm not going to start from step one, because if you dont know how to properly jack up/support the truck and remove the tires, you shouldn't be attempting this. If you dont know what control arms, tie rods, "I" shaft, CV shafts, struts, splined disco, xfer case, etc you should do quite a bit of research before attempting this.

I'll start with the shit that I did that I didn't need to.
-Remove spacers, brake calipers, and rotors

Also, I cant express enough how important part labeling and organization as you take them off. I recommend having a stash of ziploc bags and post it notes and bag/label the bolts as you go.

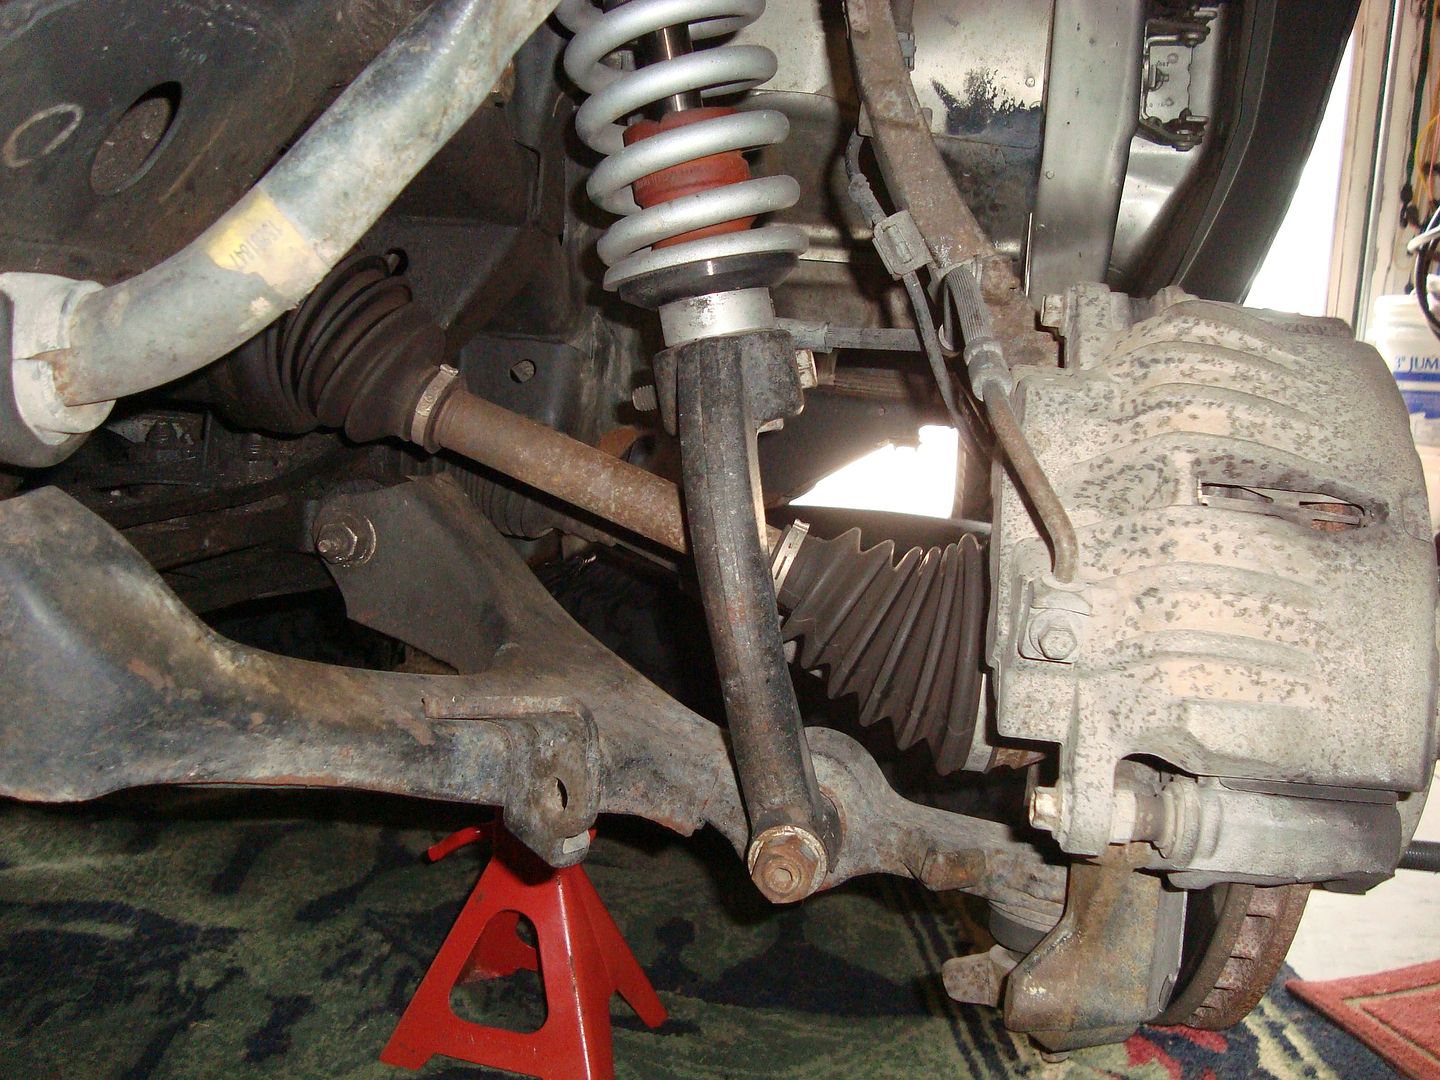
Drain oil from diff. Remove struts. I advise backing the two top bolts off almost all the way, but leave them threaded on a lil bit. Then the lower mount is tapered, so it can be quite stubborn. Back the nut off almost all the way on the lower strut mount. A pitman arm puller is the easiest way, but a BFH (metal) will work. If you're going to use the BFH method, made sure you back the nut off far enough to protect the threads. (this step applies to both sides)

Image

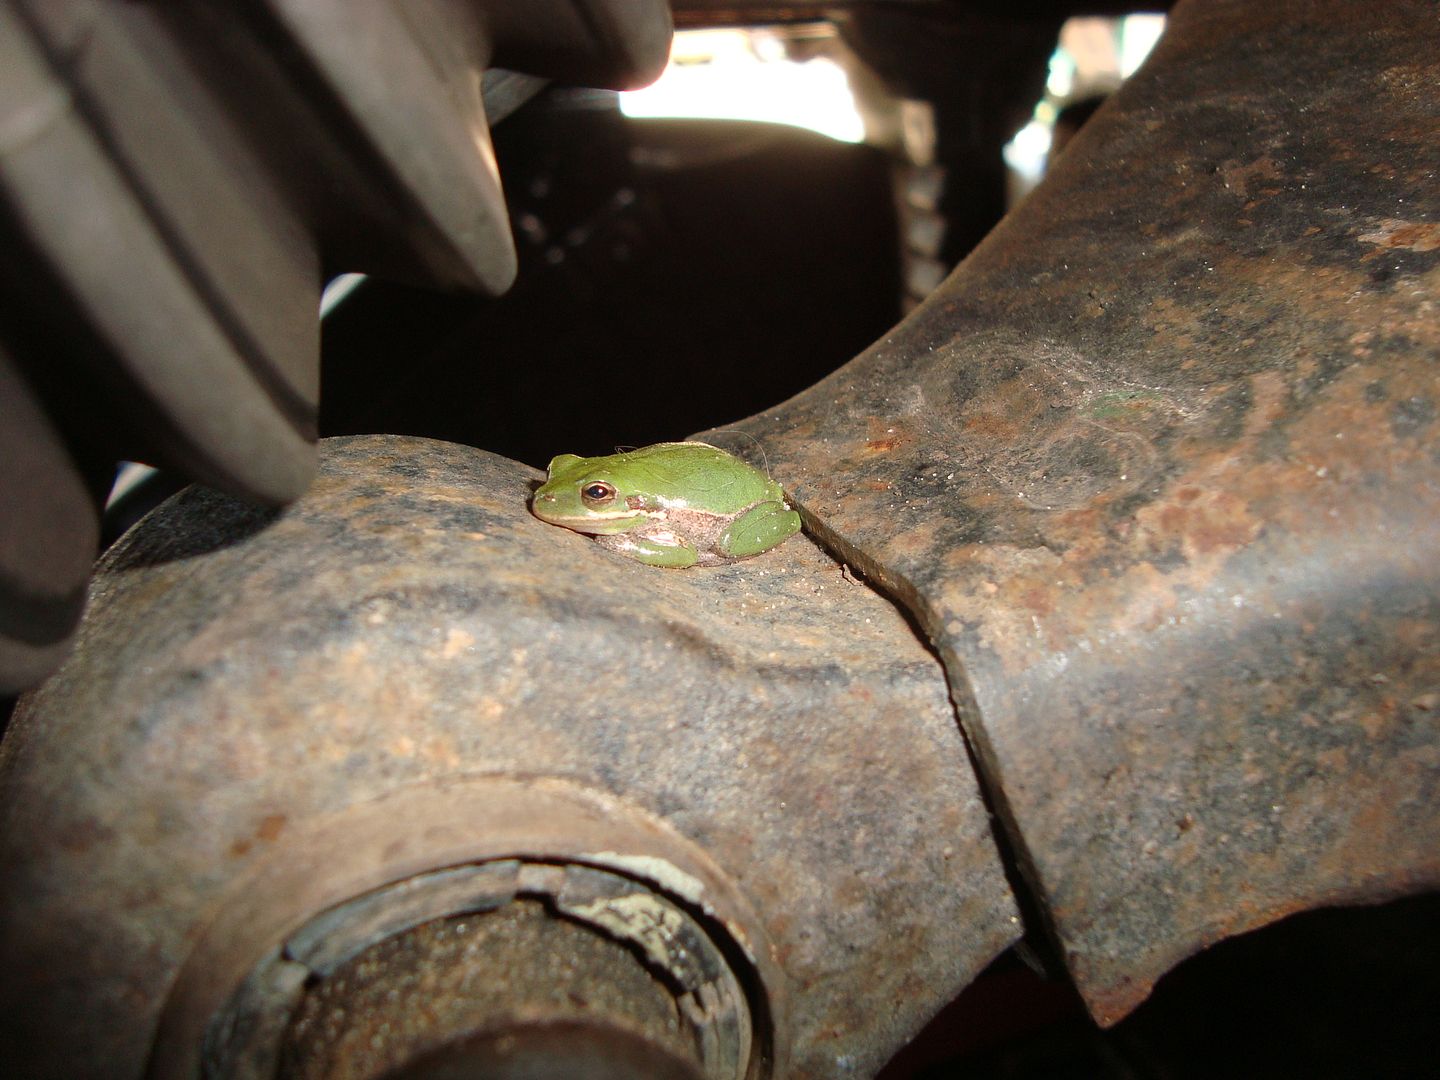
CAUTION: Dont hurt the tree frog that comes standard on 04-06 models.

Image

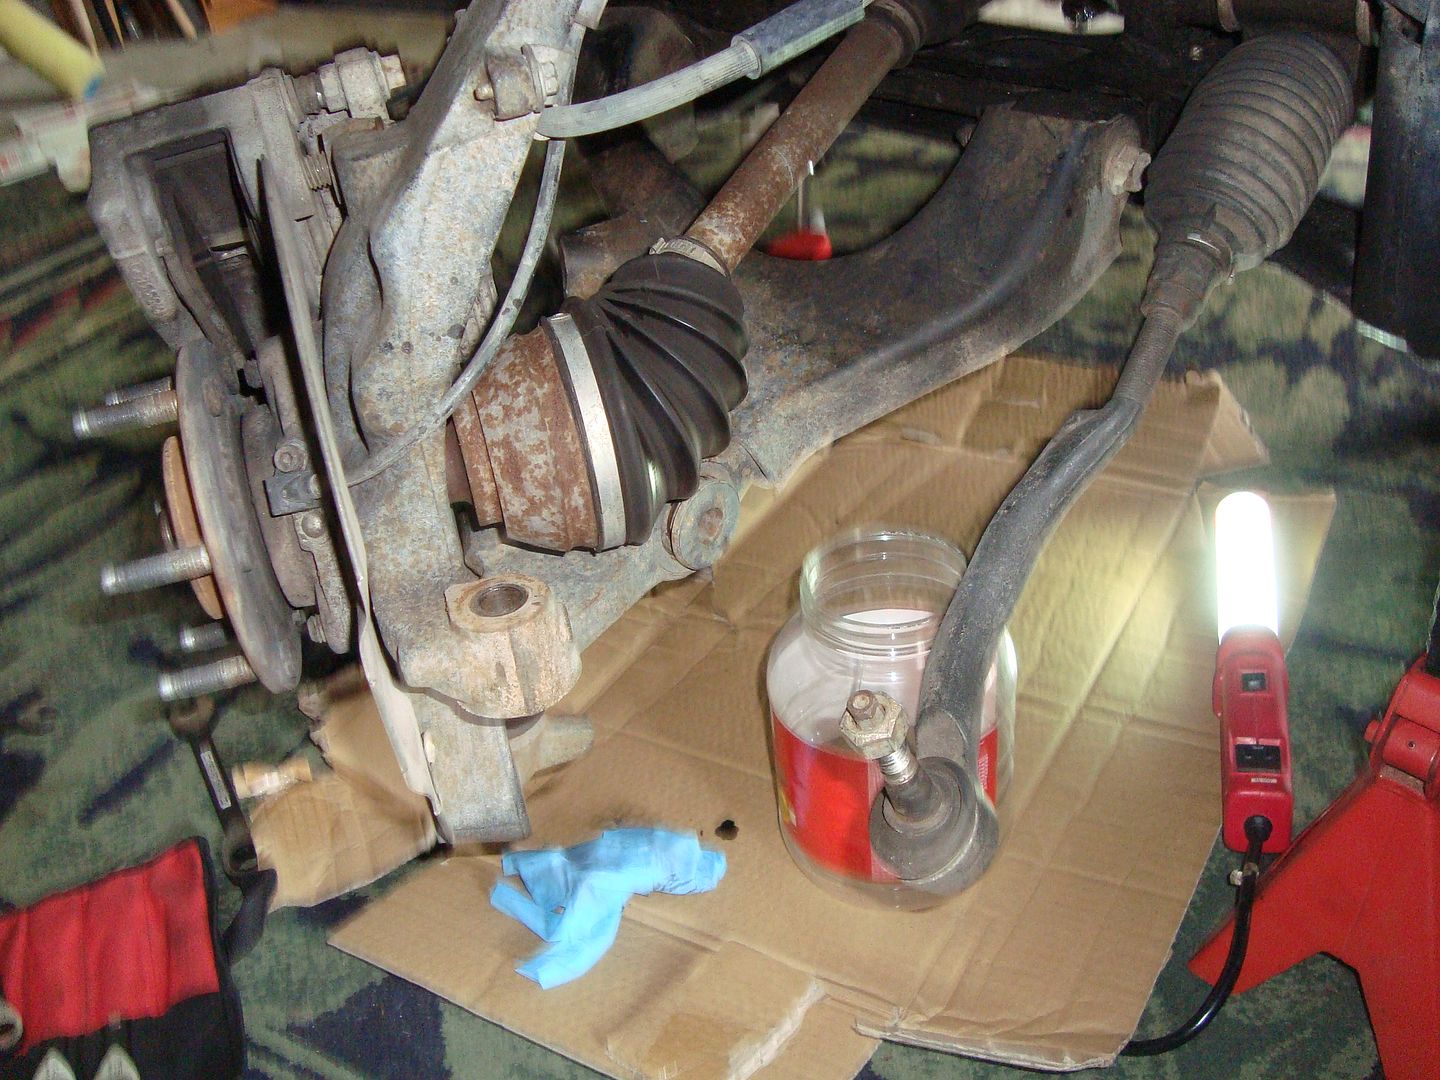
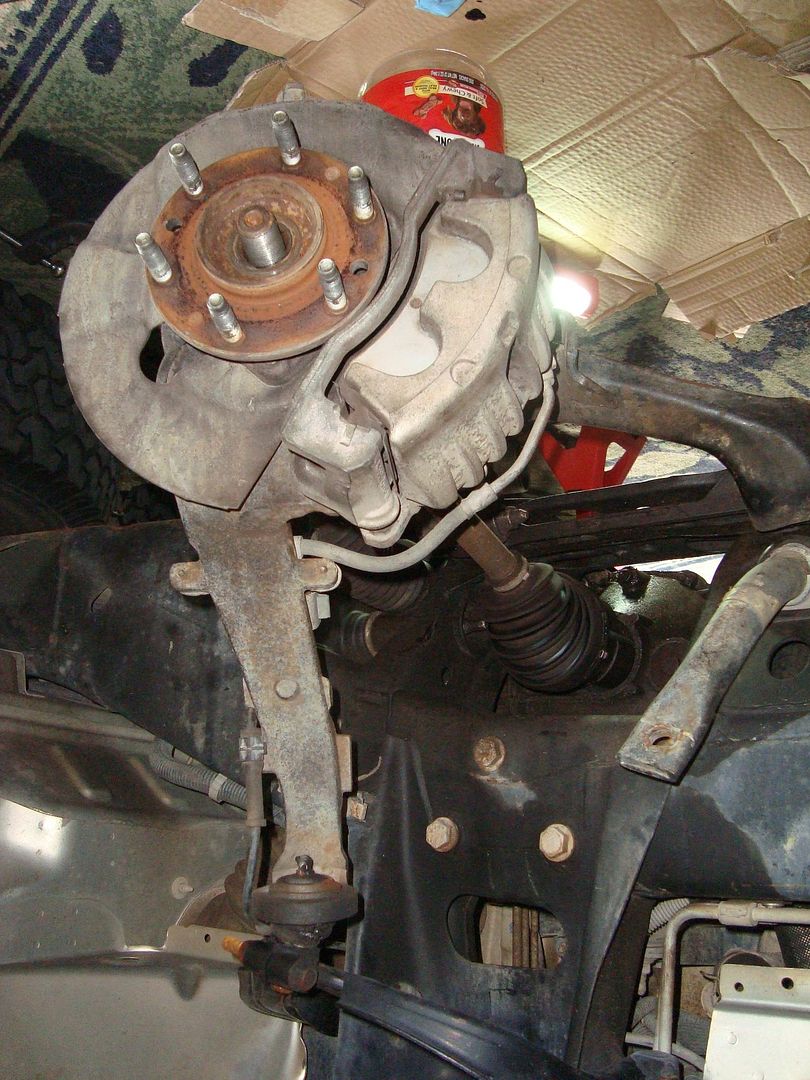
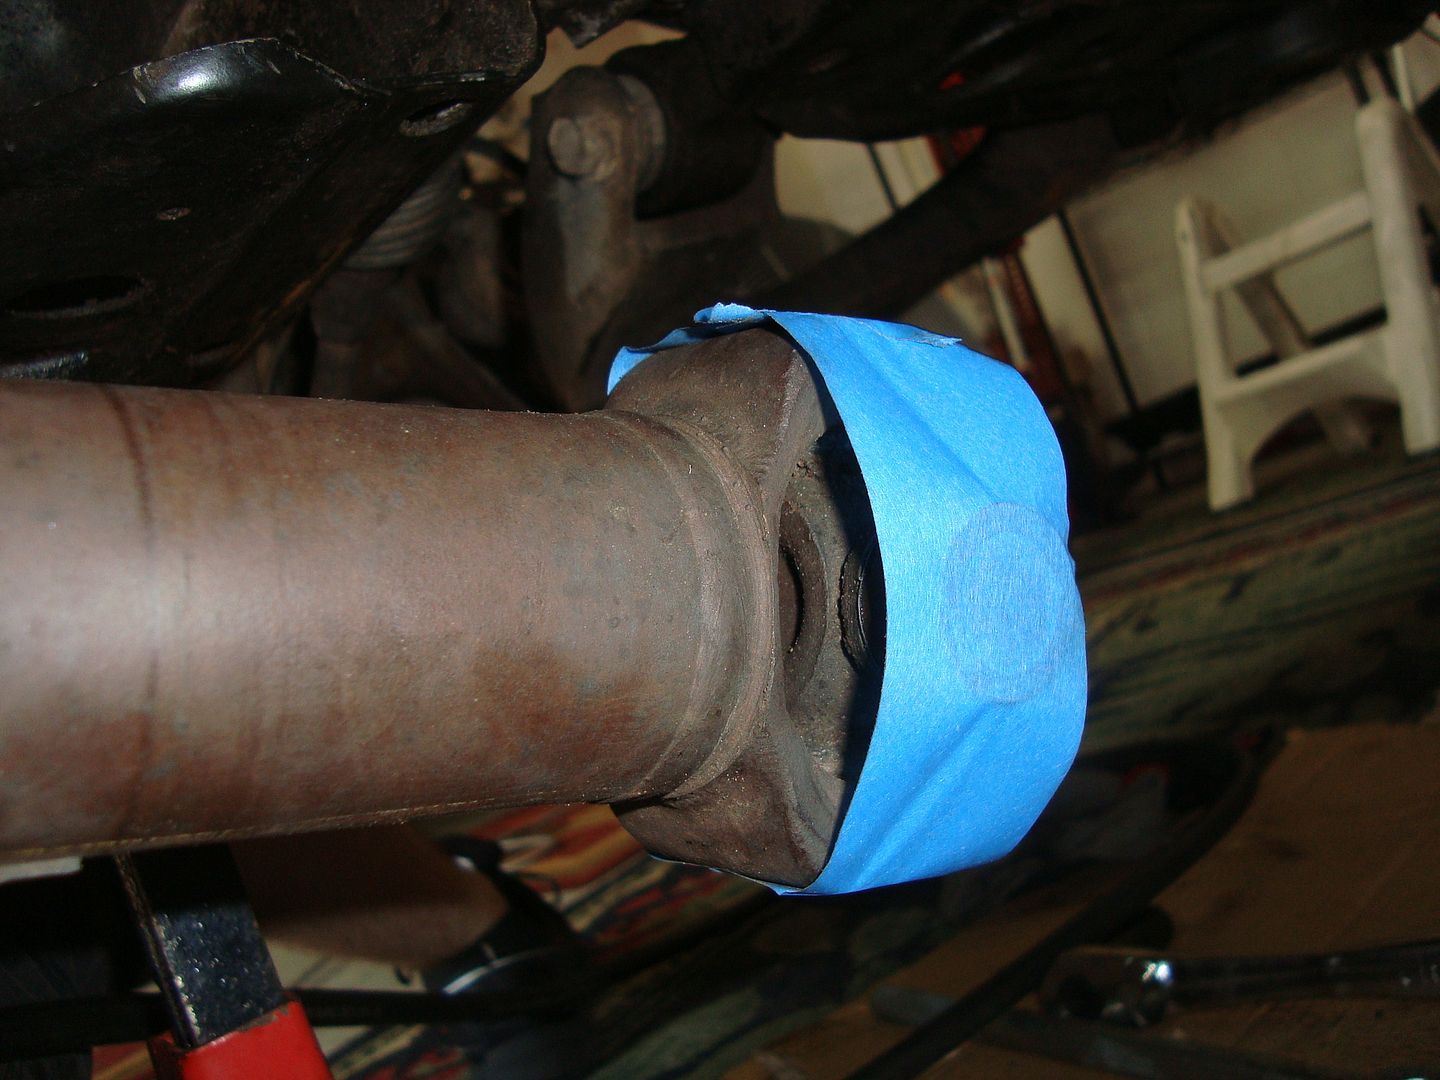
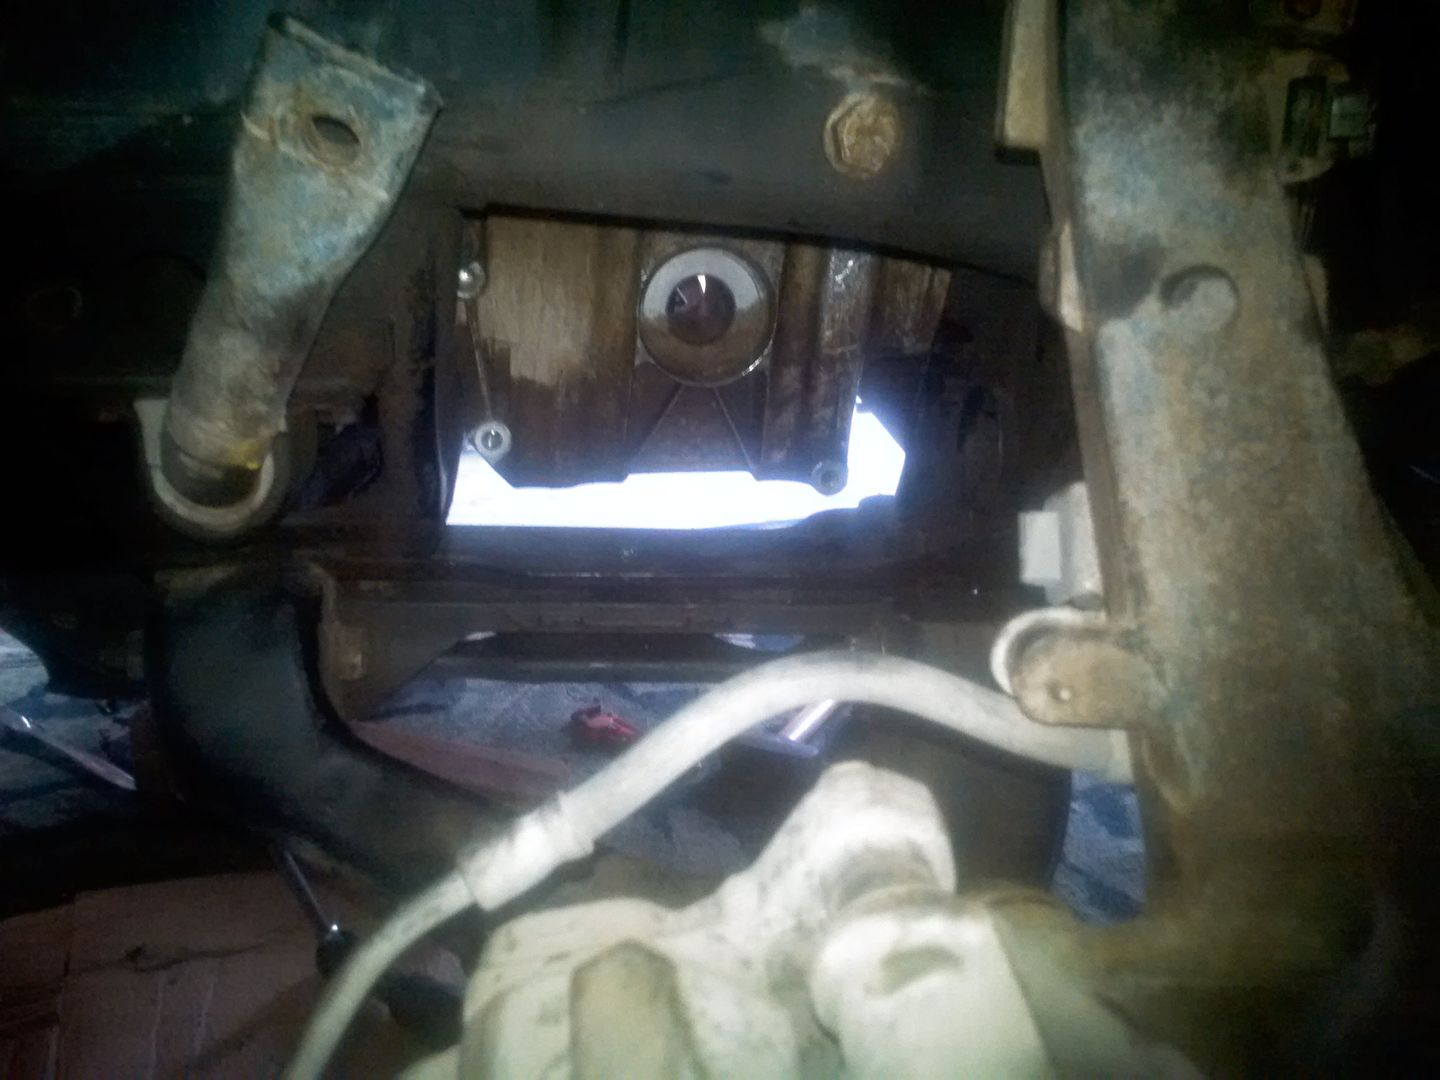
Got your strut off? Cool. Next step. Remove Tie rod nut attaching to Lower Control Arm, and disconnect from LCA. This is tapered also, so the same precaution should be used if you're going to hammer it out. Dont mess up your threads. Unbolt the brake line support and the speed sensor wire as to not break/stretch them (not yet removed in the pic). Remove the upper ball joint from the control arm and allow it to pivot down. Rotate the arm down, allowing you to remove the CV shaft. Return the upper ball joint to the UCA after the CV is removed (this step applies to both sides)

Image
Image

Good job on making it this far.

DIRTYBACON's tip: remove driver side CV first. while removing the passenger side, unbolt the splined disco from oil pan and pull it out still attached to CV. This is to prevent damaging the splined disco while trying to pry out the CV (many of us have broken the disco case trying to pry the CV from the disco). Some times the intermediate shaft will come out with the splined disco also, for an added bonus.

If the I shaft didn't come out with the disco, figure out another way to get it. I used a simple pair of Robo-Grip pliers. At this point you should have the struts, CV shafts, and the "I" shaft removed. The splined disco and I shaft will be out if you used my tip. If you're not at this point... get there. Dont forget to organize your parts as you go.

I'm not sure of the official name of the next 2 parts, but I can describe them as big black beams going laterally across the frame. One lies flat, one is more of an "I" beam shape, standing up. Unbolt and remove. CAUTION: some of these bolts holding the brackets on are also the LCA bolts. Be careful not to mess up your alignment. Removal of LCA is not necessary.

Image
Image
Image
Image

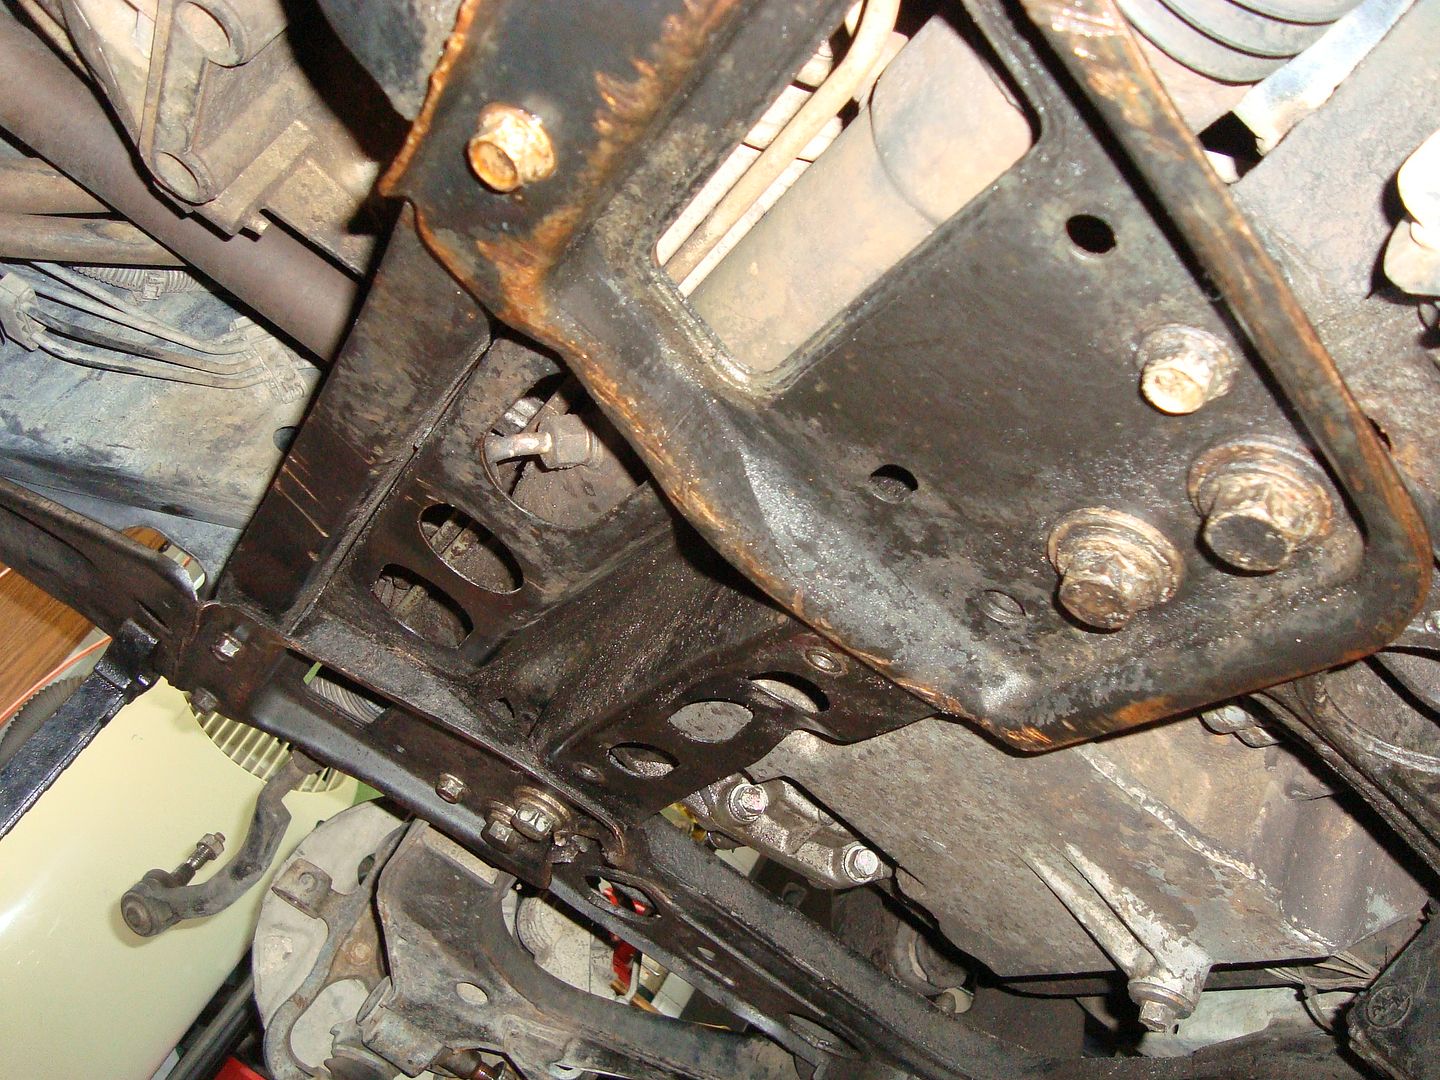
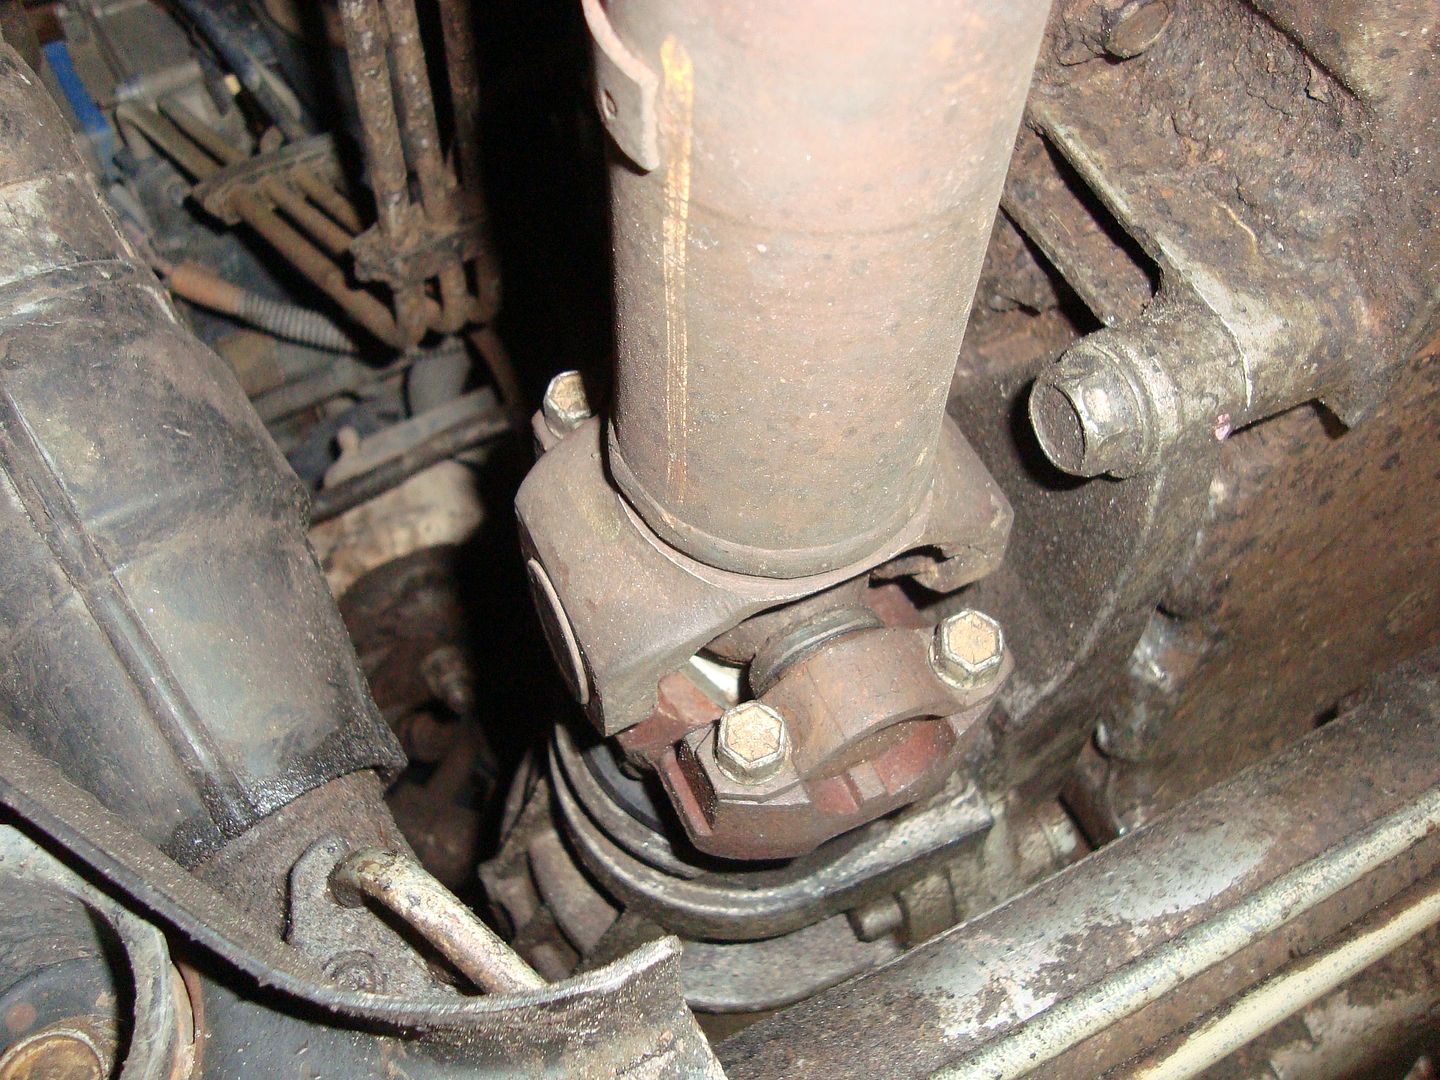
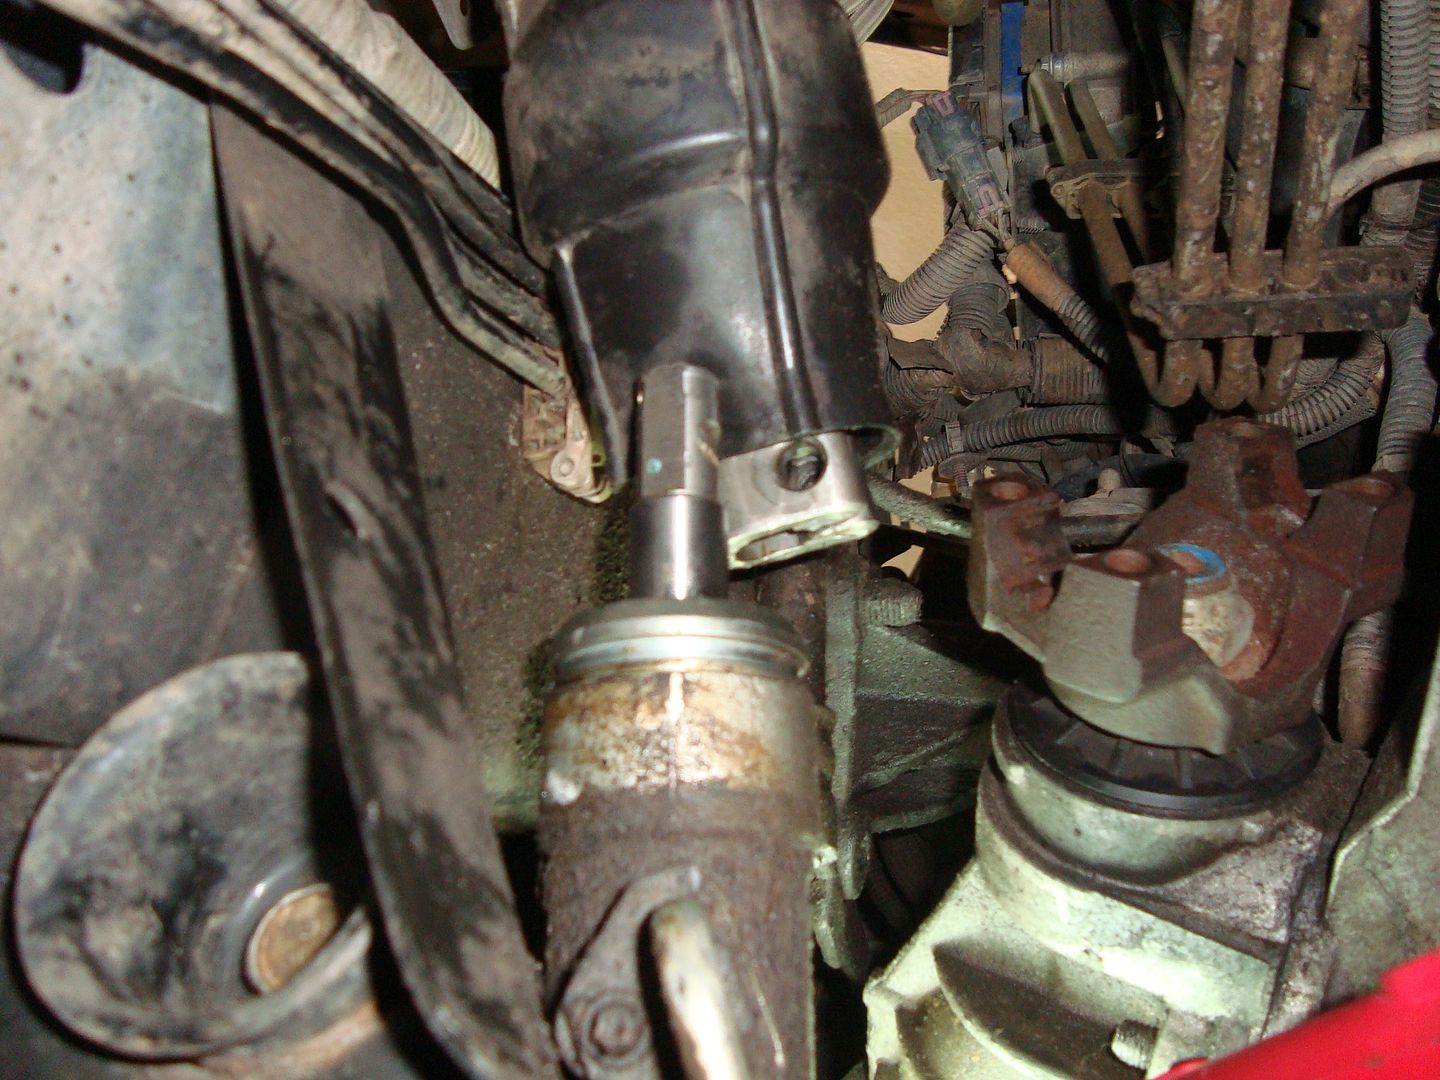
Disconnect and remove driveshaft (xfer case to front diff). Start at the U-joint conected to the front diff. When you remove the u-joint be vary careful and gentle not to bump it. Hold on to the caps as you lower it. The caps on the end of your u joints are filled with needle bearings and if you drop it, you might as well go buy a new set. I advise on wrapping tape/rubber band around the u-joint as shown.

Image
Image

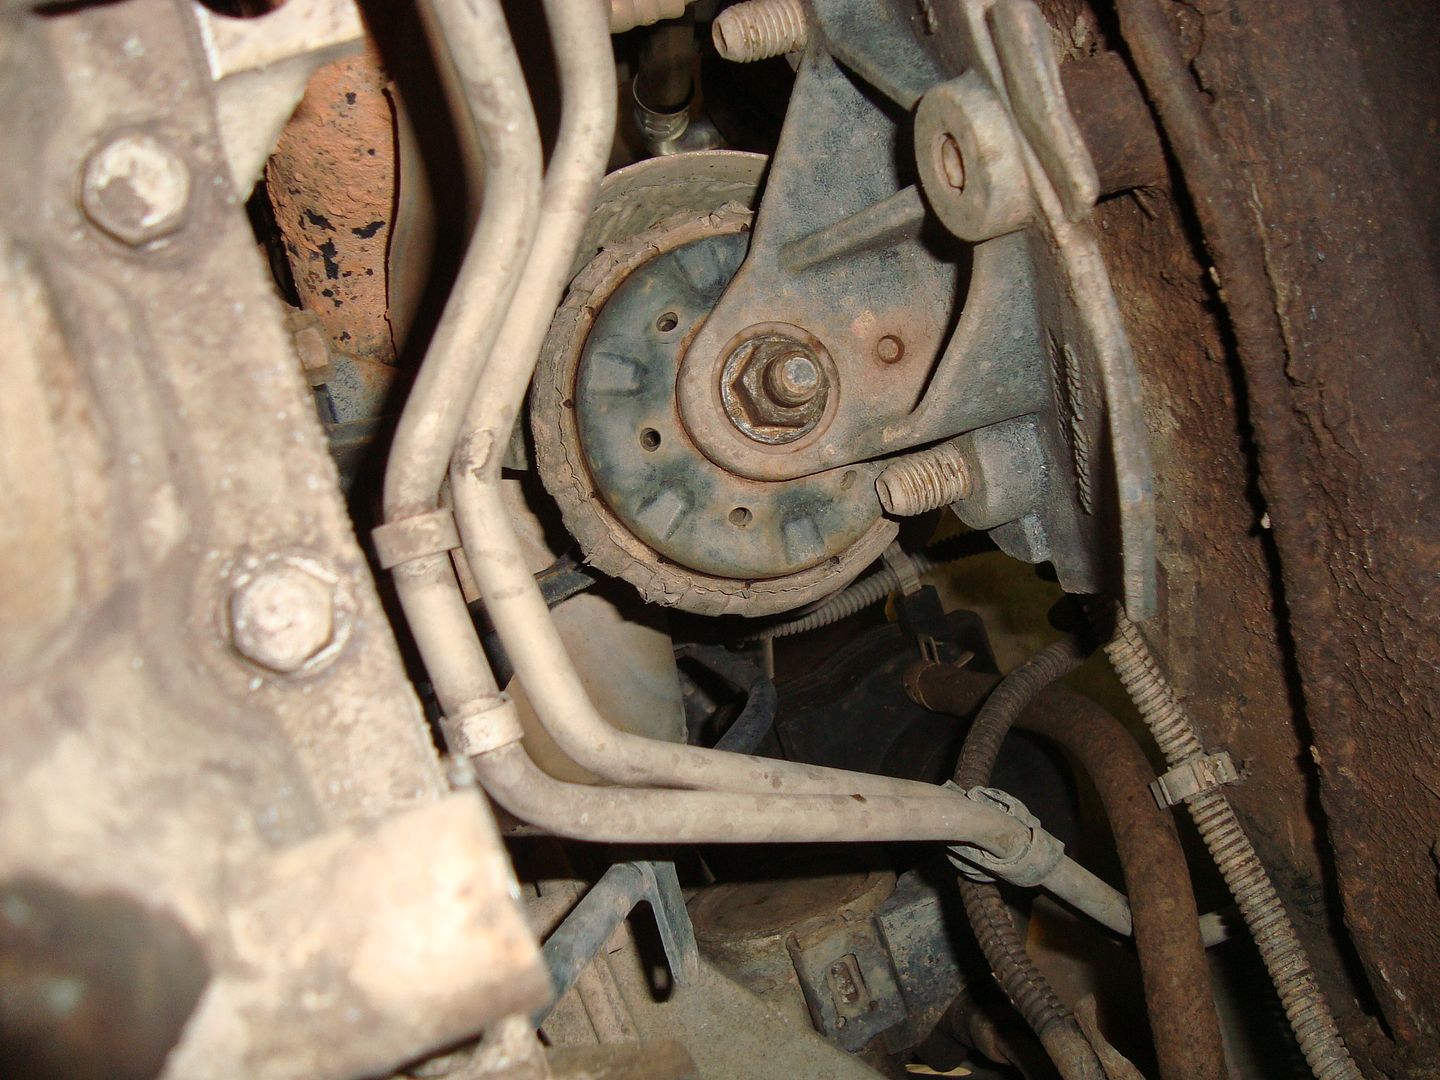
Next on the list is creating some more room. Here's what I did do gain that. Unbolt the driverside mount of the steering rack, and disconnect the steering linkage. Pull down on the driver side, this will give you a few more inches of wiggle room which will prove valuable.

Image
Image

I decided to give me some MORE wiggle room by backing the nuts off the bottom of my motor mounts (2) and jacking up the motor a little bit.

Image
Image

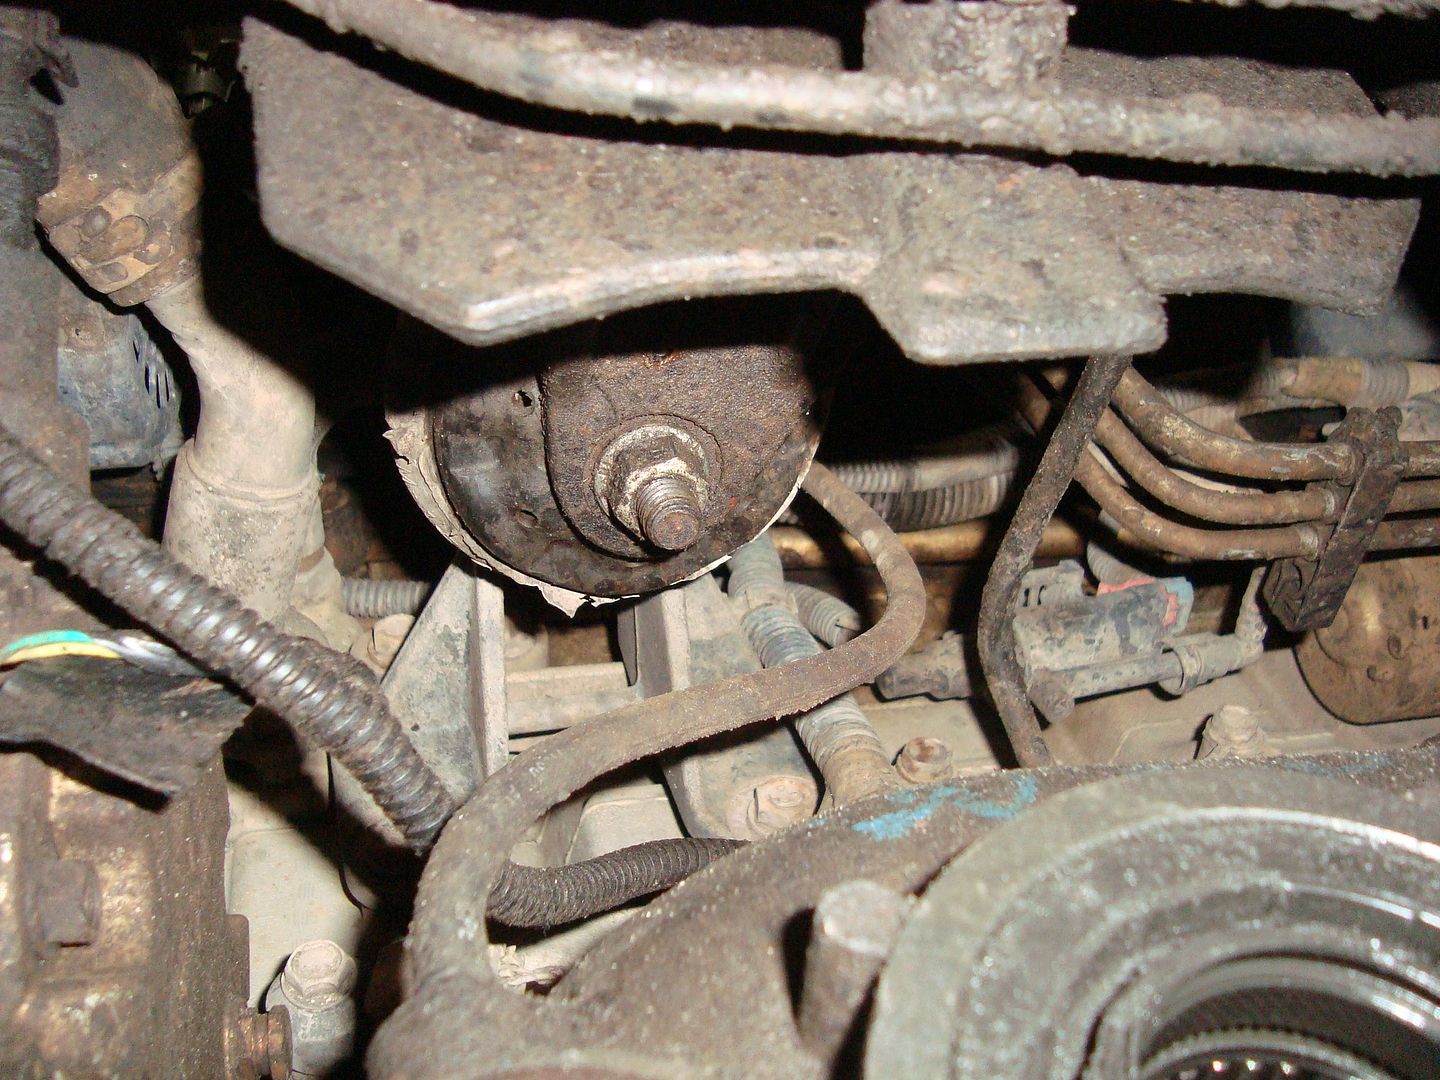
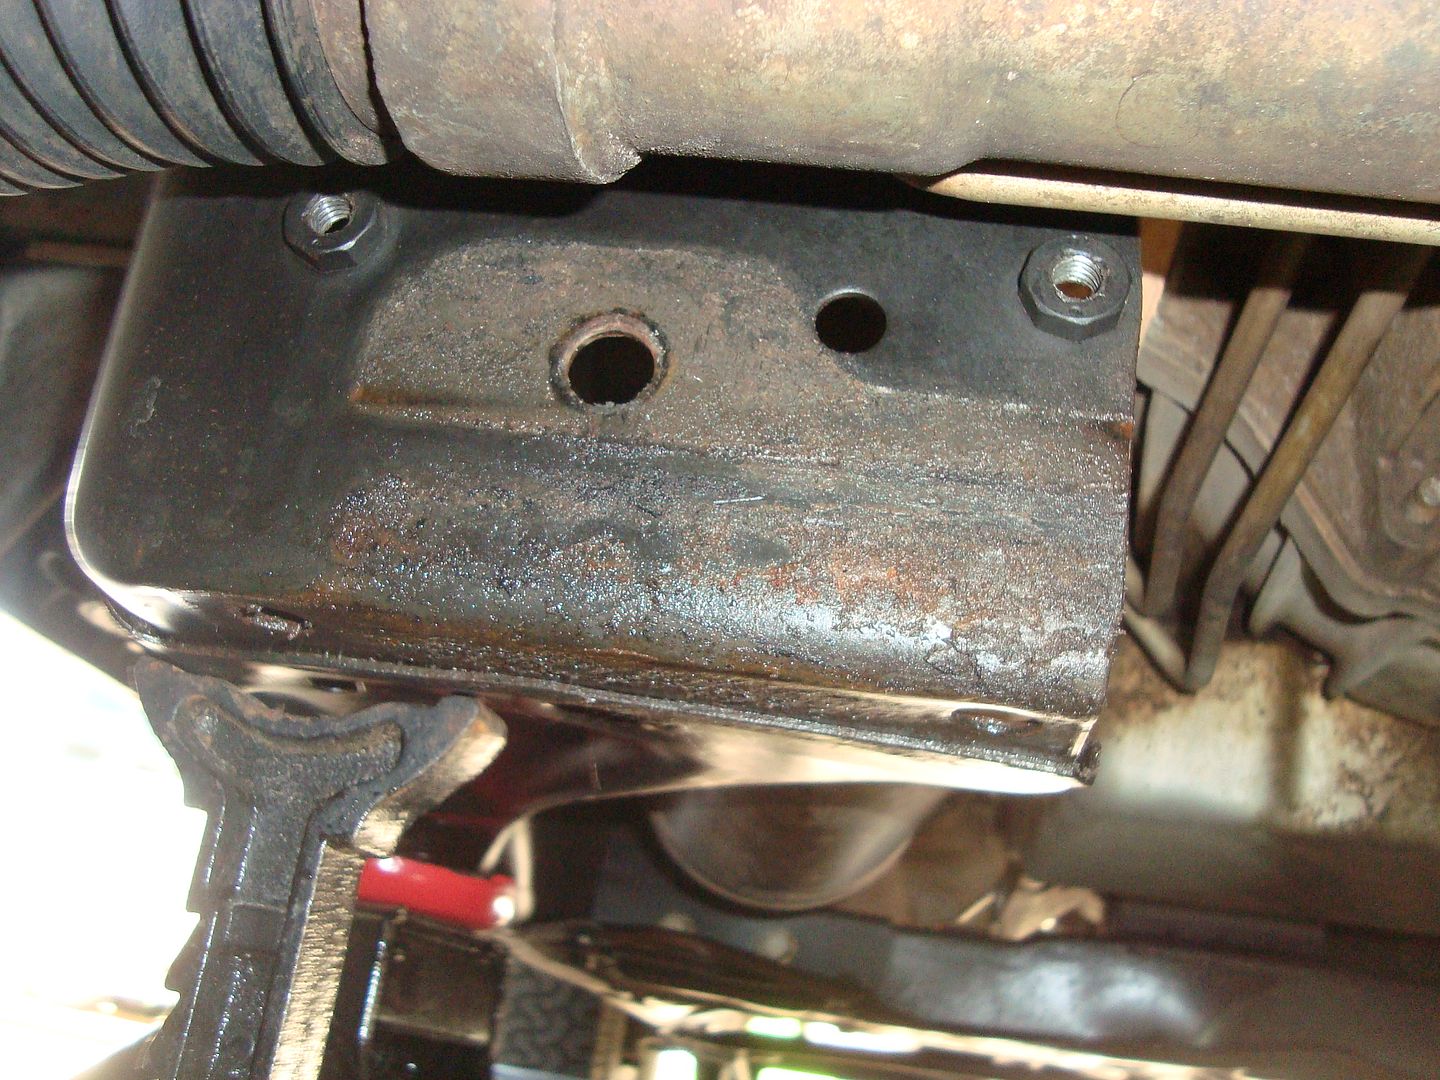
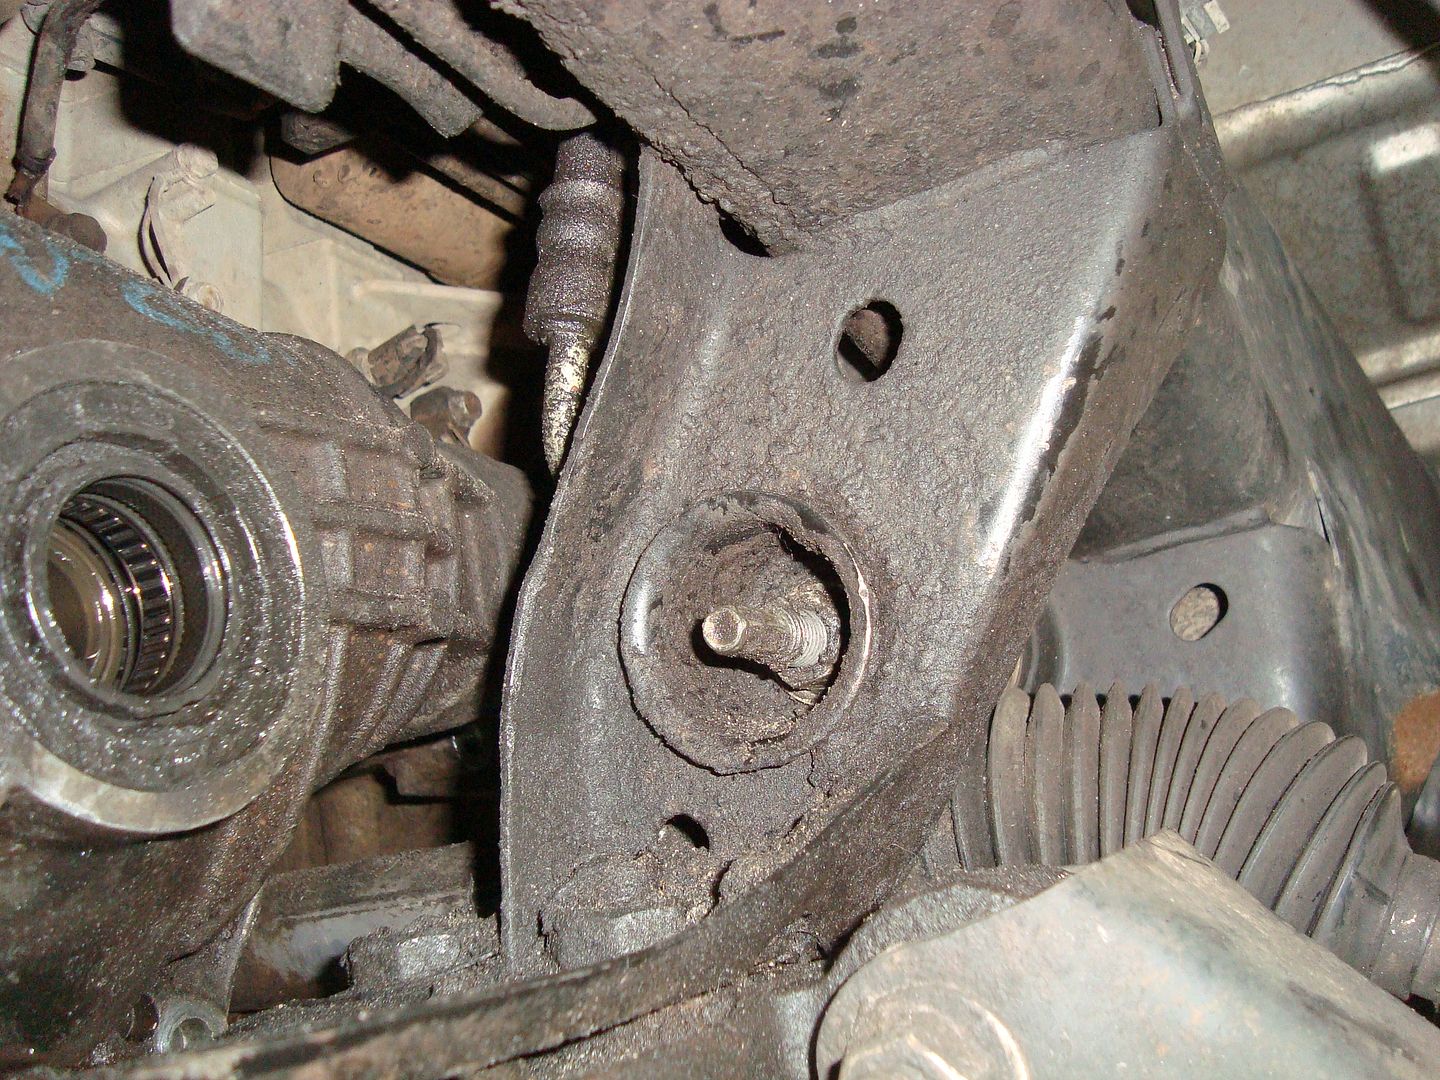
Unbolt the (4) mounting bolts to the front diff

Image

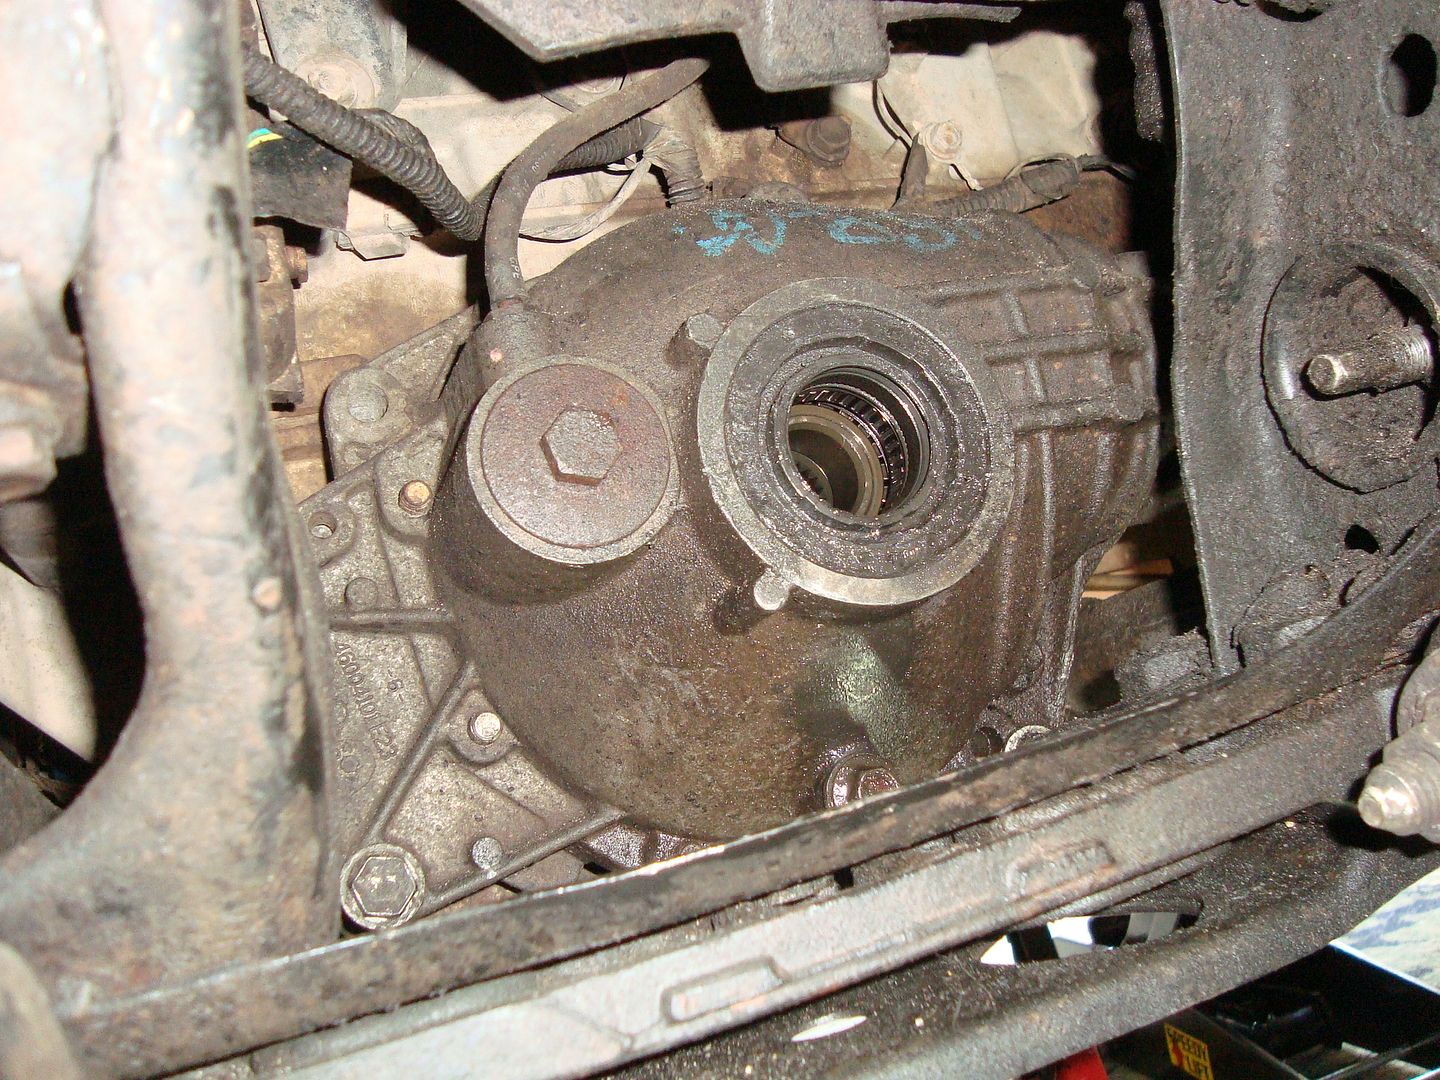
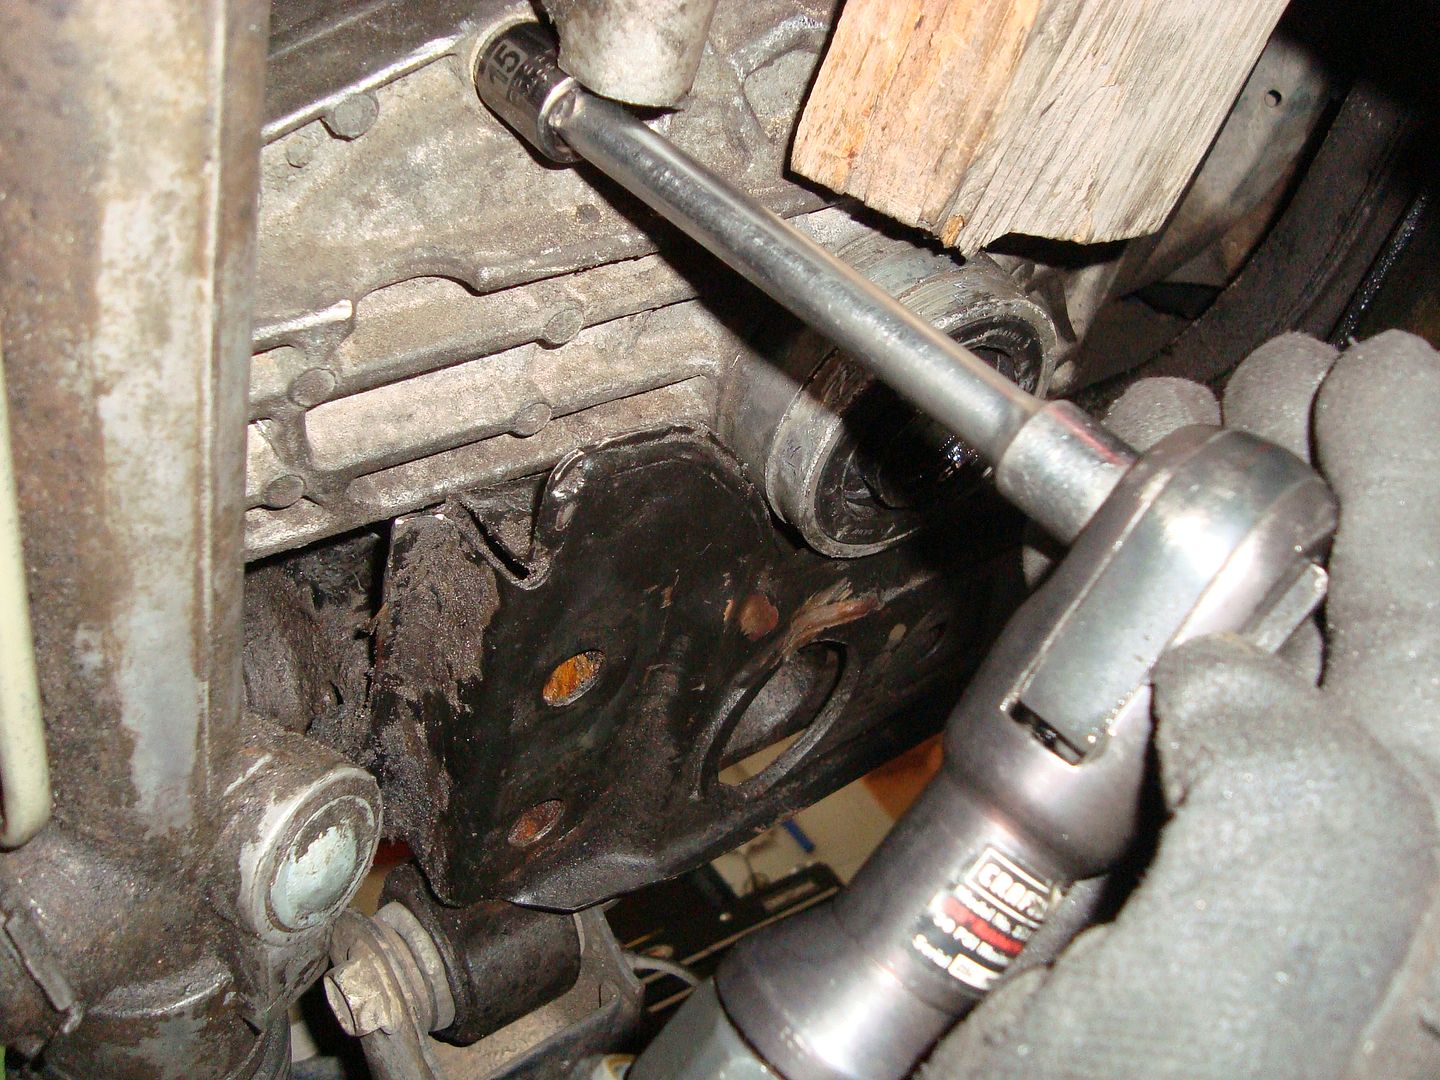
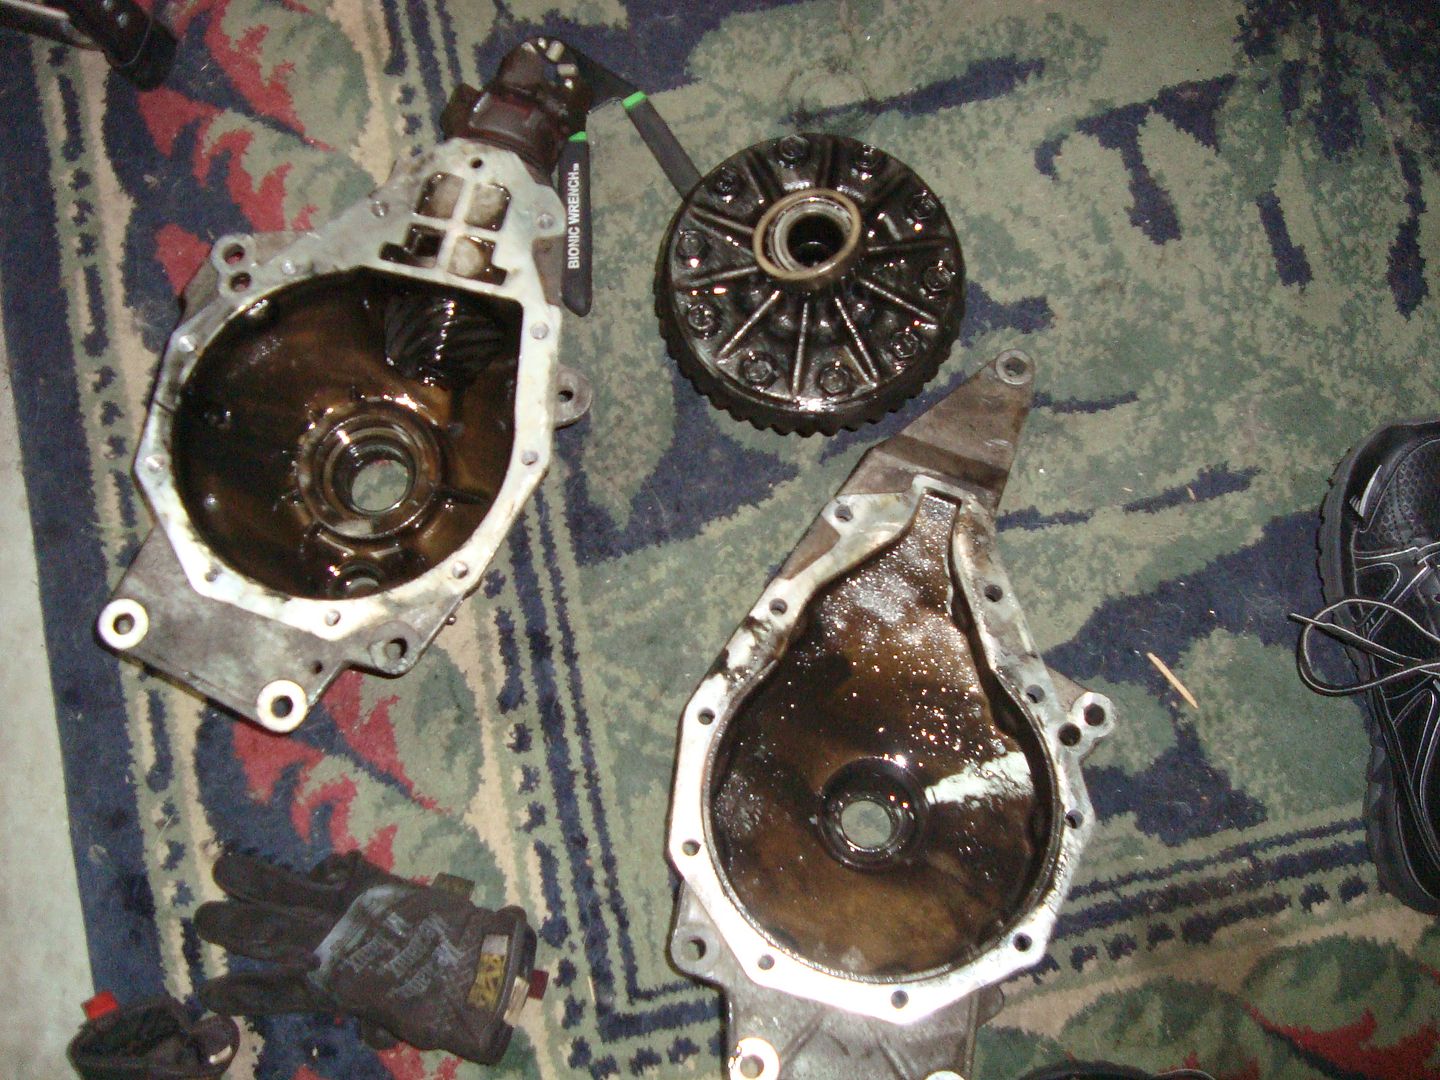
This is where this process goes from hard to pissin-me-off. You can rotate and twist it any which way and try to pull out out over the steering rack, out the back of the motor. Well, a whole bunch of bruises and cuts later, I decided to try and disassemble the front diff and pull it out in (3) pieces. About 2 hours of diff twisting, wigglying, and turning had negative results. About 20 minutes after beginning the disassembly process, it was out of the truck. My advice is to drop the diff straight down, roll clockwise, 45 deg, unbolt the bottem bolts. Then roll it 90 deg back the other way and get the top half bolts. Remove the smaller half cover first, then the carrier, then the bigger half last. (installation is reverse order)

Image
Image

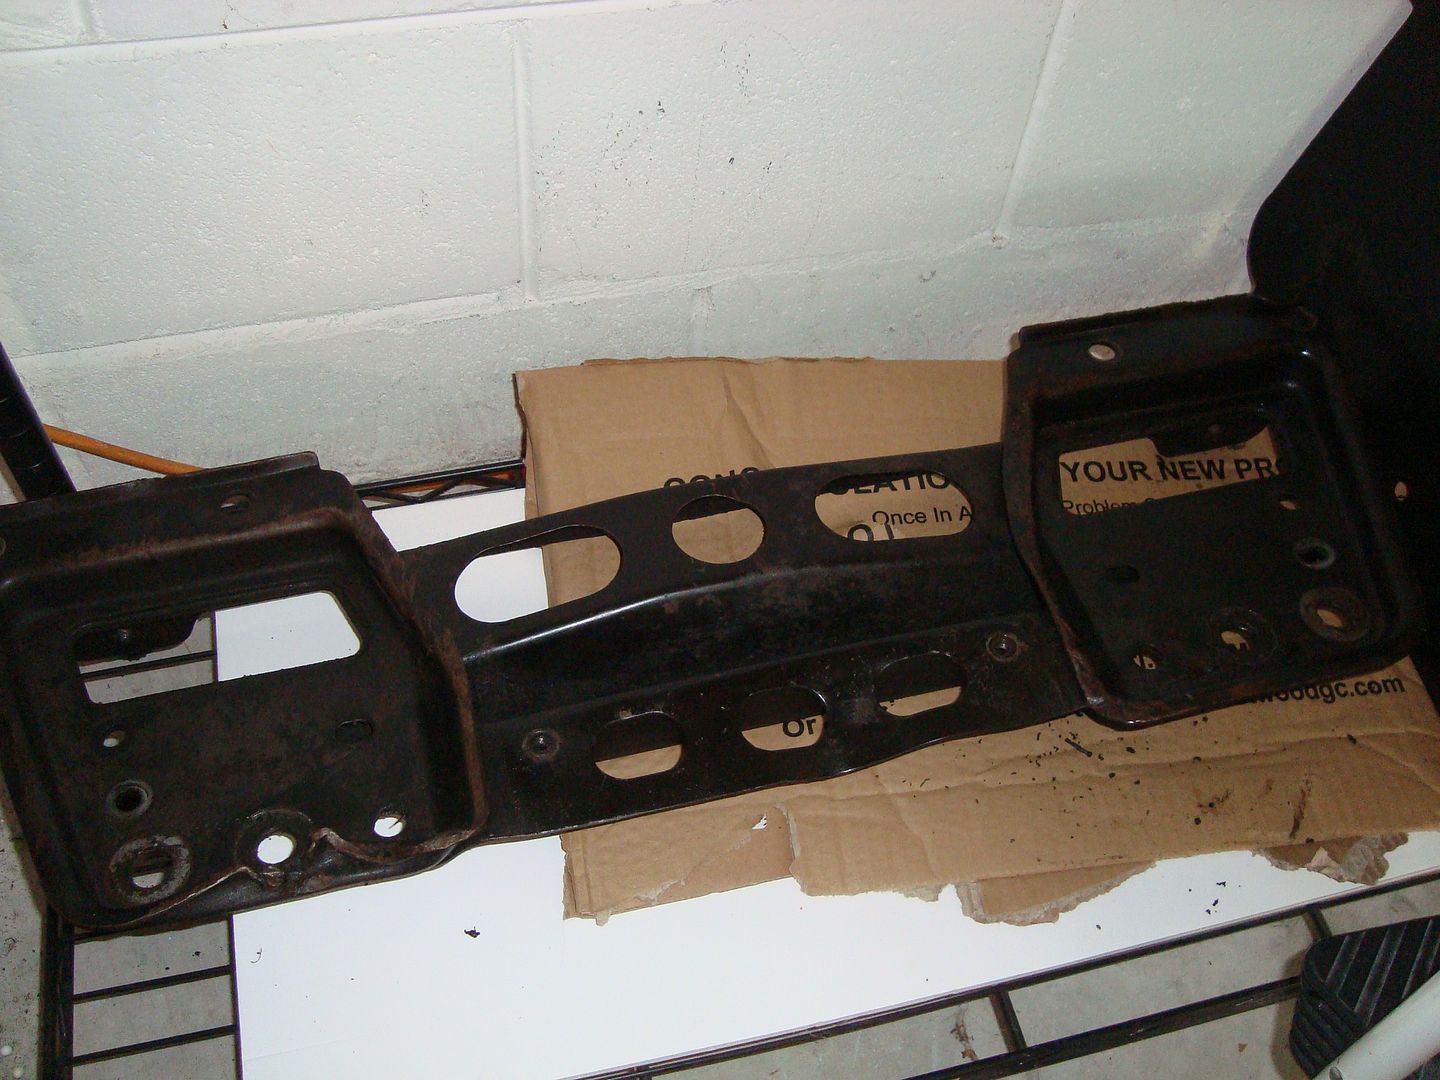
This is the final result.

Image
Image

You've earned a cold one at this point. No cracking beers until after the diff is out.

Now I wish I could say, reassembly is just reverse! Which in theory, it is. But the biggest pain in the ass was reassembling the diff in the truck. It sucked hard core. I decided to use this method to avoid dropping the oil pan... but honestly if I have to do it again, I'm dropping the friggin oil pan.

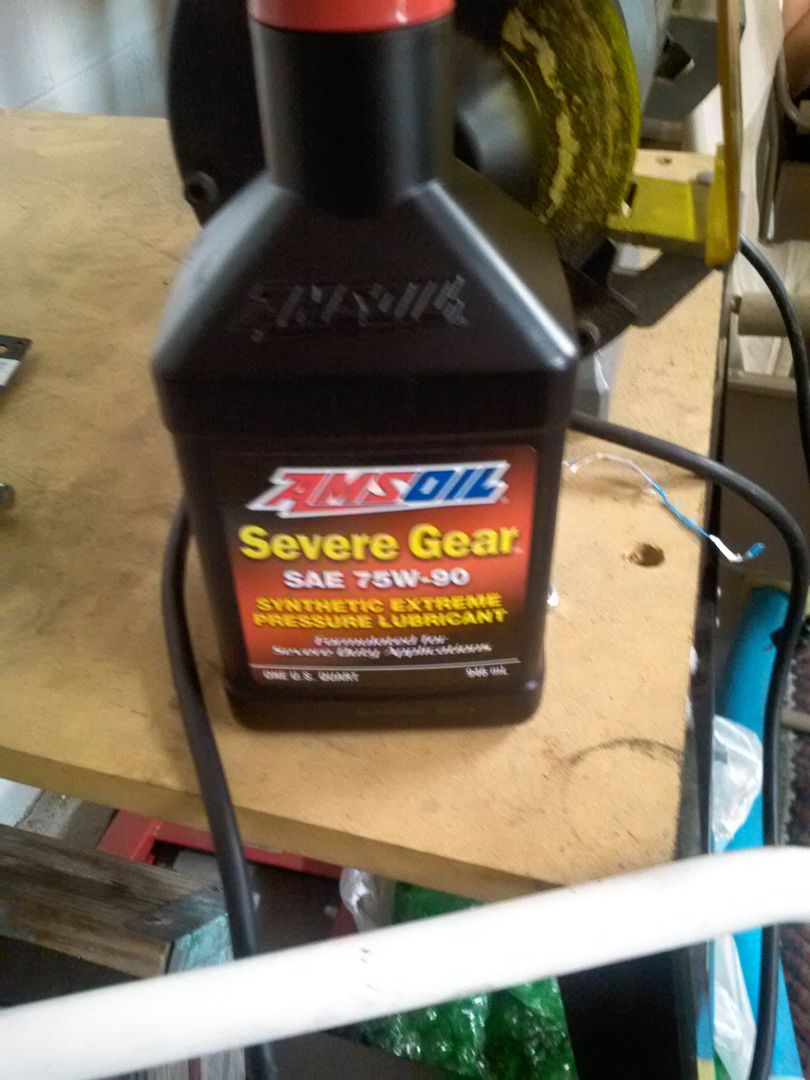
Dont forget to refill your diff with only the highest quality oil

Image
Trans-Continental Trailblazer - 5th Award
Current Count of Transmission Rebuilds: 5.5
***The more you know, the less you need.***
USMC '07-'12
Dirty Bacon's Build
User avatar
DirtyBacon04
Moderator
 
Posts: 3046
Joined: Fri Aug 05, 2011 4:59 am
Location: FL, Central
Name: Michael
Vehicle Year: 2004
Vehicle: Chevrolet TrailBlazer
DriveTrain: 4WD w/ Aftermarket Locker
Rank: Expedition Rated

by Moots1288 » Mon Jun 23, 2014 7:49 pm

Good write up, I should have done the right up about coming up the front of the motor seeing I did it 3 times. What was the overall time frame?
User avatar
Moots1288
Veteran
 
Posts: 1964
Joined: Fri Feb 24, 2012 8:42 pm
Location: Long island
Name: Moots
Vehicle Year: 2006
Vehicle: GMC Envoy
DriveTrain: 4WD
Rank: Offroad Rated

by DirtyBacon04 » Mon Jun 23, 2014 8:02 pm

lol...

about 13 hours start to finish (including breaks)
I'm sore and bruised.
Trans-Continental Trailblazer - 5th Award
Current Count of Transmission Rebuilds: 5.5
***The more you know, the less you need.***
USMC '07-'12
Dirty Bacon's Build
User avatar
DirtyBacon04
Moderator
 
Posts: 3046
Joined: Fri Aug 05, 2011 4:59 am
Location: FL, Central
Name: Michael
Vehicle Year: 2004
Vehicle: Chevrolet TrailBlazer
DriveTrain: 4WD w/ Aftermarket Locker
Rank: Expedition Rated

by Cable810 » Mon Jun 23, 2014 10:10 pm

Still think dropping the oil pan is the easiest...
The FIRST Solid Axle Swapped Trailblazer in Presque Isle County MI
My Build
The Roadie wrote:Research, plan your mods, fund the plan, then GO DO THEM. THEN WHEEL IT.
User avatar
Cable810
Veteran
 
Posts: 1989
Joined: Thu Feb 09, 2012 6:43 pm
Location: MI, Rogers City
Name: Caleb
Vehicle Year: 2002
Vehicle: Chevrolet TrailBlazer
DriveTrain: 4WD w/ Aftermarket Locker
Rank: Offroad Rated

by Moots1288 » Mon Jun 23, 2014 10:36 pm

The way I did and Regulator you might have to take more items off but seems to be the easiest when I really look at it.
User avatar
Moots1288
Veteran
 
Posts: 1964
Joined: Fri Feb 24, 2012 8:42 pm
Location: Long island
Name: Moots
Vehicle Year: 2006
Vehicle: GMC Envoy
DriveTrain: 4WD
Rank: Offroad Rated

by DirtyBacon04 » Mon Jun 23, 2014 11:07 pm

Cable810 wrote:Still think dropping the oil pan is the easiest...


yea, that's what I'll be doing next time. Just gotta make sure i get a clean container big enough for 7 qts. I got Mobil 1 HM oil (15k miles) with only 3k on it. I wasn't plannin on wasting it
Trans-Continental Trailblazer - 5th Award
Current Count of Transmission Rebuilds: 5.5
***The more you know, the less you need.***
USMC '07-'12
Dirty Bacon's Build
User avatar
DirtyBacon04
Moderator
 
Posts: 3046
Joined: Fri Aug 05, 2011 4:59 am
Location: FL, Central
Name: Michael
Vehicle Year: 2004
Vehicle: Chevrolet TrailBlazer
DriveTrain: 4WD w/ Aftermarket Locker
Rank: Expedition Rated

by Cable810 » Tue Jun 24, 2014 9:41 am

Cool. Should be pretty easy. Drop the pan, Remove the frame cross support, Drop the rack and Pinion, driveshaft and that's if I'm recalling correctly. Pan takes some time to remove with all them little bolts...
The FIRST Solid Axle Swapped Trailblazer in Presque Isle County MI
My Build
The Roadie wrote:Research, plan your mods, fund the plan, then GO DO THEM. THEN WHEEL IT.
User avatar
Cable810
Veteran
 
Posts: 1989
Joined: Thu Feb 09, 2012 6:43 pm
Location: MI, Rogers City
Name: Caleb
Vehicle Year: 2002
Vehicle: Chevrolet TrailBlazer
DriveTrain: 4WD w/ Aftermarket Locker
Rank: Offroad Rated

by Eredin » Tue Jun 24, 2014 11:33 am

Was wondering how difficult this was and never had looked it up. I'd like to move to 3.73s at some point, so this might be a good winter project.
1988 Pontiac GTA WS6 - LSX Swap

2005 Chevrolet Trailblazer LT
2012 Chevrolet Cruze LT

Build Thread
User avatar
Eredin
Trail-Blazer
 
Posts: 290
Joined: Tue Jun 17, 2014 9:42 am
Location: KY, Paducah
Name: Caleb
Vehicle Year: 2005
Vehicle: Chevrolet TrailBlazer
DriveTrain: 4WD w/ G80

by DirtyBacon04 » Tue Jun 24, 2014 3:11 pm

well i have a 3.73 front diff that is soon to be on the market!!
Trans-Continental Trailblazer - 5th Award
Current Count of Transmission Rebuilds: 5.5
***The more you know, the less you need.***
USMC '07-'12
Dirty Bacon's Build
User avatar
DirtyBacon04
Moderator
 
Posts: 3046
Joined: Fri Aug 05, 2011 4:59 am
Location: FL, Central
Name: Michael
Vehicle Year: 2004
Vehicle: Chevrolet TrailBlazer
DriveTrain: 4WD w/ Aftermarket Locker
Rank: Expedition Rated

by Moots1288 » Tue Jun 24, 2014 3:23 pm

As do I.
User avatar
Moots1288
Veteran
 
Posts: 1964
Joined: Fri Feb 24, 2012 8:42 pm
Location: Long island
Name: Moots
Vehicle Year: 2006
Vehicle: GMC Envoy
DriveTrain: 4WD
Rank: Offroad Rated

by DirtyBacon04 » Tue Jun 24, 2014 6:54 pm

Eredin wrote:Was wondering how difficult this was and never had looked it up.


It sucks. a lot.
Id rather shove a spoon up my ass and watch the 2001 super bowl half time show than do it again any time soon.
Trans-Continental Trailblazer - 5th Award
Current Count of Transmission Rebuilds: 5.5
***The more you know, the less you need.***
USMC '07-'12
Dirty Bacon's Build
User avatar
DirtyBacon04
Moderator
 
Posts: 3046
Joined: Fri Aug 05, 2011 4:59 am
Location: FL, Central
Name: Michael
Vehicle Year: 2004
Vehicle: Chevrolet TrailBlazer
DriveTrain: 4WD w/ Aftermarket Locker
Rank: Expedition Rated

by Eredin » Tue Jun 24, 2014 10:23 pm

DirtyBacon04 wrote:
It sucks. a lot.
Id rather shove a spoon up my ass and watch the 2001 super bowl half time show than do it again any time soon.


As with most of my projects. Broken bolts in precarious positions have been the woes of late on everything my friends and I have worked on. I'd love to pick up a diff from one of you, but TB budget will be limited until I get my GTA complete and I need a oil pan skid sooner than later.
1988 Pontiac GTA WS6 - LSX Swap

2005 Chevrolet Trailblazer LT
2012 Chevrolet Cruze LT

Build Thread
User avatar
Eredin
Trail-Blazer
 
Posts: 290
Joined: Tue Jun 17, 2014 9:42 am
Location: KY, Paducah
Name: Caleb
Vehicle Year: 2005
Vehicle: Chevrolet TrailBlazer
DriveTrain: 4WD w/ G80

by Trail X » Wed Jun 25, 2014 12:02 am

Timely post there Bacon. So you don't recommend this method?

There are two other methods, removal of oil pan, and removal through front of engine. I'm planning to do this Saturday, but have yet to decide which method to pursue. I'd love some opinions.
8-) Build Thread | ExPo Build | YouTube Videos
Not all who wander are lost. -Tolkien
User avatar
Trail X
Founder
 
Posts: 9935
Joined: Mon Sep 07, 2009 10:22 pm
Location: VA, Roanoke
Name: James Downing
Vehicle Year: 2005
Vehicle: Chevrolet TrailBlazer
DriveTrain: 4WD w/ Aftermarket Locker
Rank: Expedition Guide

by Cable810 » Wed Jun 25, 2014 8:36 am

Id say pan JD... Lot less that you have to remove but you just got to deal with the oil pan...
The FIRST Solid Axle Swapped Trailblazer in Presque Isle County MI
My Build
The Roadie wrote:Research, plan your mods, fund the plan, then GO DO THEM. THEN WHEEL IT.
User avatar
Cable810
Veteran
 
Posts: 1989
Joined: Thu Feb 09, 2012 6:43 pm
Location: MI, Rogers City
Name: Caleb
Vehicle Year: 2002
Vehicle: Chevrolet TrailBlazer
DriveTrain: 4WD w/ Aftermarket Locker
Rank: Offroad Rated

by DirtyBacon04 » Wed Jun 25, 2014 9:09 am

Well, the way I see it there are 4 options
-out the back, assembled
-out the back, disassemble while in the vehicle
-out the front,
-drop the oil pan

I've attempted the first two. Both are not very good for your emotional health.
Next i'll be dropping the pan. Sounds like it's a bit more time consumption, but overall easier.

Caleb, have you done that method before?
Trans-Continental Trailblazer - 5th Award
Current Count of Transmission Rebuilds: 5.5
***The more you know, the less you need.***
USMC '07-'12
Dirty Bacon's Build
User avatar
DirtyBacon04
Moderator
 
Posts: 3046
Joined: Fri Aug 05, 2011 4:59 am
Location: FL, Central
Name: Michael
Vehicle Year: 2004
Vehicle: Chevrolet TrailBlazer
DriveTrain: 4WD w/ Aftermarket Locker
Rank: Expedition Rated

by Wahugg » Wed Jun 25, 2014 9:45 am

I haven't done this at all so keep that in mind, but I feel that pulling it out the front may be the safer way.

Dropping the pan is going to suck due to all the pan bolts, and I believe you have to remove the lower transmission bolts as well.
Secondly, the pan is going to be heavy and hard to wrestle around while you are laying under the truck.
Finally, I would be worried about dirt/ debris getting in during reassembly as well as making a good seal with the block.

Pulling it out the front would be my first option as you are removing probably the same number of bolts, don't have to worry about oil or making a good seal between the pan/block, and most of the items are meant to be removed more often/ easily than an oil pan. They wear out and are called 'accessories' for a reason.

That's just my take.

-Wahugg
Wahugg
Addict
 
Posts: 576
Joined: Fri Oct 07, 2011 10:09 am
Name: Wahugg
Vehicle Year: Other
Vehicle: Other Vehicle
DriveTrain: AWD w/ G80

by Moots1288 » Wed Jun 25, 2014 11:07 am

Idk if its the way I work or its just a quicker way, the front removal seems more in depth but its actually seems to be the easiest way and the fastest
User avatar
Moots1288
Veteran
 
Posts: 1964
Joined: Fri Feb 24, 2012 8:42 pm
Location: Long island
Name: Moots
Vehicle Year: 2006
Vehicle: GMC Envoy
DriveTrain: 4WD
Rank: Offroad Rated

by fishsticks » Wed Jun 25, 2014 2:43 pm

Assuming the front method involves coming out the top like I did. That method gives you the chance to check pulleys/bearings of accessories and is a good time to replace the thermostat too.

I had that method down to 1.5 hours the last time I did it. A partner who knew his way around TBs could reduce that even further.
11 Silverado LTZ - 6.2L/6l80, 2/3 drop, self tuned
85 Hilux - 3RZ, dual cases, caged, 40s, chromo everything
02 TrailBlazer LTZ - 35s, lockers, balls - Gone but not forgotten - Build
User avatar
fishsticks
Moderator
 
Posts: 4356
Joined: Thu Apr 01, 2010 11:30 pm
Location: WA, Vancouver
Name: Donny
Vehicle Year: Other
Vehicle: Other Vehicle
DriveTrain: 4WD w/ Aftermarket Locker
Rank: Extreme Offroader

by Moots1288 » Wed Jun 25, 2014 4:50 pm

With removal and installing the new diff without reassembly of suspension just front of motor, diff and disconnect I did the whole job in an hour. And as fish states makes it easy as pie to swap out thermostat if you havent already
User avatar
Moots1288
Veteran
 
Posts: 1964
Joined: Fri Feb 24, 2012 8:42 pm
Location: Long island
Name: Moots
Vehicle Year: 2006
Vehicle: GMC Envoy
DriveTrain: 4WD
Rank: Offroad Rated

by Bacnbit » Wed Jun 25, 2014 4:57 pm

After seeing this done in the shop multiple times. And assisting the tech that lost the paper rock scissor match for the job. :wallbash: I would say out the front. Only if there is not a dynamite store close and there isnt another TB to purchase with the gears, lift and accessorys completely done and available.
User avatar
Bacnbit
Member
 
Posts: 82
Joined: Mon Apr 21, 2014 4:23 pm
Location: Grand Rapids, MI
Name: Dean
Vehicle Year: 2002
Vehicle: Chevrolet TrailBlazer
DriveTrain: 4WD

Next

Return to Differentials / Axles