Offroad Trailblazers and Envoys

Light Mouning on Stock Bumper Cover

Breaker 1-9, anybody got a copy? Any discussion or mods relating to electrons and wires go here.

by bdp1978 » Wed Oct 19, 2011 11:26 am

I think Ive only seen one person do this and they cut notches in the cover. I dont plan to ditch my stock bumper cover nor get a brush guard. Does anybody have pics ...maybe before you upgraded to an aftermarket bumper of when you had lights mounted right on your stock cover???


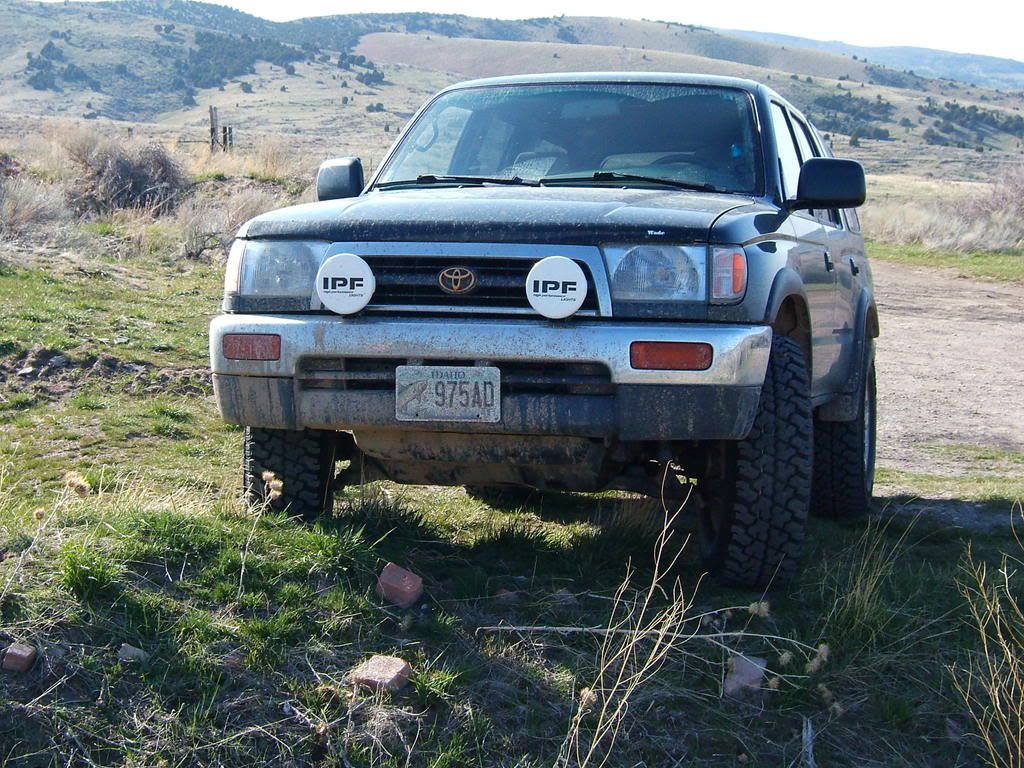
Just looking to do like below but seeing what sizes people have used on the TB's.

Image
bdp1978
Trail-Blazer
 
Posts: 253
Joined: Fri Oct 22, 2010 12:32 pm
Location: Rochester Hills, Mi
Name: Brad
Vehicle Year: 2004
Vehicle: Chevrolet TrailBlazer
DriveTrain: 4WD w/ G80

by The Roadie » Wed Oct 19, 2011 12:34 pm

Teebes and I ditched the bumper cover so early in our builds, all we had was the reinforcing steel to mount to. Must be a dozen others have done the same. You might be able to cut a slightly larger diameter hole in the cover than in the steel, and use a pipe nipple as a standoff spacer and not have to notch the cover. A galvanized iron nipple shouldn't corrode, and if you get the internal threaded kind, it won't look bad.
User avatar
The Roadie
Founder
 
Posts: 5011
Joined: Mon Sep 07, 2009 11:29 pm
Location: CA, Vista, San Diego County
Name: Bill Carton
Vehicle Year: 2004
Vehicle: GMC Envoy
DriveTrain: 4WD w/ G80
Rank: Expedition Guide

by bgwolfpack » Wed Oct 19, 2011 12:41 pm

Philberto is the only person I remember doing this. It shouldn't be that hard to achieve, all that matters is the cuts through the cover lining up with holes in the bumper reinforcement along with, possibly some type of bracket to raise the lights themselves high enough to allow for the depths of the plastic of the bumper and longer mounting bolts.

You could PM Phillip (Philberto) I know he'd be willing to give you his insight. :cheers:
bgwolfpack
Veteran
 
Posts: 1794
Joined: Fri Sep 18, 2009 7:19 pm
Name: Randy
Vehicle Year: Other
Vehicle: Other Vehicle
DriveTrain: 4WD

by bdp1978 » Wed Oct 19, 2011 12:58 pm

bgwolfpack wrote:Philberto is the only person I remember doing this. It shouldn't be that hard to achieve, all that matters is the cuts through the cover lining up with holes in the bumper reinforcement along with, possibly some type of bracket to raise the lights themselves high enough to allow for the depths of the plastic of the bumper and longer mounting bolts.

You could PM Phillip (Philberto) I know he'd be willing to give you his insight. :cheers:


Thanks BG, I remembered the thread with his truck in the mtns with the cover on and the light cutouts. Since he's ditched the bumper cover now I couldnt find the right build thread.

Roadie, it seems almost everyone has ditched their covers :) With our Michigan Winters I'm opting to leave it on but I want to add a little additional lighting besides the factory fogs. And at this point with the way my yakima racks are setup my roof isnt an option I want to explore.

I'll probably just tear into this tonight, Ive got a set of lights leftover from my last YJ that should fit. I'll just modify some bracketry for them.
bdp1978
Trail-Blazer
 
Posts: 253
Joined: Fri Oct 22, 2010 12:32 pm
Location: Rochester Hills, Mi
Name: Brad
Vehicle Year: 2004
Vehicle: Chevrolet TrailBlazer
DriveTrain: 4WD w/ G80

by MrSmithsTB » Wed Oct 19, 2011 1:58 pm

Shouldn't mount to the cover itself, only the reinforcing bar. Otherwise the lights will not last long. To mount off of the top, you need to work your way through 2" of bumper padding. If you mount to the front, right at the point of indentation is where the steel bumper takes over. I would get some construction grade 90deg brackets and bolt them to the bumper. Mark where they will come through the cover and cut just enough for the bracket to slip through. Maybe use door edge protector to dress up the cuts a little.
Since I *may* be changing to a steel bumper, I looked for the least intrusive way to add driving lights. Here is the solution I came up with over the weekend:

I replaced the stock push-thru mounts with nut/bolt/washer and mounted the lights to them. No bumper cutting and a nice little addition of lighting. Looks pretty good, as well.
Image
back in the saddle
TB BUILD
User avatar
MrSmithsTB
Veteran
 
Posts: 1756
Joined: Thu Sep 10, 2009 2:28 pm
Location: EHT, NJ
Name: Bob
Vehicle Year: 2006
Vehicle: Other GMT360/370
DriveTrain: AWD w/ G80
Rank: Offroad Rated

by navigator » Wed Oct 19, 2011 2:04 pm

look at how Karo did his winch, that should give you an idea.

viewtopic.php?f=25&t=1221
"Please consider a search before posting. Folks on this site PIONEERED functional offroad use of these trucks."
The answer to many common lift questions can be found
here
My Build Thread
User avatar
navigator
Moderator
 
Posts: 4651
Joined: Wed Mar 09, 2011 10:16 am
Location: NC, Winnabow
Name: Chris
Vehicle Year: 2006
Vehicle: Chevrolet TrailBlazer
DriveTrain: 4WD
Rank: Trail Ready

by Gordinho80 » Wed Oct 19, 2011 2:15 pm

You can mount to the top side of the cover in front of the grill... but you will need spacers between cover and reinforcement bar. There is about 3-4" gap between the bar and the cover. You mount lights to the cover and not to the bar, you'll have some seriously wobbly lights.
Mario - Build Thread
User avatar
Gordinho80
Lifer
 
Posts: 2787
Joined: Tue Sep 08, 2009 9:27 am
Location: NJ, Jackson
Name: Mario Almeida
Vehicle Year: Other
Vehicle: Other Vehicle
DriveTrain: 4WD

by bdp1978 » Wed Oct 19, 2011 2:38 pm

Gordinho80 wrote:There is about 3-4" gap between the bar and the cover. .


HOLY SHhhhh.... there is that much of a gap? Thats a little more than I would have expected, but Ive never had my cover off. That does explain why Philberto originally cut the half circles in his cover when he put the lights on though.


Mr. Smith- Ive been eyeing that same location as well and that's def. an option. My goal is on top of the bumper and it sounds like Im going to have to pull the cover off to get a better idea of the brackets I'll need to fab up.
bdp1978
Trail-Blazer
 
Posts: 253
Joined: Fri Oct 22, 2010 12:32 pm
Location: Rochester Hills, Mi
Name: Brad
Vehicle Year: 2004
Vehicle: Chevrolet TrailBlazer
DriveTrain: 4WD w/ G80

by Gordinho80 » Wed Oct 19, 2011 3:04 pm

Ok... maybe like 2-3"... but there is a significant gap. You can visualize it here. The cover comes up to the bottom of the grill... so look at the gap.
Image
Mario - Build Thread
User avatar
Gordinho80
Lifer
 
Posts: 2787
Joined: Tue Sep 08, 2009 9:27 am
Location: NJ, Jackson
Name: Mario Almeida
Vehicle Year: Other
Vehicle: Other Vehicle
DriveTrain: 4WD

by bgwolfpack » Wed Oct 19, 2011 3:15 pm

Just measured it. It is 3 1/4 inches from the bumper reinforcement to the top of the plastic of the cap on my 2004.
bgwolfpack
Veteran
 
Posts: 1794
Joined: Fri Sep 18, 2009 7:19 pm
Name: Randy
Vehicle Year: Other
Vehicle: Other Vehicle
DriveTrain: 4WD

by bdp1978 » Wed Oct 19, 2011 3:24 pm

Thanks, you fella's just saved me some time! Gonna kick this project off tonight.
bdp1978
Trail-Blazer
 
Posts: 253
Joined: Fri Oct 22, 2010 12:32 pm
Location: Rochester Hills, Mi
Name: Brad
Vehicle Year: 2004
Vehicle: Chevrolet TrailBlazer
DriveTrain: 4WD w/ G80

by Philberto » Sun Oct 23, 2011 9:37 pm

Hey my ears were burning.... I actually still run my stock bumper cover, and no longer have those cheapie lights that are shown in that picture... I had to both cut notches in my bumper cover and cut off the lower part of the center radiator grille cover in order to fit the lights... I should have a picture here somewhere:


Image


There we go. As you can see, the lower half of the honeycomb-type grille cover is gone, and there is a quite significant gap between the bumper cover and the actual bumper cover support, that would take quite a few washers to rectify. Then again, you'd still run into interference with the "chrome" crossbar if you put the lights as far back as I did. Note that I installed the lights into existing holes in the bumper cover support; no drilling was necessary.

-edit: Just noticed the confusion. I had taken off the bumper cover and ran those lights ORIGINALLY, but then I decided to put the bumper cover back on and cut the holes in it for the newer (better) lights. The picture above is the most recent shot of my TB.
My Build Thread | 2006 Trailblazer LS Desert Camping Edition **SOLD**
2013 Nissan Xterra S "ReXterra"
User avatar
Philberto
Lifer
 
Posts: 2046
Joined: Fri Sep 11, 2009 5:30 pm
Location: CA, Oxnard
Name: Philip Cruz
Vehicle Year: Other
Vehicle: Other Vehicle
DriveTrain: 4WD
Rank: Offroad Rated

by bdp1978 » Mon Oct 24, 2011 2:04 pm

Thanks for responding Phillip. I have held off on starting this as the lights I had were a little deeper than I planned, I want some that have a shallower body.

Once I have those I have a pretty good idea of how Im going to fab up the bracket to avoid doing any cutting of the grill or the bumper cover.
bdp1978
Trail-Blazer
 
Posts: 253
Joined: Fri Oct 22, 2010 12:32 pm
Location: Rochester Hills, Mi
Name: Brad
Vehicle Year: 2004
Vehicle: Chevrolet TrailBlazer
DriveTrain: 4WD w/ G80

by galacticfuzz » Mon Oct 24, 2011 7:38 pm

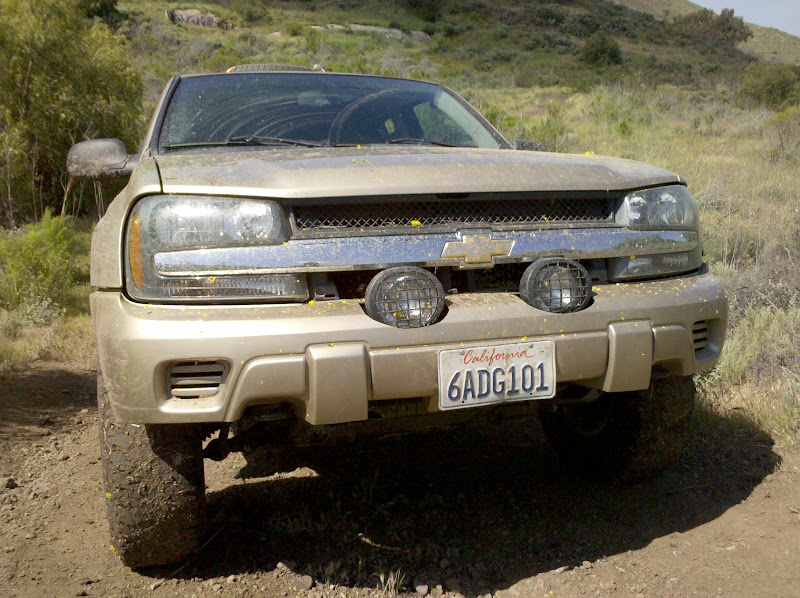
bdp1978 wrote:Thanks for responding Phillip. I have held off on starting this as the lights I had were a little deeper than I planned, I want some that have a shallower body.

Once I have those I have a pretty good idea of how Im going to fab up the bracket to avoid doing any cutting of the grill or the bumper cover.


I've been doing the same, but in all reality I never got to be happy with how it turned out. Height of the lights and such just weren't what I was hoping. I went through three different variants of mounts, each having their own bits of "issues." I was also looking at mounting through where the factory tow hooks would go, since, well, I don't have those.
Build Thread
“Set out from any point. They are all alike. They all lead to a point of departure.”
― Antonio Porchia
galacticfuzz
Off-Roader
 
Posts: 245
Joined: Sun Apr 24, 2011 11:16 am
Location: IL, Lake Vila
Name: Drew
Vehicle Year: 2007
Vehicle: Chevrolet TrailBlazer
DriveTrain: 4WD w/ G80
Rank: Trail Ready

by bdp1978 » Tue Oct 25, 2011 9:26 am

galacticfuzz wrote:I've been doing the same, but in all reality I never got to be happy with how it turned out. Height of the lights and such just weren't what I was hoping. I went through three different variants of mounts, each having their own bits of "issues." I was also looking at mounting through where the factory tow hooks would go, since, well, I don't have those.


Funny you mention this, I gave up on this project last night. I got the lights all mocked up and I just dont like the way they look. Something looks off about the round lights in the middle with the square heads and fogs.

I'm opting to mount small square driving lights where MrSmith did and go below the bumper in the air dam section. We dont run front plates in MI so its all open through there.
bdp1978
Trail-Blazer
 
Posts: 253
Joined: Fri Oct 22, 2010 12:32 pm
Location: Rochester Hills, Mi
Name: Brad
Vehicle Year: 2004
Vehicle: Chevrolet TrailBlazer
DriveTrain: 4WD w/ G80

by Trail X » Wed Oct 26, 2011 12:57 pm

Don't focus too much on the look of it. If the lights perform as you wish, it's seriously ok to have round lights. Function over form. :twisted:
8-) Build Thread | ExPo Build | YouTube Videos
Not all who wander are lost. -Tolkien
User avatar
Trail X
Founder
 
Posts: 9935
Joined: Mon Sep 07, 2009 10:22 pm
Location: VA, Roanoke
Name: James Downing
Vehicle Year: 2005
Vehicle: Chevrolet TrailBlazer
DriveTrain: 4WD w/ Aftermarket Locker
Rank: Expedition Guide

by bdp1978 » Wed Oct 26, 2011 3:57 pm

JamesDowning wrote: Function over form. :twisted:


I'm all about Function, but without an aftermarket bumper they just arent coming out how I would like. Mounted lower and out in front of the bumper looks good with the roundies as a couple members have done.
bdp1978
Trail-Blazer
 
Posts: 253
Joined: Fri Oct 22, 2010 12:32 pm
Location: Rochester Hills, Mi
Name: Brad
Vehicle Year: 2004
Vehicle: Chevrolet TrailBlazer
DriveTrain: 4WD w/ G80

by navigator » Wed Oct 26, 2011 4:41 pm

if they are too low will they help that much?
I haven't added any lights to mine yet but I'm thinking the higher they are the better they would light things up.
I would think if they were low they wouldn't add that much over the headlights.
Maybe I've driven vehicles with crappy lighting in the past(jeeps are the worst) but I feel like my headlights cast pretty good light out front.

Where I really feel like I need light is out back, with the tint etc backing up at night seems like I need more light.
"Please consider a search before posting. Folks on this site PIONEERED functional offroad use of these trucks."
The answer to many common lift questions can be found
here
My Build Thread
User avatar
navigator
Moderator
 
Posts: 4651
Joined: Wed Mar 09, 2011 10:16 am
Location: NC, Winnabow
Name: Chris
Vehicle Year: 2006
Vehicle: Chevrolet TrailBlazer
DriveTrain: 4WD
Rank: Trail Ready

by bdp1978 » Wed Oct 26, 2011 4:54 pm

In all reality being lower does actually help here in Michigan.........if theres a snowstorm. Lower lighting doesnt reflect all of the flakes as much and improves visibility drastically. Also why you run low beams during big snowfall.

Overall though I agree, the higher the better for most light applications.
bdp1978
Trail-Blazer
 
Posts: 253
Joined: Fri Oct 22, 2010 12:32 pm
Location: Rochester Hills, Mi
Name: Brad
Vehicle Year: 2004
Vehicle: Chevrolet TrailBlazer
DriveTrain: 4WD w/ G80

by navigator » Wed Oct 26, 2011 9:42 pm

now that makes sense, I've noticed the same thing with fog.
I was thinking more about for off-roading at night, the higher the better.
"Please consider a search before posting. Folks on this site PIONEERED functional offroad use of these trucks."
The answer to many common lift questions can be found
here
My Build Thread
User avatar
navigator
Moderator
 
Posts: 4651
Joined: Wed Mar 09, 2011 10:16 am
Location: NC, Winnabow
Name: Chris
Vehicle Year: 2006
Vehicle: Chevrolet TrailBlazer
DriveTrain: 4WD
Rank: Trail Ready


Return to Electrical / Radios