Offroad Trailblazers and Envoys

One piece rad & oil skid plate

If its been completed, and doesn't fit into another category, stick it here.
Forum rules
Threads must fully document the modification with pictures and verbiage in the first post.
Threads that do not meet this criteria may be moved or deleted.

by Beamer » Sun Aug 07, 2011 12:12 am

After reading through all of the oil and radiator skid plate posts, it was time to replace the plastic oil plan flap and also protect the radiator. Mikes plates look awesome, but I wanted to try something myself. I have a front brush guard that I purchased a few months after I bought my TB and I have no idea of the manufacturer and I needed to work around that.

I bought a 2'x4' piece of 1/4" steel plate, 10' of 3/16" x 2" angle iron, some 5/16" bolts, washers and nuts and 2 stainless hex recess screws. About $120 total spent.

I do not have a welder, but I did all of this with a drill, grinder and portable band saw.

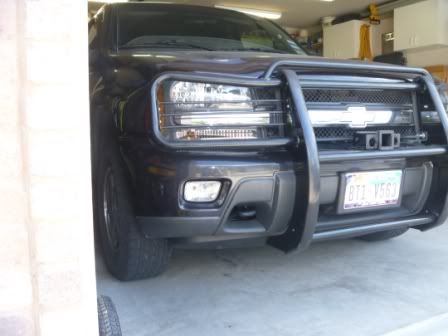
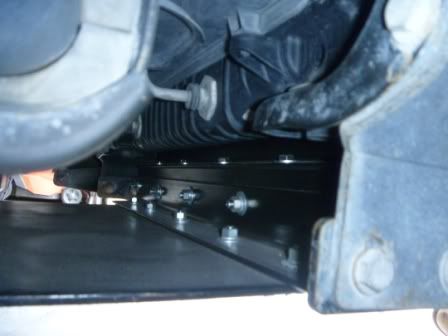
Started by mounting 42" piece of angle iron to front side of radiator bracket (the mount for my brush guard is c-chanell that is mounted inside of the radiator bracket)
Image

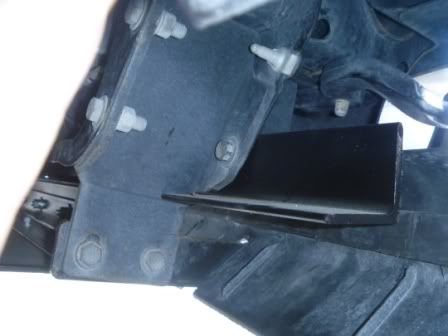
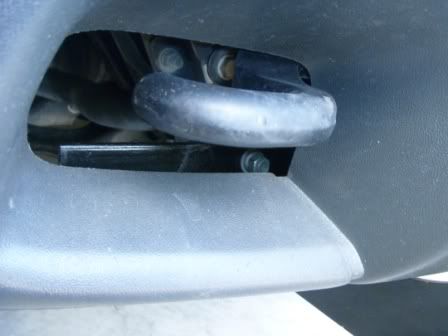
you can see the angle iron through the tow hook opening
Image

two 29" pieces of the angle iron bolted to the first one and to each other to step down and back (they form a W shape).
from top side
Image

from bottom side
Image

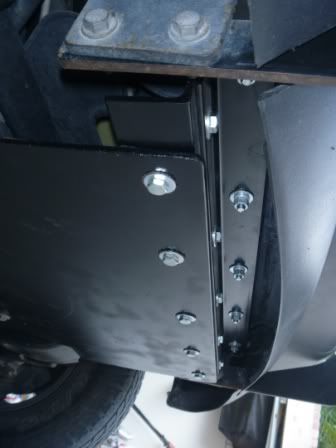
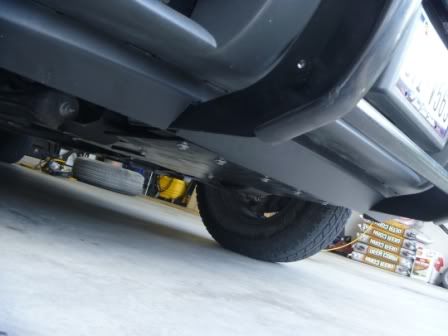
1/4" plate mounted to bottom piece of angle iron
Image

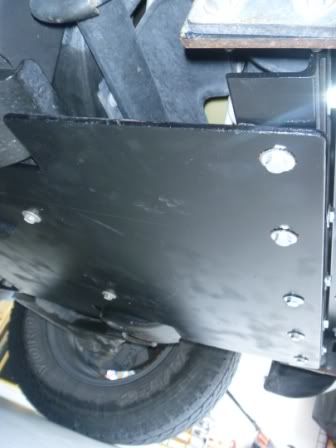
plate cutout around the frame skids
Image

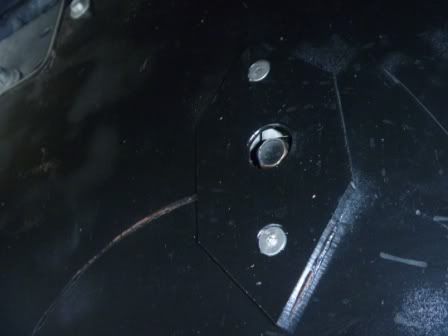
the 4 original bolts used where the factory plastic skid plate was mounted.
Not too worried about the bolt heads getting mashed up as I am mostly trying to protect the vitals from small rocks, sticks, cornstalks etc.

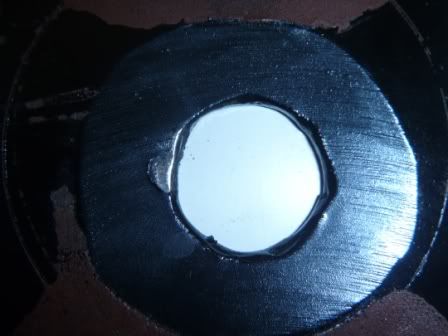
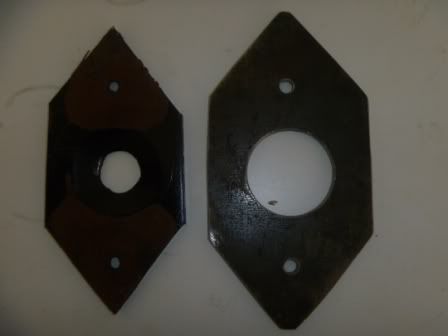
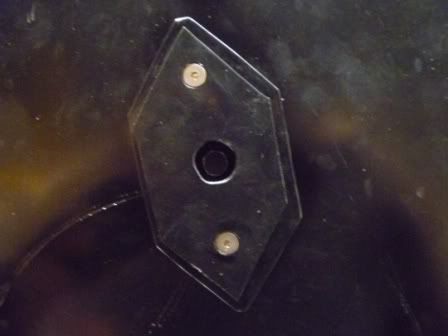
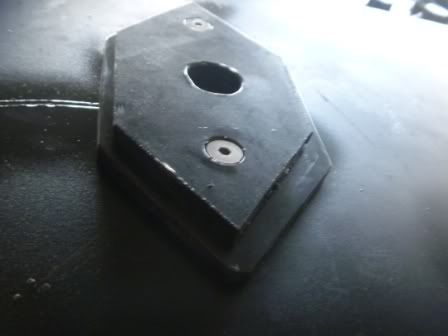
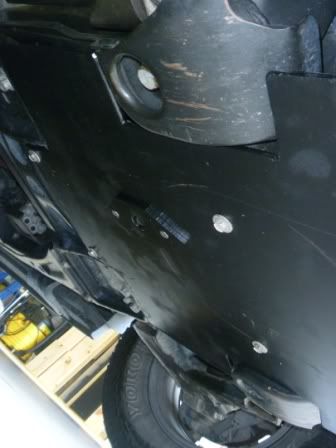
I drilled a 1-1/2" hole for around the oil drain plug in the big plate, then made this little plate with the 2 counter sink stainless hex screws and drilled a 3/4" hole to give clearance to the drain bolt
Image

I do not have the approach angle that most of you have because I am limited by my brush guard.
Image

Image
User avatar
Beamer
Member
 
Posts: 84
Joined: Wed May 18, 2011 9:33 pm
Location: MD, Westminster
Name: Chris Beam
Vehicle Year: 2003
Vehicle: Chevrolet TrailBlazer
DriveTrain: 4WD w/ G80
Rank: Trail Ready

by MrSmithsTB » Sun Aug 07, 2011 12:38 am

Very cool! I have been trying to figure out how to do the same thing without a welder or a brake. I think a variation of this may work with a body lift
back in the saddle
TB BUILD
User avatar
MrSmithsTB
Veteran
 
Posts: 1756
Joined: Thu Sep 10, 2009 2:28 pm
Location: EHT, NJ
Name: Bob
Vehicle Year: 2006
Vehicle: Other GMT360/370
DriveTrain: AWD w/ G80
Rank: Offroad Rated

by bartonmd » Sun Aug 07, 2011 9:11 am

Looks good! Especially if you're leaving the brush guard and bumper cover on...

The only things I'd add are:

1. Make the drain plug hole a little bigger... When you torque up the engine, it will rotate, which will move that drain plug side to side... I would put another piece the same shape as the one you made, but put a 1.5" hole in the middle of it, to offset your 3/4" hole down another 1/4"...

2. On the angle iron that goes in front of the radiator, I'd bolt another couple pieces of angle iron up to the frame, to help support some weight... Without a welder, you can just take 2" of one side of the angle off, then stick it in your vice and bend the remaining tab over... You don't have to bolt it to the frame if you don't want... you could use the bolts that hold your brush guard to the radiator supports to hold them on the way up, then not have to bend the tabs over on the angle pieces...


I'm a cheap ghetto-fabber from way back (as "way back" as I could be, given that I'm 30), so you don't ever have to apologize for making something yourself, rather than buying it from me! The full underbody protective shields for our SCCA rally car in college were made from cut and welded up shelving from a K-Mart that went out of business, and the skid plate under the radiator and engine/trans was... well... here:

Image

I'm a pretty busy guy, so I'm not going to CAD design everything for everybody, but if you want some input or ideas on anything that you're making yourself, feel free to send me a PM or shoot me an email at mdbfabllc to gmail.com...

Mike
bartonmd
Moderator
 
Posts: 4469
Joined: Wed Sep 09, 2009 9:35 am
Location: IN, Indianapolis
Name: Mike
Vehicle Year: 2007
Vehicle: Chevrolet TrailBlazer
DriveTrain: 4WD w/ G80
Rank: Offroad Rated

by Beamer » Sun Aug 07, 2011 11:28 am

Mike, Thanks for the input. I have noticed a quick rattle when starting the engine, it does not happen everytime, but it is probably the oil drain plug hitting the cover. I will make another piece as you suggested. I may also add some strengthening to the angle irons mounting to the frame next oil change.
User avatar
Beamer
Member
 
Posts: 84
Joined: Wed May 18, 2011 9:33 pm
Location: MD, Westminster
Name: Chris Beam
Vehicle Year: 2003
Vehicle: Chevrolet TrailBlazer
DriveTrain: 4WD w/ G80
Rank: Trail Ready

by Trail X » Sun Aug 07, 2011 11:48 am

Looks pretty sweet, Beam.

Also looks like you may need some new front springs!
8-) Build Thread | ExPo Build | YouTube Videos
Not all who wander are lost. -Tolkien
User avatar
Trail X
Founder
 
Posts: 9935
Joined: Mon Sep 07, 2009 10:22 pm
Location: VA, Roanoke
Name: James Downing
Vehicle Year: 2005
Vehicle: Chevrolet TrailBlazer
DriveTrain: 4WD w/ Aftermarket Locker
Rank: Expedition Guide

by bartonmd » Sun Aug 07, 2011 1:50 pm

Beamer wrote:Mike, Thanks for the input. I have noticed a quick rattle when starting the engine, it does not happen everytime, but it is probably the oil drain plug hitting the cover. I will make another piece as you suggested. I may also add some strengthening to the angle irons mounting to the frame next oil change.


Beam,

No problem at all! If you're not going to make the extra offset piece today, I'd take off the one that you've got! If it's doing that at startup, it could possibly do the same thing under load, and could either break the drain plug head off, or break off the whole drain plug part of the oil pan...

Mike
bartonmd
Moderator
 
Posts: 4469
Joined: Wed Sep 09, 2009 9:35 am
Location: IN, Indianapolis
Name: Mike
Vehicle Year: 2007
Vehicle: Chevrolet TrailBlazer
DriveTrain: 4WD w/ G80
Rank: Offroad Rated

by Beamer » Sun Aug 07, 2011 4:33 pm

Fixed this morning!

The drain plug was in fact rubbing the cover. I had scalloped out the back side of the cover with a 4" grinding wheel so there was more clearance than just the 3/4" hole.
Image

Made a new larger plate with 1-1/2" hole.
Image

Installed.
Image
Image

Thanks again Mike!
User avatar
Beamer
Member
 
Posts: 84
Joined: Wed May 18, 2011 9:33 pm
Location: MD, Westminster
Name: Chris Beam
Vehicle Year: 2003
Vehicle: Chevrolet TrailBlazer
DriveTrain: 4WD w/ G80
Rank: Trail Ready

by Beamer » Sun Aug 07, 2011 4:36 pm

JamesDowning wrote:Looks pretty sweet, Beam.

Also looks like you may need some new front springs!


Thanks JD. I have the 2" lift from Rough Country on there, so hoping that is good enough for now.
User avatar
Beamer
Member
 
Posts: 84
Joined: Wed May 18, 2011 9:33 pm
Location: MD, Westminster
Name: Chris Beam
Vehicle Year: 2003
Vehicle: Chevrolet TrailBlazer
DriveTrain: 4WD w/ G80
Rank: Trail Ready

by bartonmd » Sun Aug 07, 2011 4:48 pm

There ya go! Looks great!

Mike
bartonmd
Moderator
 
Posts: 4469
Joined: Wed Sep 09, 2009 9:35 am
Location: IN, Indianapolis
Name: Mike
Vehicle Year: 2007
Vehicle: Chevrolet TrailBlazer
DriveTrain: 4WD w/ G80
Rank: Offroad Rated

by djthumper » Sun Aug 07, 2011 5:37 pm

Looks nice!

You would be surprised what a bench vise and some stout angle iron and do for bending metal. Though not so much on 1/4". I have had to resort to some ghetto manufacturing since getting out of the air force.
User avatar
djthumper
Moderator
 
Posts: 2702
Joined: Wed Mar 24, 2010 6:04 pm
Location: NV, Las Vegas
Name: Larry
Vehicle Year: 2006
Vehicle: Chevrolet TrailBlazer
DriveTrain: 4WD
Rank: Offroad Rated

by fishsticks » Mon Aug 08, 2011 2:44 am

:thumright: My truck is one giant ghetto fab. (except for the stuff I bought from Mike)

I made my first rad skid with a sledge hammer. True story.
11 Silverado LTZ - 6.2L/6l80, 2/3 drop, self tuned
85 Hilux - 3RZ, dual cases, caged, 40s, chromo everything
02 TrailBlazer LTZ - 35s, lockers, balls - Gone but not forgotten - Build
User avatar
fishsticks
Moderator
 
Posts: 4356
Joined: Thu Apr 01, 2010 11:30 pm
Location: WA, Vancouver
Name: Donny
Vehicle Year: Other
Vehicle: Other Vehicle
DriveTrain: 4WD w/ Aftermarket Locker
Rank: Extreme Offroader

by mikekey » Tue Jun 26, 2012 1:15 pm

bartonmd wrote:
Image


I LOVE THIS! And it makes me feel more confident about sharing some of my personal hacks.
Once lifted 03 Trailblazer on 35's, gave it up to travel the USA with my family.
User avatar
mikekey
Lifer
 
Posts: 2585
Joined: Sat Jan 15, 2011 4:08 am
Location: North America
Name: Mike
Vehicle Year: 2003
Vehicle: Chevrolet TrailBlazer
DriveTrain: 4WD w/ G80
Rank: Expedition Rated

by bartonmd » Tue Jun 26, 2012 1:27 pm

mikekey wrote:
bartonmd wrote:
Image


I LOVE THIS! And it makes me feel more confident about sharing some of my personal hacks.


Yeah, the competition liked it, too! Most of them had 1/2" UHMW or Teflon full underbody skids. You work with what you've got!

Mike
bartonmd
Moderator
 
Posts: 4469
Joined: Wed Sep 09, 2009 9:35 am
Location: IN, Indianapolis
Name: Mike
Vehicle Year: 2007
Vehicle: Chevrolet TrailBlazer
DriveTrain: 4WD w/ G80
Rank: Offroad Rated

by NC_IslandRunner » Tue Jun 26, 2012 9:37 pm

Looks good!
IF THE FISH STOP BITING... HUNT FOR SHELLS!!!
User avatar
NC_IslandRunner
Moderator
 
Posts: 3022
Joined: Fri Dec 03, 2010 4:49 pm
Location: NC, Sanford
Name: Rory
Vehicle Year: 2004
Vehicle: Chevrolet TrailBlazer
DriveTrain: 4WD w/ G80
Rank: Offroad Rated


Return to Completed Modifications

cron