Offroad Trailblazers and Envoys

On Board Air

If its been completed, and doesn't fit into another category, stick it here.
Forum rules
Threads must fully document the modification with pictures and verbiage in the first post.
Threads that do not meet this criteria may be moved or deleted.

by Trail X » Sun Mar 20, 2011 7:49 pm

I finished up my OBA setup today. I used the tank in my bumper paired with my trusty old MV-50 superflow compressor. The combination produced a fairly inexpensive setup that should be pretty beefy, while occupying very little space.

The end result is a system that I can turn on anytime to charge the 4 gallon bumper tank with 110 psi of air. That air can be accessed from the quick-connect port on the rear bumper:

Image

I'm using a 25 ft self-coiling hose with an ARB inflator with the system. The inflator allows me to read the tire pressure instantly upon letting go of the trigger. That alone should save a good portion of time.

Image

The hose doesn't have much trouble reaching the front tires, however the reach to the front passenger tire is getting towards the max reach of the hose. I'm not sure if I could air up another vehicle without having them reposition.

Image

Here's the MV-50 getting prepared in the shop. The MV-50 has 3 ports, all different sizes (dumb design if you ask me). The intake port is a 1/4" NPT (where the red muffler/filter attaches). The gauge port (where I now have the output) is 1/8" NPT, and the old output (now plugged) is an M12x1mm thread. I never did find a M12x1mm ANYTHING, so I ended up jamming a M12x1.25mm plug in and cut new threads. All I needed was for it to seal anyways, and it seems to have worked ok when paired with some Teflon tape.

Downstream of the compressor, there's a one-way valve. Compressor heads can leak back through the cylinder, so I mitigated that by adding the valve.

Image

Below is the MV-50 installed in the passenger side storage compartment. I wanted it to be easily accessible if needed (like if it caught fire... :shock: ).

I have heard that the only downfall with some of these MV-50 compressors was that their heads can get too hot (I've never had an issue). To try to keep the head's temperatures down, I installed a small cooling fan that runs with the compressor cycle and helps keep airflow around the head and down towards the motor.

Image

Next you can see the hose routing and wiring. The hose runs from the compressor through a gasketed bulkhead fitting and into the tank port. From the tank, it runs to an aluminum manifold block. On the block, there's an emergency blowoff valve (set to 165 psi) in case the compressor switches or relays fail. There's also a pressure sensitive switch, to control the compressor, and a manual bleedoff valve, which I probably don't need. The empty ports may be used for future projects, but for now are just plugged - I wanted to make sure the system had flexibility and room to add in the future. From there, the tubing runs to the quick connect on the outside of the bumper.

Image

As the gauge shows: compressor on at 90 psi, and off at 110 psi. My guess is from 0 PSI, it takes maybe 2 minutes to blow the tank up to 110 psi (but I didn't time it). The MV-50 didn't seem to have any issues with the pressures.

Image

I'm pretty happy with the result so far, but only time will tell if it holds up to vibrations and abuse.
8-) Build Thread | ExPo Build | YouTube Videos
Not all who wander are lost. -Tolkien
User avatar
Trail X
Founder
 
Posts: 9935
Joined: Mon Sep 07, 2009 10:22 pm
Location: VA, Roanoke
Name: James Downing
Vehicle Year: 2005
Vehicle: Chevrolet TrailBlazer
DriveTrain: 4WD w/ Aftermarket Locker
Rank: Expedition Guide

by dirty anton » Sun Mar 20, 2011 8:03 pm

i know what we were both doin today! wierd! hey it looks great, its awesome how you integrated the bumper for air in your design! :cheers:
User avatar
dirty anton
Trail-Blazer
 
Posts: 426
Joined: Thu Aug 19, 2010 12:21 am
Location: upper marlboro md
Name: mike
Vehicle Year: 2002
Vehicle: Chevrolet TrailBlazer
DriveTrain: 4WD w/ Aftermarket Locker
Rank: Extreme Offroader

by DmccartneyFF2TB » Sun Mar 20, 2011 9:03 pm

That is awesome!!! I saw some where that a guy used his tubing from his roll cage as a air tank. Awesome work tho!
Dame
BDS,ROUGH COUNTRY,
Smitty Build XR-C8 Winch
33" Procomp M/T X MARK SPACERS.
Only Blue lifted 2002 Trailblazer in WMASS.
www.wm4x4.com
DmccartneyFF2TB
Trail-Blazer
 
Posts: 447
Joined: Mon Aug 30, 2010 7:03 am
Location: Wilbraham MA
Name: Damian
Vehicle Year: 2002
Vehicle: Chevrolet TrailBlazer
DriveTrain: 4WD
Rank: Offroad Rated

by dlcsjoyce » Sun Mar 20, 2011 10:26 pm

Nice setup, looks great.
dlcsjoyce
Member
 
Posts: 71
Joined: Sat Oct 23, 2010 9:36 pm
Location: Salisbury, NC
Name: Derek Joyce
Vehicle Year: 2004
Vehicle: Chevrolet TrailBlazer
DriveTrain: 4WD

by djthumper » Sun Mar 20, 2011 11:17 pm

Looks great! I hope it works out for your excursions.
User avatar
djthumper
Moderator
 
Posts: 2702
Joined: Wed Mar 24, 2010 6:04 pm
Location: NV, Las Vegas
Name: Larry
Vehicle Year: 2006
Vehicle: Chevrolet TrailBlazer
DriveTrain: 4WD
Rank: Offroad Rated

by Diacom » Sun Mar 20, 2011 11:56 pm

That turned out great. Way to go for including the pop off as well.
Diacom
Addict
 
Posts: 882
Joined: Fri Jul 23, 2010 9:08 pm
Location: NV, Yerington
Name: Noel
Vehicle Year: 2003
Vehicle: Chevrolet TrailBlazer
DriveTrain: 4WD w/ Aftermarket Locker

by fishsticks » Mon Mar 21, 2011 2:34 am

Me likey! Will probably steal ideas from your build on this. :)
11 Silverado LTZ - 6.2L/6l80, 2/3 drop, self tuned
85 Hilux - 3RZ, dual cases, caged, 40s, chromo everything
02 TrailBlazer LTZ - 35s, lockers, balls - Gone but not forgotten - Build
User avatar
fishsticks
Moderator
 
Posts: 4356
Joined: Thu Apr 01, 2010 11:30 pm
Location: WA, Vancouver
Name: Donny
Vehicle Year: Other
Vehicle: Other Vehicle
DriveTrain: 4WD w/ Aftermarket Locker
Rank: Extreme Offroader

by navigator » Mon Mar 28, 2011 5:22 pm

James, I know this is a newby question but what is the advantage of the tank?
Wouldn't the pump itself work fine to pump up your tires after a trip?
Does the tank allow you to run some air tools like an impact etc?
"Please consider a search before posting. Folks on this site PIONEERED functional offroad use of these trucks."
The answer to many common lift questions can be found
here
My Build Thread
User avatar
navigator
Moderator
 
Posts: 4651
Joined: Wed Mar 09, 2011 10:16 am
Location: NC, Winnabow
Name: Chris
Vehicle Year: 2006
Vehicle: Chevrolet TrailBlazer
DriveTrain: 4WD
Rank: Trail Ready

by Trail X » Mon Mar 28, 2011 5:53 pm

Fine questions, not necessarily newbie level stuff.
navigator wrote:James, I know this is a newby question but what is the advantage of the tank?
Wouldn't the pump itself work fine to pump up your tires after a trip?

The pump would work fine, and has for the past three years. However, the pump is annoying too. You have to raise the hood, set up the pump, go to the first tire and screw the air hose onto it, then go back and turn on the pump... then guess as to when the tire is at the correct pressure, go check the pressure with a gauge, re-hook up the compressor... adjust pressure. Then after you do that with all 4 tires, you have to pack up the rather warm compressor.

With the OBA, I just have to attach my air hose to the truck, go to the first tire, begin airing up (which is quicker due to the higher pressures), periodically let go of the fill lever to check the tire pressure, then pop it off and move on to the next tire. I won't have to touch the compressor, as it will automatically stop and start at the pre-set tank pressures. Should save a decent amount of time.
navigator wrote:Does the tank allow you to run some air tools like an impact etc?

It allows me to run air tools (for short periods of time due to the smallish tank), but also opens the door to stoking the fire with pressurized air, running an air locker, having an air horn, setting a tire bead, etc.

Since the tank was essentially free with the bumper (just a little extra design and fabrication time), and the setup saves me some cargo space, it seemed to be a no brainer.
8-) Build Thread | ExPo Build | YouTube Videos
Not all who wander are lost. -Tolkien
User avatar
Trail X
Founder
 
Posts: 9935
Joined: Mon Sep 07, 2009 10:22 pm
Location: VA, Roanoke
Name: James Downing
Vehicle Year: 2005
Vehicle: Chevrolet TrailBlazer
DriveTrain: 4WD w/ Aftermarket Locker
Rank: Expedition Guide

by navigator » Tue Mar 29, 2011 8:30 am

very nice James, thanks for the response!
"Please consider a search before posting. Folks on this site PIONEERED functional offroad use of these trucks."
The answer to many common lift questions can be found
here
My Build Thread
User avatar
navigator
Moderator
 
Posts: 4651
Joined: Wed Mar 09, 2011 10:16 am
Location: NC, Winnabow
Name: Chris
Vehicle Year: 2006
Vehicle: Chevrolet TrailBlazer
DriveTrain: 4WD
Rank: Trail Ready

by Trail X » Tue Mar 29, 2011 9:01 am

No problem Chris.

As a quick update for anyone else wishing to do something like this... I went back through and hose-clamped all of my barb connections because a few of them developed leaks. For some reason I was initially under the impression that hose clamps were not necessary with a hose barb, but my experience says otherwise.
8-) Build Thread | ExPo Build | YouTube Videos
Not all who wander are lost. -Tolkien
User avatar
Trail X
Founder
 
Posts: 9935
Joined: Mon Sep 07, 2009 10:22 pm
Location: VA, Roanoke
Name: James Downing
Vehicle Year: 2005
Vehicle: Chevrolet TrailBlazer
DriveTrain: 4WD w/ Aftermarket Locker
Rank: Expedition Guide

by dirty anton » Tue Mar 29, 2011 10:11 am

hey james i found a unloader on ebay ($6.00) and added it to the system and it helps alot,thanks again.you can hear it discharge upon startup, and since i upgraded to #12 wire and a short run to source there are not any
more issues with blowing the circuit. gave it a real workout the other day and no problems.
User avatar
dirty anton
Trail-Blazer
 
Posts: 426
Joined: Thu Aug 19, 2010 12:21 am
Location: upper marlboro md
Name: mike
Vehicle Year: 2002
Vehicle: Chevrolet TrailBlazer
DriveTrain: 4WD w/ Aftermarket Locker
Rank: Extreme Offroader

by Trail X » Tue Mar 29, 2011 2:10 pm

dirty anton wrote:hey james i found a unloader on ebay ($6.00) and added it to the system and it helps alot,thanks again.you can hear it discharge upon startup, and since i upgraded to #12 wire and a short run to source there are not any
more issues with blowing the circuit. gave it a real workout the other day and no problems.

Nice! I didn't use an unloader on mine, but it doesn't seem to be giving me any fuse blowing issues. I had considered it, but figured I'd only get it if needed. As of now, if I added one, I would have to reconfigure the output stack, as it'd be too long otherwise.
8-) Build Thread | ExPo Build | YouTube Videos
Not all who wander are lost. -Tolkien
User avatar
Trail X
Founder
 
Posts: 9935
Joined: Mon Sep 07, 2009 10:22 pm
Location: VA, Roanoke
Name: James Downing
Vehicle Year: 2005
Vehicle: Chevrolet TrailBlazer
DriveTrain: 4WD w/ Aftermarket Locker
Rank: Expedition Guide

by Philberto » Wed Mar 30, 2011 4:51 pm

I've had issues with the fuse blowing when starting under load with the mv50, so I'd definitely look into it... link for the unloader?
My Build Thread | 2006 Trailblazer LS Desert Camping Edition **SOLD**
2013 Nissan Xterra S "ReXterra"
User avatar
Philberto
Lifer
 
Posts: 2046
Joined: Fri Sep 11, 2009 5:30 pm
Location: CA, Oxnard
Name: Philip Cruz
Vehicle Year: Other
Vehicle: Other Vehicle
DriveTrain: 4WD
Rank: Offroad Rated

by dirty anton » Wed Mar 30, 2011 11:02 pm

User avatar
dirty anton
Trail-Blazer
 
Posts: 426
Joined: Thu Aug 19, 2010 12:21 am
Location: upper marlboro md
Name: mike
Vehicle Year: 2002
Vehicle: Chevrolet TrailBlazer
DriveTrain: 4WD w/ Aftermarket Locker
Rank: Extreme Offroader

by fishsticks » Mon Apr 11, 2011 7:51 pm

Here's my take on OBA.


My trusty air compressor (<$50):
Image

Not an MV50, but quite capable nonetheless.


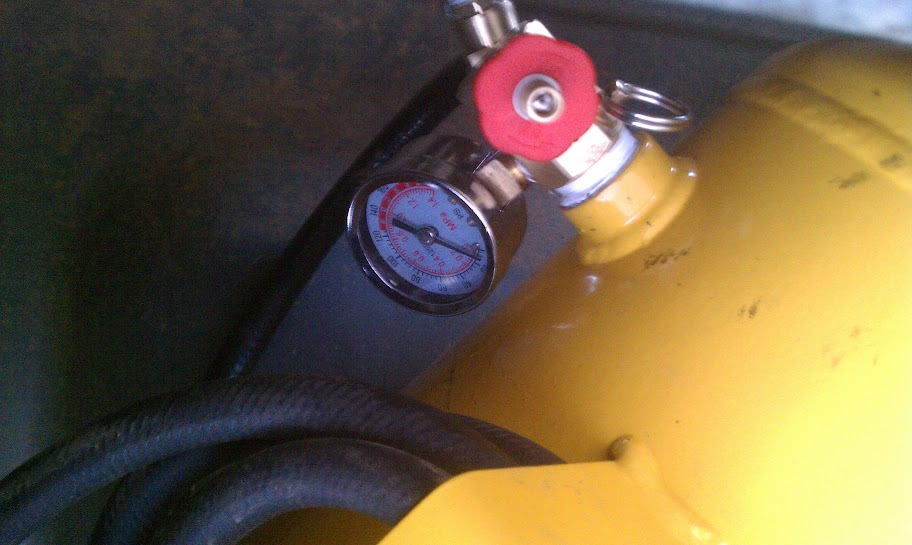
Harbor Freight Cheapo Air Tank of YELLOW DEATH! ($24.95)
Image


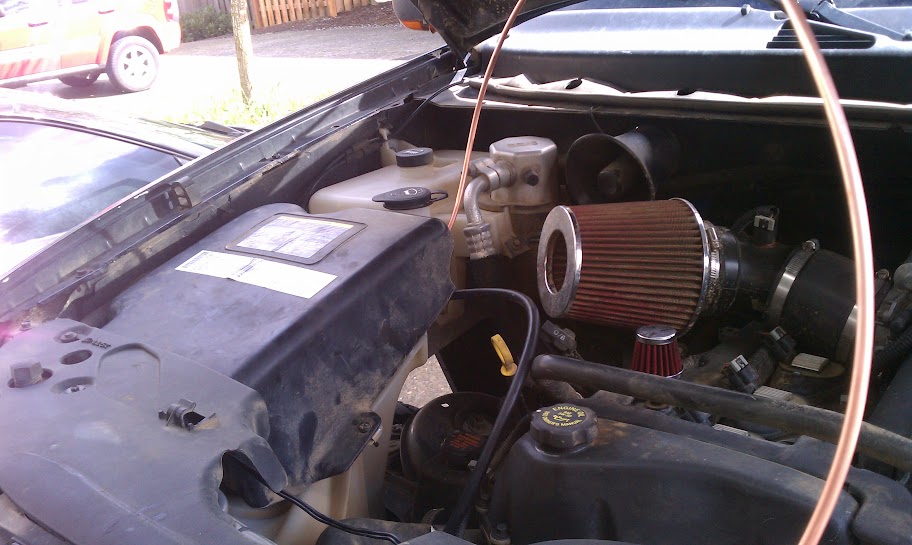
The guts of my trusty air compressor. Useless pressure gauge removed. I opted for copper line as it's easy to work with and the thing you see the compressor bolted into is the top of my stock airbox. My compressor's in my engine bay.
Image

Image

Tube routing...
Image

Image


The air tank fits up where the spare used to be, with just a little frame bending.

Image


This valve lets me charge the tank from my home compressor if I wish. I've discovered it's unnecessary as the little 12v quickly fills the tank on it's own.

Image

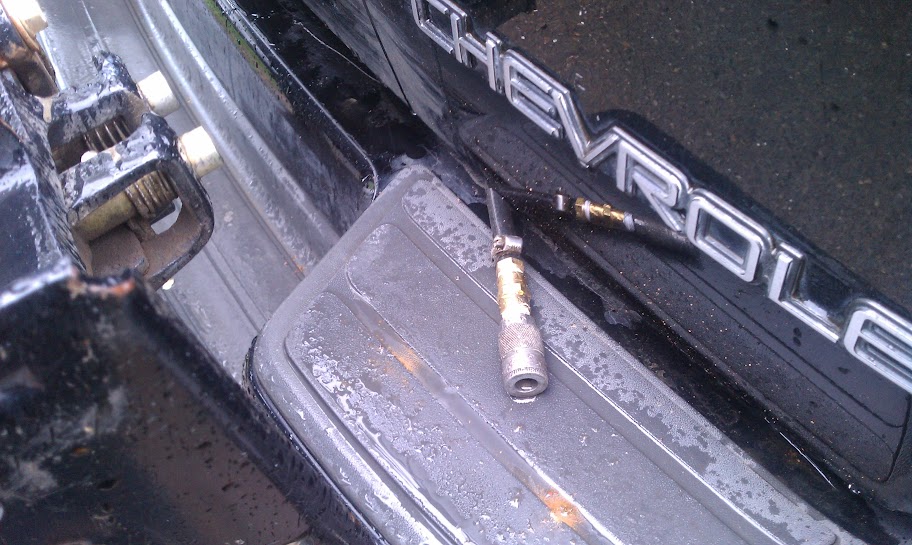
One air line out through the old tire winch hole. The other is under the hood next to my airbox.

Image


The compressor is wired to the 30A trailer power lug on the underhood fuse block and operated via relay and a switch that I mounted under the light controls. The setup will happily fill the tank to 125psi and beyond (the relief valve kicks in then). There's a very slow leak back through the compressor head when the system is off, but it takes hours to lose pressure. I may put a one way valve in somewhere to help hold pressure.

With the compressor running, I can fill two of my 35's from 16psi to 30psi in about 3 minutes if the tank is full. Takes another 5 or so to get the tank back up over 100psi then I repeat the process.

I'll probably make a couple cosmetic changes in time, but for now it's fully functional, and built mostly out of things I already had cluttering up my garage.
11 Silverado LTZ - 6.2L/6l80, 2/3 drop, self tuned
85 Hilux - 3RZ, dual cases, caged, 40s, chromo everything
02 TrailBlazer LTZ - 35s, lockers, balls - Gone but not forgotten - Build
User avatar
fishsticks
Moderator
 
Posts: 4356
Joined: Thu Apr 01, 2010 11:30 pm
Location: WA, Vancouver
Name: Donny
Vehicle Year: Other
Vehicle: Other Vehicle
DriveTrain: 4WD w/ Aftermarket Locker
Rank: Extreme Offroader

by Trail X » Mon Apr 11, 2011 8:04 pm

Nice execution. What do you use as your fill valve?
8-) Build Thread | ExPo Build | YouTube Videos
Not all who wander are lost. -Tolkien
User avatar
Trail X
Founder
 
Posts: 9935
Joined: Mon Sep 07, 2009 10:22 pm
Location: VA, Roanoke
Name: James Downing
Vehicle Year: 2005
Vehicle: Chevrolet TrailBlazer
DriveTrain: 4WD w/ Aftermarket Locker
Rank: Expedition Guide

by fishsticks » Mon Apr 11, 2011 8:38 pm

JamesDowning wrote:Nice execution. What do you use as your fill valve?


You mean the red guy in the pic above? That came on the tank.

Or am I failing to understand?
11 Silverado LTZ - 6.2L/6l80, 2/3 drop, self tuned
85 Hilux - 3RZ, dual cases, caged, 40s, chromo everything
02 TrailBlazer LTZ - 35s, lockers, balls - Gone but not forgotten - Build
User avatar
fishsticks
Moderator
 
Posts: 4356
Joined: Thu Apr 01, 2010 11:30 pm
Location: WA, Vancouver
Name: Donny
Vehicle Year: Other
Vehicle: Other Vehicle
DriveTrain: 4WD w/ Aftermarket Locker
Rank: Extreme Offroader

by chevycrew » Mon Apr 11, 2011 8:53 pm

I thought the same thing initially, but after reading it again, I think he is asking what you use to fill at the tires.
User avatar
chevycrew
Veteran
 
Posts: 1088
Joined: Tue Mar 08, 2011 2:42 pm
Location: UT, Salt Lake City
Name: Steve
Vehicle Year: 2002
Vehicle: Chevrolet TrailBlazer
DriveTrain: 4WD
Rank: Trail Ready

by fishsticks » Mon Apr 11, 2011 9:07 pm

Ah, it looks very similar to what JD is using... just not an ARB. Works reasonably as a deflator as well when not hooked up to air... but I think I want some auto deflators now.
11 Silverado LTZ - 6.2L/6l80, 2/3 drop, self tuned
85 Hilux - 3RZ, dual cases, caged, 40s, chromo everything
02 TrailBlazer LTZ - 35s, lockers, balls - Gone but not forgotten - Build
User avatar
fishsticks
Moderator
 
Posts: 4356
Joined: Thu Apr 01, 2010 11:30 pm
Location: WA, Vancouver
Name: Donny
Vehicle Year: Other
Vehicle: Other Vehicle
DriveTrain: 4WD w/ Aftermarket Locker
Rank: Extreme Offroader

Next

Return to Completed Modifications