Offroad Trailblazers and Envoys

MOD: Superwinch LP8500

If its been completed, and doesn't fit into another category, stick it here.
Forum rules
Threads must fully document the modification with pictures and verbiage in the first post.
Threads that do not meet this criteria may be moved or deleted.

by Trail X » Tue Sep 15, 2009 8:32 pm

After over a month of waiting for this thing, it finally arrived today. First of all, beware of how heavy these suckers are. I knew it would be heavy... but didn't figure THIS heavy. Too bad I don't have a bathroom scale, I'd weigh it.

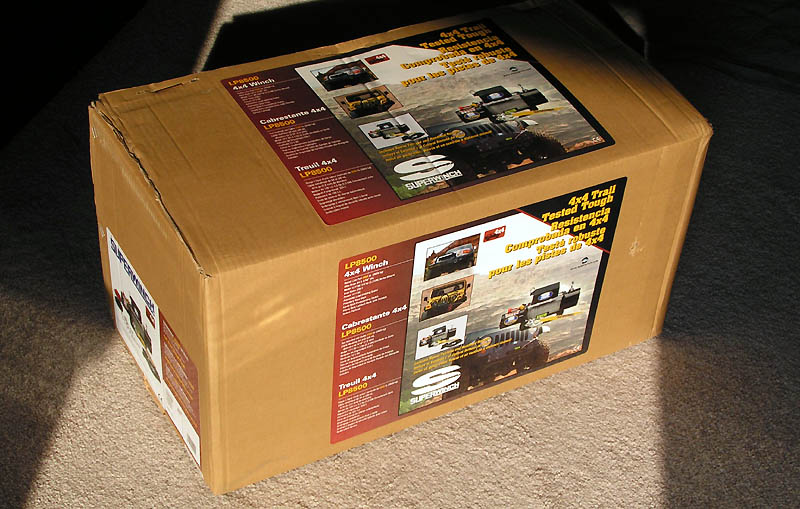
Anyways, on to the pictures! :excited:

Image

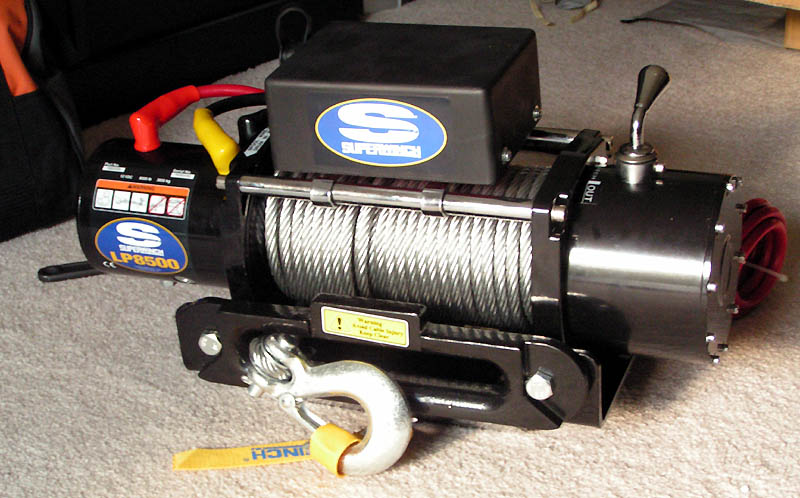
Surprisingly simple to put together... well, it basically came assembled. You just put on the hook and bolt it to the winch plate (I'm using a curt receiver mounted winch plate).

Image

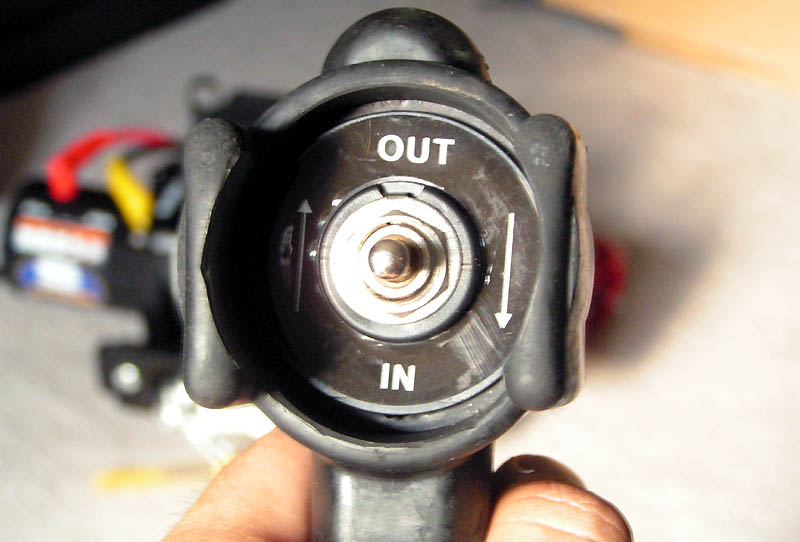
Close up of the controller. Simple, but effective. Nice rubber bumpers on the left and right to protect the switch too.

Image

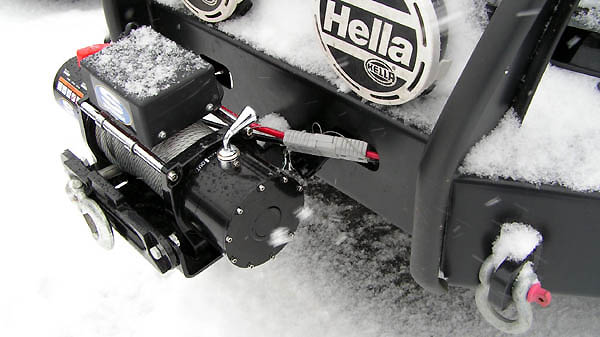
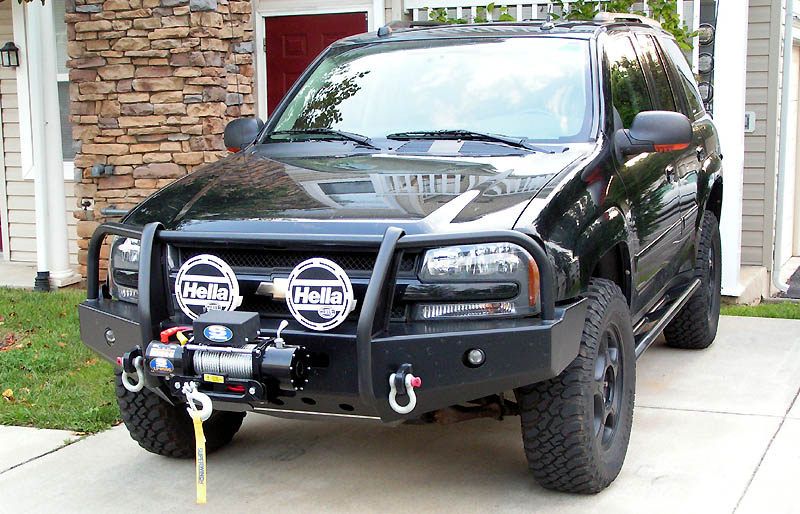
Finally a tease of it on the truck. Not wired up or anything, but I at least lugged it over and took a picture for you guys. Again... this thing is a bitch to carry around! I think I've decided I HAVE to get synthetic asap, for the weight issue alone!.

Image

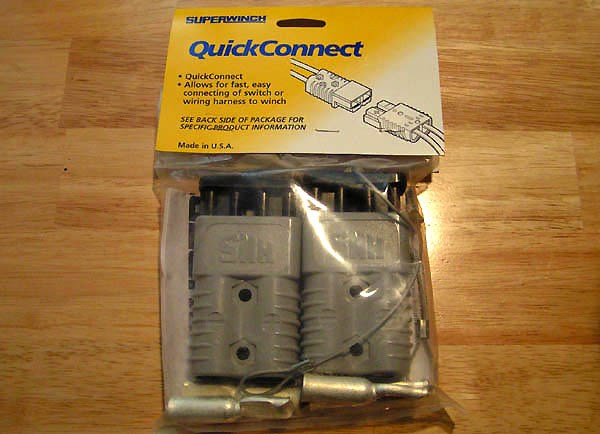
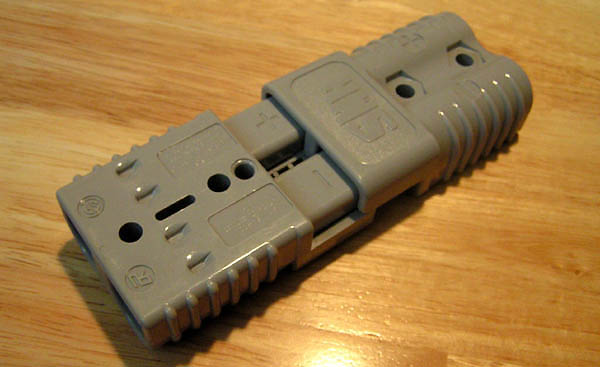
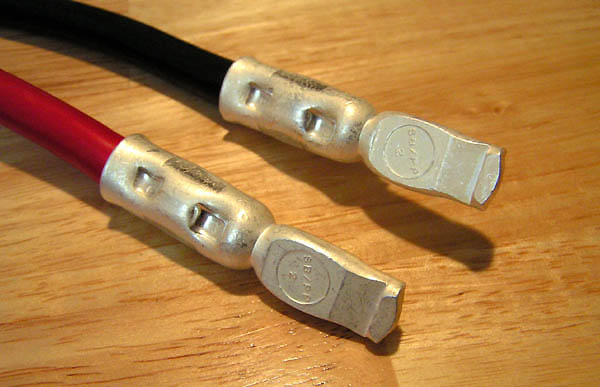
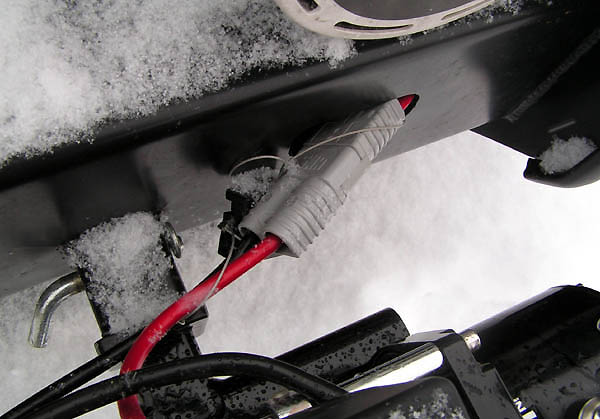
A couple questions... I purchased a 0 gauge Anderson plug (pictured below)... rated to 350 A. But the connectors seem much too large for the wire gauge of the winch. I don't think they'd crimp onto the wires at all. Did I get the wrong sized connector possibly? :slap:

Image

Secondly, the kit came with a 150A fuse that apparently you are supposed to put inline with the winch wiring. While I see the reasoning behind this, I thought winches pulled like 300 amps at full power? :gimp:

I think I'm also going to have to get a new battery in order to even connect the winch. I don't see any obvious way to connect the winch to the stock battery. Or am I just blind?
8-) Build Thread | ExPo Build | YouTube Videos
Not all who wander are lost. -Tolkien
User avatar
Trail X
Founder
 
Posts: 9935
Joined: Mon Sep 07, 2009 10:22 pm
Location: VA, Roanoke
Name: James Downing
Vehicle Year: 2005
Vehicle: Chevrolet TrailBlazer
DriveTrain: 4WD w/ Aftermarket Locker
Rank: Expedition Guide

by teebes » Tue Sep 15, 2009 8:54 pm

Is that steel cable with a rope fairlead??? If you plan to upgrade to rope down the road, I wouldn't use that fairlead w/ steel cause it'll bur it up. Unless you plan to spend some quality elbox grease sanding it down later, before you put the rope on. I'd spend a few buck and get a typical fairlead for the steel stuff.


For the battery stuff, yea, no need for the 150amp fuse. Straight connection. New battery would be ideal, connected to the TOP posts.

Once my camera is working again, I plan to post about my National Luna dual battery setup. Per their advice, they don't even recommend placing a fuse between the two batteries if a winch will ever be used.


Looking good :coffee2:
User avatar
teebes
Founder
 
Posts: 1052
Joined: Thu Sep 03, 2009 1:05 am
Location: CA, San Diego
Name: Teebes
Vehicle Year: 2002
Vehicle: Chevrolet TrailBlazer
DriveTrain: 4WD w/ Aftermarket Locker
Rank: Expedition Rated

by MrSmithsTB » Tue Sep 15, 2009 9:05 pm

Very nice, JD. :awesome: Outta come in handy this weekend.
back in the saddle
TB BUILD
User avatar
MrSmithsTB
Veteran
 
Posts: 1756
Joined: Thu Sep 10, 2009 2:28 pm
Location: EHT, NJ
Name: Bob
Vehicle Year: 2006
Vehicle: Other GMT360/370
DriveTrain: AWD w/ G80
Rank: Offroad Rated

by Trail X » Tue Sep 15, 2009 9:19 pm

teebes wrote:Is that steel cable with a rope fairlead??? If you plan to upgrade to rope down the road, I wouldn't use that fairlead w/ steel cause it'll bur it up. Unless you plan to spend some quality elbox grease sanding it down later, before you put the rope on. I'd spend a few buck and get a typical fairlead for the steel stuff.


Yeah, it came with the Hawse fairlead. I really don't plan to keep the steel cable for long now, but the fairlead that came with it didn't seem like the polished aluminum ones I see used with synthetic. I think I'll have to get a new Hawse anyways. Dunno...
8-) Build Thread | ExPo Build | YouTube Videos
Not all who wander are lost. -Tolkien
User avatar
Trail X
Founder
 
Posts: 9935
Joined: Mon Sep 07, 2009 10:22 pm
Location: VA, Roanoke
Name: James Downing
Vehicle Year: 2005
Vehicle: Chevrolet TrailBlazer
DriveTrain: 4WD w/ Aftermarket Locker
Rank: Expedition Guide

by Gordinho80 » Tue Sep 15, 2009 10:14 pm

UBER SWEET!! Its about time it arrived!
Mario - Build Thread
User avatar
Gordinho80
Lifer
 
Posts: 2787
Joined: Tue Sep 08, 2009 9:27 am
Location: NJ, Jackson
Name: Mario Almeida
Vehicle Year: Other
Vehicle: Other Vehicle
DriveTrain: 4WD

by Trail X » Wed Sep 16, 2009 8:43 pm

Well... I got the winch hard-wired in.
:mechanic:
The quick-adapter I purchased was the wrong size... The winch gauge is 4 I beleive... which doesn't work with the 0/2 gauge terminals. Oh well... it is in and will be ready to perform at TECORE.

I had to get a new battery also because the stock battery is NOT compatible with a winch. There's no way to hook it up! It needs a battery with top-terminals... so I, like Gordinho, went out and grabbed a P-4 Diehard Platinum. Woohoo!

I was wondering how I'd bring the wire from the air-dam area into the engine bay... luckily the designers of the TB were nice enough to put a battery vent tube in the perfect place. I ran the wires through it, and now it kinda acts as a shroud for the wires, and makes it nice and neat!

Pics tomorrow - maybe. Lots of packing to do... not enough time at all. :coffee2: :coffee2:
8-) Build Thread | ExPo Build | YouTube Videos
Not all who wander are lost. -Tolkien
User avatar
Trail X
Founder
 
Posts: 9935
Joined: Mon Sep 07, 2009 10:22 pm
Location: VA, Roanoke
Name: James Downing
Vehicle Year: 2005
Vehicle: Chevrolet TrailBlazer
DriveTrain: 4WD w/ Aftermarket Locker
Rank: Expedition Guide

by Gordinho80 » Wed Sep 16, 2009 10:05 pm

I'll expect to see pics tomorrow..... BUT... I'll be seeing it in person on Friday... so I can wait. :coffee:
Mario - Build Thread
User avatar
Gordinho80
Lifer
 
Posts: 2787
Joined: Tue Sep 08, 2009 9:27 am
Location: NJ, Jackson
Name: Mario Almeida
Vehicle Year: Other
Vehicle: Other Vehicle
DriveTrain: 4WD

by bartonmd » Thu Sep 17, 2009 3:37 pm

Cool!

Mike
bartonmd
Moderator
 
Posts: 4469
Joined: Wed Sep 09, 2009 9:35 am
Location: IN, Indianapolis
Name: Mike
Vehicle Year: 2007
Vehicle: Chevrolet TrailBlazer
DriveTrain: 4WD w/ G80
Rank: Offroad Rated

by AlekG » Thu Sep 24, 2009 4:50 pm

Steel Hawse farileads are for metal cable. I had this set up on my previous winch with no problems. Some people actually prefer them over the roller fairleads.

However, if you go to synthetic rope, you will need to change it to an aluminum fairlead. The current one will shred the synthrope.

AG


|| Documenting and sharing overland travels ||
|| adventures and expeditions ||
|| Trailblazer modifications ||
User avatar
AlekG
Off-Roader
 
Posts: 116
Joined: Tue Sep 15, 2009 9:29 pm
Location: Guelph, Ontario, CANADA
Name: Alek
Vehicle Year: 2006
Vehicle: Chevrolet TrailBlazer
DriveTrain: 4WD w/ Aftermarket Locker
Rank: Expedition Rated

by EwingJK » Fri Oct 16, 2009 3:33 am

Pretty cool! How about pics of the battery, cables & connector installaton. :poke: :happy whip:
User avatar
EwingJK
Cruiser
 
Posts: 43
Joined: Sun Sep 13, 2009 1:23 am
Location: Brentwood, CA (SF Bay Area)
Name: John Ewing
Vehicle Year: 2005
Vehicle: Chevrolet TrailBlazer
DriveTrain: 4WD w/ G80

by Trail X » Fri Oct 16, 2009 9:19 am

When I get the connectors installed I'll post up a couple pics... I haven't really had a spare moment at home in the past month or so to get much done.
8-) Build Thread | ExPo Build | YouTube Videos
Not all who wander are lost. -Tolkien
User avatar
Trail X
Founder
 
Posts: 9935
Joined: Mon Sep 07, 2009 10:22 pm
Location: VA, Roanoke
Name: James Downing
Vehicle Year: 2005
Vehicle: Chevrolet TrailBlazer
DriveTrain: 4WD w/ Aftermarket Locker
Rank: Expedition Guide

by bartonmd » Fri Oct 16, 2009 10:47 am

JamesDowning wrote:When I get the connectors installed I'll post up a couple pics... I haven't really had a spare moment at home in the past month or so to get much done.


Welcome to married life!! I now look forward to the couple evenings a week that my wife works, so I can get stuff done around the house!

Mike
bartonmd
Moderator
 
Posts: 4469
Joined: Wed Sep 09, 2009 9:35 am
Location: IN, Indianapolis
Name: Mike
Vehicle Year: 2007
Vehicle: Chevrolet TrailBlazer
DriveTrain: 4WD w/ G80
Rank: Offroad Rated

by Trail X » Sun Jan 31, 2010 1:40 am

So after the longest time ever... I was able to get the wiring completed for the winch. Before now, I've been hard wiring the winch in place every time I installed it. This worked fine... but it was a pain to put on and take off.

The plan was always to wire a plug in... but a 150 amp plug is hard to find. The only plugs I know of are Anderson connectors. I had originally ordered some off ebay. Turns out the 300 amp plug I purchased was not the correct size for my winch's wires. Plus, the set did not come with dust covers... which I felt was a necessity.

So I found a nice pack that Superwinch actually sells (presumably in conjunction with Anderson). I found mine from Expedition Exchange (http://www.expeditionexchange.com/superwinch/).

Image

Because I think the Anderson design is so genius, I'll give a quick overview of it's design.

The plug's main housing is the same exact part for the male side and the, uh, male side. They simply are flipped over in order to nest into one another. The housings fit together appropriately, and the line polarity matches. The housings cup each other perfectly in order to provide 360 degree coverage of the connectors.

Image

The connectors are fairly straight forward. They were another thing that held me back though... where am I supposed to find a crimper for a 2 gauge wire?!

Image

Once crimped, just insert the connectors into the housing. Done... (The black thing to the right is the dust cover)

Image

And here it is... nice and simple now... no wrench needed anymore!

Image

Image

I've got one more mod for the winch coming... just waiting on one last part... back-ordered, sadly. :angry whip:
8-) Build Thread | ExPo Build | YouTube Videos
Not all who wander are lost. -Tolkien
User avatar
Trail X
Founder
 
Posts: 9935
Joined: Mon Sep 07, 2009 10:22 pm
Location: VA, Roanoke
Name: James Downing
Vehicle Year: 2005
Vehicle: Chevrolet TrailBlazer
DriveTrain: 4WD w/ Aftermarket Locker
Rank: Expedition Guide

by The Roadie » Sun Jan 31, 2010 1:20 pm

1) So where DID you find the crimper to borrow? Assume you didn't buy one.

2) Since the 12V feed wire isn't fused, did you put a solenoid disconnect between it and the battery? I found some insulation abrasion on mine near where I fed mine under the grille, and I see a risk in feeding yours through that square opening in the bumper, without some pinch welting. My Optima could be used for stick welding, so the risk of a meltdown is there. :poke:
User avatar
The Roadie
Founder
 
Posts: 5011
Joined: Mon Sep 07, 2009 11:29 pm
Location: CA, Vista, San Diego County
Name: Bill Carton
Vehicle Year: 2004
Vehicle: GMC Envoy
DriveTrain: 4WD w/ G80
Rank: Expedition Guide

by Trail X » Sun Jan 31, 2010 1:38 pm

1. Sometimes the fringe benefits of working for a powertool company pay off. We have a large electrical department who just happened to have an appropriate crimper. Something like this:
Image

2. Good thought, and no, I have no solenoid wired up. The hole in the bumper shouldn't pose a problem, as it is nice and filleted. Nothing sharp there, plus the plug housing rests on the bumper when it's sitting there. I should take a second look into how it is routed in front of the radiator... I did the routing in the dark with a flashlight, so there may be a sharp corner that I overlooked. I'll tear the grille off again in a few more hundred miles and take a look to see if there's any wear on the insulation. If so, I'll find something to cushion it. True though... a potential for a meltdown.
8-) Build Thread | ExPo Build | YouTube Videos
Not all who wander are lost. -Tolkien
User avatar
Trail X
Founder
 
Posts: 9935
Joined: Mon Sep 07, 2009 10:22 pm
Location: VA, Roanoke
Name: James Downing
Vehicle Year: 2005
Vehicle: Chevrolet TrailBlazer
DriveTrain: 4WD w/ Aftermarket Locker
Rank: Expedition Guide

by bartonmd » Sun Jan 31, 2010 7:20 pm

I guess if it was me, I'd use a butane or propane torch to melt some solder in there...

Mike
bartonmd
Moderator
 
Posts: 4469
Joined: Wed Sep 09, 2009 9:35 am
Location: IN, Indianapolis
Name: Mike
Vehicle Year: 2007
Vehicle: Chevrolet TrailBlazer
DriveTrain: 4WD w/ G80
Rank: Offroad Rated

by Zero » Mon Feb 01, 2010 7:46 am

bartonmd wrote:I guess if it was me, I'd use a butane or propane torch to melt some solder in there...

Mike


I like to crimp then use solder. that way I know i have something to hold the bastard wire in there, then the solder to make sure it has a good connection.
Zero
Veteran
 
Posts: 1048
Joined: Thu Sep 10, 2009 5:07 pm
Location: Los Angeles, CA / Toronto, ON
Name: Brendan
Vehicle Year: 2005
Vehicle: Chevrolet Trailblazer EXT
DriveTrain: 4WD w/ G80
Rank: Offroad Rated

by KE7WOX » Mon Feb 01, 2010 12:25 pm

Nice installation job.

Regarding the PowerPoles...
My friend likes to solder the PowerPoles (he says he's damaged far too many of them trying to crimp them), and some people like to solder and crimp.

And the design itself is awesome, that's what we use to run our ham radios (and a lot of hams use them, in fact, most/all ARES / RACES organizations are trying to make them the standard connections to allow for easier use during emergencies)
This is an aggressive post. You probably won’t like it. It is quite doubtful that you have the taste or sophistication to be able to appreciate a post of this quality and depth.

Build Thread
User avatar
KE7WOX
Veteran
 
Posts: 1226
Joined: Tue Sep 29, 2009 2:10 pm
Location: OH, Dublin (Columbus)
Name: Felipe G
Vehicle Year: 2004
Vehicle: Chevrolet TrailBlazer
DriveTrain: 4WD

by Zero » Mon Feb 01, 2010 3:57 pm

Could I get a set of plugs like that so I could quick disconnect my battery if I ever needed too? Id also like to have a direct plug type connection that i could run through my grill or bumper for easy access when charging, or if I needed a boost. Some tow trucks have a system similar to what I am describing. I hope someone can figure out what I am getting at hahahaha.


thanx,

Z
Zero
Veteran
 
Posts: 1048
Joined: Thu Sep 10, 2009 5:07 pm
Location: Los Angeles, CA / Toronto, ON
Name: Brendan
Vehicle Year: 2005
Vehicle: Chevrolet Trailblazer EXT
DriveTrain: 4WD w/ G80
Rank: Offroad Rated

by Trail X » Mon Feb 01, 2010 4:08 pm

Image
http://www.awdirect.com/plug-in-jump-st ... cessories/

Sure, there are jump start kits like what you're describing... such as above.

However, this plug is not meant to be a disconnect... so I wouldn't recommend using it to disconnect a live battery. If there's too much draw, it may arc and weld the plugs together.
8-) Build Thread | ExPo Build | YouTube Videos
Not all who wander are lost. -Tolkien
User avatar
Trail X
Founder
 
Posts: 9935
Joined: Mon Sep 07, 2009 10:22 pm
Location: VA, Roanoke
Name: James Downing
Vehicle Year: 2005
Vehicle: Chevrolet TrailBlazer
DriveTrain: 4WD w/ Aftermarket Locker
Rank: Expedition Guide

Next

Return to Completed Modifications