Offroad Trailblazers and Envoys

Rack & Pinion Replacement

Something not working right?

by DirtRidinZ71 » Wed Jul 02, 2014 7:26 pm

The steering rack and pinion in my 2005 Trailblazer has developed a pretty steady leak and I'm looking to replace it with a "new" remaned unit.

I'm looking for a how to or any good tips or tricks on what all needs to be removed to get at it and remove it. This will be done in the driveway with your normal hand tools. Obvisously and alignment will need done afterwards since the inner TRE's come off, will the CV axle shafts half to be pulled? What all underneath the truck needs to be unbolted? A couple lines and mounting bolts, is that it?

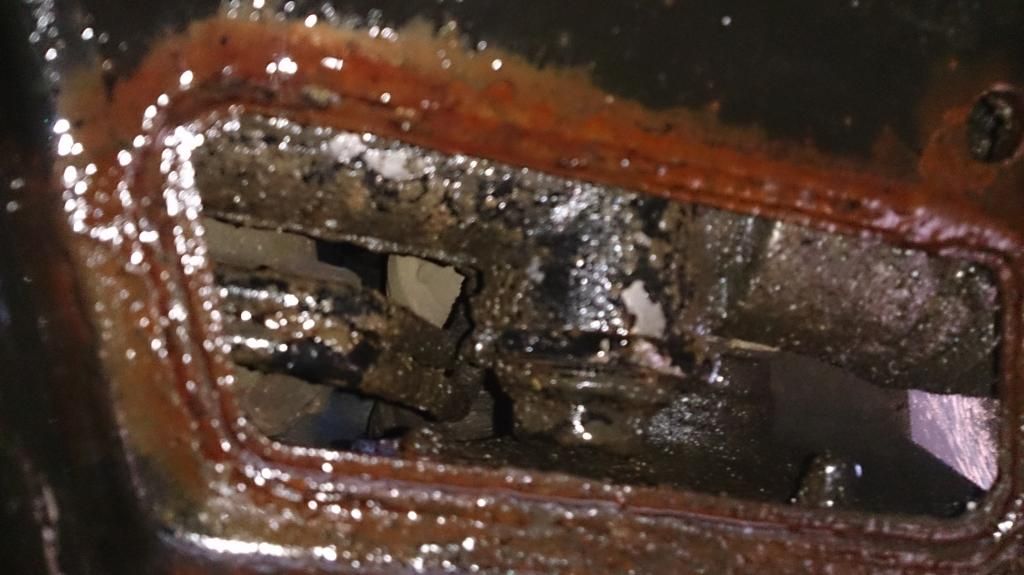
It seems to be leaking pretty steady from this port on the drivers side.
Image
DirtRidinZ71
Cruiser
 
Posts: 22
Joined: Thu Feb 28, 2013 12:44 pm
Name: Scott
Vehicle Year: 2005
Vehicle: Chevrolet TrailBlazer
DriveTrain: 4WD

by DirtyBacon04 » Wed Jul 02, 2014 8:11 pm

I've never pulled it all the way off, but after taking out the front diff twice, this seems like a cake job!!

I'd imigine the wheels, CV, struts, the (2) lateral big black braces going underneath the frame. The brackets use the LCA bolts to mount, so once you take them off, dont get too jiggy with it and you will limit the difficulty of your alignment.
Trans-Continental Trailblazer - 5th Award
Current Count of Transmission Rebuilds: 5.5
***The more you know, the less you need.***
USMC '07-'12
Dirty Bacon's Build
User avatar
DirtyBacon04
Moderator
 
Posts: 3046
Joined: Fri Aug 05, 2011 4:59 am
Location: FL, Central
Name: Michael
Vehicle Year: 2004
Vehicle: Chevrolet TrailBlazer
DriveTrain: 4WD w/ Aftermarket Locker
Rank: Expedition Rated

by Moots1288 » Wed Jul 02, 2014 8:51 pm

Really to replace only the rack all that needs to come off is the wheels, cross brace and tre. Make sure you tie the steering wheel straight so it doesnt spin. You just have to take the one bolt off the steering shaft and then with the rack out you can take off the rest of the steering shaft. It drops right out, I should do a how to but I didnt take any pictures. Maybe ill do it again and take pictures.

The lines are one 8mm bolt and the bracket pops out.

The CV's might have to come out in order to get a deep socket on the nut for the rack and pinion. I somehow got a socket in there hopefully you have the same luck as I did the 3rd time I did it.
User avatar
Moots1288
Veteran
 
Posts: 1964
Joined: Fri Feb 24, 2012 8:42 pm
Location: Long island
Name: Moots
Vehicle Year: 2006
Vehicle: GMC Envoy
DriveTrain: 4WD
Rank: Offroad Rated

by harvyne » Thu Jul 03, 2014 12:58 am

im there with you dirtridin, my rack is steadilly leaking from my left side inner tie rod and the tie rod end is also bad. ill be looking to that work as well.
On that token i was just checking some prices and wondering if when you do replace the rack is it worth it to replace the inner tie rod ends as well. autozone has their duralast inner tie rod product for 26.00 with the warranty where as pepboys has the moog for 93.00. Obviously moog bieng the better, what direction would some of you folks go with?
harvyne
Member
 
Posts: 82
Joined: Mon Mar 31, 2014 1:47 am
Location: NH. Rockingham County
Name: christian
Vehicle Year: 2003
Vehicle: GMC Envoy
DriveTrain: 4WD

by Bacnbit » Thu Jul 03, 2014 8:22 am

harvyne wrote:On that token i was just checking some prices and wondering if when you do replace the rack is it worth it to replace the inner tie rod ends as well. autozone has their duralast inner tie rod product for 26.00 with the warranty where as pepboys has the moog for 93.00. Obviously moog bieng the better, what direction would some of you folks go with?

The inner tie rods would be on the replacement rack. On My year of TB if and when the rack fails I will update to the 16mm inner tie rod version and install the beefer outers. But if were me and I needed inners and the rack was still good I would spend the extra and get a moog product any day. Never had an issue with warranty return and can be purchased pretty much anywhere.
User avatar
Bacnbit
Member
 
Posts: 82
Joined: Mon Apr 21, 2014 4:23 pm
Location: Grand Rapids, MI
Name: Dean
Vehicle Year: 2002
Vehicle: Chevrolet TrailBlazer
DriveTrain: 4WD

by Regulator1175 » Sun Jul 06, 2014 1:43 am

Helpful tip: My deep well sockets did not go large enough for the nut, but the large spark plug socket was a good fit. Just pull out the rubber boot in it and your good to go.
Twenty years from now you will be more disappointed by the things that you didn’t do than by the ones you did do.
So throw off the bowlines. Sail away from the safe harbor. Catch the trade winds in your sails. Explore. Dream. Discover.
- Mark Twain
--Build--
User avatar
Regulator1175
Veteran
 
Posts: 1048
Joined: Wed Mar 17, 2010 3:48 pm
Location: IN, Warsaw
Name: Matthew McClelland
Vehicle Year: 2002
Vehicle: GMC Envoy
DriveTrain: 4WD w/ G80
Rank: Extreme Offroader

by harvyne » Sun Jul 06, 2014 10:21 pm

Bacnbit wrote:
harvyne wrote:On that token i was just checking some prices and wondering if when you do replace the rack is it worth it to replace the inner tie rod ends as well. autozone has their duralast inner tie rod product for 26.00 with the warranty where as pepboys has the moog for 93.00. Obviously moog bieng the better, what direction would some of you folks go with?

The inner tie rods would be on the replacement rack. On My year of TB if and when the rack fails I will update to the 16mm inner tie rod version and install the beefer outers. But if were me and I needed inners and the rack was still good I would spend the extra and get a moog product any day. Never had an issue with warranty return and can be purchased pretty much anywhere.


I remember having a tie rod replaced last 5th july, i thought it was the outer but i found out this weeken it was the inner and i remember paying more for the moog which when inspected this past weekend it was still strong, so my outer tie rod was bad, replaced that np however when the rack gets alot worse i will redo everything in the 16mm as you stated.
harvyne
Member
 
Posts: 82
Joined: Mon Mar 31, 2014 1:47 am
Location: NH. Rockingham County
Name: christian
Vehicle Year: 2003
Vehicle: GMC Envoy
DriveTrain: 4WD

by DirtRidinZ71 » Wed Jul 09, 2014 7:49 pm

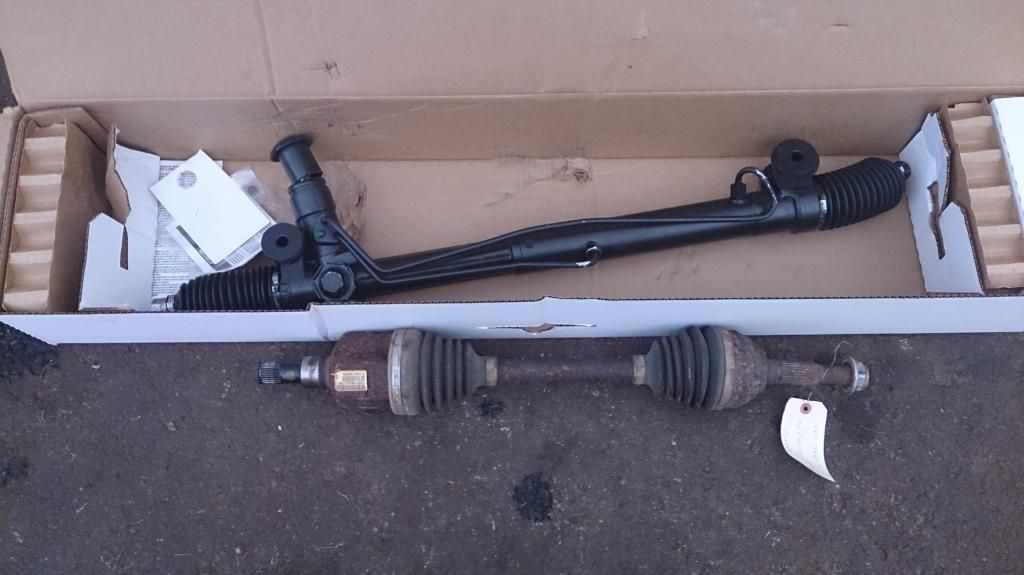
Well I got the rack and pinion done on the weekend as well as a passenger side CV, new outer tie rod ends, front diff oil change and engine oil and filter change.
The rack and pinion swap went pretty good and wasn't to much of a hassle, hardest part was getting at the bolt that holds the lines on, I tried to drop the rack down to get at it but there is little to no slack, ended up using about 10" of extensions and going over the drivers side CV axle.

Image
DirtRidinZ71
Cruiser
 
Posts: 22
Joined: Thu Feb 28, 2013 12:44 pm
Name: Scott
Vehicle Year: 2005
Vehicle: Chevrolet TrailBlazer
DriveTrain: 4WD

by DirtyBacon04 » Thu Jul 10, 2014 10:24 am

good work!
glad you got it in? What would you say was your total maint time?
Trans-Continental Trailblazer - 5th Award
Current Count of Transmission Rebuilds: 5.5
***The more you know, the less you need.***
USMC '07-'12
Dirty Bacon's Build
User avatar
DirtyBacon04
Moderator
 
Posts: 3046
Joined: Fri Aug 05, 2011 4:59 am
Location: FL, Central
Name: Michael
Vehicle Year: 2004
Vehicle: Chevrolet TrailBlazer
DriveTrain: 4WD w/ Aftermarket Locker
Rank: Expedition Rated

by Moots1288 » Thu Jul 10, 2014 12:44 pm

I said 1:30 to 2 hours is a decent time frame if taking your time
User avatar
Moots1288
Veteran
 
Posts: 1964
Joined: Fri Feb 24, 2012 8:42 pm
Location: Long island
Name: Moots
Vehicle Year: 2006
Vehicle: GMC Envoy
DriveTrain: 4WD
Rank: Offroad Rated


Return to Troubleshooting