Offroad Trailblazers and Envoys

Reversing UCA's (Pics)

BDS, ReadyLift, Smaxx... You name it, we know about it here.

by fishsticks » Wed Aug 18, 2010 1:47 pm

JamesDowning wrote:
So... to summarize and clarify... flipping the UCA gives you 7/8" + the 1/2" Smaxx spacer - giving a total of 1-3/8" of space from your RC spacer to the frame mount?


Yes. But the CV angle is too severe. Right now I am running 7/8" total shimming and getting a slight bind at full droop. I've got 88 springs coming Friday. I'll dial it in when they arrive and then get an alignment.
11 Silverado LTZ - 6.2L/6l80, 2/3 drop, self tuned
85 Hilux - 3RZ, dual cases, caged, 40s, chromo everything
02 TrailBlazer LTZ - 35s, lockers, balls - Gone but not forgotten - Build
User avatar
fishsticks
Moderator
 
Posts: 4356
Joined: Thu Apr 01, 2010 11:30 pm
Location: WA, Vancouver
Name: Donny
Vehicle Year: Other
Vehicle: Other Vehicle
DriveTrain: 4WD w/ Aftermarket Locker
Rank: Extreme Offroader

by Trail X » Wed Aug 18, 2010 1:51 pm

fishsticks wrote:Yes. But the CV angle is too severe. Right now I am running 7/8" total shimming and getting a slight bind at full droop. I've got 88 springs coming Friday. I'll dial it in when they arrive and then get an alignment.


Gotcha - but new springs won't make a difference to the droop of the suspension.

I'd also imagine that an alignment will help your tripod bind, as it will pull the tripod out of the housing more.
8-) Build Thread | ExPo Build | YouTube Videos
Not all who wander are lost. -Tolkien
User avatar
Trail X
Founder
 
Posts: 9935
Joined: Mon Sep 07, 2009 10:22 pm
Location: VA, Roanoke
Name: James Downing
Vehicle Year: 2005
Vehicle: Chevrolet TrailBlazer
DriveTrain: 4WD w/ Aftermarket Locker
Rank: Expedition Guide

by fishsticks » Wed Aug 18, 2010 2:01 pm

JamesDowning wrote:
fishsticks wrote:Yes. But the CV angle is too severe. Right now I am running 7/8" total shimming and getting a slight bind at full droop. I've got 88 springs coming Friday. I'll dial it in when they arrive and then get an alignment.


Gotcha - but new springs won't make a difference to the droop of the suspension.

I'd also imagine that an alignment will help your tripod bind, as it will pull the tripod out of the housing more.


Good call on the alignment. I hadn't thought of that.

When I install the springs I'm going to play around with extending the total strut length inside the assembly. Similar to what you guys were talking about with extenders, but instead I'm just going to leverage the inch or so of threads that are unused on my current setup. 3/8" grade 8 washers have a nice fit over a 10mm shaft, so I'm just going to try moving the bushings up a bit.

I'm hoping this gives me the extra droop without the absolutely huge amount of resting height increase that using the 88's with 7/8" of shims would give me. Tall is fun and all, but I don't want to run my CV tripods at a super steep angle all of the time, binding or not.
11 Silverado LTZ - 6.2L/6l80, 2/3 drop, self tuned
85 Hilux - 3RZ, dual cases, caged, 40s, chromo everything
02 TrailBlazer LTZ - 35s, lockers, balls - Gone but not forgotten - Build
User avatar
fishsticks
Moderator
 
Posts: 4356
Joined: Thu Apr 01, 2010 11:30 pm
Location: WA, Vancouver
Name: Donny
Vehicle Year: Other
Vehicle: Other Vehicle
DriveTrain: 4WD w/ Aftermarket Locker
Rank: Extreme Offroader

by Trail X » Wed Aug 18, 2010 2:08 pm

fishsticks wrote:Good call on the alignment. I hadn't thought of that.

When I install the springs I'm going to play around with extending the total strut length inside the assembly. Similar to what you guys were talking about with extenders, but instead I'm just going to leverage the inch or so of threads that are unused on my current setup. 3/8" grade 8 washers have a nice fit over a 10mm shaft, so I'm just going to try moving the bushings up a bit.

I'm hoping this gives me the extra droop without the absolutely huge amount of resting height increase that using the 88's with 7/8" of shims would give me. Tall is fun and all, but I don't want to run my CV tripods at a super steep angle all of the time, binding or not.


Shimming could work - I'm torn between that and another option that would involve much more modification.

You can only shim about 1/2" max, right?

Method 2 - which is just a sketch on a piece of paper right now - could dial in the exact amount we want - maybe. I have questions regarding the strength of the idea.
8-) Build Thread | ExPo Build | YouTube Videos
Not all who wander are lost. -Tolkien
User avatar
Trail X
Founder
 
Posts: 9935
Joined: Mon Sep 07, 2009 10:22 pm
Location: VA, Roanoke
Name: James Downing
Vehicle Year: 2005
Vehicle: Chevrolet TrailBlazer
DriveTrain: 4WD w/ Aftermarket Locker
Rank: Expedition Guide

by fishsticks » Wed Aug 18, 2010 2:15 pm

JamesDowning wrote:
fishsticks wrote:Good call on the alignment. I hadn't thought of that.

When I install the springs I'm going to play around with extending the total strut length inside the assembly. Similar to what you guys were talking about with extenders, but instead I'm just going to leverage the inch or so of threads that are unused on my current setup. 3/8" grade 8 washers have a nice fit over a 10mm shaft, so I'm just going to try moving the bushings up a bit.

I'm hoping this gives me the extra droop without the absolutely huge amount of resting height increase that using the 88's with 7/8" of shims would give me. Tall is fun and all, but I don't want to run my CV tripods at a super steep angle all of the time, binding or not.


Shimming could work - I'm torn between that and another option that would involve much more modification.

You can only shim about 1/2" max, right?


I'm going to try and move all of my shim length.... 3/4-7/8" or so to the strut rod. I have a LOT of threads sticking out of mine.


Method 2 - which is just a sketch on a piece of paper right now - could dial in the exact amount we want - maybe. I have questions regarding the strength of the idea.


Does it involve some lefty threaded allthread for the top mount and a long nut in between that and the strut? Similar to a chain tensioner? That's all I could think up off the top of my head.
11 Silverado LTZ - 6.2L/6l80, 2/3 drop, self tuned
85 Hilux - 3RZ, dual cases, caged, 40s, chromo everything
02 TrailBlazer LTZ - 35s, lockers, balls - Gone but not forgotten - Build
User avatar
fishsticks
Moderator
 
Posts: 4356
Joined: Thu Apr 01, 2010 11:30 pm
Location: WA, Vancouver
Name: Donny
Vehicle Year: Other
Vehicle: Other Vehicle
DriveTrain: 4WD w/ Aftermarket Locker
Rank: Extreme Offroader

by Trail X » Wed Aug 18, 2010 2:25 pm

fishsticks wrote:I'm going to try and move all of my shim length.... 3/4-7/8" or so to the strut rod. I have a LOT of threads sticking out of mine.


That is a lot of thread... just remember that the end of the shock piston will be weaker due to the hex indentation - it gets rid of a ton of cross-sectional area.

fishsticks wrote:
Method 2 - which is just a sketch on a piece of paper right now - could dial in the exact amount we want - maybe. I have questions regarding the strength of the idea.


Does it involve some lefty threaded allthread for the top mount and a long nut in between that and the strut? Similar to a chain tensioner? That's all I could think up off the top of my head.


Something like that, but it can't be added to the end of the shock, that'd give you about 3" of extra extension... much too much. I just wish I would have kept my stock shocks. :wallbash: :slap:
8-) Build Thread | ExPo Build | YouTube Videos
Not all who wander are lost. -Tolkien
User avatar
Trail X
Founder
 
Posts: 9935
Joined: Mon Sep 07, 2009 10:22 pm
Location: VA, Roanoke
Name: James Downing
Vehicle Year: 2005
Vehicle: Chevrolet TrailBlazer
DriveTrain: 4WD w/ Aftermarket Locker
Rank: Expedition Guide

by fishsticks » Wed Aug 18, 2010 3:23 pm

JamesDowning wrote:That is a lot of thread... just remember that the end of the shock piston will be weaker due to the hex indentation - it gets rid of a ton of cross-sectional area.


I'm hoping to have enough thread left to get past the hex key. I've considered using smaller bushings as well. Guess we'll see on Friday.
11 Silverado LTZ - 6.2L/6l80, 2/3 drop, self tuned
85 Hilux - 3RZ, dual cases, caged, 40s, chromo everything
02 TrailBlazer LTZ - 35s, lockers, balls - Gone but not forgotten - Build
User avatar
fishsticks
Moderator
 
Posts: 4356
Joined: Thu Apr 01, 2010 11:30 pm
Location: WA, Vancouver
Name: Donny
Vehicle Year: Other
Vehicle: Other Vehicle
DriveTrain: 4WD w/ Aftermarket Locker
Rank: Extreme Offroader

by Trail X » Wed Aug 18, 2010 3:38 pm

fishsticks wrote:
JamesDowning wrote:That is a lot of thread... just remember that the end of the shock piston will be weaker due to the hex indentation - it gets rid of a ton of cross-sectional area.


I'm hoping to have enough thread left to get past the hex key. I've considered using smaller bushings as well. Guess we'll see on Friday.


Any idea of the OD and thickness of the BDS/RC bushings? Maybe RC is thinner to begin with - possible if you have that much thread showing.
8-) Build Thread | ExPo Build | YouTube Videos
Not all who wander are lost. -Tolkien
User avatar
Trail X
Founder
 
Posts: 9935
Joined: Mon Sep 07, 2009 10:22 pm
Location: VA, Roanoke
Name: James Downing
Vehicle Year: 2005
Vehicle: Chevrolet TrailBlazer
DriveTrain: 4WD w/ Aftermarket Locker
Rank: Expedition Guide

by fishsticks » Wed Aug 18, 2010 3:51 pm

JamesDowning wrote:Any idea of the OD and thickness of the BDS/RC bushings? Maybe RC is thinner to begin with - possible if you have that much thread showing.


IIRC the RC bushings looked to me like poly bushings for a typical screw type swaybar endlink.
11 Silverado LTZ - 6.2L/6l80, 2/3 drop, self tuned
85 Hilux - 3RZ, dual cases, caged, 40s, chromo everything
02 TrailBlazer LTZ - 35s, lockers, balls - Gone but not forgotten - Build
User avatar
fishsticks
Moderator
 
Posts: 4356
Joined: Thu Apr 01, 2010 11:30 pm
Location: WA, Vancouver
Name: Donny
Vehicle Year: Other
Vehicle: Other Vehicle
DriveTrain: 4WD w/ Aftermarket Locker
Rank: Extreme Offroader

by Trail X » Wed Aug 18, 2010 4:15 pm

Mcmaster # 87235K122 is a polyurethane sleeve that should work well to cut to a desired thickness. It's a 6" sleeve.

I believe it's the proper Durometer spec - 60A?

They have a harder spec - 80A. That's Mcmaster # 87235K123.
8-) Build Thread | ExPo Build | YouTube Videos
Not all who wander are lost. -Tolkien
User avatar
Trail X
Founder
 
Posts: 9935
Joined: Mon Sep 07, 2009 10:22 pm
Location: VA, Roanoke
Name: James Downing
Vehicle Year: 2005
Vehicle: Chevrolet TrailBlazer
DriveTrain: 4WD w/ Aftermarket Locker
Rank: Expedition Guide

by fishsticks » Wed Aug 18, 2010 4:26 pm

JamesDowning wrote:Mcmaster # 87235K122 is a polyurethane sleeve that should work well to cut to a desired thickness. It's a 6" sleeve.

I believe it's the proper Durometer spec - 60A?

They have a harder spec - 80A. That's Mcmaster # 87235K123.


That'd probably work. I have some miscellaneous poly bushings floating around from other projects that I may try though. Or I may just modify the existing ones...
11 Silverado LTZ - 6.2L/6l80, 2/3 drop, self tuned
85 Hilux - 3RZ, dual cases, caged, 40s, chromo everything
02 TrailBlazer LTZ - 35s, lockers, balls - Gone but not forgotten - Build
User avatar
fishsticks
Moderator
 
Posts: 4356
Joined: Thu Apr 01, 2010 11:30 pm
Location: WA, Vancouver
Name: Donny
Vehicle Year: Other
Vehicle: Other Vehicle
DriveTrain: 4WD w/ Aftermarket Locker
Rank: Extreme Offroader

by Regulator1175 » Thu Aug 19, 2010 2:02 am

JamesDowning wrote:
Something like that, but it can't be added to the end of the shock, that'd give you about 3" of extra extension... much too much. I just wish I would have kept my stock shocks. :wallbash: :slap:


I have the front shocks in the garage if you want them to play with. I need to get them separated from the pitman arms, but their yours if it will help.
Twenty years from now you will be more disappointed by the things that you didn’t do than by the ones you did do.
So throw off the bowlines. Sail away from the safe harbor. Catch the trade winds in your sails. Explore. Dream. Discover.
- Mark Twain
--Build--
User avatar
Regulator1175
Veteran
 
Posts: 1048
Joined: Wed Mar 17, 2010 3:48 pm
Location: IN, Warsaw
Name: Matthew McClelland
Vehicle Year: 2002
Vehicle: GMC Envoy
DriveTrain: 4WD w/ G80
Rank: Extreme Offroader

by The Roadie » Thu Aug 19, 2010 11:08 am

Regulator1175 wrote:...separated from the pitman arms...
[Professor mode on]Just to make sure we keep purity of terminology - the bottom mount of the shock is just called a lower shock mount, or yoke mount. We use Pitman arm pullers to get them off, but a true Pitman arm is a steering system part our rack and pinion system doesn't have.

Image
User avatar
The Roadie
Founder
 
Posts: 5011
Joined: Mon Sep 07, 2009 11:29 pm
Location: CA, Vista, San Diego County
Name: Bill Carton
Vehicle Year: 2004
Vehicle: GMC Envoy
DriveTrain: 4WD w/ G80
Rank: Expedition Guide

by djthumper » Thu Aug 19, 2010 12:21 pm

Thank you Professor Roadie. ;) When I first read his statement last night I was wondering how they were connected to a pitman arm and figured I was just too tired. hehe
User avatar
djthumper
Moderator
 
Posts: 2702
Joined: Wed Mar 24, 2010 6:04 pm
Location: NV, Las Vegas
Name: Larry
Vehicle Year: 2006
Vehicle: Chevrolet TrailBlazer
DriveTrain: 4WD
Rank: Offroad Rated

by Regulator1175 » Thu Aug 19, 2010 12:57 pm

The Roadie wrote:
Regulator1175 wrote:...separated from the pitman arms...
[Professor mode on]Just to make sure we keep purity of terminology - the bottom mount of the shock is just called a lower shock mount, or yoke mount. We use Pitman arm pullers to get them off, but a true Pitman arm is a steering system part our rack and pinion system doesn't have.

Image


Thanks Roadie, I appreciate the correction. I was just taking a shot in the dark there, and hoping I was correct. It could have been worse though, I could have gone with my wife's terminology. "You know, that curved thing with the hole in top that the shock thing sits in."
Twenty years from now you will be more disappointed by the things that you didn’t do than by the ones you did do.
So throw off the bowlines. Sail away from the safe harbor. Catch the trade winds in your sails. Explore. Dream. Discover.
- Mark Twain
--Build--
User avatar
Regulator1175
Veteran
 
Posts: 1048
Joined: Wed Mar 17, 2010 3:48 pm
Location: IN, Warsaw
Name: Matthew McClelland
Vehicle Year: 2002
Vehicle: GMC Envoy
DriveTrain: 4WD w/ G80
Rank: Extreme Offroader

by fishsticks » Fri Aug 20, 2010 3:05 am

Since my parts came in a day early and I decided to do my front disconnect today, I did my 88 springs as well.

I jacked my truck up and let the front wheels hang. As I've said before my driver's side tripod was binding at full droop... enough to move the motor on it's mounts it turns out. :awesome:

So I put the jack under my driver side control arm. I alternately jacked up the wheel and spun the tire until there was no binding on my tripod. When I started my hub-fender was 24.75". At ~24.5" I had zero binding issues. So I figured taking 3/16" (3/16" x 1.5 = just over .28") out of my strut assembly length would put me in the clear.

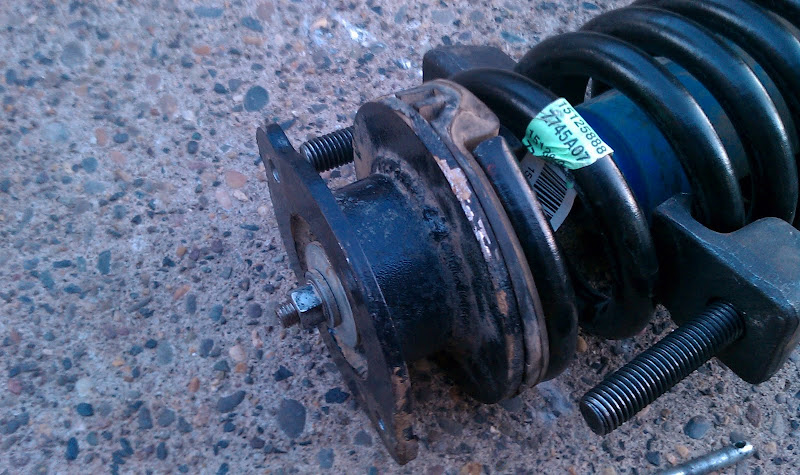
I bought a bunch of 3/8" grade 8 washers a few days ago in preparation this project. My plan has been to remove the 7/8" from my top spacers completely, letting the new springs handle my resting lift. So when I had my struts apart, I added 9 washers to each side (9 washers ended up being ~21/32") of the strut rod. 3/8" washers fit just a hair more snugly than 10mm washers.

Image


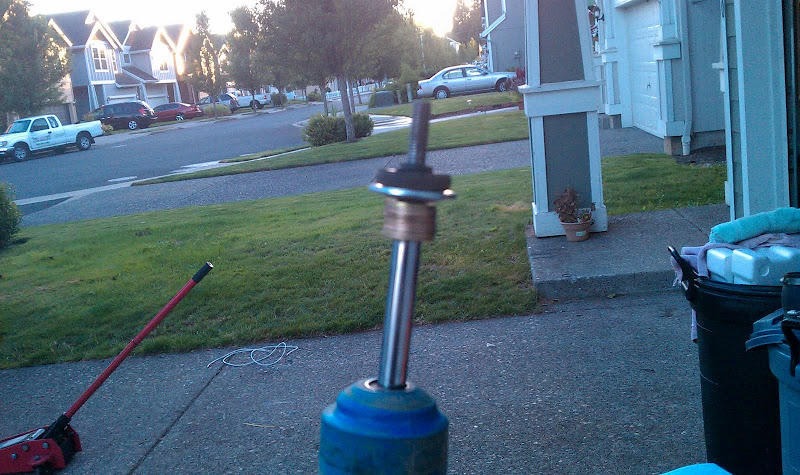
My bushings were only about 3/8" think and compressed fairly easily. I was able to get the nuts back onto my struts and tighten them down so that the top was past the keyed portion of the shaft.

Image


I reinstalled the assemblies without my top shims.

By the time the struts and front disconnect were done and installed it was dark so if anyone wants pics I can take them tomorrow. I gained .5" of resting height from this setup over my previous multi-shim setup. I drove it around the block to settle the suspension and then measured. I went from 38" to 38.5" ground-fender. At full droop I am ~24.5" hub-fender. I have just a hair of resistance on the driver's side tripod, but it's so slight I'm not going to diassemble the strut just to pull one washer.


So now I have .5" of negative rake. I either need to unload some stuff from the back (unlikely), add some lift to the rear (probable) or add some weight to the front (hmmmmmmm).
11 Silverado LTZ - 6.2L/6l80, 2/3 drop, self tuned
85 Hilux - 3RZ, dual cases, caged, 40s, chromo everything
02 TrailBlazer LTZ - 35s, lockers, balls - Gone but not forgotten - Build
User avatar
fishsticks
Moderator
 
Posts: 4356
Joined: Thu Apr 01, 2010 11:30 pm
Location: WA, Vancouver
Name: Donny
Vehicle Year: Other
Vehicle: Other Vehicle
DriveTrain: 4WD w/ Aftermarket Locker
Rank: Extreme Offroader

by HARDTRAILZ » Fri Aug 20, 2010 11:24 am

Have you or anyone who has flipped got the camber corrected? I think I am going to flip mine back since it will help alignment and i already removed some of the lift. It rode too rough for everyday driving with everything maxxed out. I still think the right set of 35s is do-able though.
I hate to advocate weird chemicals, alcohol, violence or insanity to anyone...but
they've always worked for me.
User avatar
HARDTRAILZ
Moderator
 
Posts: 6342
Joined: Sat Sep 12, 2009 1:49 am
Location: IN, Batesville
Name: Kyle
Vehicle Year: 2006
Vehicle: Chevrolet TrailBlazer
DriveTrain: 4WD w/ Aftermarket Locker
Rank: Extreme Offroader

by Trail X » Fri Aug 20, 2010 11:30 am

Kyle, that rough ride is due to the shock bottoming out... the only way to fix that would be to cut down your inside spacer, or add shims like Fishy did.
8-) Build Thread | ExPo Build | YouTube Videos
Not all who wander are lost. -Tolkien
User avatar
Trail X
Founder
 
Posts: 9935
Joined: Mon Sep 07, 2009 10:22 pm
Location: VA, Roanoke
Name: James Downing
Vehicle Year: 2005
Vehicle: Chevrolet TrailBlazer
DriveTrain: 4WD w/ Aftermarket Locker
Rank: Expedition Guide

by DZPearl » Fri Aug 20, 2010 12:06 pm

Now wee just need to talk the shock companies into making a front replacement with a 3/4"-1" longer shaft to accomodate the longer coil spring while lowering the tension to make a ride that is not too firm for everyday driving. Or, have a shaft extension machined to fit.
User avatar
DZPearl
Cruiser
 
Posts: 14
Joined: Sun Nov 15, 2009 8:23 pm
Location: MO, Saint Charles
Name: Dave
Vehicle Year: 2003
Vehicle: Chevrolet TrailBlazer
DriveTrain: 2WD w/ G80

by fishsticks » Fri Aug 20, 2010 12:18 pm

HARDTRAILZ wrote:Have you or anyone who has flipped got the camber corrected? I think I am going to flip mine back since it will help alignment and i already removed some of the lift. It rode too rough for everyday driving with everything maxxed out. I still think the right set of 35s is do-able though.


I'm going to run this on road for a couple days then take it up to GPNF and beat the hell out of it on Sunday. I'll have my G80 back as well as 4WD so balls will most assuredly be out.

Once I I break in the new springs I'll take it over and have it aligned. I was under the truck yesterday while fixing stuff, and from what I can see my LCA plates are most assuredly pushed inwards quite a lot. It should be cake for the shop to get the camber fixed.


JamesDowning wrote:Kyle, that rough ride is due to the shock bottoming out... the only way to fix that would be to cut down your inside spacer, or add shims like Fishy did.


I didn't get measurements last night (it was late) but I didn't have a ton of droop to speak of. I'm sure you're right and Kyle's shocks are pretty close to the internal stops at rest.

I took the kids to school this morning and drove to the bank. I've had a good amount of body roll from not having front or rear swaybars, but the meat of the 88's seems to really keep it in check.
11 Silverado LTZ - 6.2L/6l80, 2/3 drop, self tuned
85 Hilux - 3RZ, dual cases, caged, 40s, chromo everything
02 TrailBlazer LTZ - 35s, lockers, balls - Gone but not forgotten - Build
User avatar
fishsticks
Moderator
 
Posts: 4356
Joined: Thu Apr 01, 2010 11:30 pm
Location: WA, Vancouver
Name: Donny
Vehicle Year: Other
Vehicle: Other Vehicle
DriveTrain: 4WD w/ Aftermarket Locker
Rank: Extreme Offroader

PreviousNext

Return to Lifts / Suspension