Offroad Trailblazers and Envoys

Reversing UCA's (Pics)

BDS, ReadyLift, Smaxx... You name it, we know about it here.

by fishsticks » Tue Jul 27, 2010 3:42 pm

Op Copied from my post on TrailVoy:


Enough speculation. I've humm'd and haaah'd over doing this for over 2 months. Free day = project.


Firstly...

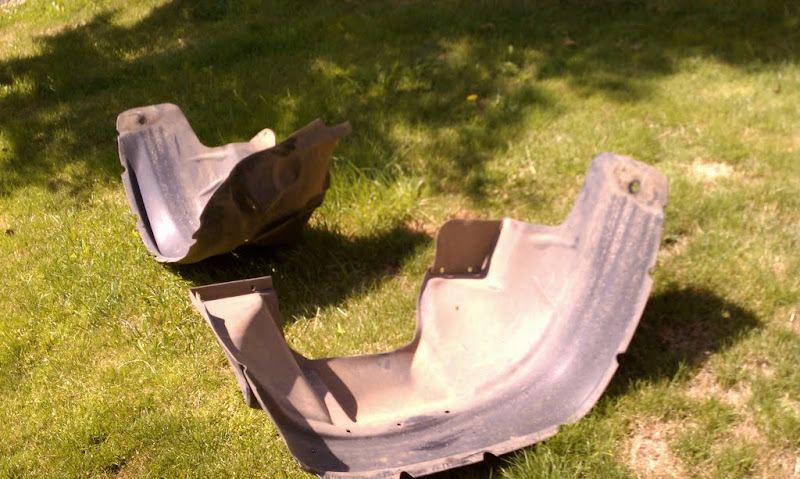
Bill, you hurt me when you made fun of my wheel liners... this is for you.

Image


So...

Image

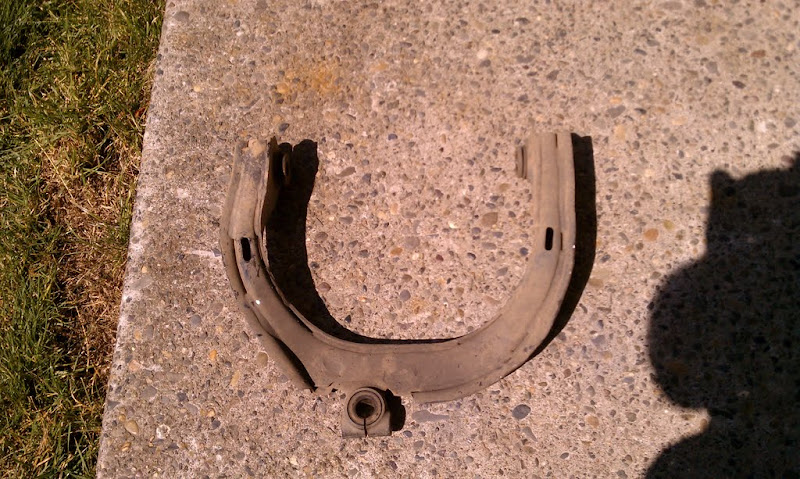
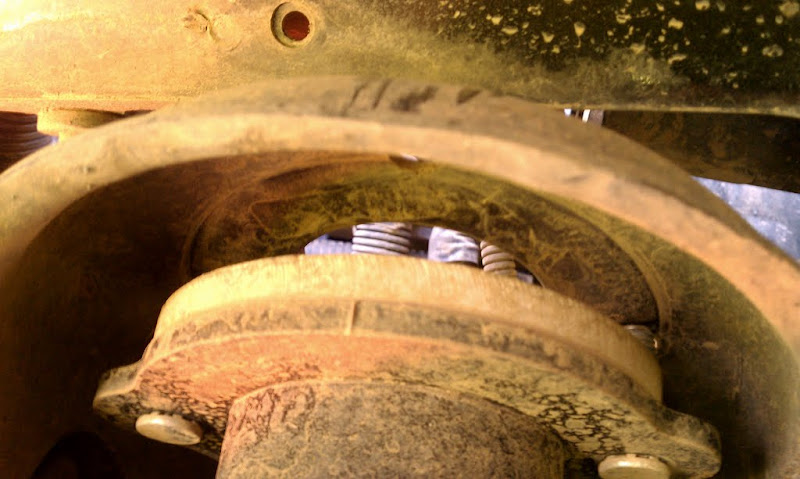
Some cutting required...


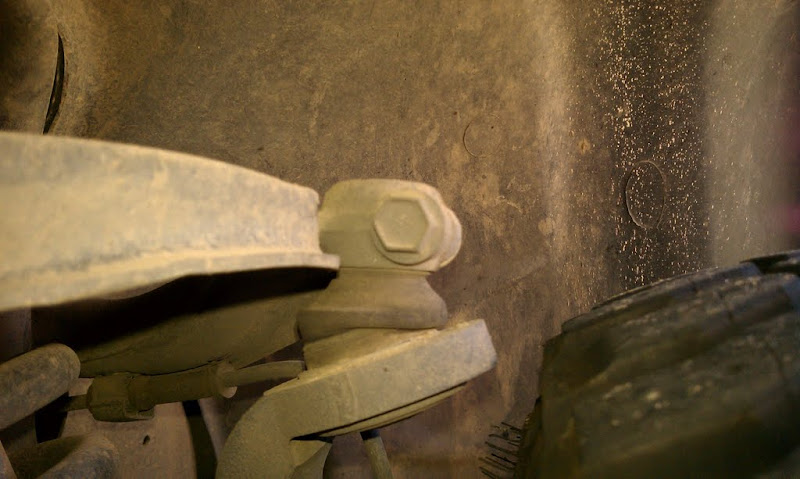
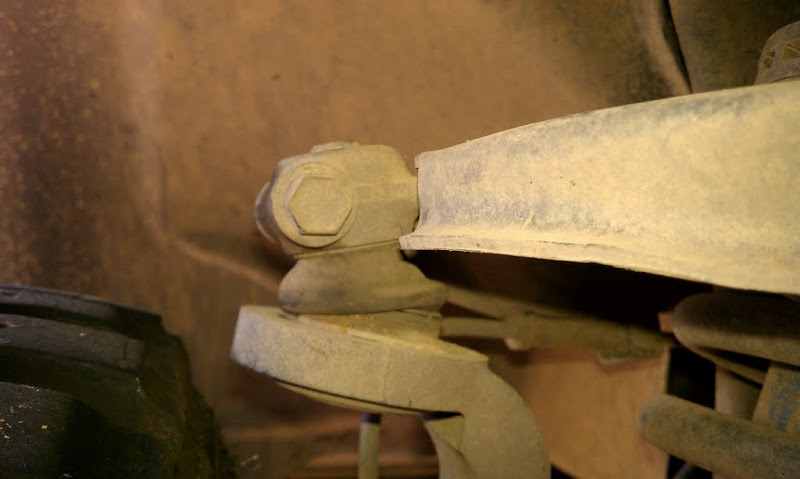
I don't know if this varies by year, but my uppers were already boxed.

Image

Image


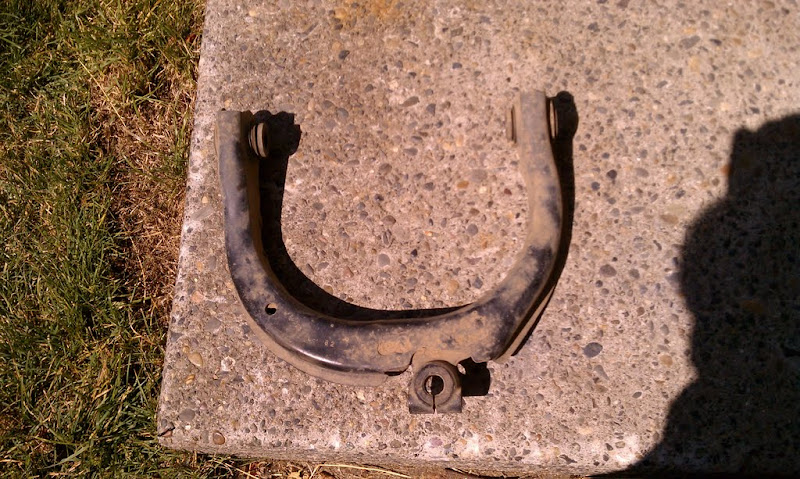
Reversed AND exchanged side for side.

Image

Image

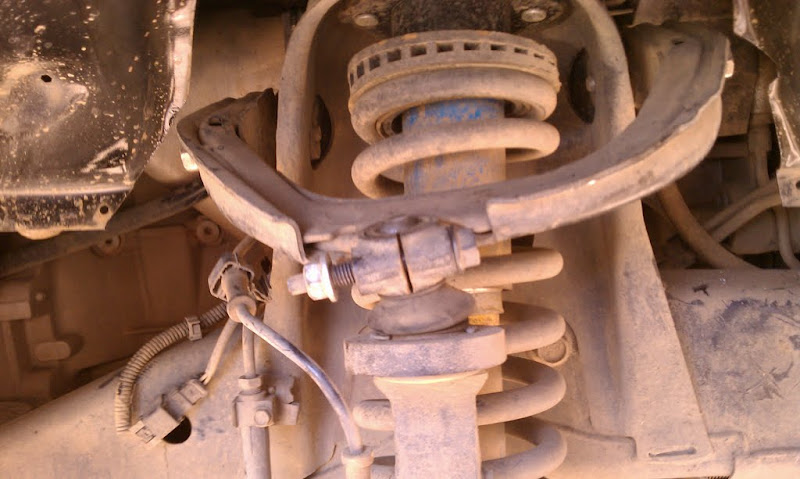
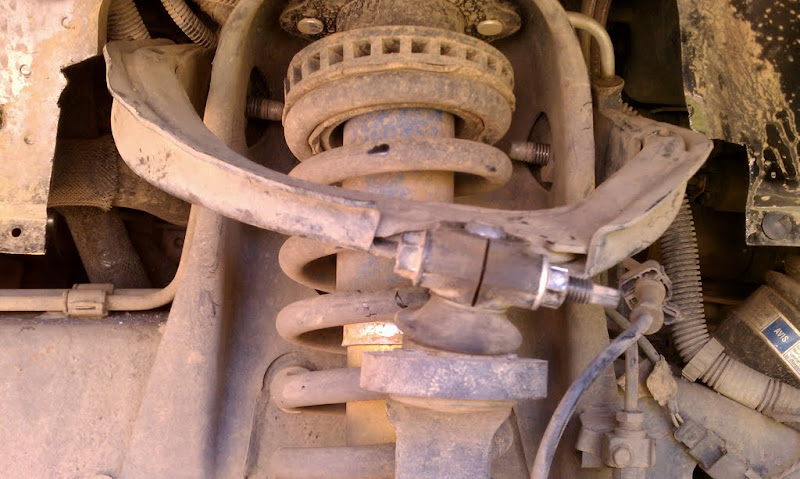
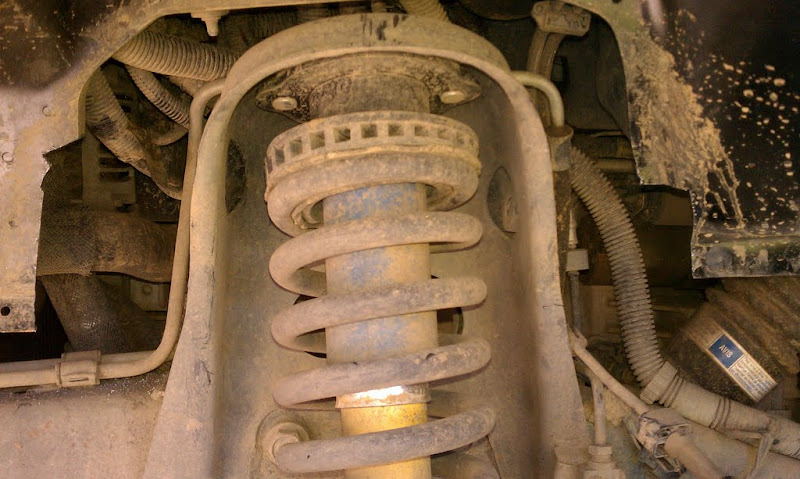
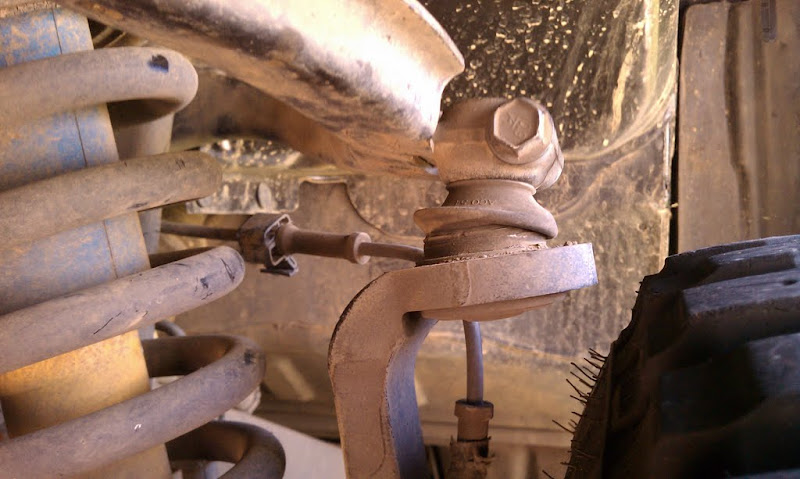
Stupid me forgot to take before pictures with the wheels off. I left my ball joints in the same position as when I took them off though and when reassembling them I had to return them towards center a bit, which supports the theory that we get some angle back. They do seem to angle a bit more to the rear of the vehicle, but not badly.
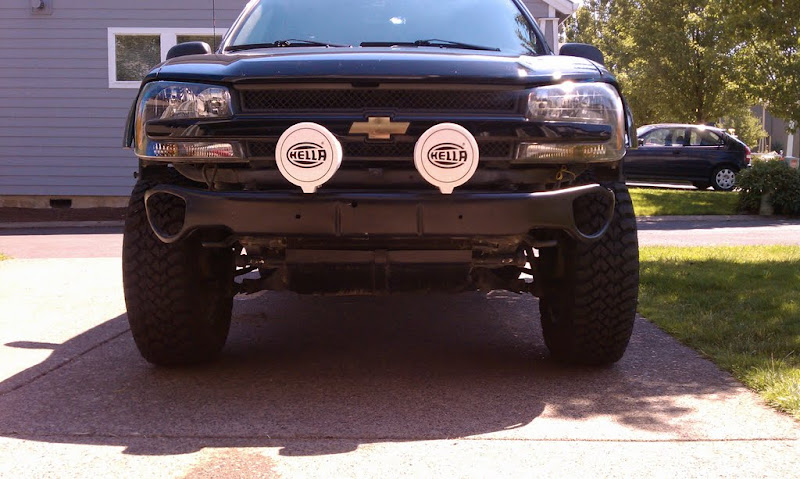
Wheels back on.

Image

Image

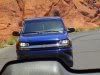
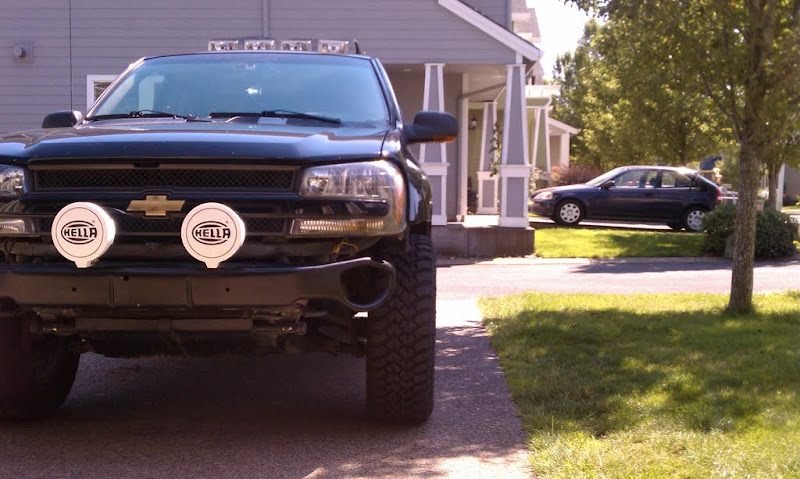
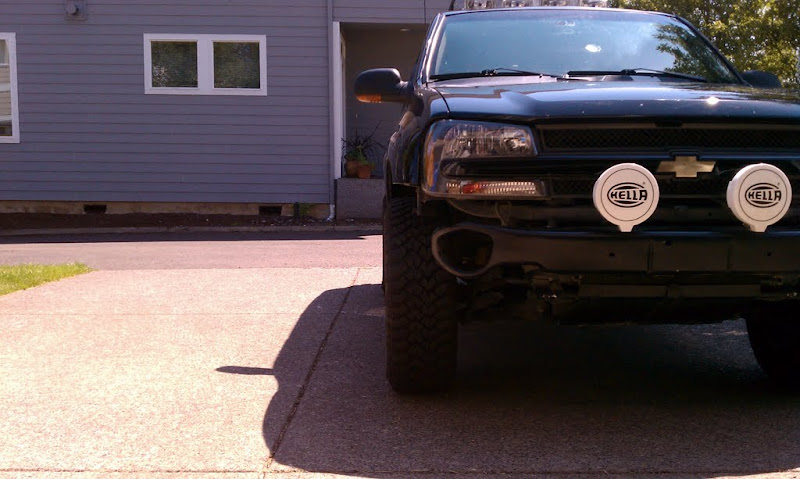
Wheels on, before shots:

Image

Image


I think I may have been wrong... and frankly, I couldn't be happier that I am.

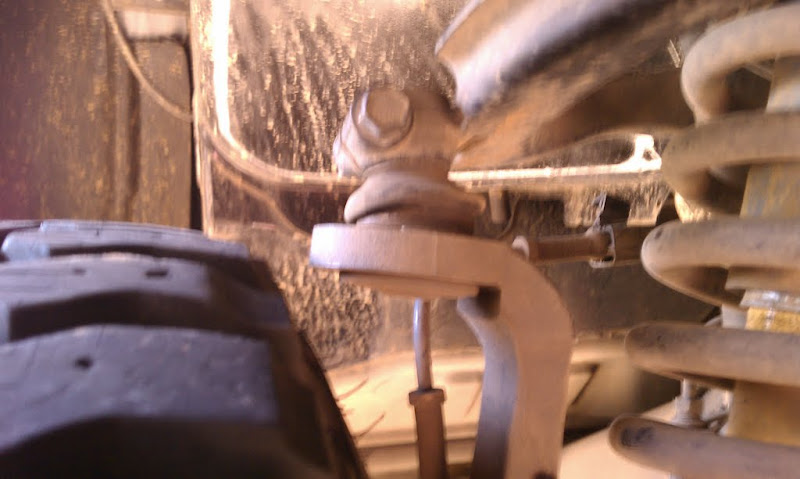
Additional angle shots by request. Discuss! :D
11 Silverado LTZ - 6.2L/6l80, 2/3 drop, self tuned
85 Hilux - 3RZ, dual cases, caged, 40s, chromo everything
02 TrailBlazer LTZ - 35s, lockers, balls - Gone but not forgotten - Build
User avatar
fishsticks
Moderator
 
Posts: 4356
Joined: Thu Apr 01, 2010 11:30 pm
Location: WA, Vancouver
Name: Donny
Vehicle Year: Other
Vehicle: Other Vehicle
DriveTrain: 4WD w/ Aftermarket Locker
Rank: Extreme Offroader

by SteveTB03 » Tue Jul 27, 2010 3:59 pm

It looks like you get a considerable amount of angle back!!! Wow if it drives well I might have to do that also.

So by what it looks like is if you were to cut out about 1/2" or less out of each side of the UCA you would effectively get back your ball joint angle.

How does it drive?
Do you project that doing this it will have some bad side effects?
Go Big & Go Broke
User avatar
SteveTB03
Addict
 
Posts: 600
Joined: Fri Sep 11, 2009 6:11 pm
Location: Las Vegas, NV
Name: Steve Darras
Vehicle Year: Other
Vehicle: Other Vehicle
DriveTrain: 4WD
Rank: Trail Ready

by fishsticks » Tue Jul 27, 2010 4:06 pm

I haven't driven it yet. :)

It was a proof on concept since there was a thread on it over on the OS and I'd been talking about doing it for quite some time. I think we actually talked about it didn't we?

Getting angle back = I may possibly be able to do what I originally wanted to do.... stack shims.
11 Silverado LTZ - 6.2L/6l80, 2/3 drop, self tuned
85 Hilux - 3RZ, dual cases, caged, 40s, chromo everything
02 TrailBlazer LTZ - 35s, lockers, balls - Gone but not forgotten - Build
User avatar
fishsticks
Moderator
 
Posts: 4356
Joined: Thu Apr 01, 2010 11:30 pm
Location: WA, Vancouver
Name: Donny
Vehicle Year: Other
Vehicle: Other Vehicle
DriveTrain: 4WD w/ Aftermarket Locker
Rank: Extreme Offroader

by SteveTB03 » Tue Jul 27, 2010 4:14 pm

fishsticks wrote:I haven't driven it yet. :)

It was a proof on concept since there was a thread on it over on the OS and I'd been talking about doing it for quite some time. I think we actually talked about it didn't we?

Getting angle back = I may possibly be able to do what I originally wanted to do.... stack shims.


Well get out there and drive it! :poke: :)

But yeah we talked about doing it a lot actually it'd be nice to stack shims :excited:

And how long did it take you? You need any special tools?
Go Big & Go Broke
User avatar
SteveTB03
Addict
 
Posts: 600
Joined: Fri Sep 11, 2009 6:11 pm
Location: Las Vegas, NV
Name: Steve Darras
Vehicle Year: Other
Vehicle: Other Vehicle
DriveTrain: 4WD
Rank: Trail Ready

by Trail X » Tue Jul 27, 2010 4:18 pm

Sweet!

I didn't expect the front-back angle... but otherwise looks good!

You probably want to get an alignment now, you probably have some positive camber going on now. Should actually make alignment easier, from my recollection, the LCAs are stuffed into the frame in order to align when lifted.

(I'm not responding to the TV thread anymore!)
8-) Build Thread | ExPo Build | YouTube Videos
Not all who wander are lost. -Tolkien
User avatar
Trail X
Founder
 
Posts: 9935
Joined: Mon Sep 07, 2009 10:22 pm
Location: VA, Roanoke
Name: James Downing
Vehicle Year: 2005
Vehicle: Chevrolet TrailBlazer
DriveTrain: 4WD w/ Aftermarket Locker
Rank: Expedition Guide

by MrSmithsTB » Tue Jul 27, 2010 4:34 pm

Very interesting. I do look forward to progress reports, as this is something that I would like to try. And for some reason, I was not aware of this conversation until right now :shoot:
back in the saddle
TB BUILD
User avatar
MrSmithsTB
Veteran
 
Posts: 1756
Joined: Thu Sep 10, 2009 2:28 pm
Location: EHT, NJ
Name: Bob
Vehicle Year: 2006
Vehicle: Other GMT360/370
DriveTrain: AWD w/ G80
Rank: Offroad Rated

by fishsticks » Tue Jul 27, 2010 4:37 pm

SteveTB03 wrote:
fishsticks wrote:I haven't driven it yet. :)

It was a proof on concept since there was a thread on it over on the OS and I'd been talking about doing it for quite some time. I think we actually talked about it didn't we?

Getting angle back = I may possibly be able to do what I originally wanted to do.... stack shims.


Well get out there and drive it! :poke: :)

But yeah we talked about doing it a lot actually it'd be nice to stack shims :excited:

And how long did it take you? You need any special tools?


Impact tools, a sawzall and some determination... I was done in under an hour.


JamesDowning wrote:Sweet!

I didn't expect the front-back angle... but otherwise looks good!

You probably want to get an alignment now, you probably have some positive camber going on now. Should actually make alignment easier, from my recollection, the LCAs are stuffed into the frame in order to align when lifted.


(I'm not responding to the TV thread anymore!)


I'd rather discuss it here anyway. I'm going to remove my strut assembly on one side and test the full range of motion. I want to see where the limits are and how much the rearward angle increases as the suspension compresses.

The bolts on my front lift aren't welded in, so replacing them with some grade 8's and adding shims isn't a big deal for me. Score 1 for Rough Country's cost saving design I guess.
11 Silverado LTZ - 6.2L/6l80, 2/3 drop, self tuned
85 Hilux - 3RZ, dual cases, caged, 40s, chromo everything
02 TrailBlazer LTZ - 35s, lockers, balls - Gone but not forgotten - Build
User avatar
fishsticks
Moderator
 
Posts: 4356
Joined: Thu Apr 01, 2010 11:30 pm
Location: WA, Vancouver
Name: Donny
Vehicle Year: Other
Vehicle: Other Vehicle
DriveTrain: 4WD w/ Aftermarket Locker
Rank: Extreme Offroader

by johnburgelin » Tue Jul 27, 2010 4:59 pm

I'm going to be anxiously awaiting a driving test of this, I'm hoping to do the same thing at work tomorrow (we'll see if I can get away with it). I've got a 20 mile highway drive home so hopefully the functionality of this on the road it acceptable, as well as off road. If so I'm all in!
User avatar
johnburgelin
Off-Roader
 
Posts: 171
Joined: Sun May 23, 2010 9:29 am
Name: John
Vehicle Year: 2003
Vehicle: Chevrolet TrailBlazer
DriveTrain: 4WD

by teamred250ex » Tue Jul 27, 2010 5:08 pm

You may have opened up a whole new world for TB's! I have my fingers crossed that it functions well, good luck!
teamred250ex
Cruiser
 
Posts: 19
Joined: Thu Apr 22, 2010 2:29 am
Name: Ron
Vehicle Year: 2006
Vehicle: Chevrolet TrailBlazer
DriveTrain: 2WD

by fishsticks » Tue Jul 27, 2010 5:43 pm

After checking steering travel and securing my ABS lines, I took a drive.

Ride and handling characteristics are unchanged, as expected.
11 Silverado LTZ - 6.2L/6l80, 2/3 drop, self tuned
85 Hilux - 3RZ, dual cases, caged, 40s, chromo everything
02 TrailBlazer LTZ - 35s, lockers, balls - Gone but not forgotten - Build
User avatar
fishsticks
Moderator
 
Posts: 4356
Joined: Thu Apr 01, 2010 11:30 pm
Location: WA, Vancouver
Name: Donny
Vehicle Year: Other
Vehicle: Other Vehicle
DriveTrain: 4WD w/ Aftermarket Locker
Rank: Extreme Offroader

by MrSmithsTB » Tue Jul 27, 2010 5:45 pm

How does the camber look as changed, without a new alignment?
back in the saddle
TB BUILD
User avatar
MrSmithsTB
Veteran
 
Posts: 1756
Joined: Thu Sep 10, 2009 2:28 pm
Location: EHT, NJ
Name: Bob
Vehicle Year: 2006
Vehicle: Other GMT360/370
DriveTrain: AWD w/ G80
Rank: Offroad Rated

by fishsticks » Tue Jul 27, 2010 5:52 pm

Image

Image

Image

May be hard to see... but looks like some positive camber.
11 Silverado LTZ - 6.2L/6l80, 2/3 drop, self tuned
85 Hilux - 3RZ, dual cases, caged, 40s, chromo everything
02 TrailBlazer LTZ - 35s, lockers, balls - Gone but not forgotten - Build
User avatar
fishsticks
Moderator
 
Posts: 4356
Joined: Thu Apr 01, 2010 11:30 pm
Location: WA, Vancouver
Name: Donny
Vehicle Year: Other
Vehicle: Other Vehicle
DriveTrain: 4WD w/ Aftermarket Locker
Rank: Extreme Offroader

by MrSmithsTB » Tue Jul 27, 2010 5:59 pm

Might have to tug on the bottom of the wheels a little bit, but that definitely looks doable 5deg +-. As long as that front to back angle isn't going to present an issue, I don't see any reason not to do this.
back in the saddle
TB BUILD
User avatar
MrSmithsTB
Veteran
 
Posts: 1756
Joined: Thu Sep 10, 2009 2:28 pm
Location: EHT, NJ
Name: Bob
Vehicle Year: 2006
Vehicle: Other GMT360/370
DriveTrain: AWD w/ G80
Rank: Offroad Rated

by SteveTB03 » Tue Jul 27, 2010 6:17 pm

Your making me want to do this to my truck also now. It sounds like this is going to be a simple yet very effective way to reduce BJ stress for cheap without having custom CA's made.

Now what exactly did you have to cut?

Well be testing it offroad for sure on Thursday that way well know if anything breaks or not.
Go Big & Go Broke
User avatar
SteveTB03
Addict
 
Posts: 600
Joined: Fri Sep 11, 2009 6:11 pm
Location: Las Vegas, NV
Name: Steve Darras
Vehicle Year: Other
Vehicle: Other Vehicle
DriveTrain: 4WD
Rank: Trail Ready

by fishsticks » Tue Jul 27, 2010 6:41 pm

EXPERIMENT TIME!

The easiest one to do....and probably the one most people want to know the results of.


DATA:

Rough Country front lift spacer measurement: 1-13/16th inch
+
Smaxx Shim measurement: 8/16th (1/2) inch
=
Total of spacers between spring isolator and frame mount: 2-5/16th inch
-
Stock upper strut mount measurement: 6/16th (3/8) inch
=
Total lengthening of strut assembly: 1-15/16th inch


TEST:

Conditions: Front of truck jacked up. Wheels mounted but off ground. Top of strut tower unbolted from frame. Downward force (me) applied to wheel, moving wheel/suspension downwards until UBJ reaches limit of travel.

RESULT:

Image


I couldn't get a picture while holding the tape measure and the wheel, but there is an additional 7/8" from the top of my shim to the frame mount on all sides.

I don't know if the BDS kits measures out the same... But it seems that if everything else pans out, I could add another 1/2" to 5/8" in there and still be in the green zone ball joint wise.


Thoughts?


Edit: Just reread my own post and realized that my total spacer + shim length is not added directly to the strut assembly length, since part of it simply compresses the spring more. Ugh.
Last edited by fishsticks on Tue Jul 27, 2010 9:37 pm, edited 1 time in total.
11 Silverado LTZ - 6.2L/6l80, 2/3 drop, self tuned
85 Hilux - 3RZ, dual cases, caged, 40s, chromo everything
02 TrailBlazer LTZ - 35s, lockers, balls - Gone but not forgotten - Build
User avatar
fishsticks
Moderator
 
Posts: 4356
Joined: Thu Apr 01, 2010 11:30 pm
Location: WA, Vancouver
Name: Donny
Vehicle Year: Other
Vehicle: Other Vehicle
DriveTrain: 4WD w/ Aftermarket Locker
Rank: Extreme Offroader

by johnburgelin » Tue Jul 27, 2010 7:36 pm

fishsticks wrote:Thoughts?


Unless someone does this tonight, I'm going to officially be the second one to flip their UCA's first thing tomorrow morning, thanks for the driving test fishsticks :coffee2:
User avatar
johnburgelin
Off-Roader
 
Posts: 171
Joined: Sun May 23, 2010 9:29 am
Name: John
Vehicle Year: 2003
Vehicle: Chevrolet TrailBlazer
DriveTrain: 4WD

by HARDTRAILZ » Tue Jul 27, 2010 8:33 pm

Props for having the balls to try something different. Thanks for pics and report s well.
I hate to advocate weird chemicals, alcohol, violence or insanity to anyone...but
they've always worked for me.
User avatar
HARDTRAILZ
Moderator
 
Posts: 6342
Joined: Sat Sep 12, 2009 1:49 am
Location: IN, Batesville
Name: Kyle
Vehicle Year: 2006
Vehicle: Chevrolet TrailBlazer
DriveTrain: 4WD w/ Aftermarket Locker
Rank: Extreme Offroader

by gotspeed1 » Tue Jul 27, 2010 10:51 pm

HARDTRAILZ wrote:Props for having the balls to try something different. Thanks for pics and report s well.

:Iagree: Nice work Fish!!!
3...2...1....FIRE IN THE HOLE!!!
User avatar
gotspeed1
Trail-Blazer
 
Posts: 294
Joined: Tue Sep 22, 2009 9:02 pm
Location: Woodland Park, CO
Name: Joey
Vehicle Year: 2002
Vehicle: Chevrolet TrailBlazer
DriveTrain: 4WD
Rank: Offroad Rated

by Trail X » Wed Jul 28, 2010 8:17 am

fishsticks wrote:

May be hard to see... but looks like some positive camber.


Agreed... and based on the UCA's geometry, it makes sense.

Based purely off my recollection, the LCA is pushed farther in, towards the engine when lifted. Positive camber should be able to be fixed... negative may not have been.
8-) Build Thread | ExPo Build | YouTube Videos
Not all who wander are lost. -Tolkien
User avatar
Trail X
Founder
 
Posts: 9935
Joined: Mon Sep 07, 2009 10:22 pm
Location: VA, Roanoke
Name: James Downing
Vehicle Year: 2005
Vehicle: Chevrolet TrailBlazer
DriveTrain: 4WD w/ Aftermarket Locker
Rank: Expedition Guide

by DZPearl » Wed Jul 28, 2010 3:56 pm

Good to see this is working out. Now I think that I am in need of more lift since the balljoint angle can be corrected. Good job everyine for your input!
User avatar
DZPearl
Cruiser
 
Posts: 14
Joined: Sun Nov 15, 2009 8:23 pm
Location: MO, Saint Charles
Name: Dave
Vehicle Year: 2003
Vehicle: Chevrolet TrailBlazer
DriveTrain: 2WD w/ G80

Next

Return to Lifts / Suspension

cron